Asana Time Tracking: How to Use It to Improve Your Workflow
Last updated on: March 20, 2024
If you’ve been using Asana for a while, you probably already keep a neat track of your projects.
But what about keeping track of your time? Are you genuinely certain that you spend your workday in the most efficient way possible?
If this question caused a thoughtful look into the distance, you may want to look into Asana time tracking.
Even though Asana does have a built-in time tracking feature, this option doesn’t come with detailed analytics stand-alone time trackers offer. So, if you’re looking for the most practical way to build a flawless workflow, you may want to consider pairing up Asana with Clockify.
To give you a helping hand with this process, this blog post will dive deeper into:
- Creating and setting up a Clockify account,
- Installing the Clockify browser extension,
- Making the most out of Clockify’s integration with Asana, and
- Managing the time tracked in Clockify.
Let’s begin.
- Even though Asana comes with a built-in time tracker, it doesn’t offer robust analytics other time tracking tools, such as Clockify, do.
- Integrating Clockify with Asana lets you analyze in great detail how you spend your time, generate reports based on the time you spent working on each task in Asana, and even invoice your clients accordingly.
- To start with Asana time tracking, all you need to do is create a Clockify account and set up the Clockify browser extension.
- Clockify browser extension allows you to track the time you spend working on tasks and sub-tasks in Asana.
- For a more accurate description of the tasks you tackle, you can select any text you want in Asana and start the timer from there.
- After you’re done with Asana time tracking, move on to the Clockify web version where you can edit your time entries, see a breakdown of your activity in Asana, and even calculate your earnings based on billable rates.
Table of Contents
How to track time in Asana with Clockify?
Since Clockify is a time tracking tool built to simplify staying on top of your time, it shouldn’t come as a surprise that pairing up Asana with Clockify is a smooth process.
Intended to help its users get a complete rundown of their activities in just a couple of clicks, Clockify makes Asana time tracking a breeze, too.
Here’s a step-by-step walkthrough on making the most of the Asana time tracking integration.
Step #1: Create a Clockify account
To start tracking your time in Asana, begin by creating a Clockify account.
To be able to do so, visit the Clockify homepage and click the ‘Get started’ button in the top right corner.
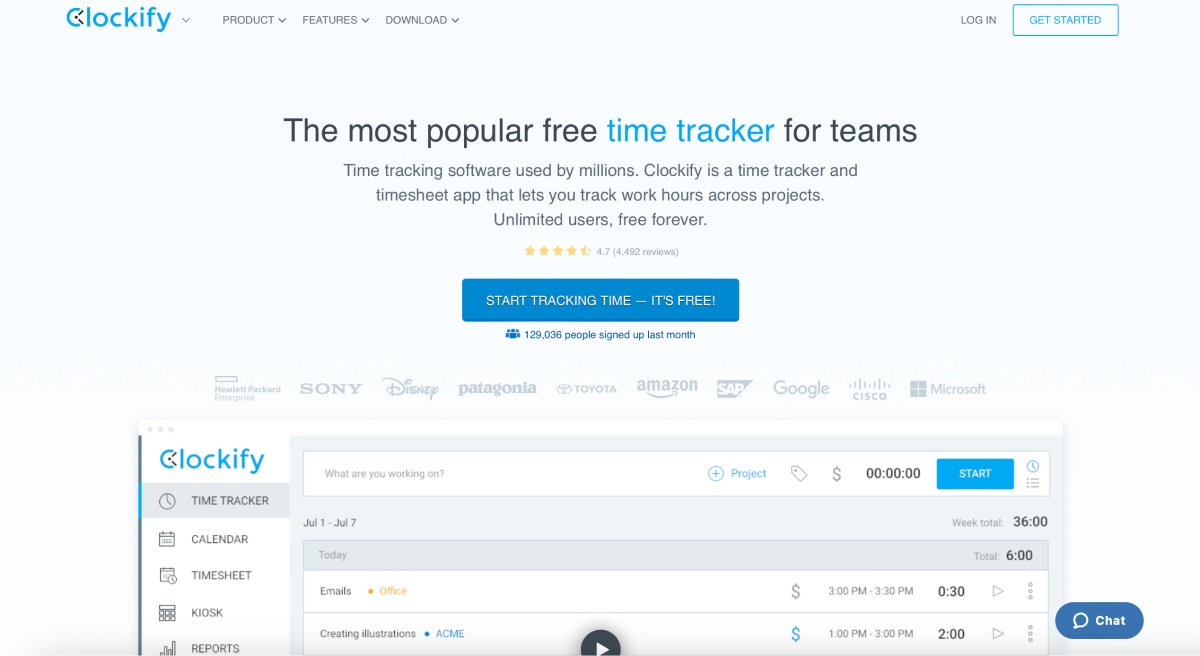
Immediately after, you’ll get the option to sign up either by:
- Entering your email address, after which you’ll receive a verification code, or
- Clicking the ‘Continue with Google’ button that will instantly connect your email address to your Clockify account.
Whichever option you pick, you’ll be redirected to your newly created Clockify dashboard within a couple of seconds, where you’ll be able to begin tracking your time.
Step #2: Setup your Clockify preferences
Before you integrate Clockify with Asana, it’s best to first define and set up your tasks, tags, clients, and projects in Clockify’s web version.
You can access each of these options in the Clockify sidebar.
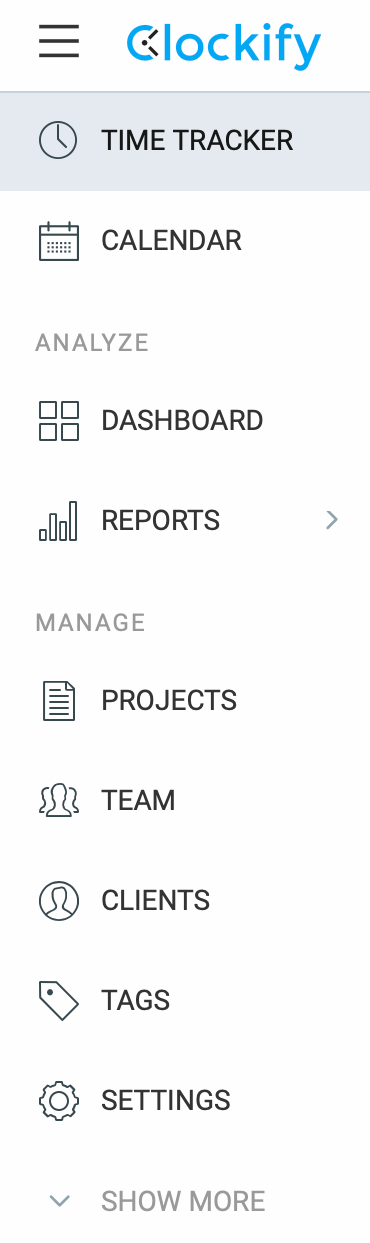
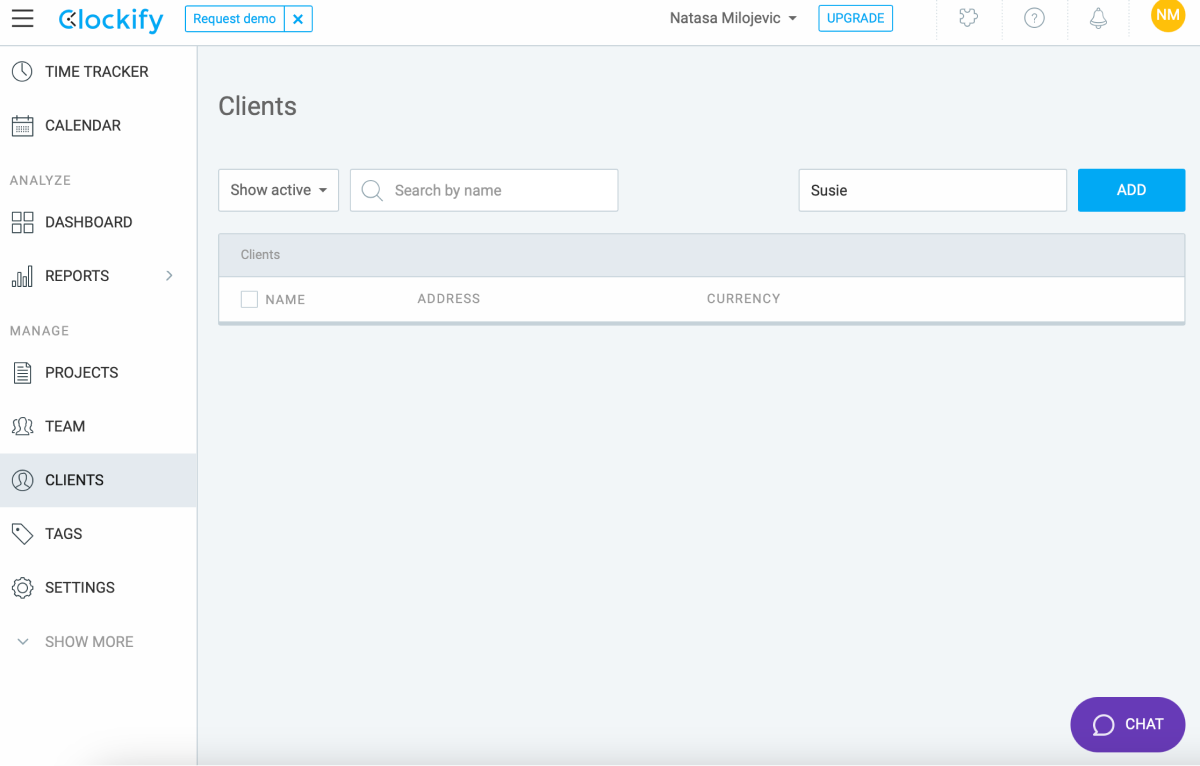
Adding tags and clients works the same way — all you need to do is click your desired option in the Clockify sidebar, type in the name of your tag or client next to the ‘Add’ button, and click ‘Add.’
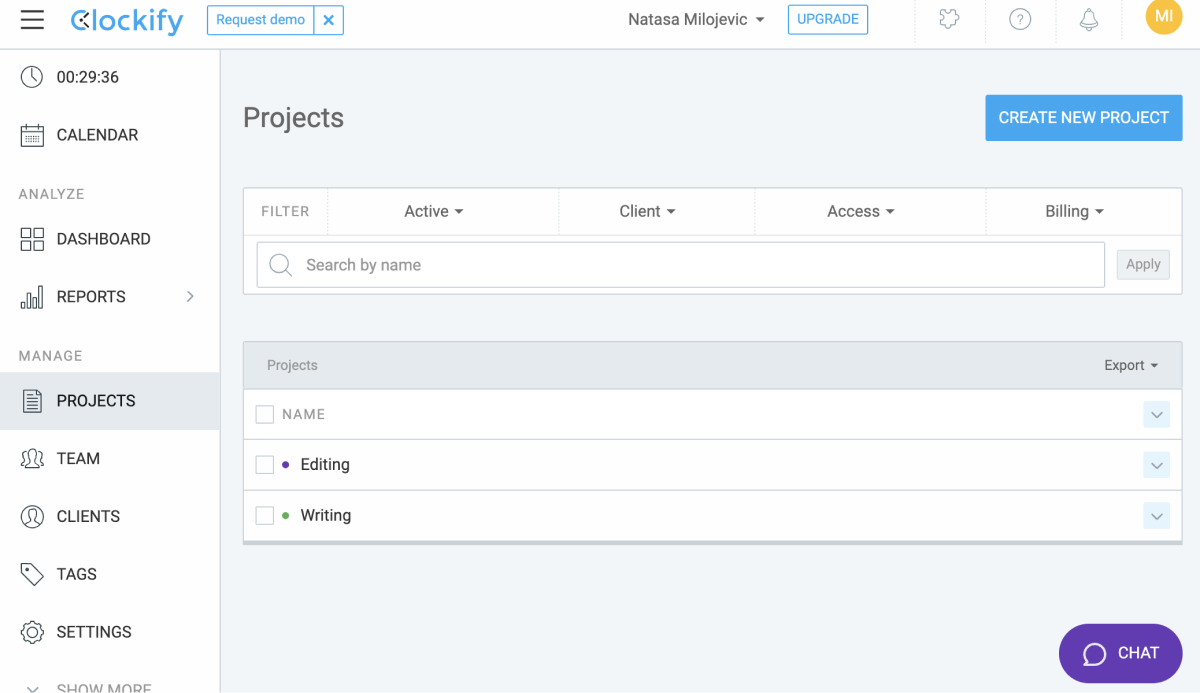
If you’d like to create a project in Clockify, the gist is quite similar. After you click on ‘Projects’ in the Clockify sidebar, you just need to click the ‘Create new project’ button, enter your project name, select the client (if any), and click ‘Create.’
Once you add this information to your account, it will immediately become available to you within the extension, and you’ll be able to select the right projects, tasks, and tags when tracking time in an integrated app.
Step #3: Install Clockify browser extension
After you’ve created your Clockify account, now would be the time to download the Clockify extension for your browser. You may choose between downloading:
Clockify’s browser extensions are 100% free, and you can integrate them with more than 80 of the most popular web apps for development, productivity, business, and project management — and this includes Asana.
💡 Clockify Pro Tip
Apart from Asana, Clockify can be integrated with Trello, too. Check out how you can monitor your project progress in Trello:
Step #4: Start with Asana time tracking
Now that you’ve armed yourself with a time tracker, you’ll be able to track the time you spend in Asana in several ways. You’ll be able to:
- Track time on tasks,
- Track time on sub-tasks, and
- Track time anywhere you’d like in Asana.
Let’s take a look at each of them in more detail.
Track time on tasks in Asana
Whichever view you’ve picked in Asana (List, Board, Calendar, Timeline, or Dashboard) you can track the time spent on individual tasks the same way.
All you need to do is click on your task, and locate the ‘Start timer’ button next to the ‘Mark complete’ button in the left upper corner of your task card.
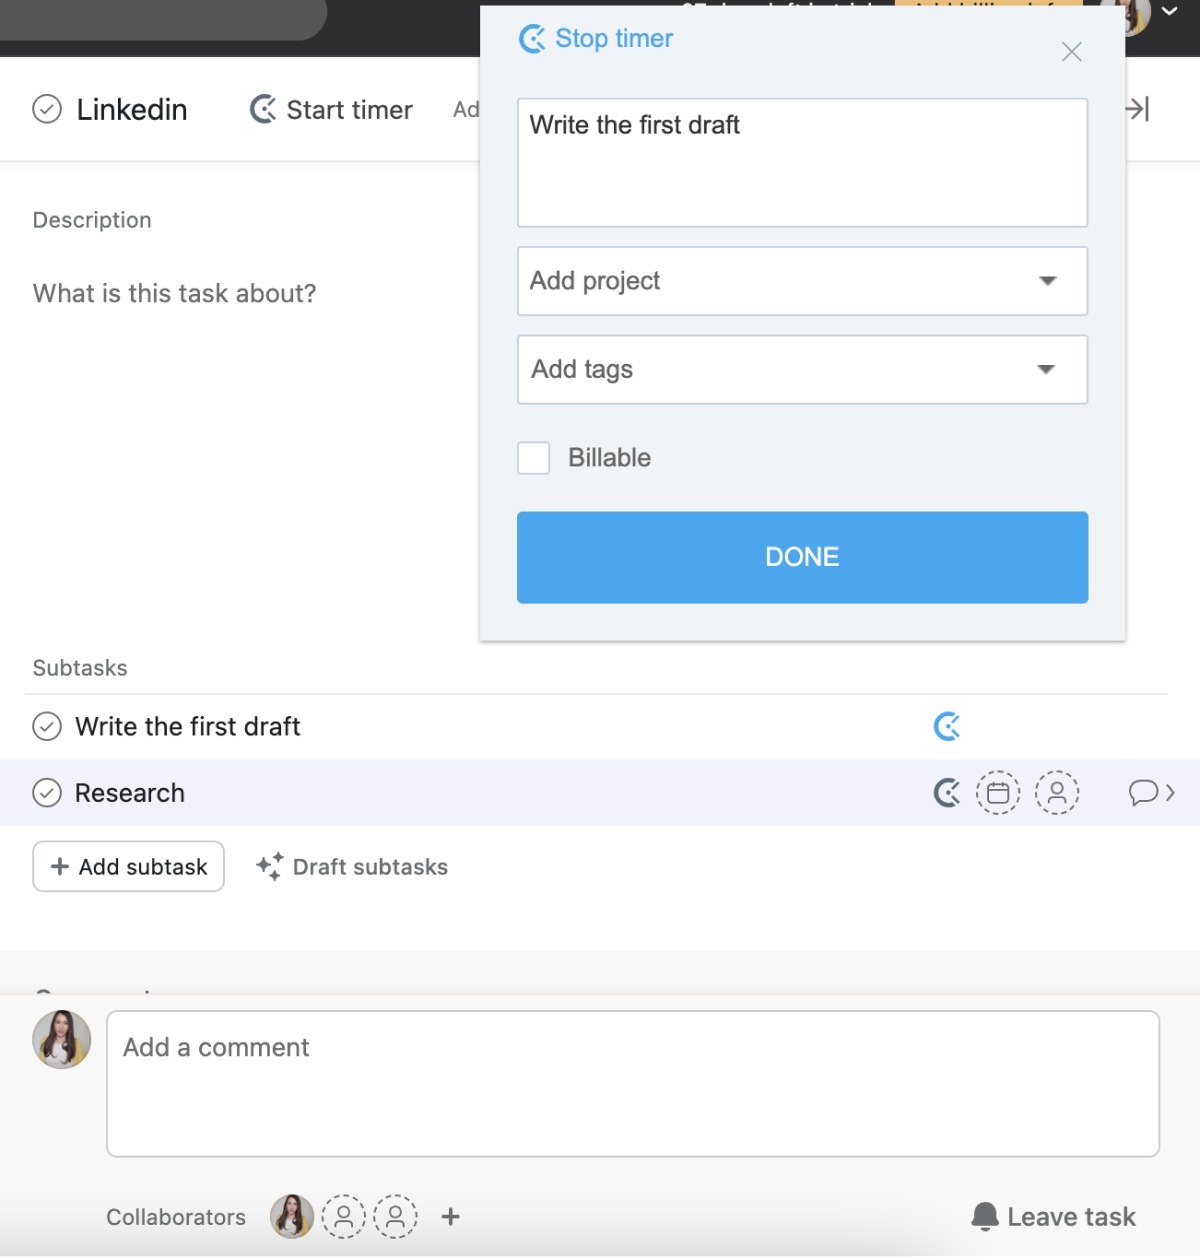
Immediately after, you’ll see the Clockify extension window popping up where you’ll be able to select a project or a tag for that specific task and mark it as billable.
Clockify, however, will pick up the name of your Asana task, which serves as a description for your time entry.
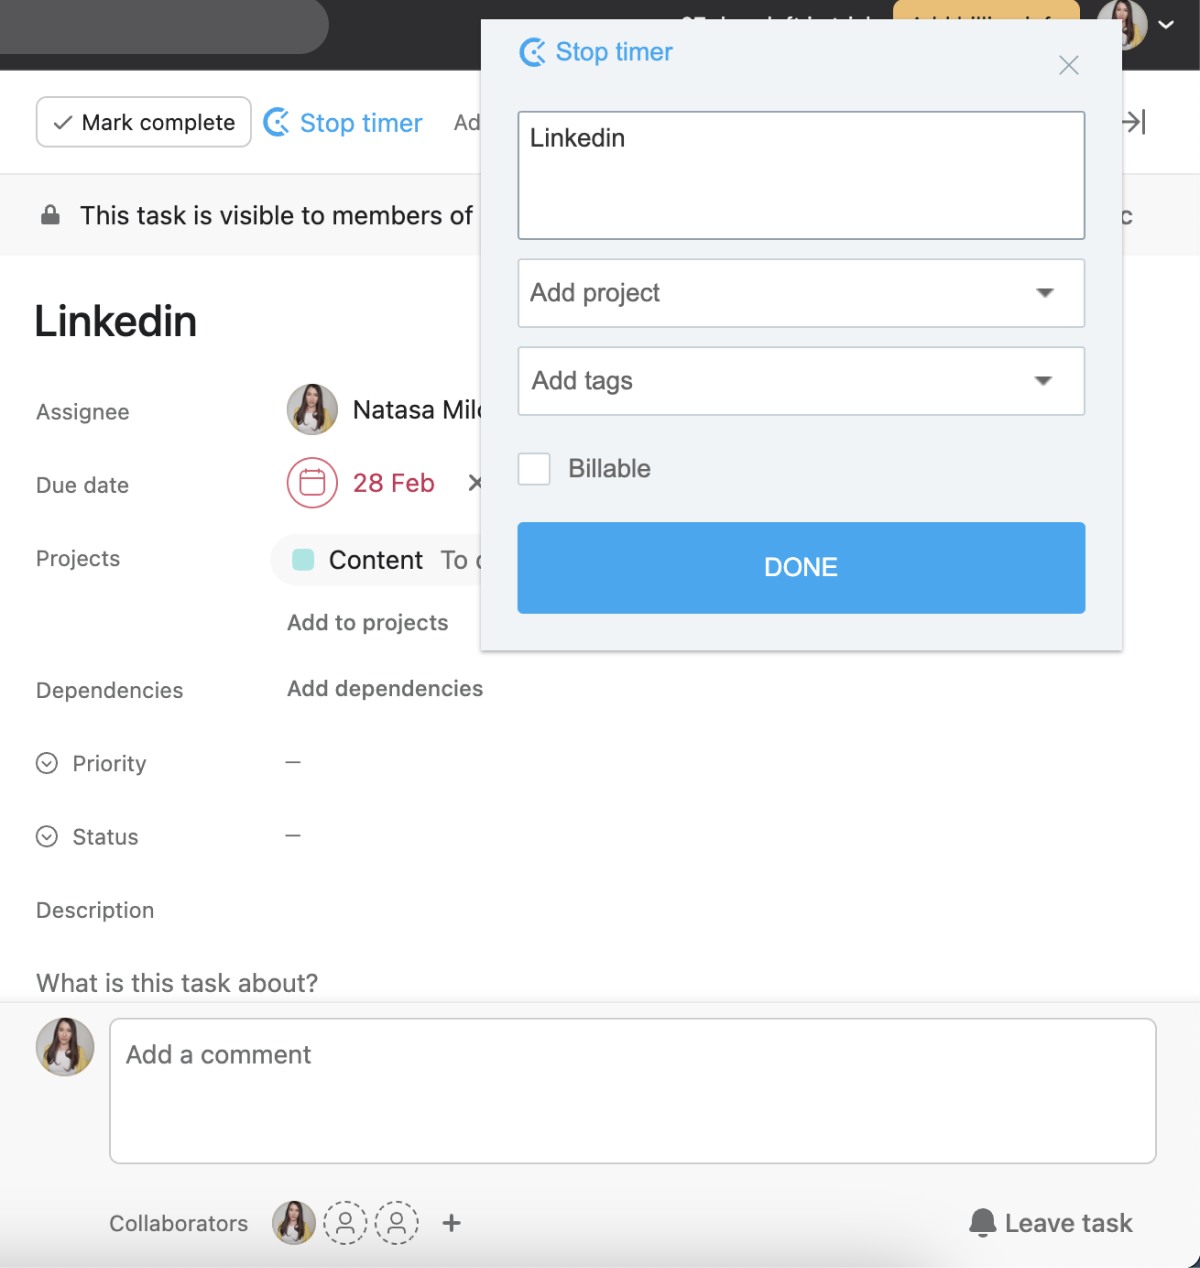
Then, after you’ve clicked on the ‘Done’ button, your timer will keep on running until you press the ‘Stop timer’ button next to the ‘Mark complete’ button in the left upper corner of your task card.
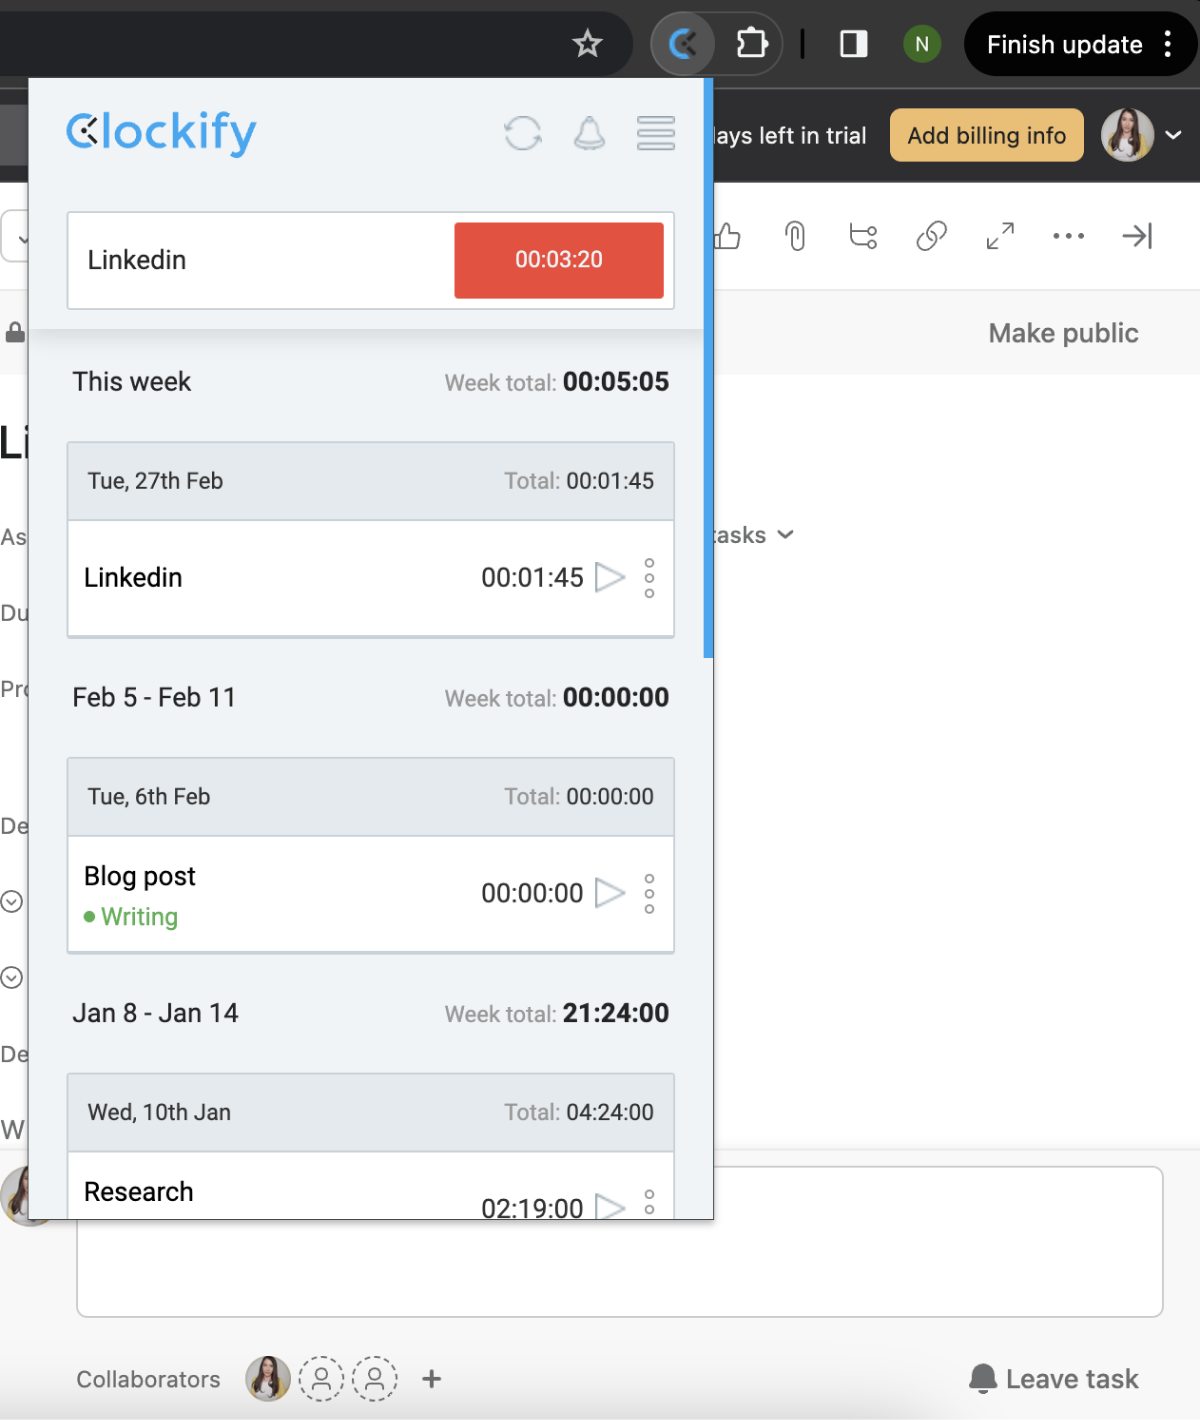
Additionally, you can access the Clockify browser extension directly from your browser’s extension button in the toolbar.
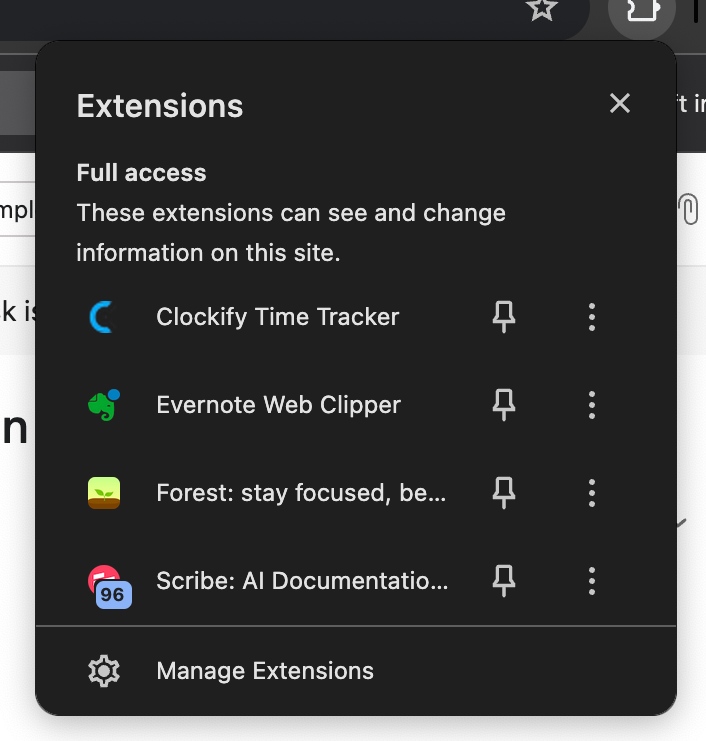
This way, you’ll quickly be able to see exactly how long you’ve been busy with a task, edit your time entry in case you want to make additional changes, or stop the timer altogether.
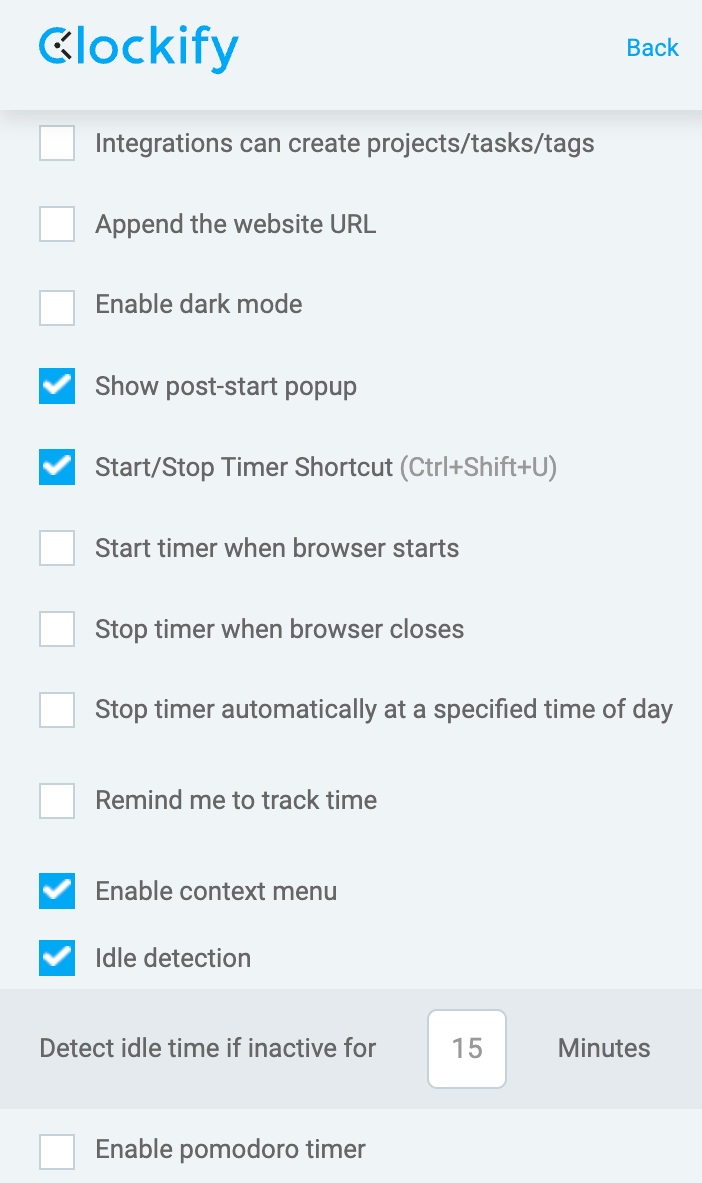
If you’d like to gain the most accurate insight into your progress, you can check off the Idle detection option in the Clockify browser extension settings. This way, the timer will automatically stop running whenever you leave your desk and you’re not actively working on a task.
This option is particularly useful if you frequently work on recurring tasks, so knowing exactly how long each of your to-dos takes would help you accurately plan your day.
Track time on sub-tasks in Asana
If your workflow usually consists of a variety of additional tasks grouped under one umbrella card, you’ll probably benefit from tracking time on sub-tasks by using Clockify’s browser extension.
The process is quite similar to tracking time on tasks.
First, you’ll need to locate your Asana task card which consists of sub-tasks you’d wish to track time for.
Then, next to each of your sub-task names, you’ll notice a Clockify logo. The logo basically works the same way as the ‘Start timer’ button.
As soon as you click on it, you’ll see the Clockify extension window popping up where you can group your sub-task under a project, add a tag to it, and mark it as billable.
Then, after you’re done making final changes to your time entry, simply click the ‘Done’ button, and the timer will go off. You’ll see the Clockify logo turning blue, which is your signal that the timer is running.
Once you’re done working on a sub-task, all you need to do is click the Clockify logo once again. You’ll see the logo turn gray, which indicates the timer’s stopped running.
Track time on task descriptions in Asana
If you’d like your time tracker to portray the most accurate description of the task you tackle, then tracking time from description could be perfect for you.
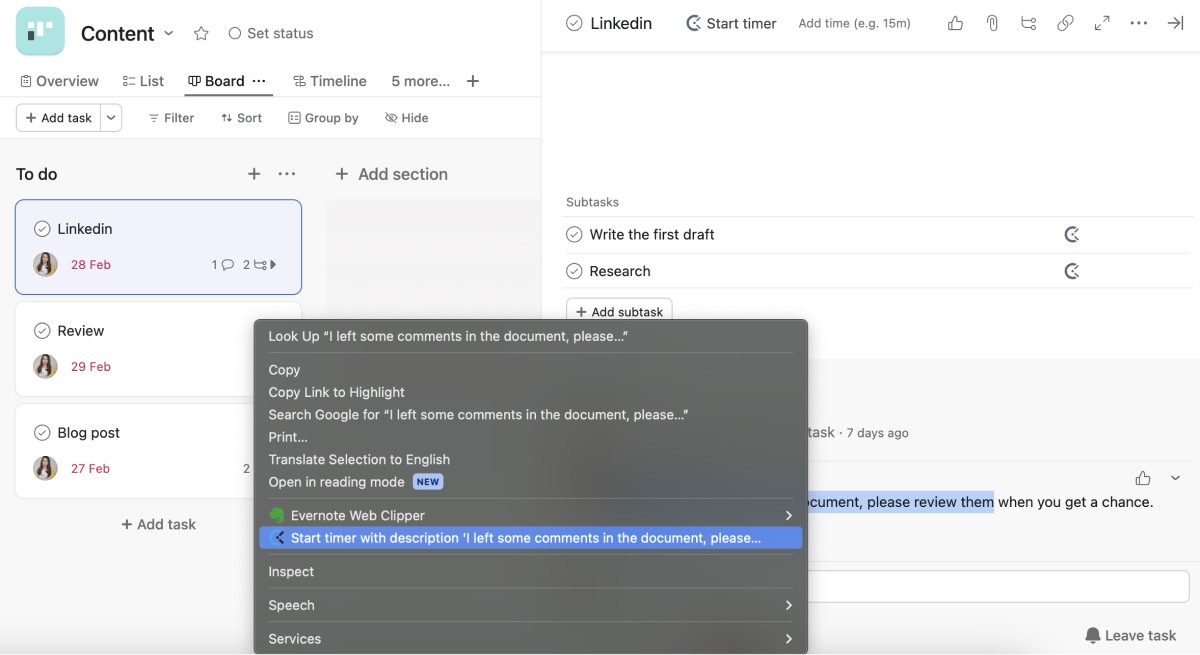
With Clockify’s Browser extension, you get a simple, alternative method of time tracking which lets you track time anywhere you want in Asana — from comments and notes to card descriptions.
All you need to do is right-click on the text you want to track time on, and select ‘Start timer with description…’ in the drop-down menu.
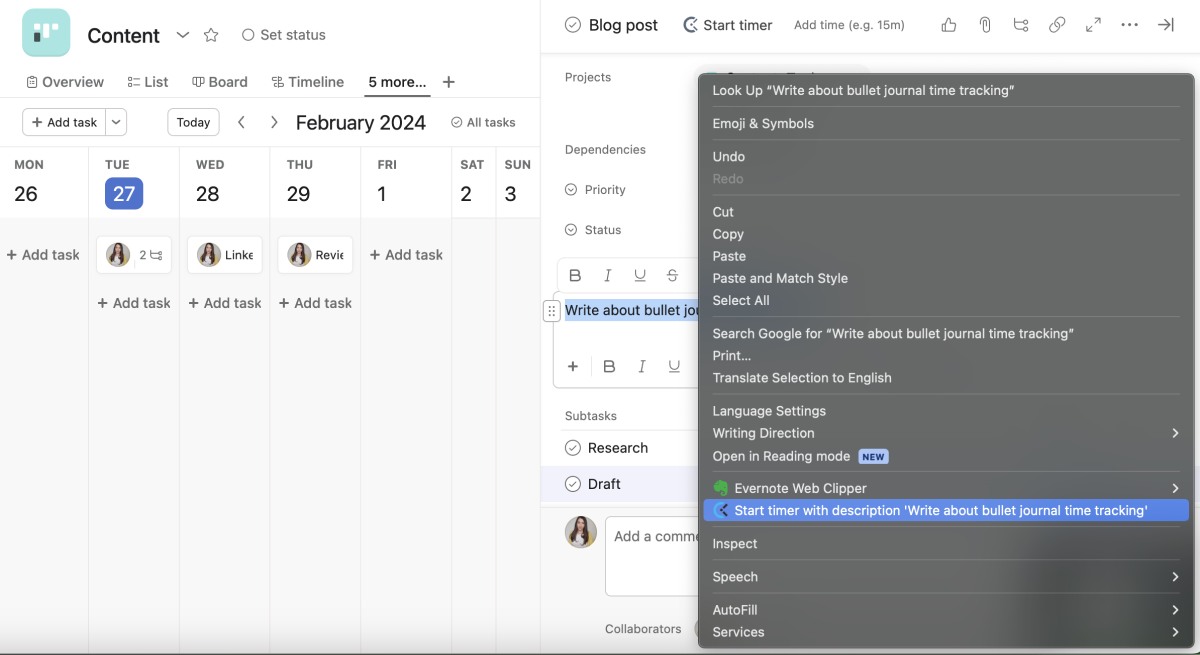
Immediately after, Clockify will pick up that text as your time entry’s description. Then, you’ll see the timer ticking in the extension menu, where you can also stop it once you’re done with this activity.
This option is also quite handy if you frequently need to revise your tasks based on the comments or suggestions left on a card. You can start tracking time as soon as you begin addressing the comment and edit the task description in the Clockify web version once you’re finished working on it.
This way, you waste minimum time while you’re busy and get to focus on more burning issues throughout your workday.
Step #5: Manage your tracked time in Clockify
Once you’re done with Asana time tracking, you can go to your Clockify web account and:
- Stop the timer,
- Delete faulty time entries,
- Edit time entries (change their descriptions, dates, or the amount of time you’ve tracked),
- Calculate your earnings based on your billable tasks,
- Create invoices from all your billable tasks and dispatch them to your clients,
- See a color-coded breakdown of all your activity,
- Generate and export reports based on your tracked time,
- Send reports to your clients, and more.
To generate and export reports in Clockify, simply select the type of report you want (either Summary, Detailed, or Weekly Report) and filter by the project that served as your project in Asana, to get a detailed breakdown of the amount of time you spend on this project.
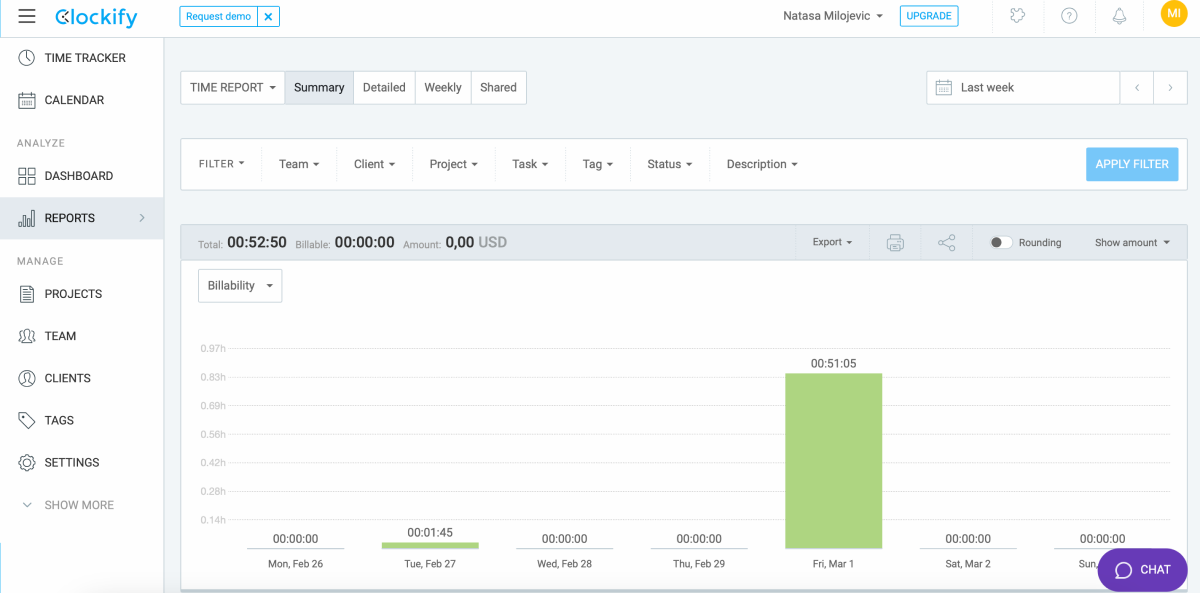
Then, once you’ve generated a report, you can export it as a PDF, CSV or Excel file, and analyze it further.
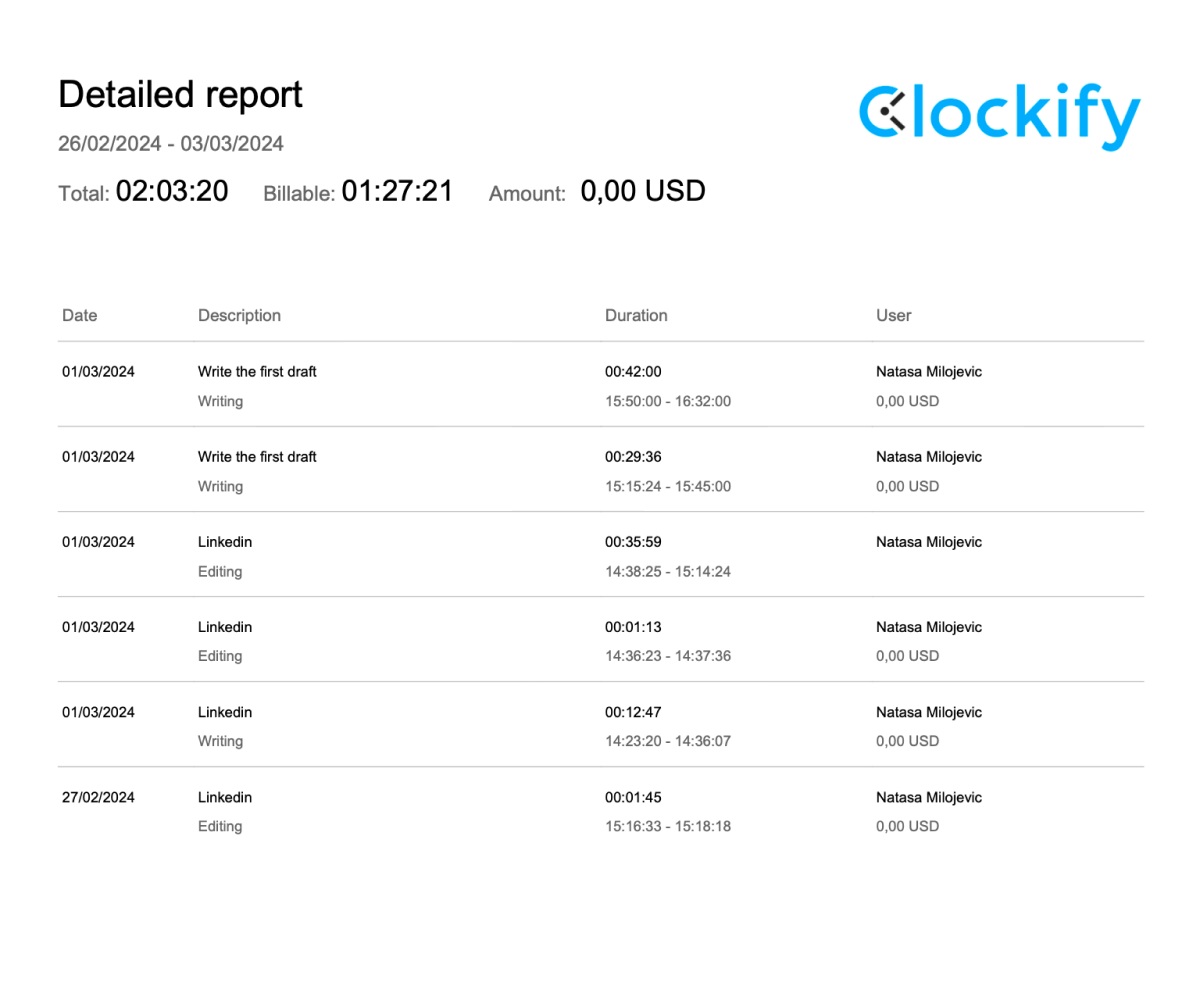
After you’ve saved the report in your preferred format, you can quickly send it to your client or manager. This way, they will be able to track your progress on the project you’re working on in Asana in real-time.
When you’re done tracking time in Asana, you can use the newly-acquired information to create and issue invoices based on the time spent on each of your tasks.
You can generate an invoice by moving onto the Invoices section in the Clockify sidebar, choosing your client, currency, issue and due dates.
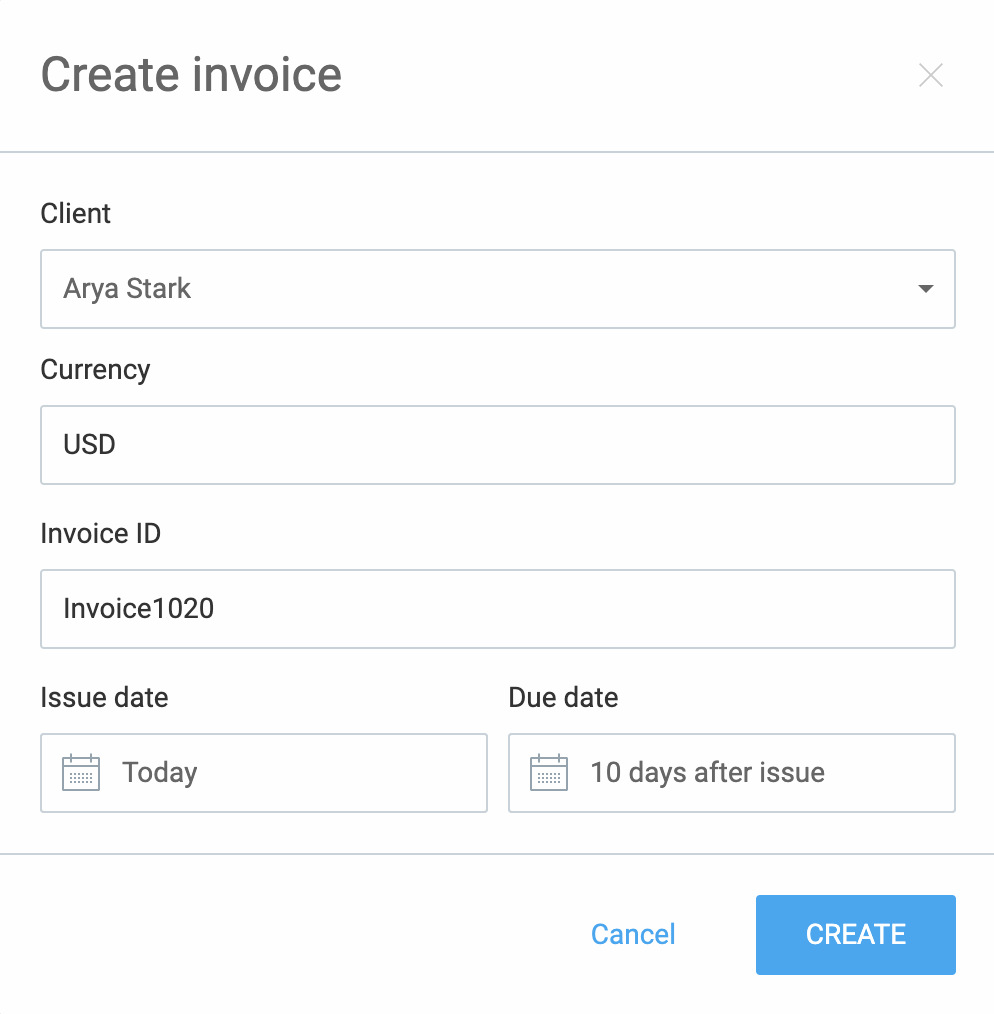
Then, as soon as you receive payment from your client, you can mark that invoice as Paid or Partially paid.
💡 Clockify Pro Tip
You’ve tracked time for all your tasks in Asana and promptly dispatched an invoice, but you still haven’t received payment for your services? Find out exactly what you can do here:
Maximize the power of your workflow with Asana time tracking
As you’ve already realized from the step-by-step walkthrough above, a robust work management platform paired with a straightforward time tracking system can help you introduce a wide-reaching change into your workflow.
In fact, Clockify’s integration with Asana lets you see where your time goes and allows you to speed up the processes that previously may have required shuffling through several apps.
On top of all that, Clockify lets you analyze all your projects, estimate the time required for each task, and even set milestones for maximum control of your workflow.

