Lock timesheets
You can prevent employees from editing their old time entries or adding new entries to past dates by locking timesheets. Once you lock timesheets, you can safely send your reports to your clients or accountant knowing the data will stay accurate.
Lock timesheets is an extra feature, which you can enable by upgrading your workspace to Standard, Pro, or Enterprise plan.
Locking timesheets #
- Open Settings from the left sidebar
- Switch to the Permissions tab
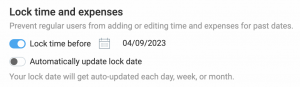
- Toggle Lock entries switch to activate
- Specify a date before which all time entries will be locked
- Changes will be automatically saved upon selecting the date or toggling the Lock entries switch
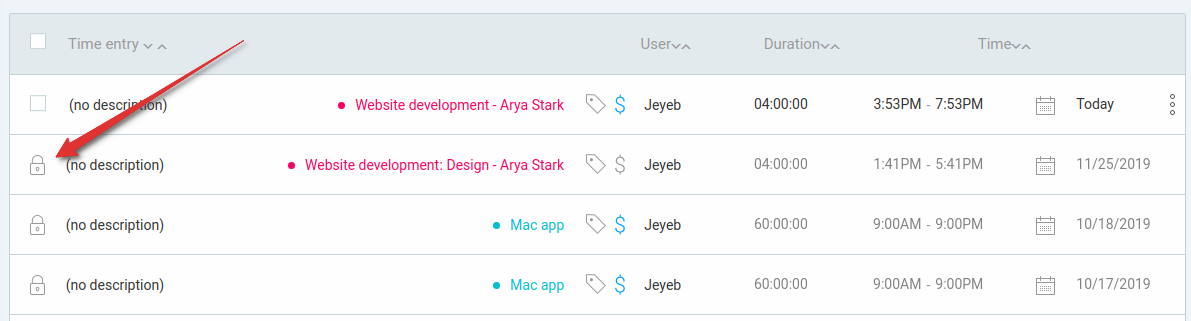
When entries are locked before, for example, April 15th, it means that regular users won’t be able to:
- Edit any time entries with the date April 14th or earlier
- Add new time entries with the date April 14th or earlier
Locking timesheets doesn’t affect administrators. Admins can still edit and add time in the locked period.
To unlock, move the switch back, and everyone will be able to edit all their time entries and add new ones to any date they want.
If you lock timesheets each month and have users across timezones, you should set the lock to the 2nd of each month. If you set it to 1st of the month, your team that’s in the later timezone won’t be able to enter dates for the last day in the previous month due to timezone difference.
Automatic lock #
Set automatic lock and the lock date will get auto-updated each day, week, or month so you don’t have to do it manually anymore.

How to set automatic lock #
- Go to workspace settings and switch to the Permissions tab
- Switch Automatically update lock date to ON
- Select lock frequency (weekly, monthly, older than x days/weeks/months)
When selecting the Weekly option, you have to select two days: when the lock date will get updated (e.g. Wednesday) and what is the first day of the week in your company (e.g. Monday). This way, when a new week starts (on Monday), your team can still add their missing hours for the previous week before that week gets locked (which happens on Wednesday).
When the automatic lock is enabled, you won’t be able to manually set a lock date.
When you set auto-update lock date older than 1 day, it means that at every end of the day, the lock date will be automatically updated so users cannot edit their yesterday’s hours.
The daily lock is updated every day at midnight, using the workspace owner’s time zone.
If you lock timesheets monthly and have users across timezones, you should set auto-lock to the 2nd of each month – otherwise, your team that’s in the later timezone won’t be able to enter dates for the last day in the month.
Locking today’s time #
You can’t lock current or future dates.
To prevent people from adding time manually for today or the future (or changing the start/end time of their entries), you need to enable the Force timer.
Locking expenses #
If you’re using expenses, keep in mind that lock date also affects expenses, meaning regular users won’t be able to add or edit expenses for locked dates.