Split entry
Split long entries into shorter segments and improve granularity in your time tracking.
Use Time tracker or Calendar to split entries based on either their duration, or specific times of the day and add more flexibility and precision when managing your time.
Split entry option is available to users on paid plans and on Free trial.
All users can perform this action, but admins can split time for all other team members in Calendar. However, if Who can edit time and expenses for others is set to Admins and Team managers, then Team managers are also able to split time for their team members in Calendar.
You can split both time and break entries. The step-by-step procedure is the same.
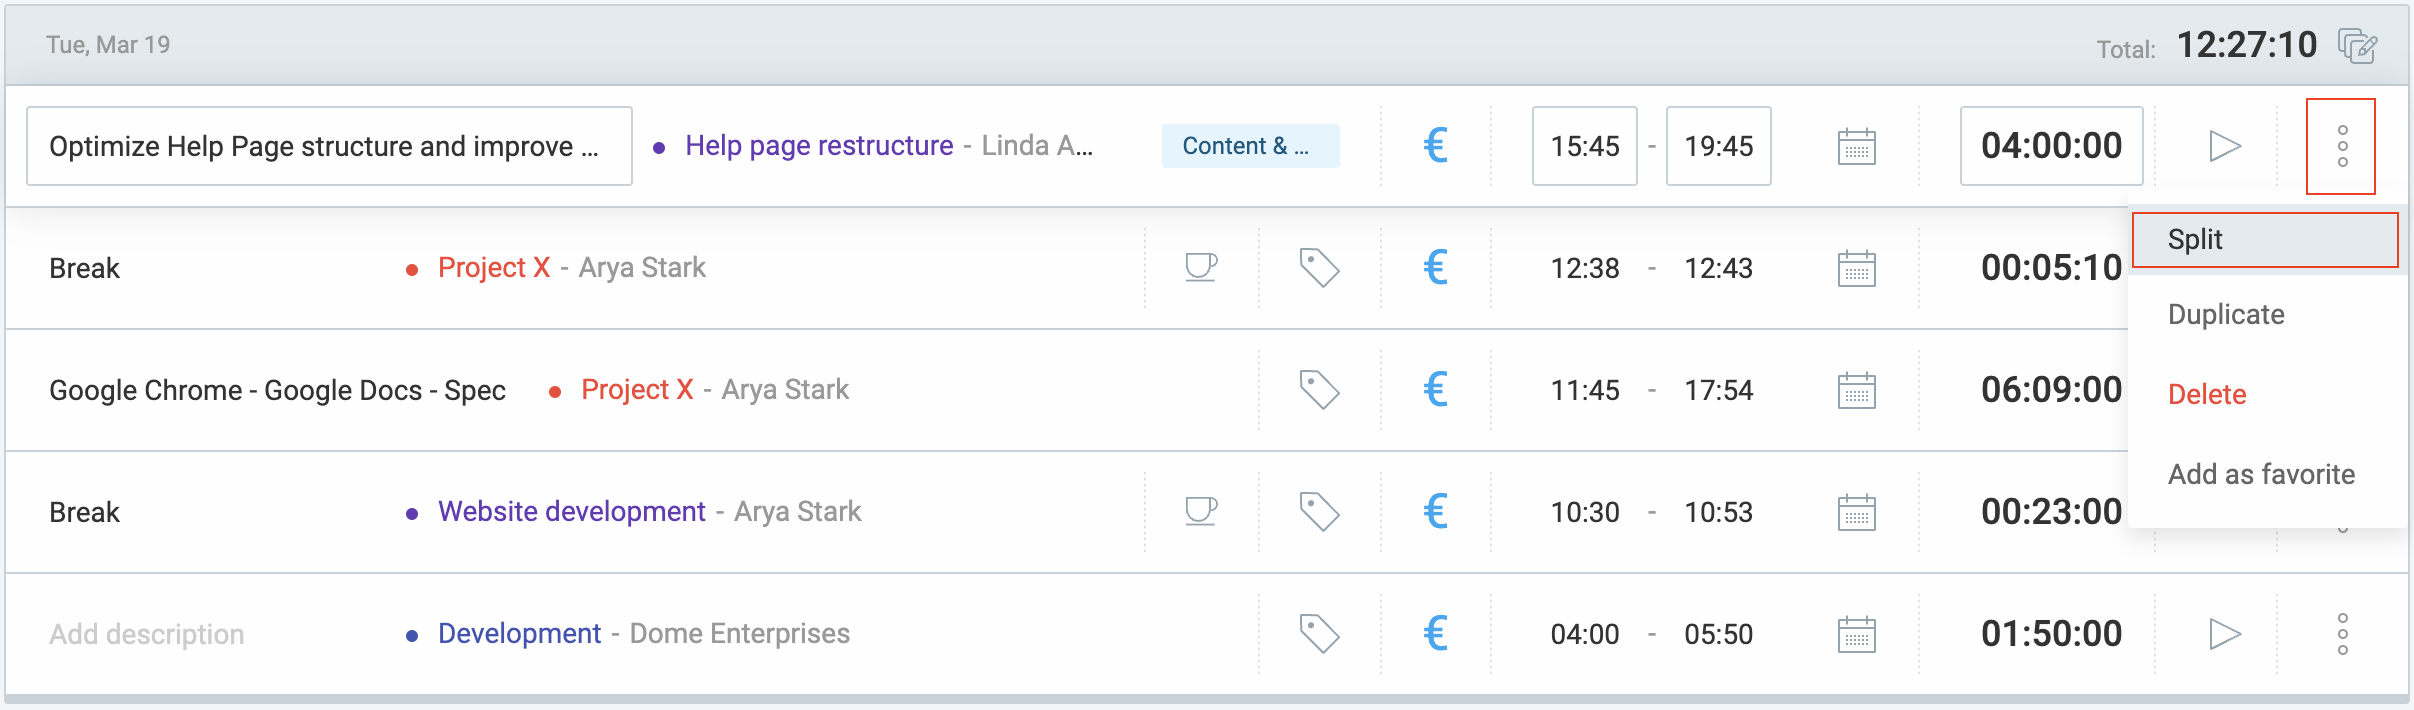
Split entry in Time tracker #
Time tracker contains a list of time/break entries that have been tracked, or those currently running in a workspace.
Time can be split for the running and existing entries. The steps are the same with the only difference being the type of entry you’re choosing in the Time tracker (the one that is running, or the one from the list).
To split entry:
- Go to Time tracker page
- Navigate to the entry you’d like to split
- Click on the three dots
- Choose Split option
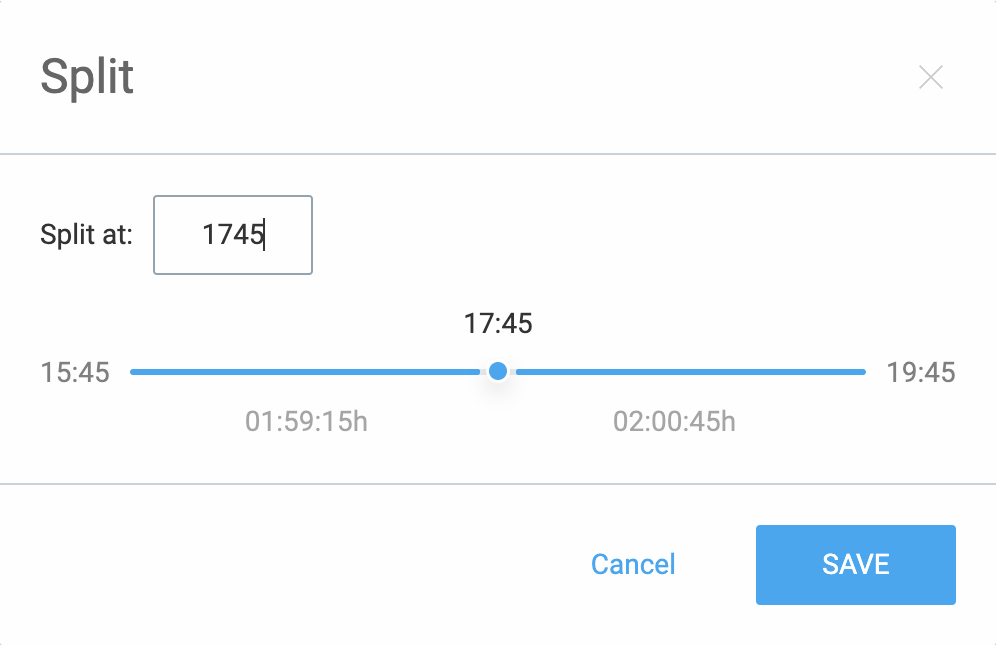
- In the Split at box write the time at which you’d like the split to occur
or - Toggle the bar on the timeline to the number you’d like to split
- Click Save to complete the action
If you split a running entry, as a result, you’ll get two entries with the first one having start and end time and the second one running with the start time being the end time of the first one.
For example: Entry has been running since 9:00 and now it’s 12:30. You split it at 10:00 and now you have two entries, with the first one being 9:00 – 10:00 and the second one 10:00 and running.
Entries can be split a minute after the start time and a minute before the ending time, meaning that entries shorter than two minutes cannot be split.
If there are multiple identical hours and minutes for which the entry spans, you can split time via the input field only for the first one.
If an entry has screenshots, they are split between two entries based on the time of creation.
For example: The entry lasts 10:00 – 10:30. It is split to: 10:00 – 10:15 and 10:15 – 10: 30. The screenshots created in the 10:00 – 10:15 time span belong to that time entry. Same goes for the other split entry.
The same logic applies to GPS location tracking. They are also split between two entries based on the time of creation.
Modify duration #
Duration of split entries can be modified:
- Navigate to the blue circle
- Move the arrow to the left or right
Entries are dynamic and change in real time to match new end time and duration. As one half of the timeline changes, the other one changes dynamically according to that.
Split entry in Calendar #
You can also split running and already created entries in the Calendar. Steps are the same.
- Go to the Calendar page
- Click on the running/existing entry
- Edit windows appears
- Click on the three dots menu at the bottom right corner
- Choose Split option
- In the Split at box write the time at which you’d like the split to occur
or - Toggle the bar on the timeline to the number you’d like to split
- Click Save to complete the action
If Force timer is on, the split time option is not available at all.
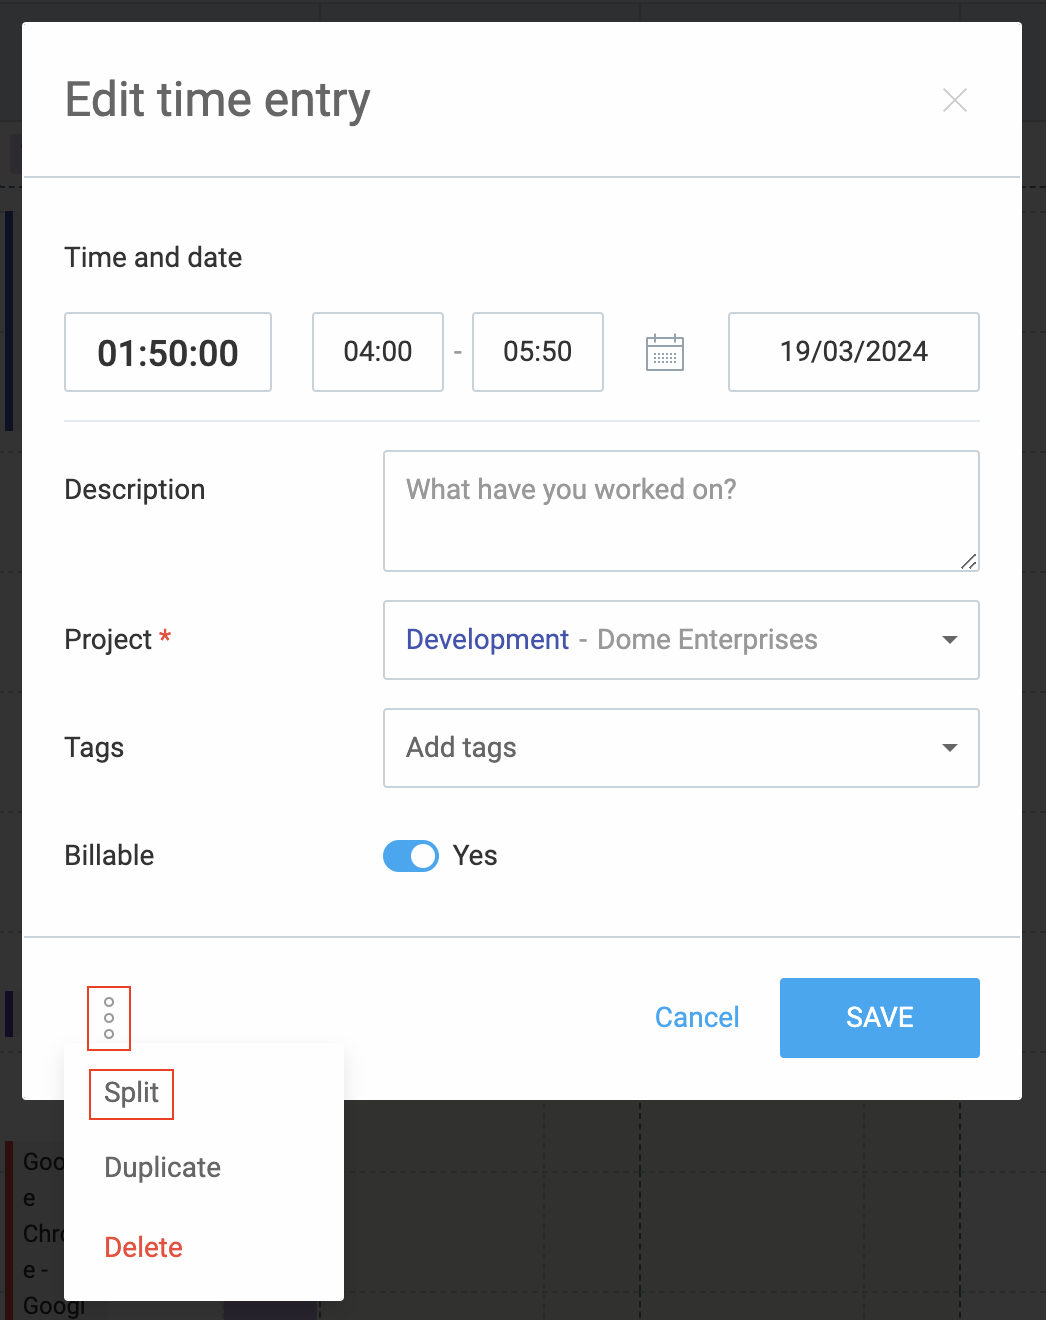
Split pending approvals #
You can also split time for pending time entries on the Approvals page:
- Go to the Approvals page
- Choose Pending tab
- Click on pending timesheet that contains entry you want to split
- Choose the entry and click on edit icon

- Edit time entry window appears
- Click on the three dots at the left bottom corner
- Choose Split from the dropdown
- In the Split at box write the time at which you’d like the split to occur
or - Toggle the bar on the timeline to the number you’d like to split
- Click Save to complete the action
Admins and Team managers (for their teams) can perform this action only if Who can edit time and expenses for others is set to Admins and team managers.