Definir campos obrigatórios para entradas de tempo
Como Proprietário/Administrador, você precisa garantir que todas as entradas de tempo em seu espaço de trabalho sejam precisas e consistentes. Uma maneira de conseguir isso é definindo campos obrigatórios para entradas de tempo.
O que são campos obrigatórios? #
Campos obrigatórios são campos de preenchimento obrigatório que devem ser preenchidos antes que uma entrada de tempo possa ser criada ou salva. Ao definir quais campos devem ser obrigatórios, você garante que as entradas de tempo contenham as informações necessárias para organização, geração de relatórios e análise adequada.
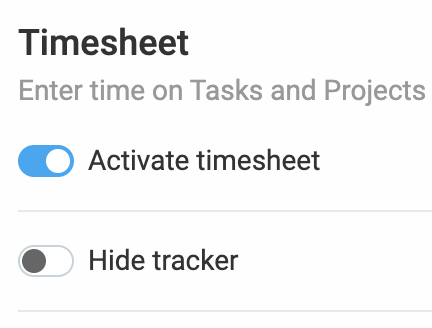
Habilitar campos obrigatórios #
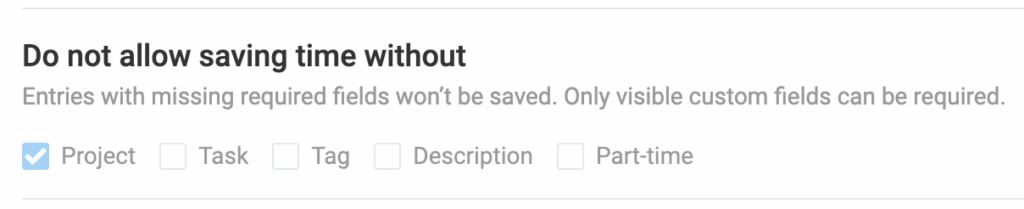
Os campos obrigatórios disponíveis são predefinidos e listados em Configurações do espaço de trabalho > guia Geral > seção Não permitir economia de tempo sem.
Você pode escolher entre os seguintes campos para torná-los obrigatórios para todas as entradas de tempo:
- Projeto
- Tarefa
- Etiqueta
- Descrição
Se a página Planilhas de horas estiver ativada nas configurações do seu ambiente de trabalho, o campo Projeto se tornará obrigatório. Você deve definir um projeto para que uma entrada seja salva.
Como funciona #
Se você marcar Projeto e Etiqueta como campos obrigatórios:
- Os usuários não poderão adicionar uma entrada de tempo sem selecionar um projeto e uma etiqueta
- O cronômetro pode ser iniciado, mas não pode ser interrompido até que ambos os campos sejam preenchidos
- As entradas de tempo não serão salvas sem esses dois campos
Por exemplo, se Tarefa for um campo obrigatório, as entradas de tempo vinculadas a projetos sem tarefas não serão exibidas no seletor de projetos, impedindo o envio de entradas de tempo incompletas.
O que são campos personalizados? #
Além dos campos padrão, você pode adicionar campos personalizados para monitorar qualquer coisa específica às suas necessidades comerciais.
Isso pode incluir:
- Despesas, quilometragem, intervalos, horas extras
- Status da fatura, local, equipamento
- Links para tíquetes, recibos e muito mais
Criar campos personalizados #
Somente proprietários do espaço de trabalho e administradores têm permissão para configurar campos personalizados.
Para criar campos personalizados para entradas de tempo:
- Acesse Configurações do espaço de trabalho > Campos personalizados
- Clique em Criar novo campo e selecione o tipo de campo:
- Texto: Entrada de texto livre
- Número: Somente valores numéricos (ex.: quilometragem, despesas)
- Link: URLs (ex.: links para recibos)
- Alternar: Opções Sim/Não (ex.: pago/não pago)
- Selecionar: Lista suspensa (ex.: status, localização)
- Selecionar vários: Permite várias seleções (ex.: equipamento utilizado)
Tornar campos personalizados obrigatórios #
Para definir um campo personalizado como obrigatório para cada entrada de tempo:
- Certifique-se de que o campo esteja Visível com um valor padrão ou editável pelos usuários
- Nas Configurações do espaço de trabalho, na aba Geral, marque a caixa de seleção do campo personalizado na seção Não permitir registrar o tempo sem
- O campo agora aparecerá como um campo obrigatório tanto no Rastreador e na Planilha, garantindo que todos os usuários os preencham ao inserir o tempo
Melhores práticas para usar campos obrigatórios #
- Certifique-se de que os campos obrigatórios sejam os mesmos em todos os projetos e áreas de trabalho.
Por exemplo: Digamos que, como gerente de marketing, você precise rastrear [Nome da campanha] para cada entrada de tempo. Se você tornar este campo obrigatório para o seu projeto de [Mídias sociais], mas não para o seu projeto de [Marketing por e-mail], os relatórios da sua empresa terão dados ausentes. Ao tornar [Nome da campanha] um campo obrigatório para todos os projetos, seus dados permanecem limpos e completos, facilitando a geração de relatórios posteriormente. - Use campos personalizados para rastrear informações comerciais importantes para relatórios e análises, por exemplo, sua equipe de desenvolvimento de software precisa priorizar bugs. Crie um campo personalizado chamado Prioridade do bug com opções como Alta, Média e Baixa. Ao exigir que sua equipe preencha esse campo para cada registro de tempo relacionado a bugs, você pode filtrar seus relatórios rapidamente para ver exatamente quanto tempo foi gasto em problemas de alta prioridade.
Perguntas frequentes #
O que acontece se eu não definir nenhum campo como obrigatório? #
Se você não definir nenhum campo como obrigatório, os usuários poderão enviar entradas de tempo sem preencher informações críticas, como projeto, tarefa ou descrição. Embora isso não impeça os usuários de adicionar entradas de tempo, pode levar a dados incompletos ou inconsistentes, dificultando a geração de relatórios e análises.
Posso tornar um campo personalizado visível apenas para projetos específicos? #
Sim, os campos personalizados podem ser definidos para serem visíveis apenas para projetos específicos. Nas configurações do projeto, você pode gerenciar quais campos personalizados devem ser visíveis e definir valores padrão para cada projeto. Além disso, você pode optar por tornar alguns campos visíveis apenas quando um usuário seleciona um projeto específico.
Posso tornar determinados campos invisíveis para usuários comuns? #
Sim, você pode tornar determinados campos invisíveis para usuários comuns, permitindo que eles acompanhem os dados. Campos invisíveis podem ser usados para metadados, IDs de projeto ou integrações de back-end. Os usuários não verão esses campos no Rastreador de Tempo ou na Planilha, mas os dados ainda estarão disponíveis para relatórios e poderão ser usados em exportações ou integrações de API.
Campos obrigatórios podem afetar meus relatórios? #
Sim, campos obrigatórios podem ser usados em relatórios. Ao exportar entradas de tempo para Excel ou CSV, os campos obrigatórios (e seus valores) aparecerão no Relatório detalhado. Isso permite que você filtre e analise entradas de tempo com base nos campos obrigatórios, garantindo dados consistentes e completos para fins de relatórios.