Guia de início rápido para configurar o monitoramento de atividades
Este artigo é um guia simplificado para ajudar proprietários e administradores de espaços de trabalho a configurar o monitoramento de atividades de suas equipes.
Use um computador ou notebook para acessar esta funcionalidade, pois ela ainda não está disponível em dispositivos móveis.
Antes de começar #
O monitoramento de atividades deve estar ativado nas Configurações do espaço de trabalho.
Para fazer isso:
- Clique no ícone de
 três pontos ao lado do nome do seu espaço de trabalho
 - Selecione Configurações do espaço de trabalho > Atividade do usuário
- Localize a seção de monitoramento de atividades
- Ative a opção Monitoramento de atividades

Em seguida, verifique quais funções podem acessar o monitoramento de atividades.
Para fazer isso:
1. Acesse as configurações do espaço de trabalho
2. Clique na página Permissões
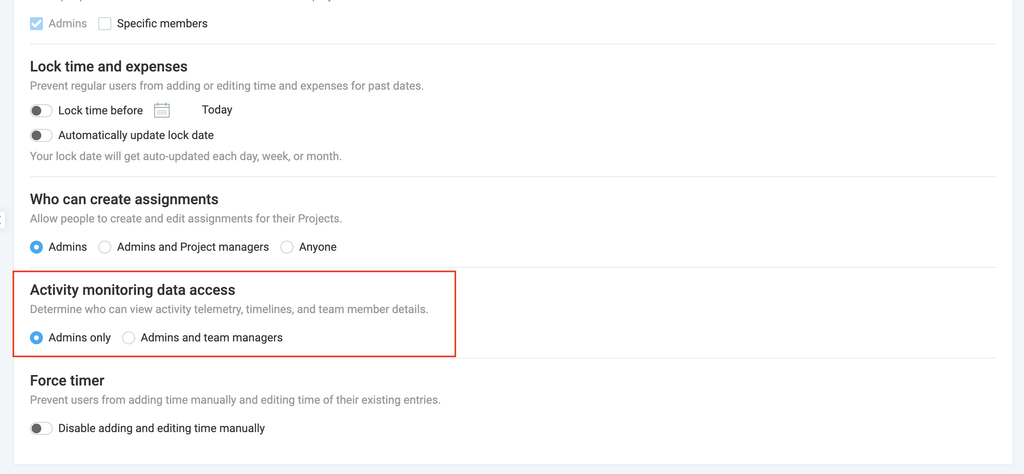
3. Selecione as funções às quais você deseja conceder acesso:
- Somente administradores
- Administradores e gerentes de equipe
Etapa 1: Configurar o espaço de trabalho #
Para configurar o monitoramento de atividades:
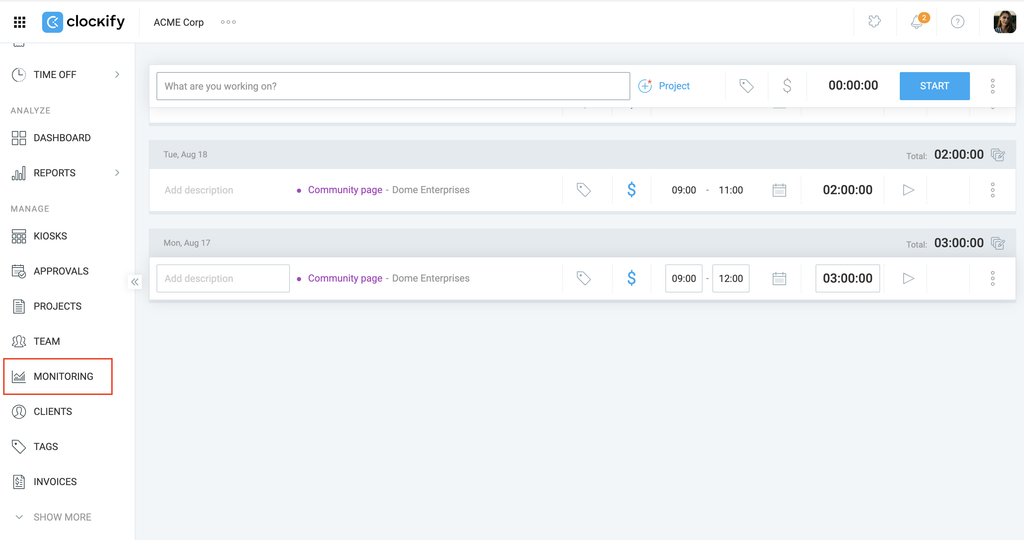
- Acesse Monitoramento na barra lateral esquerda
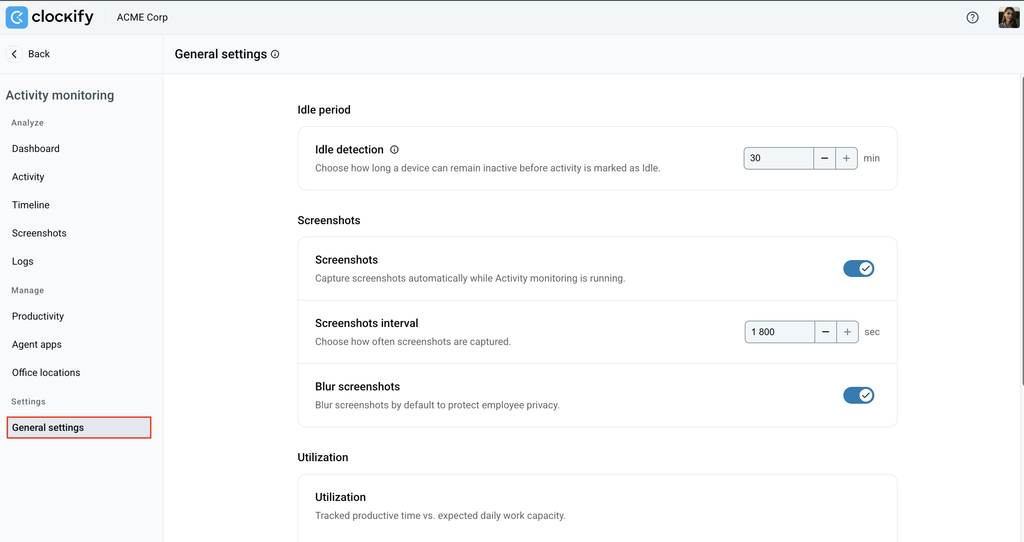
Clique em Configurações gerais (localizado na seção Configurações da barra lateral esquerda)
Configure a detecção de inatividade #
Defina o limite de inatividade (entre 1 e 30 minutos) para determinar quando o sistema deve marcar um usuário como ausente.

Ative as capturas de tela #
Para habilitar as capturas de tela da sua equipe:
- Ative a opção Capturas de tela
- Defina o Intervalo entre capturas de tela para definir a frequência das capturas, de no mínimo 30 segundos a no máximo 30 minutos
- Desative a opção Desfocar capturas de tela se quiser remover o desfoque
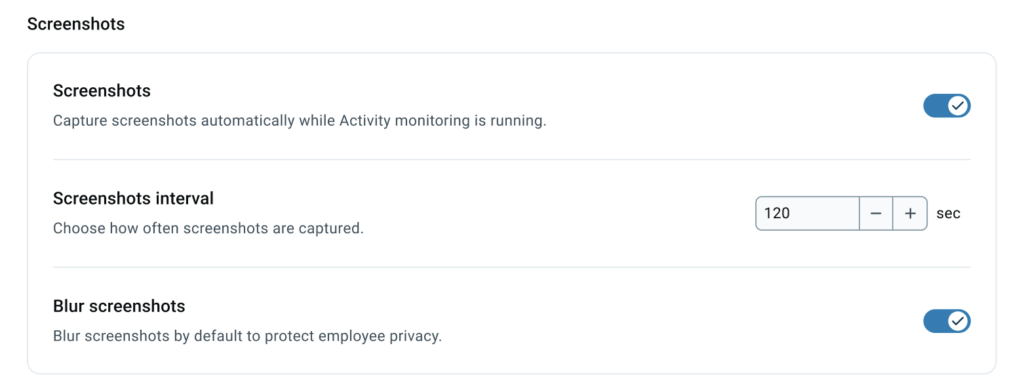
A opção Desfocar capturas de tela está habilitada por padrão. Desativá-la permitirá que suas capturas de tela fiquem nítidas, sem desfoque.
Defina a utilização #
Selecione quais tipos de aplicativos e sites contam como tempo produtivo:
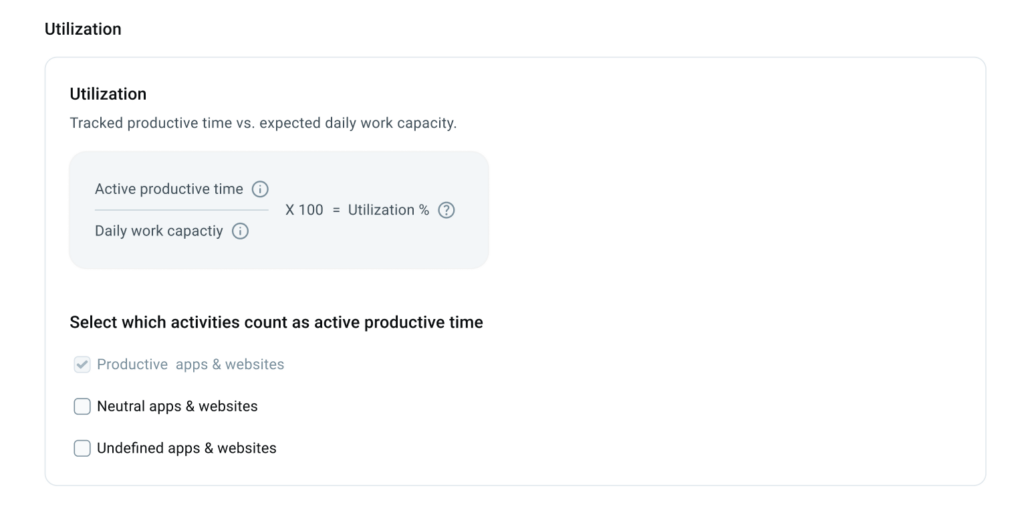
Consulte Noções básicas do monitoramento de atividades para saber como o tempo de produtividade é calculado.
Passo 2: Instale o agente para desktop #
Para começar a coletar dados, você deve garantir que o agente de rastreamento esteja instalado nos computadores. Você tem duas maneiras de implantá-lo:
1. Para usuários
- O administrador precisa garantir que os usuários já estejam adicionados ao espaço de trabalho do Clockify.
- Vá para Aplicativos do agente > Instalar aplicativo do agente e clique em Copiar link.
- Envie o link para sua equipe por chat ou e-mail.
- Os usuários simplesmente abrem o link para baixar e instalar o aplicativo.
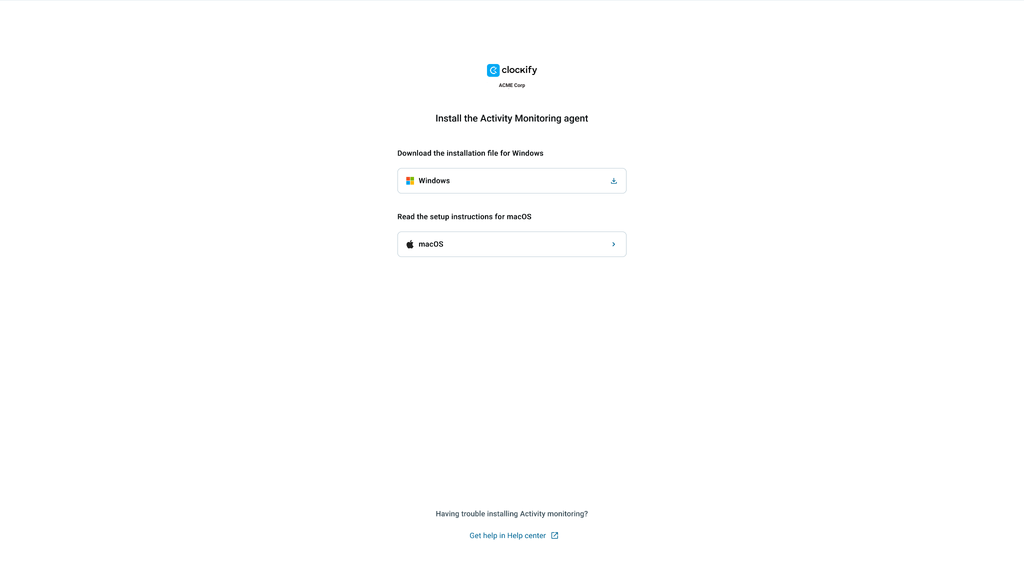
2. Para administradores
Siga estas etapas para instalar o agente de rastreamento (para monitorar sua própria utilização)
- Acesse Monitoramento > Aplicativos do agente
- Clique em Instalar aplicativo do agente
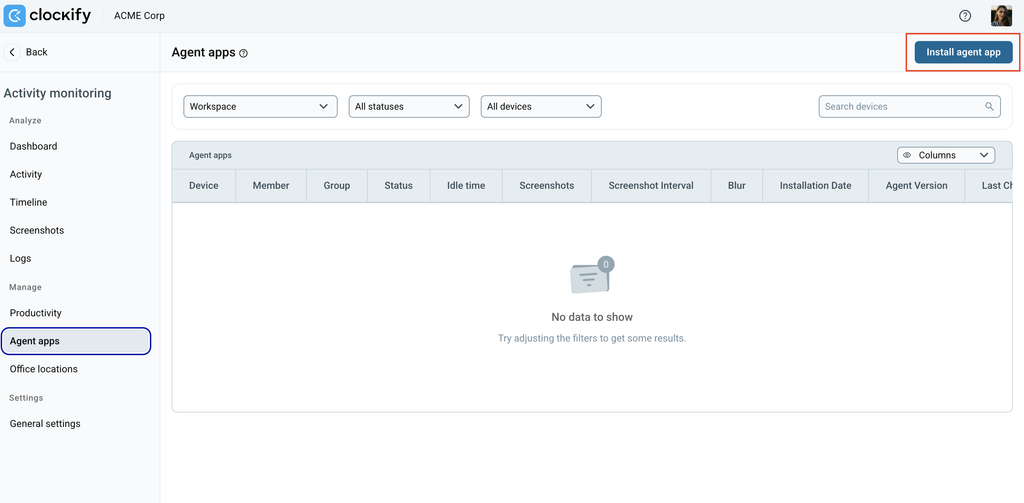
3. Você tem três opções:
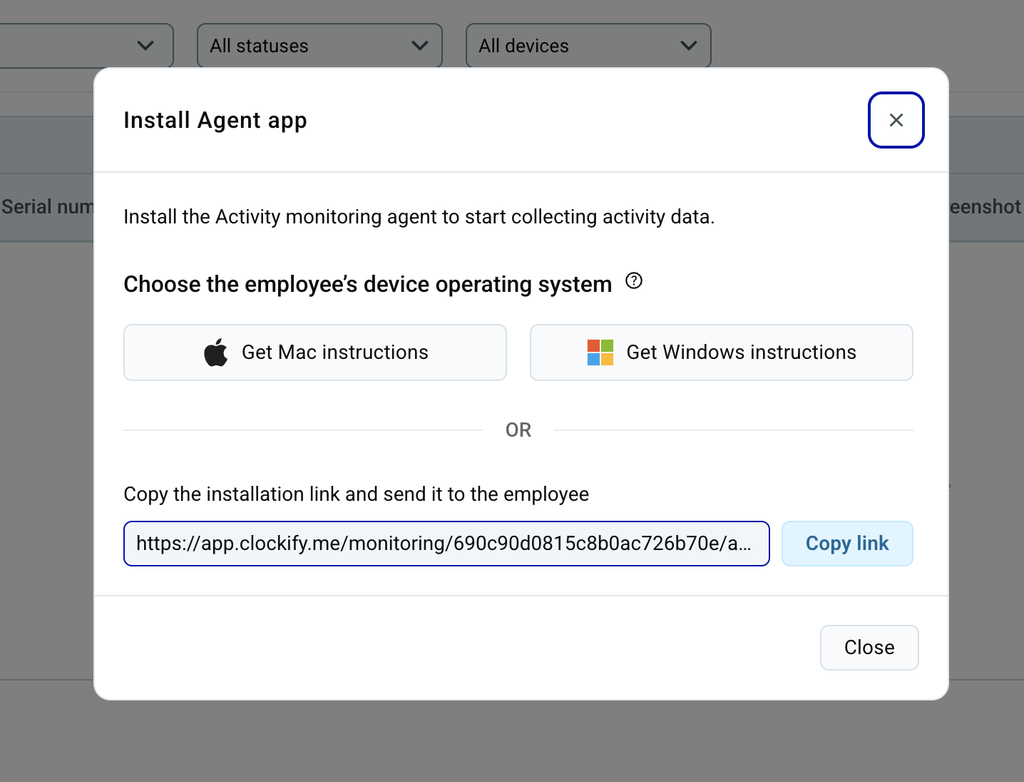
Instalar no Mac
- Acesse Monitoramento > Aplicativos do agente
- Clique em Instalar aplicativo do agente
- Selecione Obter instruções para Mac
- Copie o código que aparece na janela pop-up
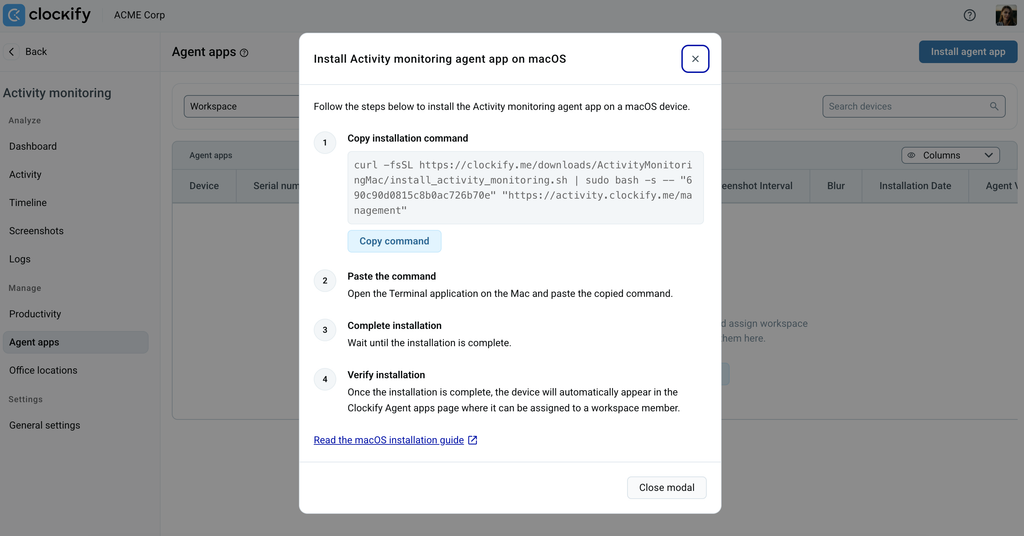
5. Siga o restante das instruções para instalar o aplicativo do agente
Instalar no Windows
- Acesse Monitoramento > Aplicativos do agente
- Clique em Instalar aplicativo do agente
- Selecione Obter instruções para o Windows
- Copie o código que aparece na janela pop-up
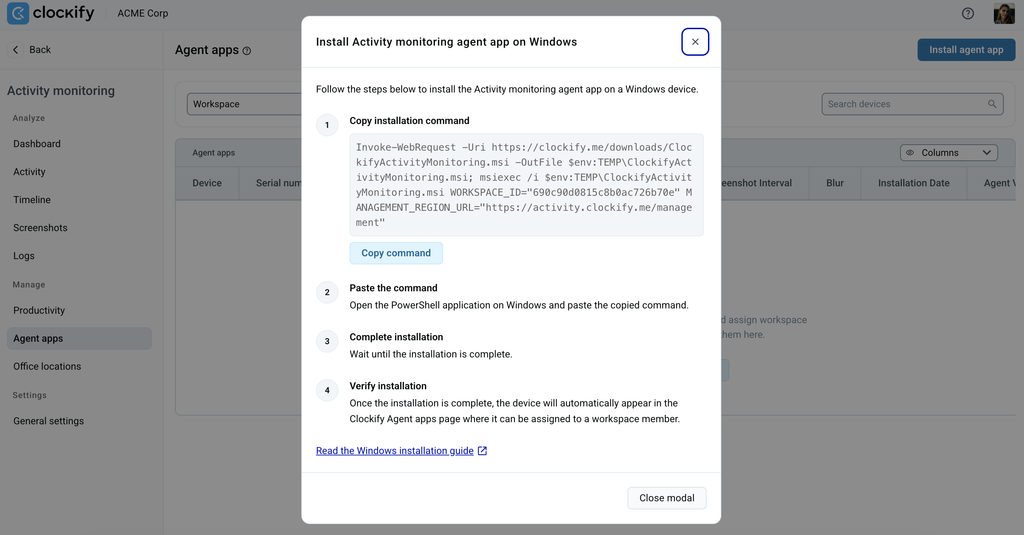
5. Siga o restante das instruções para instalar o aplicativo do agente
Copiar link
Você pode copiar o link de instalação e enviá-lo ao membro da equipe que precisa instalar o aplicativo do agente em seu dispositivo.
Etapa 3: Atribuir membros aos agentes instalados #
Os agentes recém-instalados começam a coletar dados imediatamente, mas inicialmente aparecerão como Não atribuídos . Após a instalação, você deve atribuir o aplicativo do agente a cada membro.
Para fazer isso:
- Acesse Monitoramento
- Clique em Aplicativos do agente
- Clique na lista suspensa da coluna Membro e selecione o membro que deseja atribuir ao dispositivo
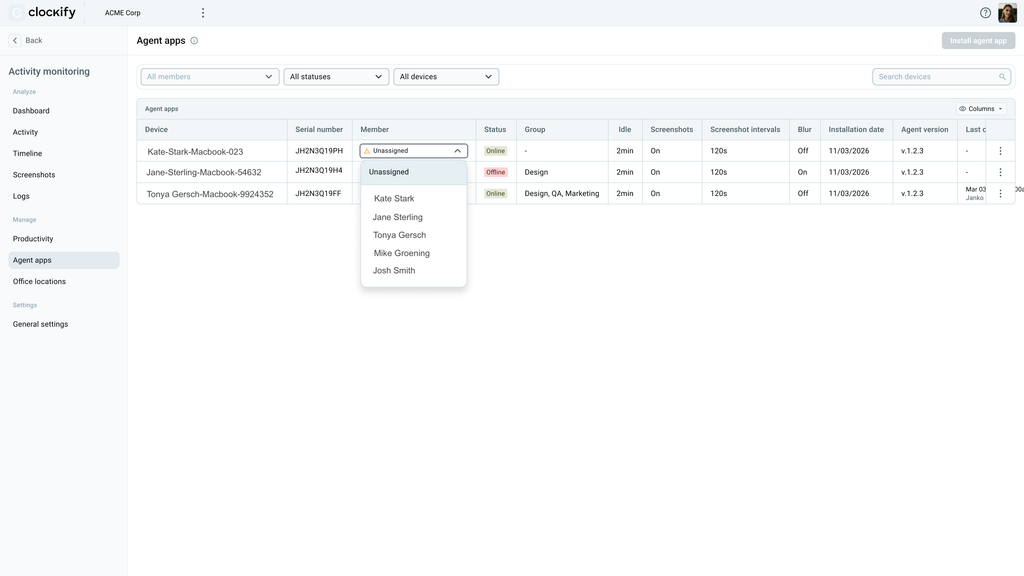
Os dados coletados enquanto um agente está Não atribuído são preservados no banco de dados, mas não são vinculados retroativamente ao usuário após a atribuição inicial.
Etapa 4: Definir as classificações de iniciais produtividade #
Inicialmente, os dados brutos do monitoramento de atividades são registrados no sistema como Não definidos. Como os índices de utilização da sua equipe dependem diretamente dessas classificações, você deve definir o que conta como trabalho.
- Acesse Monitoramento
- Selecione Produtividade
- Analise a tabela de aplicativos e sites detectados e classifique-os como:
- Produtivo: Tempo gasto usando aplicativos, programas ou sites que sua empresa marcou como relacionados ao trabalho
- Neutro: Categoria para aplicativos ou sites que a empresa decide não rotular como estritamente relacionados ao trabalho ou completamente improdutivos
- Não produtivo: Tempo gasto em aplicativos ou sites que não estão relacionados às suas tarefas de trabalho
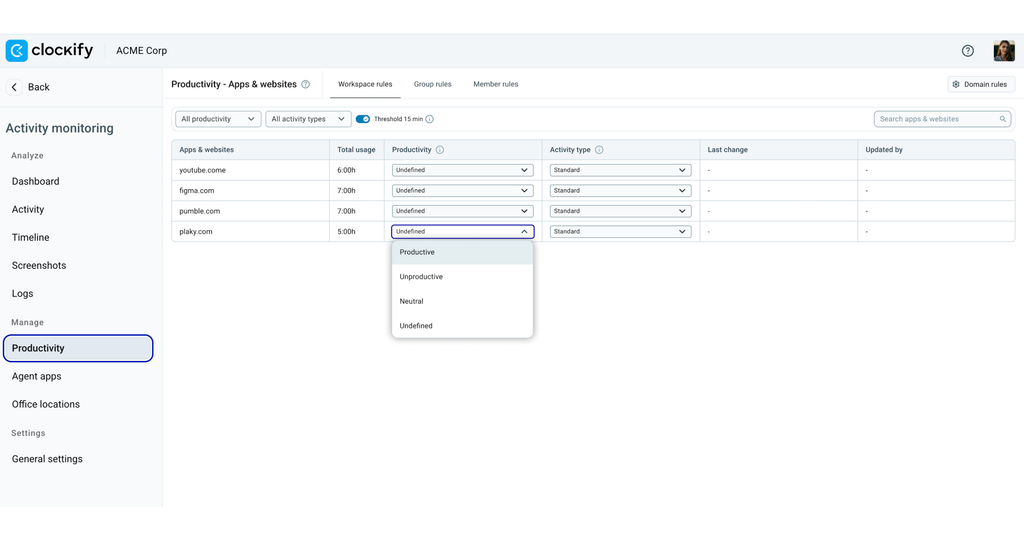
Para agilizar a configuração inicial, clique no ícone Regras de domínio no canto superior esquerdo para criar uma regra geral (por exemplo, digitar *.google.com classificará instantaneamente todos os subdomínios do Google de uma só vez).
Perguntas Frequentes (FAQs) #
Como faço para implantar e instalar o aplicativo de agente de monitoramento de atividades para a minha equipe?
Administradores e gerentes compartilham um link de instalação com os membros da equipe para que eles mesmos possam instalar o agente. Após a instalação, os dispositivos aparecerão em Monitoramento > Aplicativos do agente como Não atribuídos. Em seguida, será necessário atribuir cada dispositivo ao seu respectivo usuário.