Configurar e gerenciar o quiosque
O quiosque permite que seus funcionários registrem entrada e saída usando um dispositivo compartilhado enquanto trabalham presencialmente. Depois, você pode visualizar o tempo registrado e a presença nos relatórios.
O quiosque também pode ser usado por usuários sem e-mail para registrar seu tempo. Você pode adicioná-los ao espaço de trabalho como membros limitados, que só podem registrar entrada pelo quiosque.
Se você trabalha com funcionários sazonais (por exemplo, estagiários ou trabalhadores de meio período), você pode configurar um quiosque para que eles registrem entrada e saída durante o período em que estiverem na empresa.
Para obter orientações gerais sobre como registrar a entrada e a saída pelo quiosque, assista ao vídeo e siga as instruções abaixo.
Ativar o quiosque #
Antes de criar um quiosque e usá-lo para registro de tempo, você deve primeiro ativá-lo no espaço de trabalho.
Para ativar o quiosque:
- Clique no três pontos ao lado do nome do seu espaço de trabalho
- Clique em Configurações do espaço de trabalho
- Na aba Geral, role até a seção Quiosque
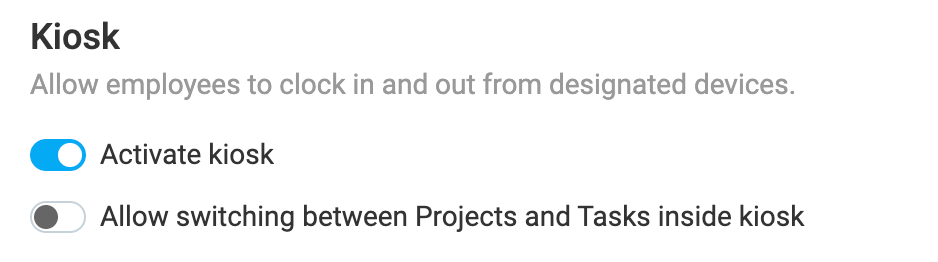
- Ative a opção Ativar quiosque (ON)
Configurar as definições do quiosque #
Quando um quiosque estiver ativado no espaço de trabalho, você poderá configurar suas definições antes de iniciá-lo.
Configurações gerais #
Essas configurações se aplicam a todos os quiosques em seu espaço de trabalho. Vá em Configurações do espaço de trabalho > Aba Geral para configurar o seguinte:
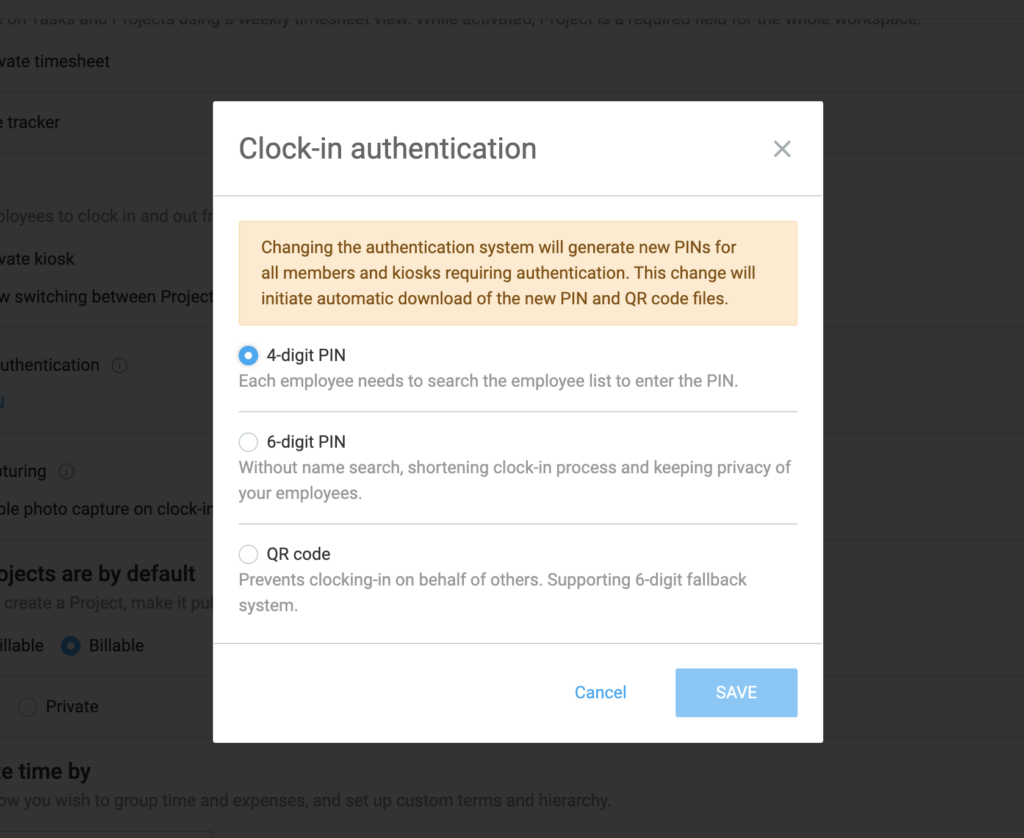
- Autenticação de registro de ponto – Selecione as opções disponíveis para você (PIN de 4 dígitos, PIN de 6 dígitos ou código QR)
- Alternância entre Projetos/Tarefas: Ative a opção Permitir alternar entre projetos e tarefas dentro do quiosque se quiser que os usuários registrem no que estão trabalhando enquanto estão com o ponto ativo (por exemplo, mudar do Projeto A para o Projeto B).
- Intervalos: Ative a opção Habilitar intervalos se quiser que os usuários registrem o tempo de intervalo.
Configurações de inicialização #
Essas configurações definem as permissões para iniciar o quiosque em um dispositivo. Vá em Configurações do espaço de trabalho > Permissões > Configurações de inicialização do quiosque para configurar o seguinte:
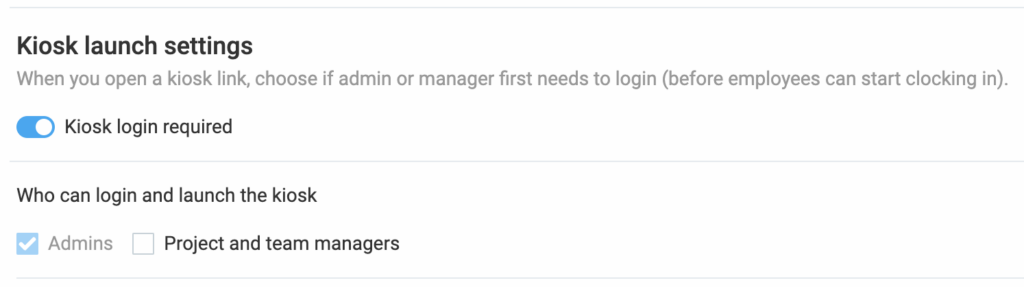
- Login obrigatório no quiosque: Ative esta opção se quiser que administradores/gerentes façam login antes de iniciar o quiosque.
- Quem pode fazer login e iniciar o quiosque: Defina como apenas Administradores (padrão) ou inclua Gerentes de projeto e equipes para que também possam iniciar o quiosque.
Criar quiosque #
Para criar um quiosque:
- Vá até a página Quiosques na barra lateral
- Clique em Criar quiosque
- Insira o nome do quiosque (sem caracteres especiais; ex.: Westside Bar: Equipe)
- Escolha os responsáveis (usuários) que poderão usar o quiosque
- Escolha o projeto padrão onde todas as entradas de tempo serão registradas (a menos que seja alterado)
- Opcional: Marque a opção Autenticação obrigatória para exigir que os usuários façam o registro usando o método de autenticação definido nas Configurações do espaço de trabalho
- Clique em Criar para concluir o processo
Cada vez que você edita ou ativa o método de autenticação de entrada (clock-in) para o quiosque, você receberá um arquivo CSV com novos códigos PIN/QR gerados para seus funcionários.
Captura de tela para registro de ponto #
Este recurso está disponível para usuários do plano Pro ou superior.
O recurso de captura de fotos oferece uma camada adicional de verificação após o registro de ponto, tirando automaticamente uma foto dos usuários quando eles registram entrada e saída pelo quiosque.
Existem duas maneiras de ativar a captura de foto para sua equipe:
- Configuração do espaço de trabalho: Ative a captura de fotos para todos os quiosques da sua organização para uma verificação uniforme.
- Configuração individual do quiosque: Ative ou desative a captura de fotos seletivamente para quiosques específicos, caso apenas determinados locais precisem de verificação.
Permissões da captura de foto #
- Apenas administradores podem ativar a captura de foto
- Administradores podem acessar e visualizar as fotos de todos os usuários
- Gerentes de equipe podem acessar e visualizar as fotos dos membros de sua equipe
- Membros da equipe podem acessar e visualizar suas próprias fotos
Certifique-se de que sua equipe esteja totalmente informada sobre a captura de fotos para registro de entrada/saída ao implementar este recurso de quiosque. Isso é necessário para manter a conformidade e proteger a privacidade.
Ativar captura de fotos para o seu espaço de trabalho #
Somente administradores podem ativar a captura de fotos.
Para ativar a captura de fotos em todos os quiosques:
- Clique no ícone de três pontos ao lado do nome do seu espaço de trabalho
- Selecione Configurações do espaço de trabalho
- Localize Captura de fotos na sessão Quiosque
- Ative o botão ao lado de Habilitar captura de fotos no registro de entrada e saída
- Leia e confirme que você leu a Política de privacidade de captura de fotos e clique em Concordo
Os usuários do quiosque devem dar permissão explícita para que sua foto seja tirada antes da primeira captura.
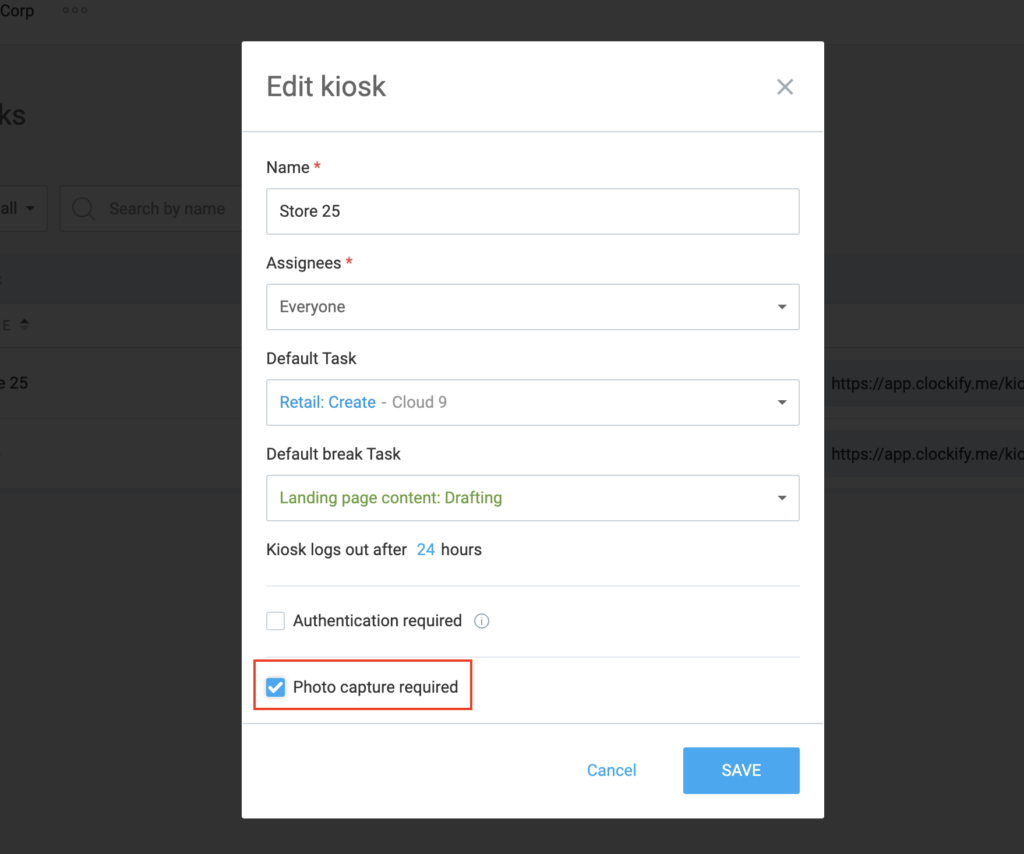
Ativar captura de fotos por quiosque #
Para ativar a captura de fotos em um quiosque específico:
- Vá para Quiosques
- Clique nos três pontos ao lado do quiosque que deseja atualizar
- Selecione Editar
- Ative a configuração de captura de fotos
- Clique em Salvar
Ver fotos capturadas #
Para visualizar as fotos capturadas:
- Vá para a página Atividade
- Selecione Fotos do quiosque
- Passe o cursor sobre uma foto e clique em Visualizar
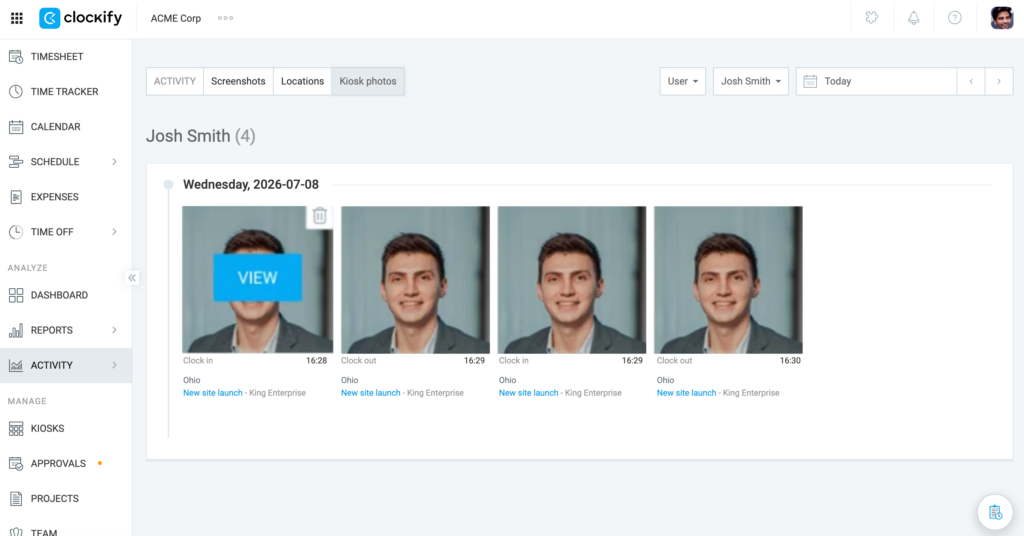
Usuários comuns podem acessar apenas suas próprias fotos capturadas, enquanto os administradores podem acessar e visualizar todas as fotos capturadas. Os gerentes de equipe podem acessar e visualizar as fotos dos membros de suas equipes.
Excluir fotos capturadas #
Para excluir fotos capturadas:
- Vá para a página Atividade
- Clique em Fotos do quiosque
- Passe o cursor sobre uma foto e clique no ícone da lixeira
- Clique em Excluir na janela de confirmação
Inicie o quiosque #
Esta ação é realizada por administradores do espaço de trabalho, a menos que seja configurado de outra forma nas definições de inicialização do quiosque.
Um quiosque pode ser iniciado por meio de um link em qualquer dispositivo com navegador (tablet, computador ou telefone - não é necessário equipamento especial).
Para abrir um quiosque:
- Vá até a página Quiosques
- Copie o link do quiosque
- Abra o link do quiosque no seu dispositivo (por exemplo: tablet, telefone, computador).
- Se for necessário login no quiosque, faça login usando suas credenciais de administrador
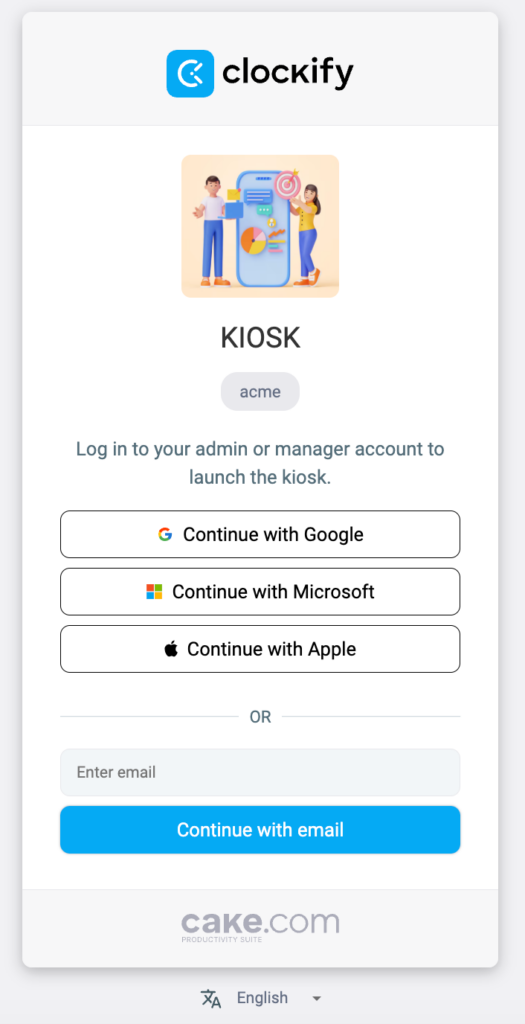
Como alternativa, você pode iniciar um quiosque diretamente pelo Clockify, mas será solicitado que você saia da sua conta antes de registrar entrada no quiosque.
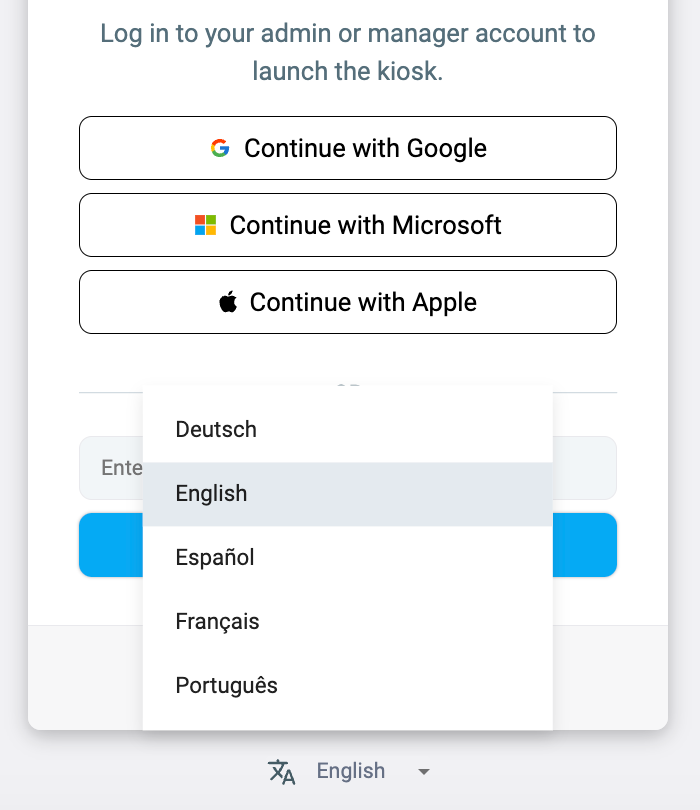
Você pode definir o idioma do quiosque na página de login. Essa configuração se aplica apenas à sessão atual, e você precisará definir o idioma novamente ao iniciar uma nova sessão. Se o login no quiosque não for obrigatório, ele será aberto diretamente no navegador e o idioma seguirá as configurações do dispositivo.
Editar quiosque #
Se necessário, você pode alterar as configurações do quiosque:
- Vá até a página Quiosques
- Clique no menu de três pontos ao lado do nome do quiosque
- Clique em Editar
- Altere o campo desejado (por exemplo: responsáveis/usuários)
- Clique em Salvar para aplicar a alteração

Você também tem as seguintes opções no menu de três pontos:
- Exportar responsáveis para obter informações sobre os membros atribuídos ao quiosque
- Desativar o quiosque se você não precisar mais usá-lo
Registrar ponto para outros (PIN universal) #
Se necessário, um administrador (ou alguém autorizado com o PIN universal do quiosque) pode registrar entrada/saída para outros funcionários:
- Vá até o quiosque
- Selecione o perfil da pessoa
- Insira o PIN universal do quiosque (se necessário)
- Toque em Entrar para começar a contar o tempo
Para encerrar o turno, siga os mesmos passos e toque em Sair.
O proprietário da organização e o administrador do espaço de trabalho devem sempre usar seu PIN pessoal. O PIN universal não se aplica a eles.
Para mais informações sobre como registrar ponto para outros usando PIN, consulte este artigo.
Gerenciar quiosque #
Os administradores podem editar, desativar ou excluir um quiosque a qualquer momento.
- Se as configurações do quiosque forem alteradas, todas as sessões serão encerradas
- Se desativado, o link (URL) do quiosque deixa de funcionar e os funcionários não poderão registrar ponto
- Se excluído, o link desaparece e os dados do quiosque são removidos dos registros de tempo
Os quiosques permanecem abertos por 24 horas por padrão. Após esse período, o administrador deve reiniciar o quiosque para que ele esteja pronto para uso no dia seguinte. Se você precisar de sessões mais longas ou precisar usar o quiosque em vários dispositivos, será necessário atualizar para qualquer plano pago.
Se você estiver no plano Standard e tiver enviado o logotipo da empresa nas configurações do espaço de trabalho, ele será exibido no seu quiosque.
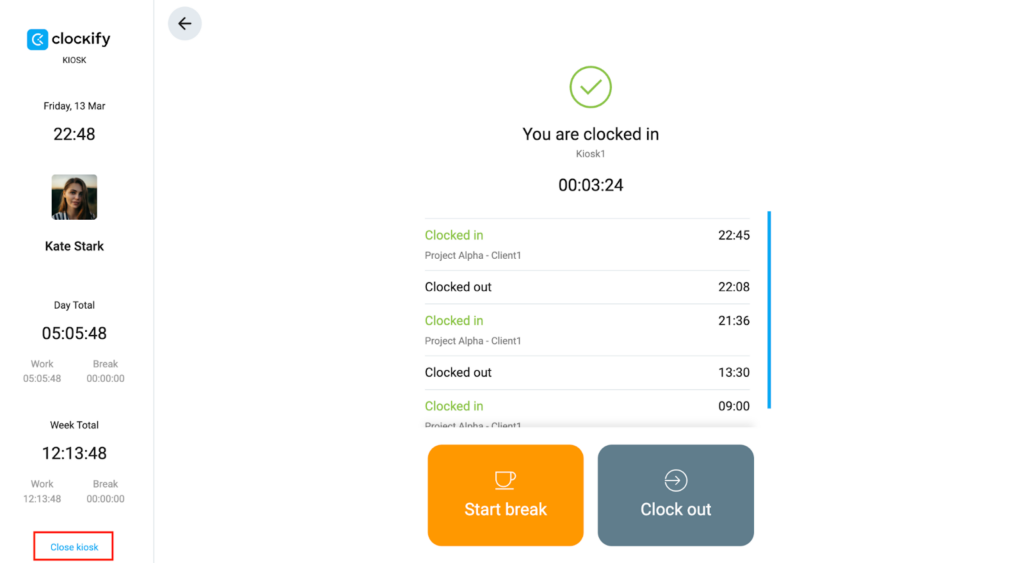
Fechar quiosque #
Ao fechar um quiosque, os usuários que estiverem com o ponto ativo não poderão registrar saída nem parar o cronômetro. Se isso acontecer, o administrador terá que fazer isso por eles. Em um plano pago, o administrador pode interromper o tempo de outro usuário no aplicativo web acessando o calendário dele e parando o cronômetro no bloco de tempo em andamento.
Para fechar um quiosque:
- Selecione seu perfil de administrador no quiosque
- Insira seu PIN (se necessário)
- Clique em Fechar quiosque no canto inferior esquerdo
Rebaixamento de assinatura #
Se o administrador fizer downgrade da assinatura a partir dos planos Enterprise/Pro/Standard:
| Plano Alvo | Impacto | Notificação do Administrador |
| Gratuito | Quiosque desativado. | Nenhuma |
| Basic | Autenticação por QR desativada. O sistema retorna à autenticação por PIN de 6 dígitos. | Janela pop-up |
| Personalização do quiosque desativada. | Nenhuma |
Todas as configurações e ajustes permanecem salvos em sua conta. Para reativar o acesso aos recursos pagos, faça upgrade para o plano Basic ou superior.
Relatórios do Quiosque #
Ao fazer login no aplicativo de quiosque, o usuário só pode visualizar os registros de tempo do dia.
Proprietários da organização, administradores do espaço de trabalho e membros com permissão podem visualizar todos os registros via quiosque no Clockify:
| Funcionalidade | Dados disponíveis |
| Painel da equipe | Visualizar membros da equipe atualmente com ponto ativo |
| Relatório resumido e semanal | Visualizar resumo dos registros de tempo por usuário, data e projeto (pode ser exportado como PDF, CSV ou Excel) |
| Relatório detalhado | Visualizar lista completa de registros de entrada/saída (pode ser exportado como PDF, CSV ou Excel) |
Para filtrar o tempo nos relatórios por quiosque, você precisa exibir o filtro de quiosque:
- Acesse a página Relatórios
- Clique no menu suspenso de Filtro
- Marque a caixa ao lado de Quiosque
Depois que o filtro de quiosque estiver visível, você poderá aplicá-lo para exibir todos os dados por nome de quiosque.
Acessar o quiosque em dispositivos móveis #
Se você quiser acessar o quiosque rapidamente a partir de um dispositivo móvel e evitar que as pessoas saiam acidentalmente, fixe o link na tela inicial seguindo os passos abaixo.
- Abra o link do quiosque no Safari
- Toque em Compartilhar
- Toque em Adicionar à tela de início
- Dê um nome ao atalho
- Vá em Ajustes> Acessibilidade > Geral > Acesso guiado
- Acesse Atalho de Acessibilidade
- Volte à tela inicial e abra o atalho do quiosque
- Inicie o Acesso Guiado clicando três vezes no botão Home
- Vá em Opções no canto inferior esquerdo e desative todas as opções, exceto Toque e Teclado
- Retome o Acesso Guiado
Saiba mais: Acesso Guiado (iOS) | Adicionar um atalho (iOS)
- Vá para Configurações
- Vá em Segurança e localização > Avançado > Fixar aplicativos (se não encontrar, procure ajuda do fabricante do seu dispositivo)
- Ative Fixar aplicativos
- Abra o link do quiosque no seu navegador
- Deslize até o meio da tela
- Toque no ícone do navegador
- Toque em Fixar
Saiba mais: Fixar aplicativos (Android)