Les saisies de temps ne sont pas importées dans les factures
Si vos saisies de temps n’apparaissent pas lors de la création d’une facture, voici les étapes à suivre pour résoudre ce problème.
Les saisies de temps ne sont pas attribuées à un projet ou à un client #
Les factures dans Clockify sont basées sur les clients, et les saisies de temps doivent être associées à un projet appartenant à un client. Si vous avez suivi le temps sans l’attribuer à un projet, ou si le projet n’est pas attribué à un client, le temps n’apparaîtra pas lors de l’importation des factures.
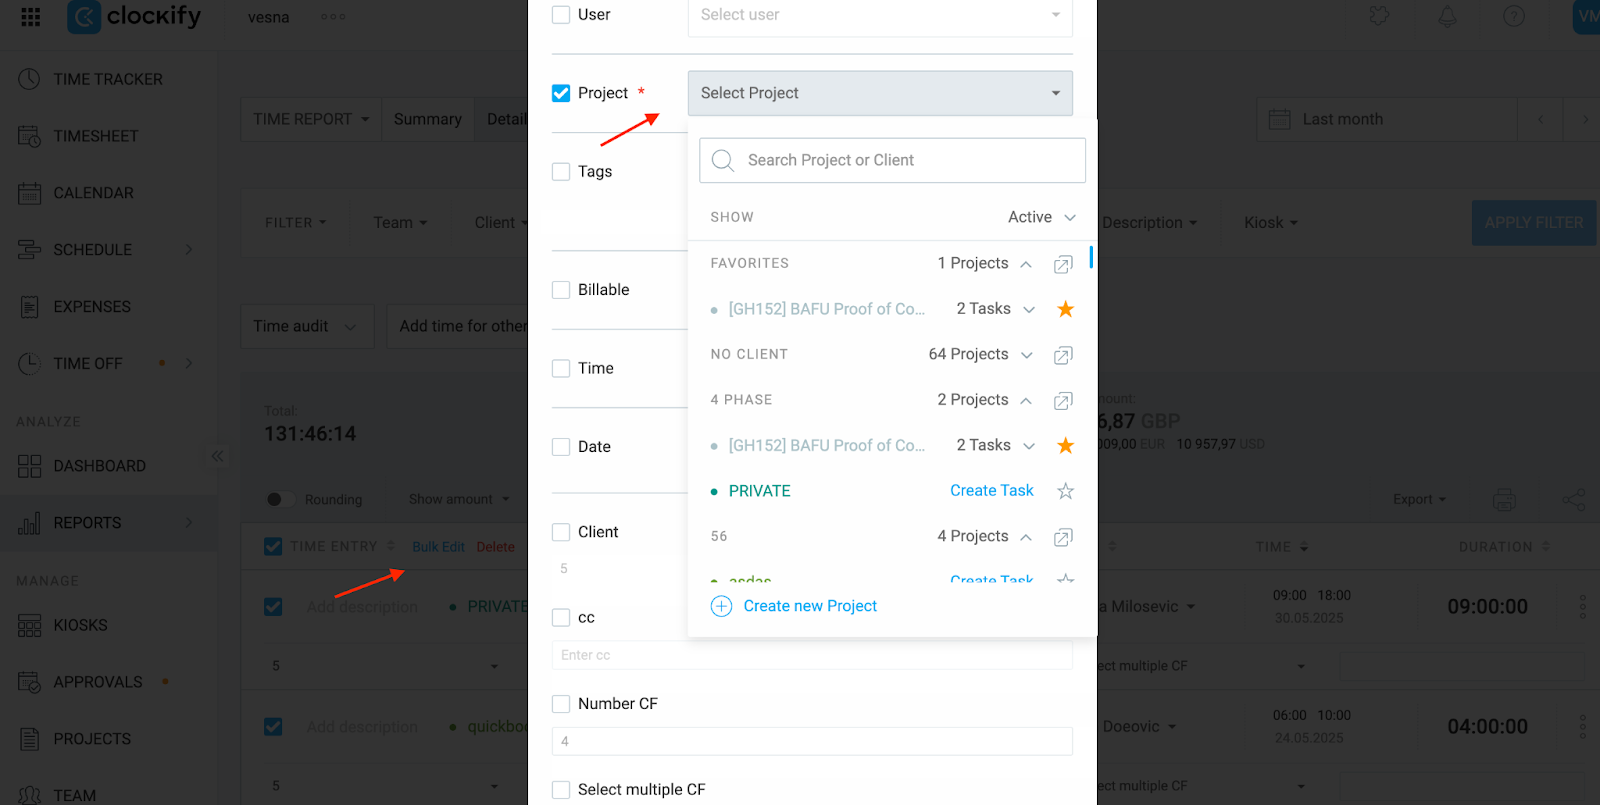
Comment attribuer des saisies de temps à un projet à l’aide de la fonctionnalité Modification en bloc :
- Naviguez vers le Rapport détaillé
- Sélectionnez la plage de dates souhaitée dans le calendrier
- Cochez la case à côté de Saisie de temps
- Cliquez sur Modification en bloc
- Cochez l’option Projet et sélectionnez le projet souhaité dans le menu déroulant
- Cliquez sur Enregistrer
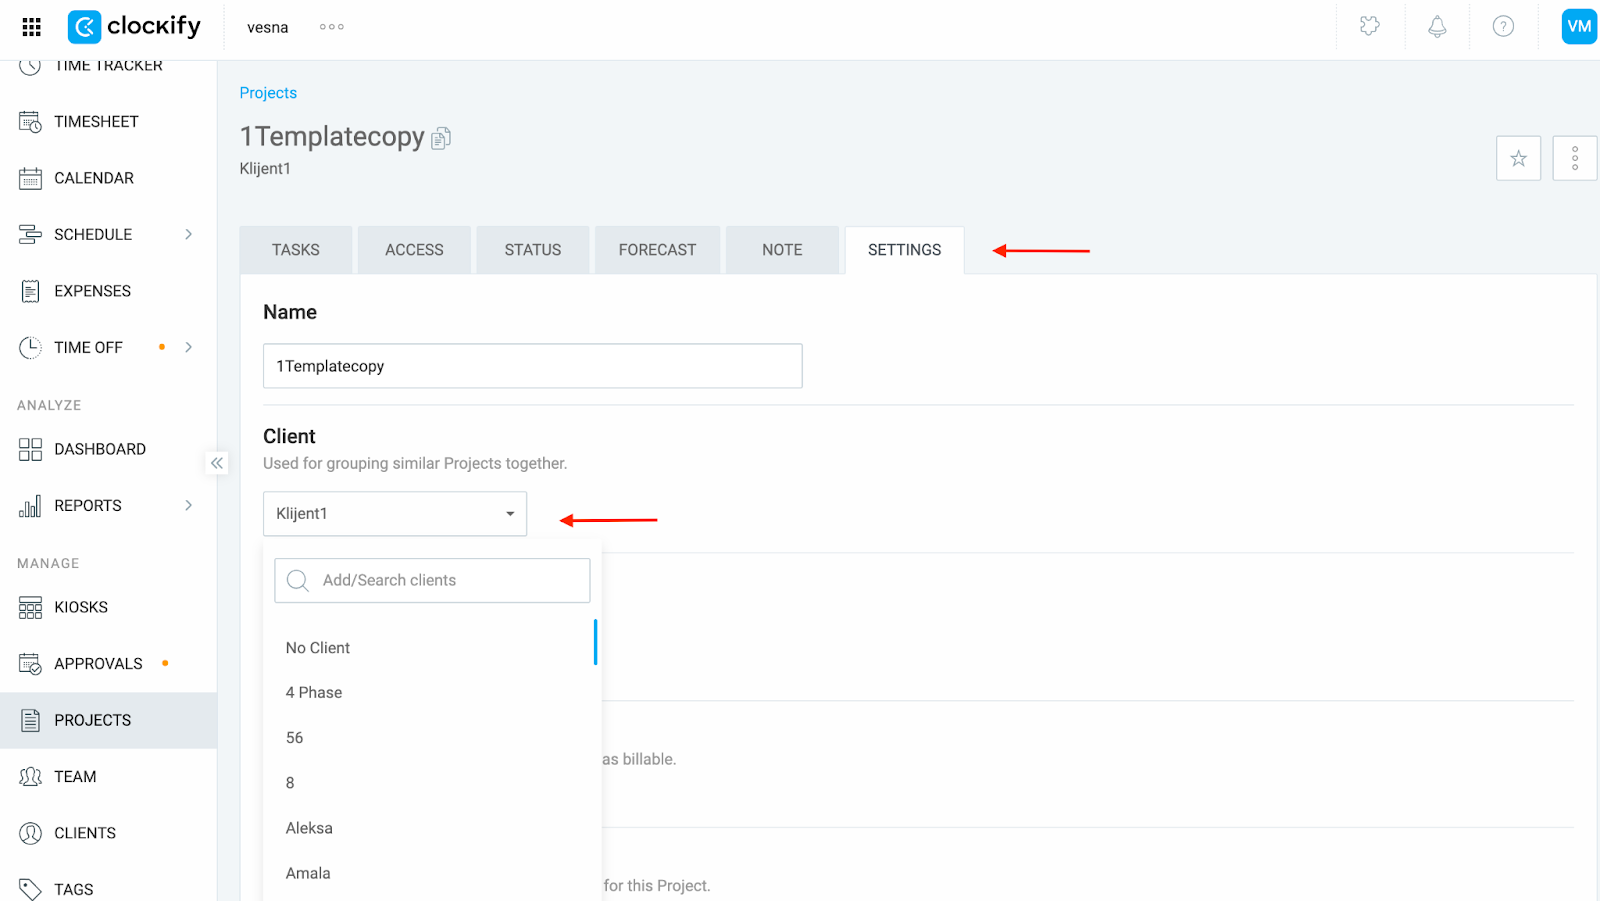
Comment attribuer un projet à un client :
- Naviguez vers la page Projets depuis la barre latérale
- Cliquez sur le projet pour l’ouvrir
- Accédez à l’onglet Paramètres
- Sous Client, choisissez un client dans la liste déroulante ou créez-en un nouveau
Le mauvais projet est sélectionné lors de la création d’une facture #
Seules les saisies de temps des projets sélectionnés pour le client choisi seront intégrées à la facture.
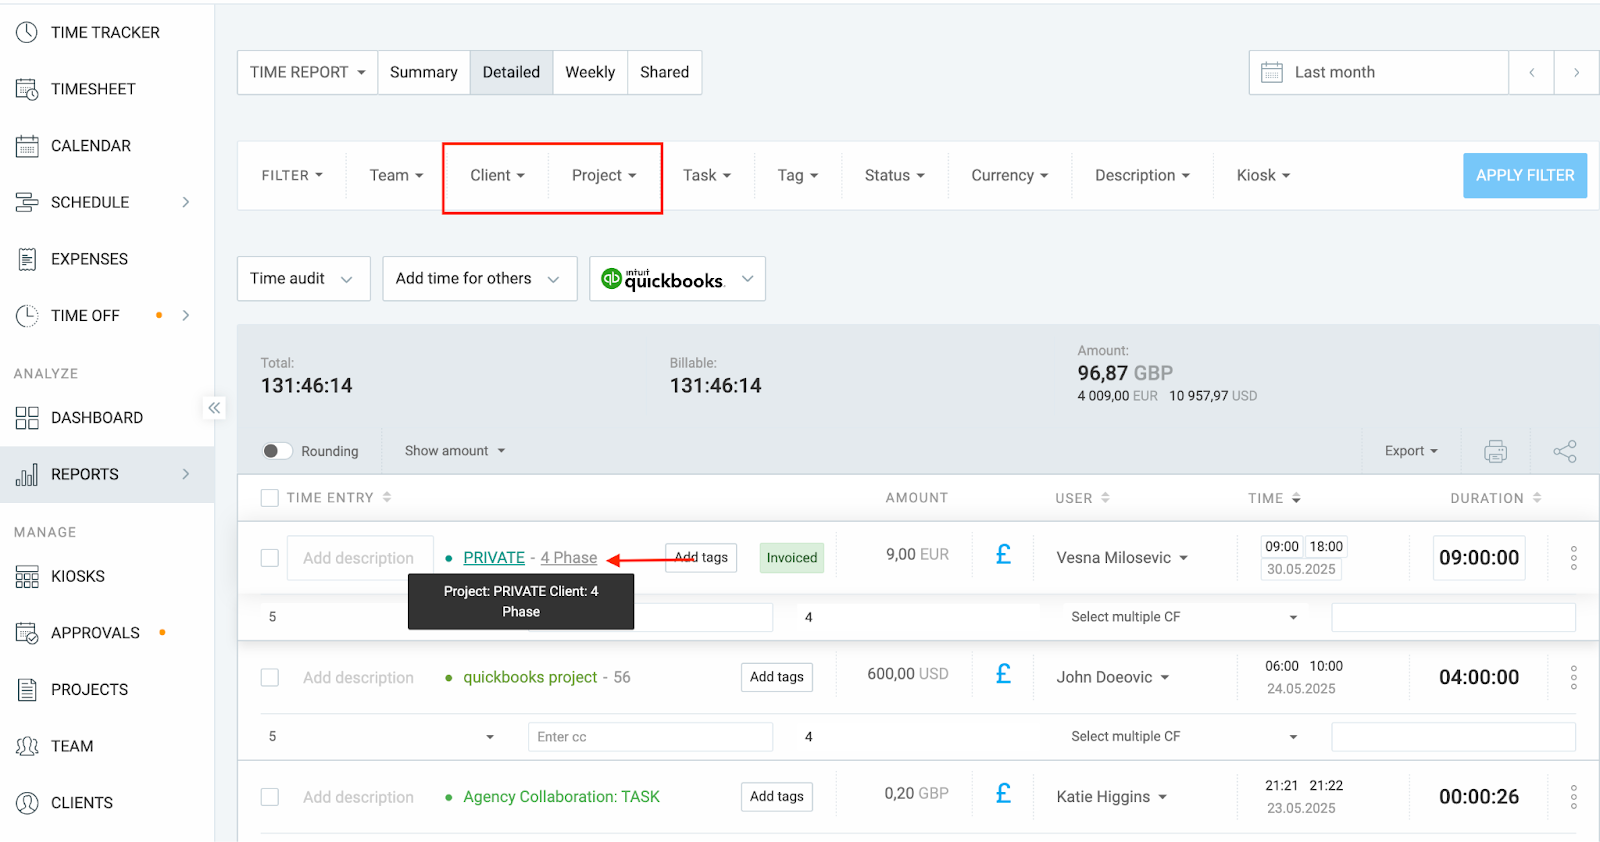
Comment comparer la sélection des factures avec le rapport détaillé :
- Ouvrez le rapport détaillé et filtrez selon la période souhaitée
- Consultez la section Projet et Client pour trouver les saisies de temps pertinentes
Ou :
- Ouvrez le rapport détaillé et sélectionnez une plage de dates dans le calendrier
- Filtrez un rapport à l’aide des filtres Client et Projet
- Appliquer le filtre
- Accédez aux factures et cliquez sur Créer une nouvelle facture
- Make sure you’ve selected the same client show in the report
- Dans le menu déroulant Projets, vérifiez que les mêmes projets que ceux du rapport sont sélectionnés
Si le client ou le projet n’est pas sélectionné dans la facture, le temps ne sera pas importé.
La plage de dates est incorrecte
Clockify utilise par défaut le mois dernier lors de l’importation des saisies de temps dans une facture. Si vos saisies concernent le mois en cours ou une autre période, elles ne s’afficheront pas.
Comment comparer la plage de dates avec le rapport détaillé :
- Ouvrez le rapport détaillé et définissez la période que vous souhaitez facturer
- Vérifiez les jours auxquels correspondent les saisies de temps
- Accédez à la facture et cliquez sur Importer le temps et les dépenses
- Modifiez la période afin qu’elle corresponde à celle que vous avez utilisée dans le rapport détaillé
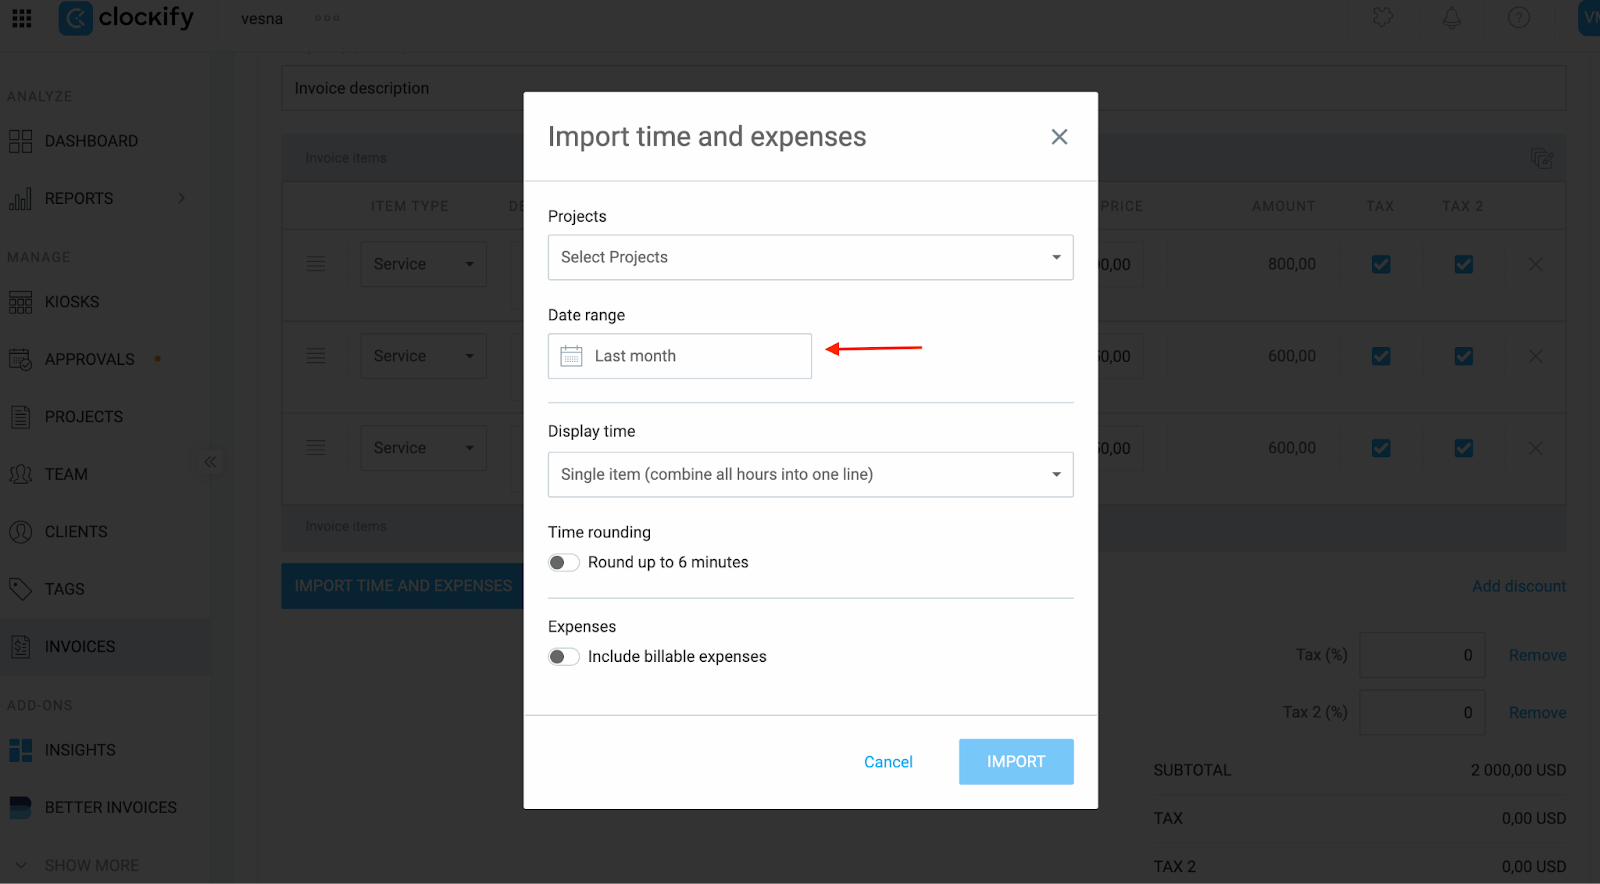
Assurez-vous que la période couverte par la facture correspond exactement à celle du rapport. Même un écart d’un jour peut entraîner l’exclusion de certaines saisies.
Les saisies de temps ont déjà été facturées #
Clockify permet de facturer chaque saisie de temps une seule fois. Si le temps que vous essayez d’importer a déjà été utilisé dans une autre facture, il n’apparaîtra pas à nouveau.
Comment consulter le rapport détaillé :
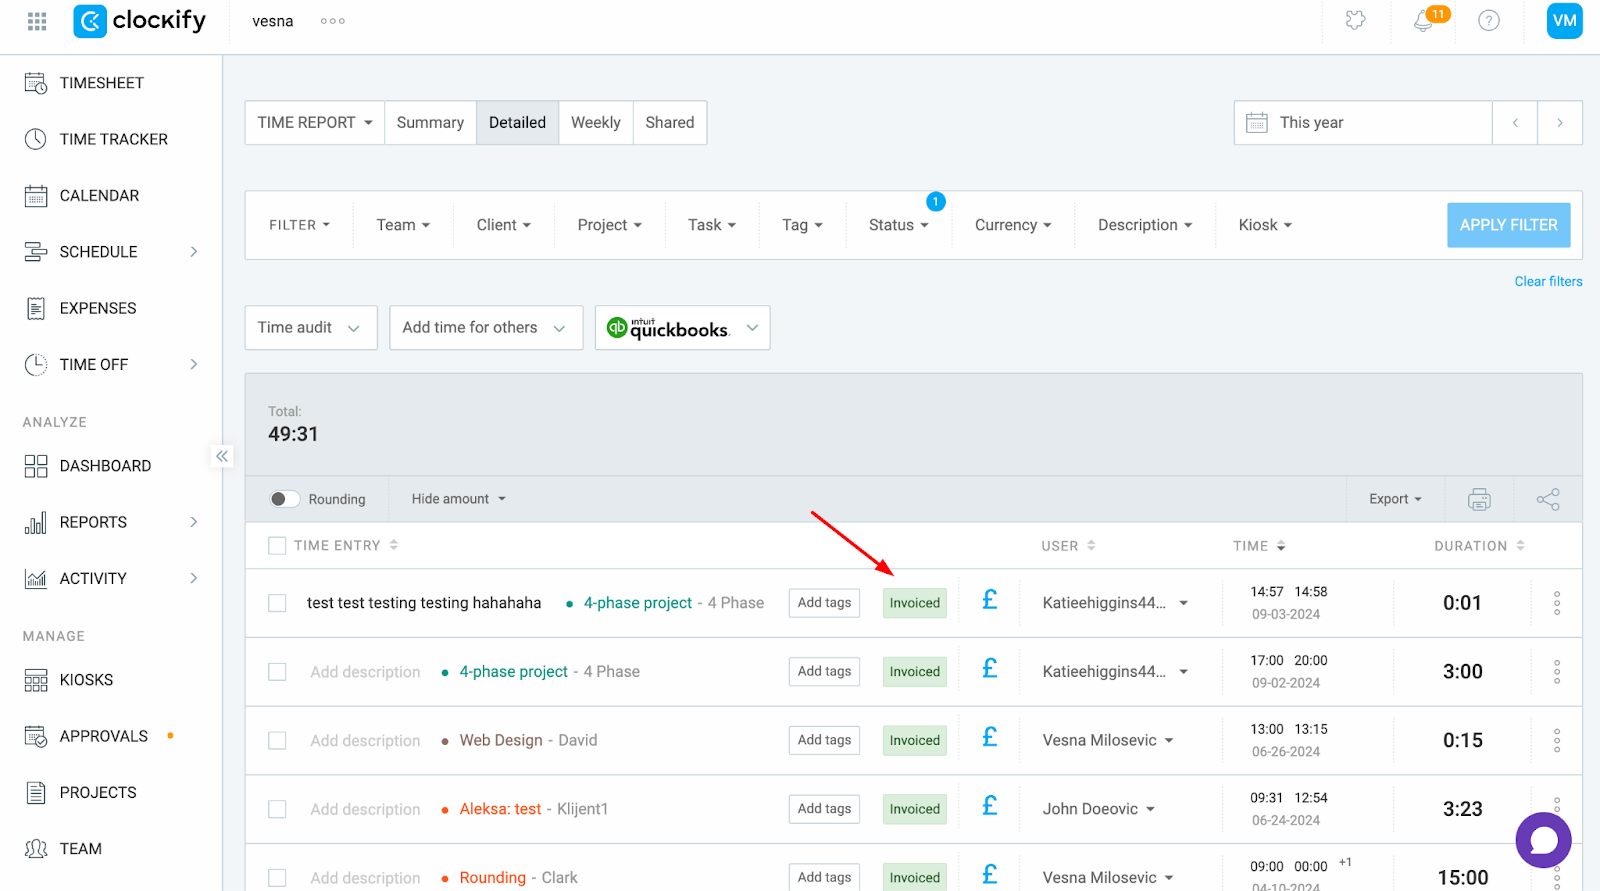
- Accédez au rapport détaillé
- Sélectionnez une plage de dates pertinente dans le calendrier
- Cliquez sur le filtre Statut et sélectionnez Facturé
- Appliquez un filtre et recherchez la balise Facturé à côté d’une saisie de temps
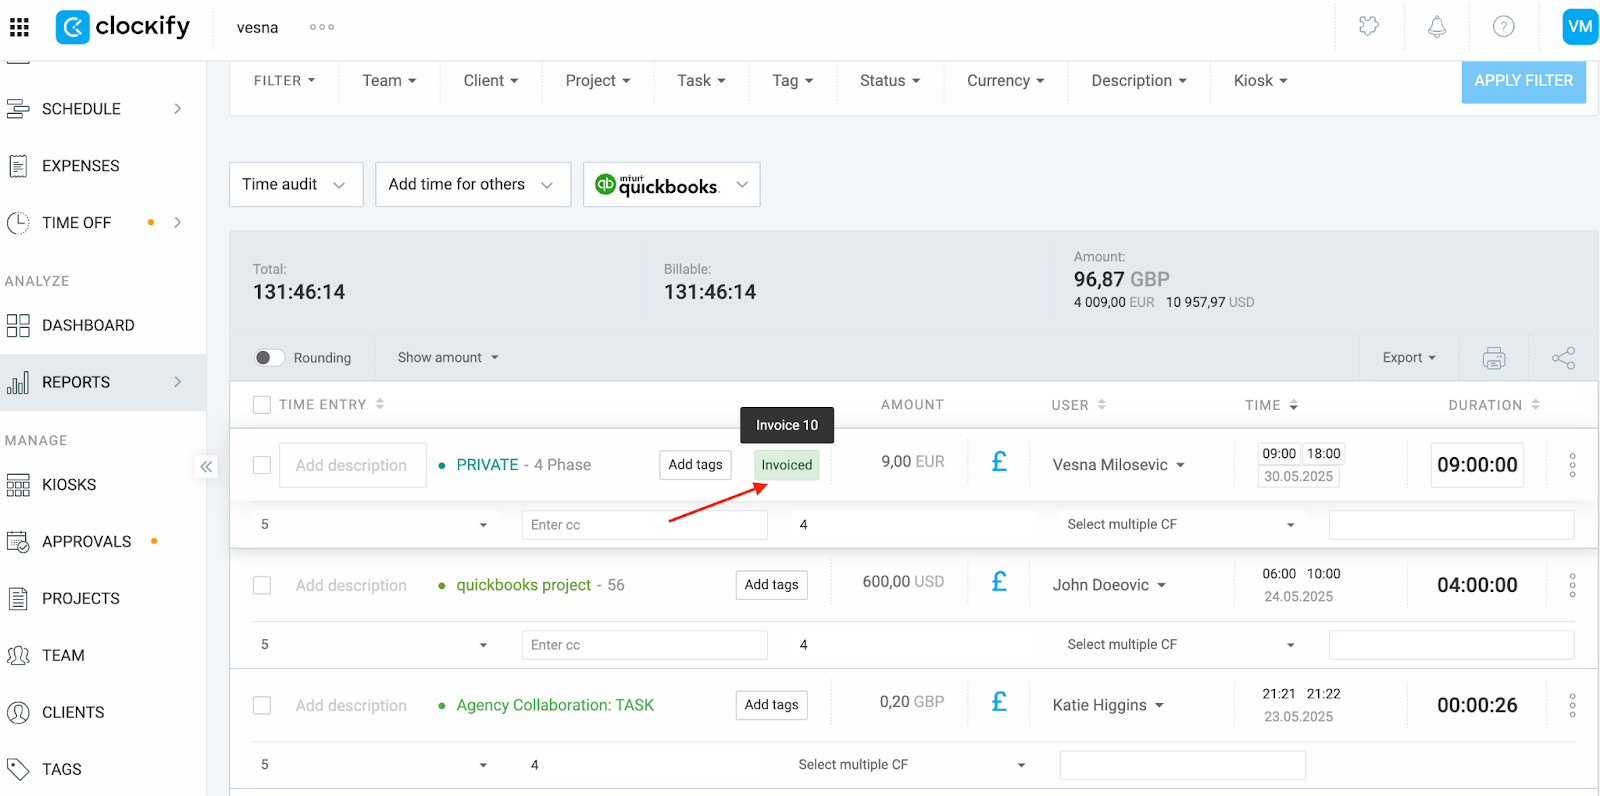
Comment voir à quelle facture elle a été importée :
- Passez la souris sur la balise de facture d’une saisie et vous verrez le nom de la facture à laquelle cette saisie a été ajoutée
- Vous pouvez localiser cette facture à partir de la page Factures
Si cette facture n’est plus nécessaire :
- Vous pouvez la supprimer afin de libérer ces saisies pour les réutiliser
- Ou, si vous êtes prêt à l’envoyer, finalisez-la en cliquant sur Envoyer la facture
Vous rencontrez toujours des difficultés ? Notre équipe d’assistance se fera un plaisir d’examiner votre cas et de vous aider. Veuillez nous contacter à l’adresse support@clockify.me et nous fournir les informations suivantes :
- Une capture d’écran du rapport détaillé pour cette période
- Une capture d’écran des paramètres de facturation, y compris un client et un projet
- La période que vous essayez de facturer