Convidar usuários e atribuir funções em seu espaço de trabalho
Os administradores e proprietários do espaço de trabalho são responsáveis por gerenciar os usuários em seu espaço de trabalho. Isso inclui convidar membros da equipe, atribuir funções e gerenciar perfis de usuários. Com esses recursos, você garante que sua equipe tenha o acesso adequado para monitorar e gerenciar o tempo com eficiência.
Convidar usuários para seu espaço de trabalho #
Como administrador ou proprietário, comece convidando membros da equipe para o seu espaço de trabalho, permitindo que eles registrem o tempo.
Você pode convidar dois tipos de membros:
- Completo – Para membros que precisam de acesso à maioria dos recursos do espaço de trabalho [Caso de uso mais comum]
- Limitado – Para membros que precisam registrar apenas a entrada e a saída pelo Quiosque
Quiosque e Usuários limitados são recursos pagos disponíveis em qualquer plano pago.
Convide um usuário completo #
Para convidar um usuário completo para o seu espaço de trabalho:
- Acesse a página da Equipe
- Clique em Adicionar membro completo
- Insira os endereços de e-mail dos usuários que você deseja convidar
- Clique em Enviar convite
Depois que o usuário aceita o convite, ele se torna um membro do espaço de trabalho.
Você pode convidar até 4 usuários no plano gratuito. Atualize para qualquer plano pago se precisar convidar mais de 4 usuários.
Convide usuários limitados #
Para adicionar um membro com acesso limitado ao seu espaço de trabalho:
1. Acesse Equipe
2. Clique na aba Membros limitados
3. Clique em Adicionar Membro limitado
4. Digite o nome do usuário que você está adicionando
5. Clique em Adicionar
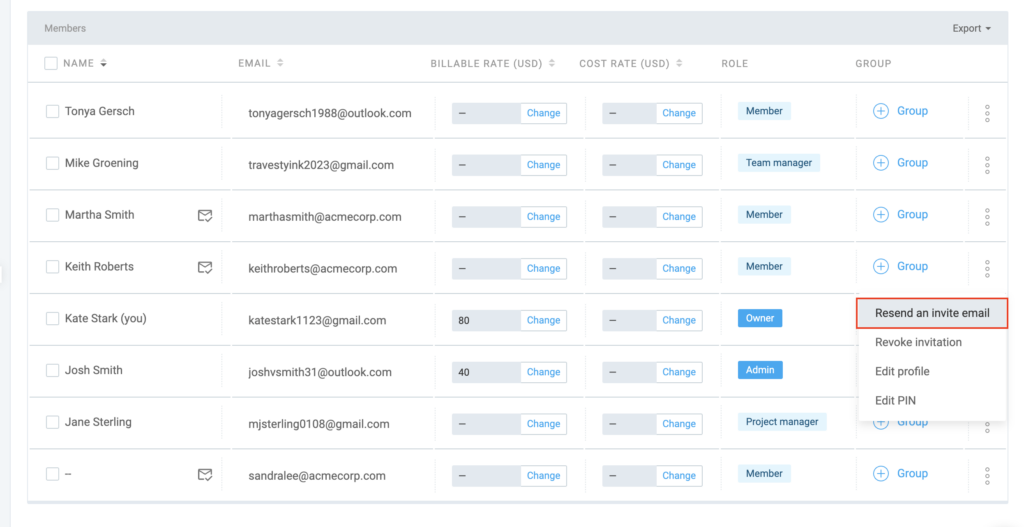
Reenviar convites #
Se você adicionou usuários, mas eles não receberam um convite por e-mail, você pode reenviar o convite manualmente:
- Vá para a página da Equipe
- Clique nos três pontos ao lado do nome do usuário
- Selecione Reenviar um e-mail de convite
Os membros com convite pendente podem cadastrar-se com o mesmo endereço de e-mail usado para convidá-los, e poderão aceitar o convite e fazer parte do seu espaço de trabalho.
Aceite o convite #
Após o convite, os usuários receberão um e-mail com um link de ativação.
Para aceitar o convite:
- Clique no link de ativação no e-mail
- Siga as instruções para fazer login no painel de controle do Clockify
Gerenciar perfis de usuários #
Como administrador ou proprietário, você pode editar os perfis dos membros da equipe diretamente na página Equipe.
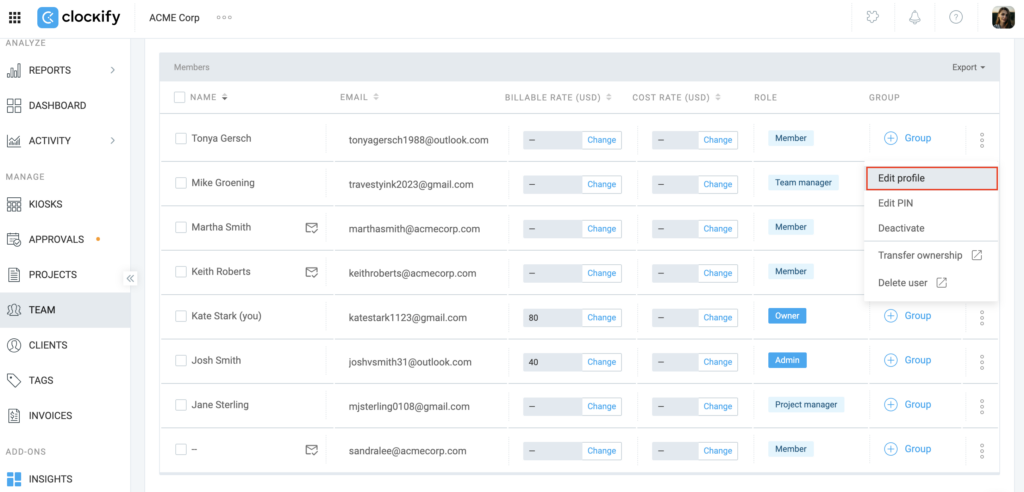
Para editar o perfil de um membro da equipe:
- Vá para a página da Equipe
- Clique no ícone de três pontos ao lado do nome do membro.
- Selecione Editar perfil
- Edite as seguintes configurações:
- Início da semana
- Dias úteis
- Capacidade de trabalho diária (horas)
- Gerente de equipe atribuído
5. Clique em Salvar
Atribuir funções #
Somente o proprietário do espaço de trabalho pode remover a função de administrador de alguém.
Você pode atribuir diferentes funções, cada uma com seu próprio nível de acesso, às pessoas em seu espaço de trabalho.
Para atribuir funções:
- Vá para a página da Equipe
- Click Member next to the user you want to make an Admin
- Selecione a função que deseja atribuir
- Membro – A função padrão para todos no espaço de trabalho (ativada por padrão)
- Administrador – Pode gerenciar as configurações do espaço de trabalho, permissões de usuário e a administração geral do espaço de trabalho
- Gerente de Projeto (Recurso pago) – Pode visualizar o tempo registrado em seus projetos, gerenciar detalhes do projeto, iniciar o Kiosk (se ativado) e aprovar planilhas de horas enviadas
- Gerente de Equipe – Pode visualizar todo o tempo registrado dos membros de sua equipe, editar o tempo de sua equipe (se ativado) e aprovar planilhas de horas enviadas
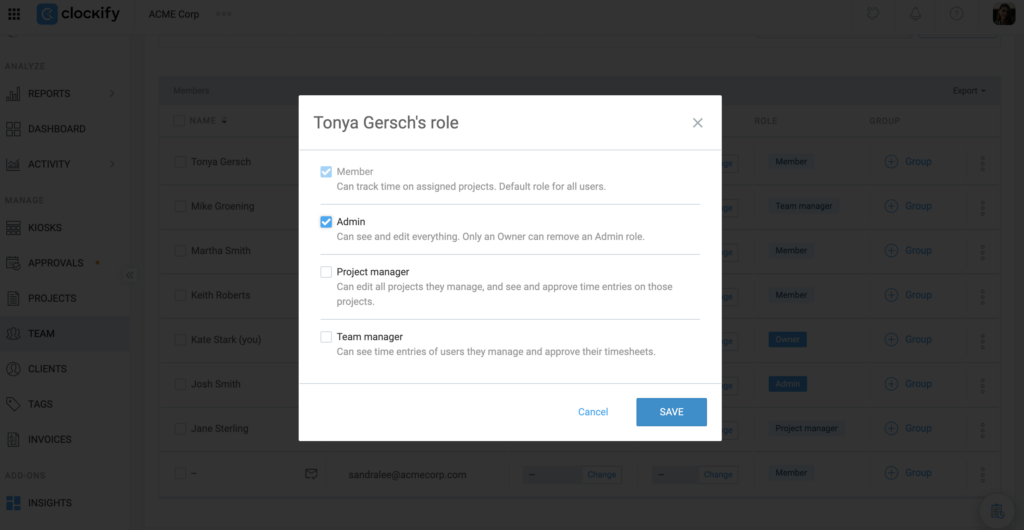
4. Clique em Salvar
Gerente de Projetos é uma funcionalidade disponível em qualquer plano pago.
Desativar um usuário #
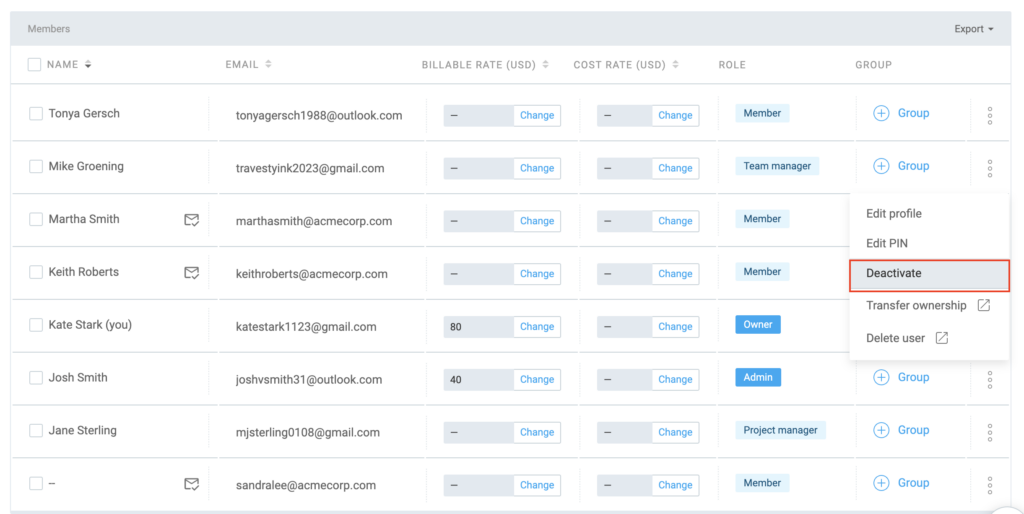
- Vá para a página da Equipe
- Clique no ícone de três pontos ao lado do nome do usuário
- Selecione Desativar
Quando um usuário é desativado, ele é desconectado instantaneamente do espaço de trabalho em todos os dispositivos e seu cronômetro ativo é interrompido automaticamente.
Todos os registros de tempo, descrições e etiquetas anteriores permanecem no sistema, mas não aparecerão nos relatórios por padrão. Você precisará usar o filtro Inativo para visualizar os dados.
Um usuário deve ser desativado antes de poder ser excluído do espaço de trabalho/organização.
Reativar um usuário #
Você pode reativar um usuário para restaurar o acesso dele a um espaço de trabalho. Reativar um usuário permite que ele faça login, registre seu tempo e visualize seu painel novamente. Todos os dados anteriores são restaurados automaticamente nos relatórios atuais.
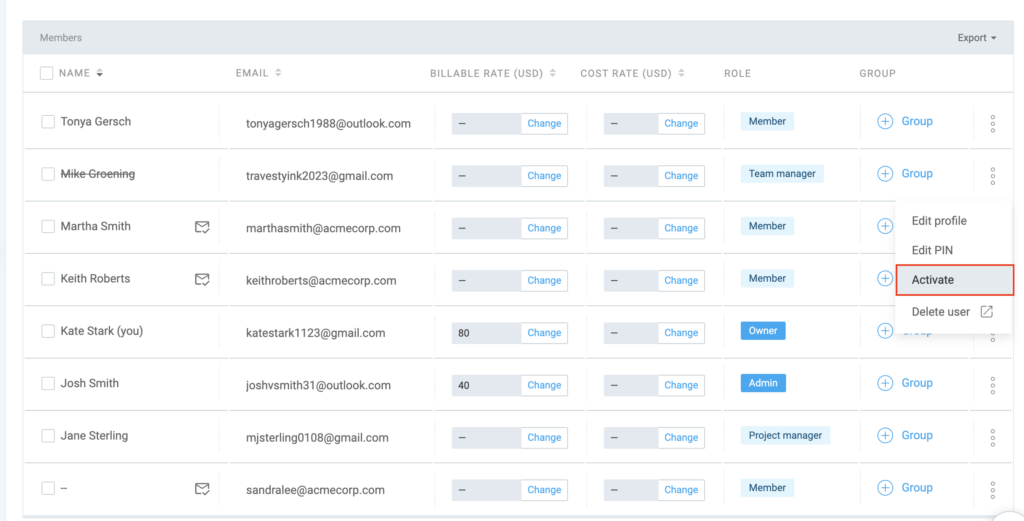
Para reativar um usuário:
- Vá para a página da Equipe
- Selecione Mostrar todos ou Mostrar usuários inativos no menu suspenso
- Clique em Ativar ao lado do usuário que você deseja reativar
Usuários inativos não receberão uma notificação por e-mail quando forem reativados.
Excluir um usuário #
Para excluir um usuário:
- Acesse a página Equipe
- Encontre o membro que deseja excluir
- Clique no ícone de três pontos
- Clique em Excluir usuário
Você será redirecionado para o perfil do usuário na página da sua conta CAKE.com, onde poderá concluir a ação.
Ou você pode acessar diretamente sua conta CAKE.com:
- Navegue até o seletor de aplicativos no canto superior esquerdo da tela
- Escolha sua conta CAKE.com
- Acesse a página de Integrantes
- Clique no membro desativado do espaço de trabalho que deseja excluir
- Abra o ícone de três pontos à direita
- Escolha Excluir
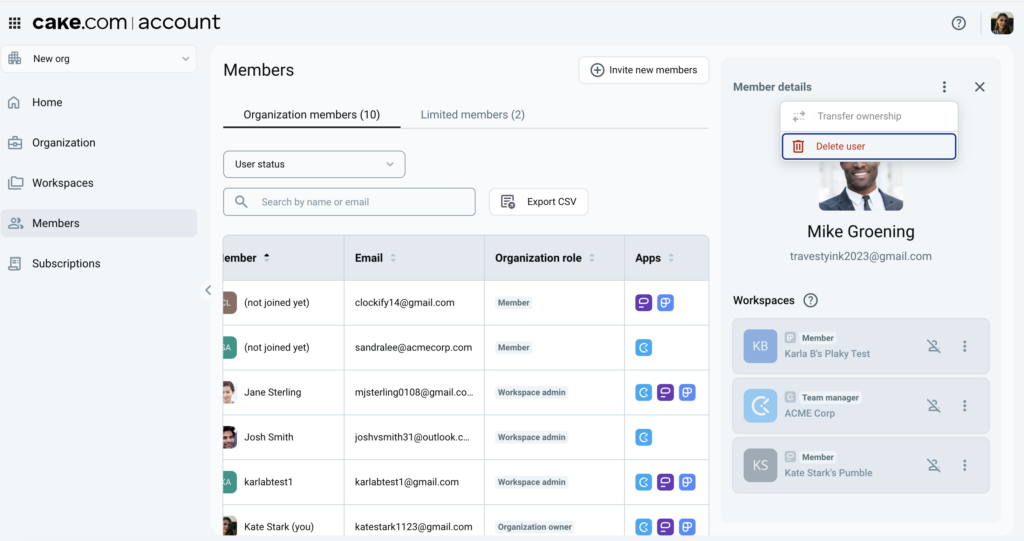
O usuário não terá mais acesso ao espaço de trabalho e seu nome será excluído da página Equipe.
Desativar vs. excluir #
Eis as diferenças entre desativar e excluir um usuário:
| Desativar Usuário | Excluir Usuário |
| O usuário não poderá mais fazer login ou registrar o tempo no espaço de trabalho | O usuário será removido permanentemente e perderá o acesso ao espaço de trabalho |
| Todos os registros de tempo permanecem nos relatórios e ainda podem ser filtrados por esse usuário. | Os registros de tempo permanecem nos relatórios, mas você não poderá mais filtrar os dados pelo nome desse usuário específico |
| Se um cronômetro estiver em execução, ele será interrompido automaticamente | O usuário deve ser desativado primeiro antes de ser excluído |
| Você pode reativar o usuário a qualquer momento na página da Equipe | Para trazer o usuário de volta, você deve enviar um convite completamente novo |
| Libera um assento/vaga para um novo membro (em planos pagos) | Remove permanentemente o registro do usuário do espaço de trabalho/organização |
| O nome do usuário é movido para a lista "Inativos" | O nome do usuário é completamente excluído da página da Equipe |
Transferir a propriedade #
Atenção: Para evitar a transferência acidental da propriedade para a pessoa errada, confirme se os dados do novo proprietário estão corretos antes de prosseguir com a transferência.
Se você é proprietário de um espaço de trabalho e deseja transferir a propriedade para outro usuário, você precisará fazer isso em sua conta CAKE.com.
Para transferir a propriedade:
- Abra as Configurações do seu perfil no canto superior direito
- Clique no botão Gerenciar a conta CAKE.com
- Acesse a página de Integrantes
- Selecione o membro do espaço de trabalho para o qual você deseja transferir a propriedade
- Clique no ícone de três pontos no canto superior direito
- Escolha Transferir propriedade
- Clique em Transferir
O que acontece a seguir?
- O novo proprietário obtém controle total do espaço de trabalho, incluindo direitos exclusivos que nem mesmo os administradores possuem, como a capacidade de excluir o espaço de trabalho, configurar o Login único (SSO) e gerenciar a assinatura no nível mais alto.
- O antigo Proprietário será automaticamente rebaixado para Administrador. Ele não perderá o acesso ao espaço de trabalho, mas perderá as permissões específicas de Proprietário mencionadas acima.
Para obter mais informações sobre como transferir a propriedade para outro usuário, consulte este artigo.
Perguntas frequentes #
Posso convidar usuários sem enviar um e-mail imediatamente?
Não, assim que você clicar no botão Enviar convite, o convite por e-mail será enviado automaticamente.
Por que um usuário que acabei de convidar ainda aparece como "Inativo"?
Um usuário permanece com o status “Pendente” ou “Inativo” até clicar no link do e-mail de convite e verificar sua conta. Caso não o tenha recebido, verifique a pasta de spam ou envie o convite novamente.
Recebo um reembolso se desativar um usuário no meio do mês?
Não, o Clockify não oferece reembolsos proporcionais para usuários removidos. Ao desativar um usuário, você simplesmente libera uma vaga. Você pode então convidar uma nova pessoa para ocupar essa vaga sem custo adicional pelo restante do ciclo de faturamento.
O que acontece com meus assentos se eu mudar para o plano gratuito?
Ao fazer o rebaixamento, você perde o acesso aos recursos pagos, mas ainda pode manter todos os seus usuários. O plano gratuito permite usuários e projetos ilimitados.
Por que não consigo convidar alguém pelo aplicativo móvel?
Atualmente, a possibilidade de convidar novos membros para um espaço de trabalho está restrita à versão web para garantir que todas as funções administrativas e permissões do espaço de trabalho sejam configuradas corretamente durante o processo de integração. Use um navegador de computador para acessar a página da Equipe para convites.