Import time entries for former employees
When migrating your historical data to Clockify, you may want to bring over time entries for employees who are no longer with your company.
Here are two workarounds to import your historical data for team members that are not part of your future workspace in Clockify.
Method 1: Use tags #
This is the easiest method for migrating high volumes of historical data. Instead of assigning time to a specific user profile, you assign it to an active admin in your workspace and use tags to separate team members who actually worked the hours.
- Import to an admin: Import all historical time entries for past employees into a single, active administrador o manager account via CSV.
When creating your CSV file, enter the admin or manager’s email address (not the ex-employee’s email address) in all rows.
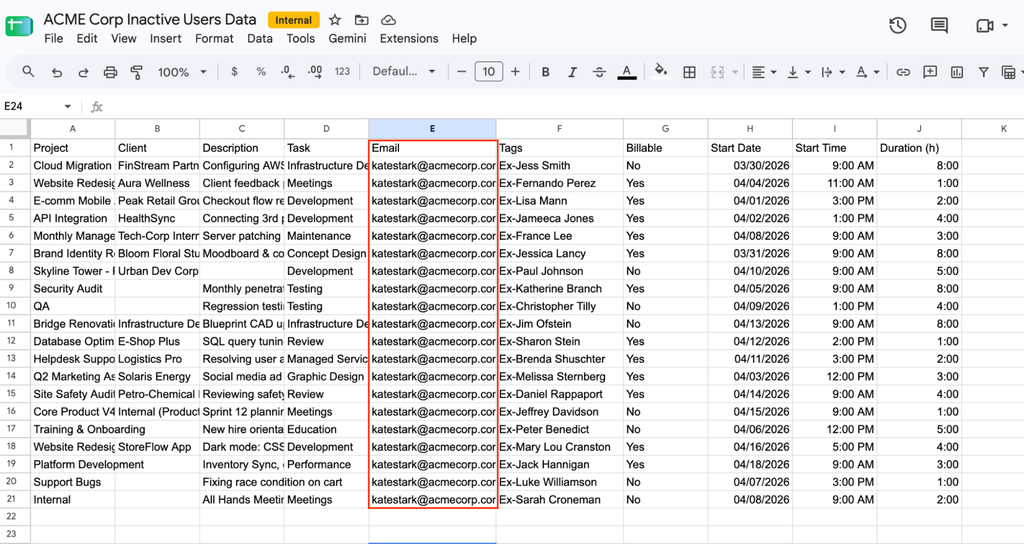
2. Apply custom tags: Add a distinct tag to these entries with the former employee’s name (e.g., Tag: Ex-John Doe).
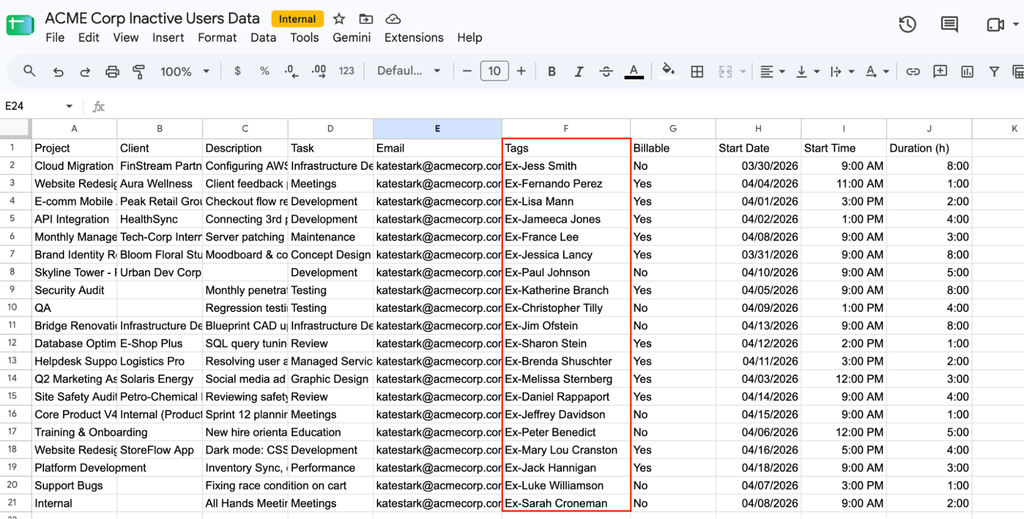
3. Run reports: When you need to see a former employee’s historical hours, go to your Reports and filter the data by their specific tag (e.g. name of that employee).
Method 2: Reassign to deactivated users #
Use this method if it is required that the former employee’s actual name appears in the “User” field on your reports.
1. Create Limited Members: Add your former employees to your workspace as Limited Users.
Limited Users is a paid feature available on the Plan Basic and higher.
Ve a Team > Limited on your Clockify workspace and click Add Limited Member.
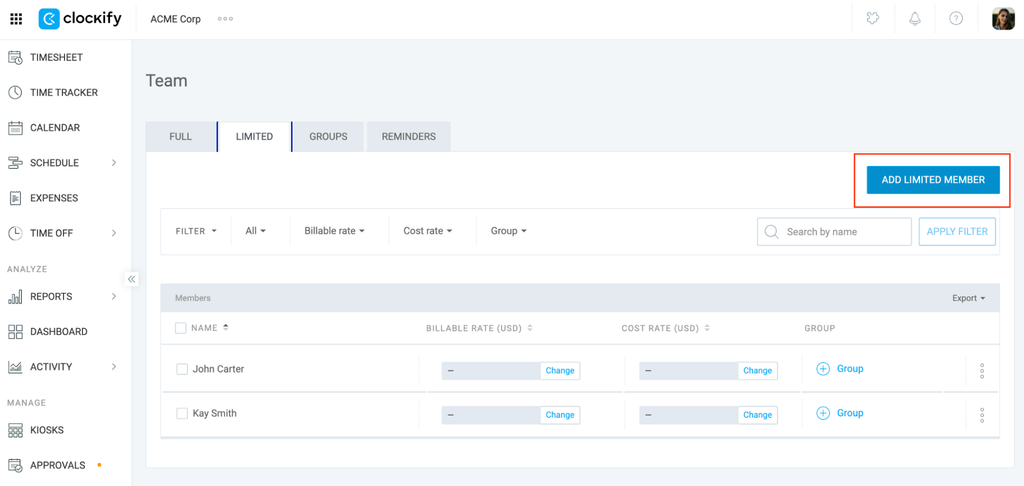
2. Deactivate immediately: Deactivate these users right away. (They will not receive an email invitation, and you will not be charged for their seats)
This can be done during the free trial. When the trial expires (and you did not upgrade to a paid plan), your workspace will automatically move to the Free plan, where you can continue to keep users deactivated if needed to remain within the 5-active-user limit.
Read this guide on deactivating users in Clockify.
3. Import to an admin: Just like in Method 1, import the historical time via CSV to an active admin account and tag the entries with the former employee’s name.
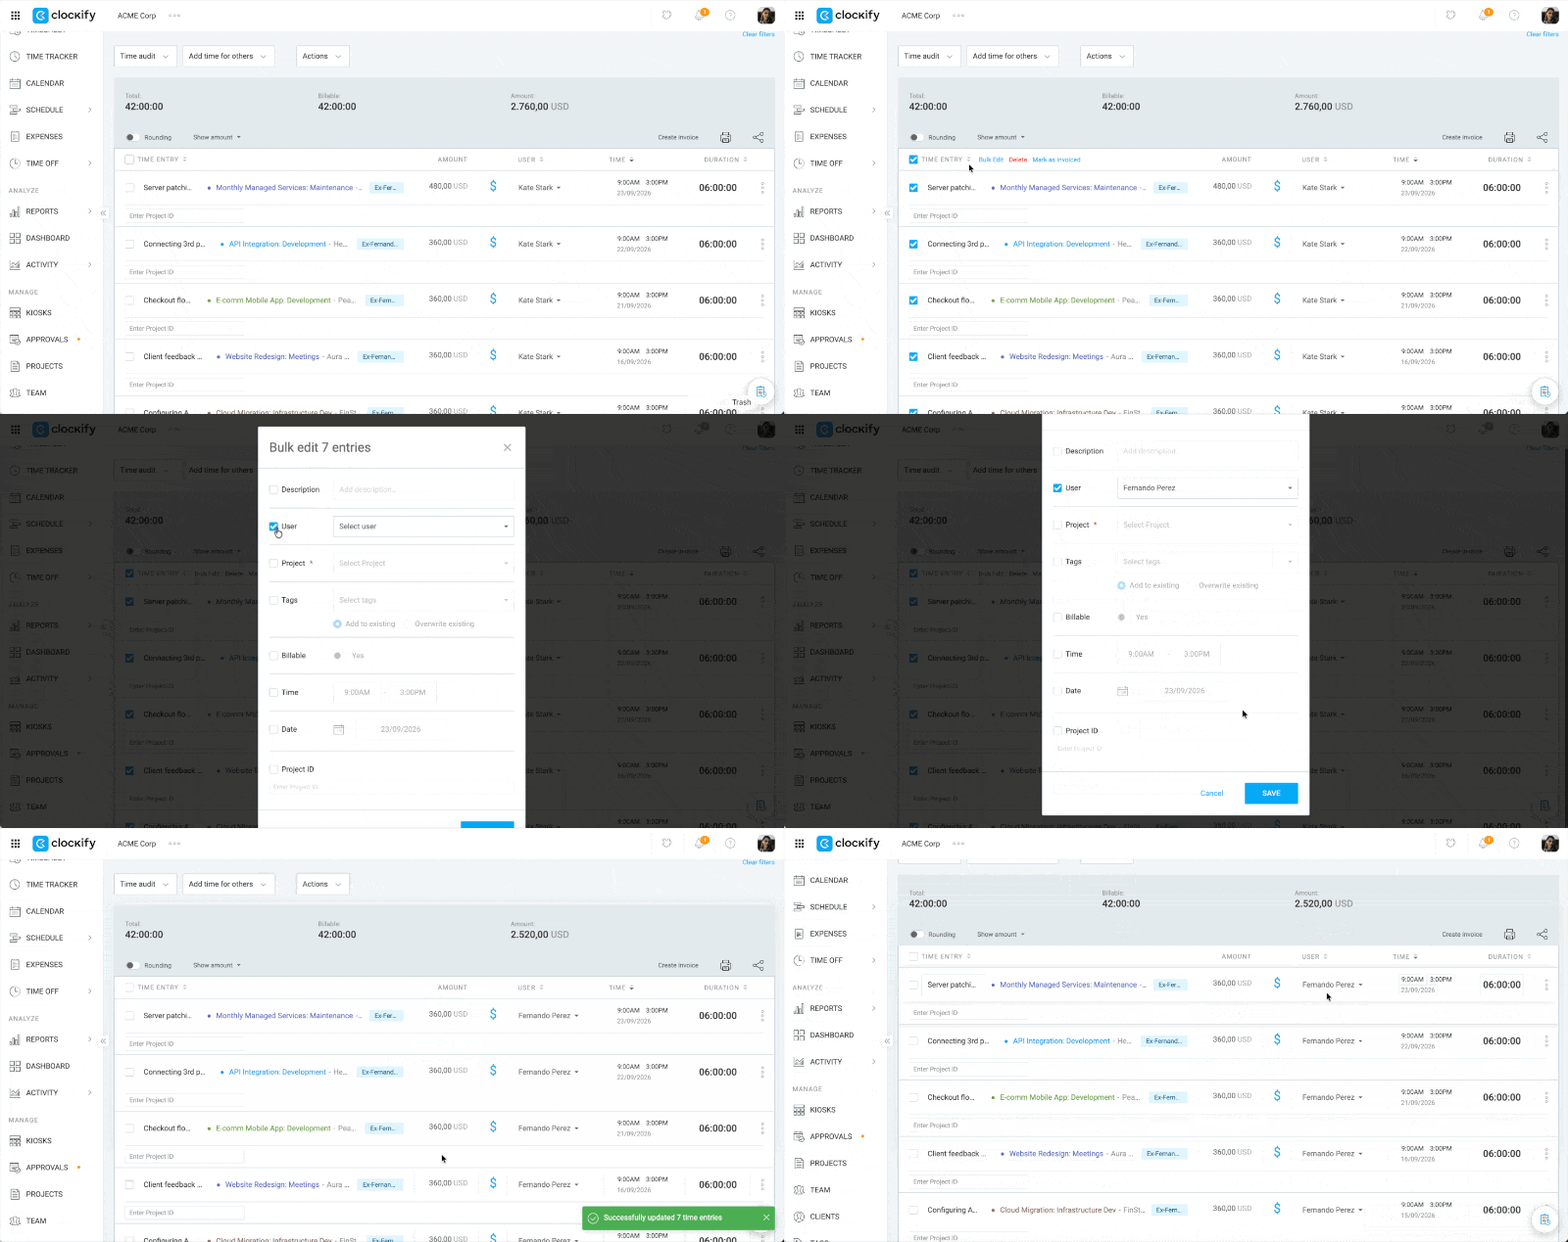
4. Bulk reassign: Ve a la página de Informe detallado and filter by the employee’s tag (e.g., Tag: Ex-John Doe).
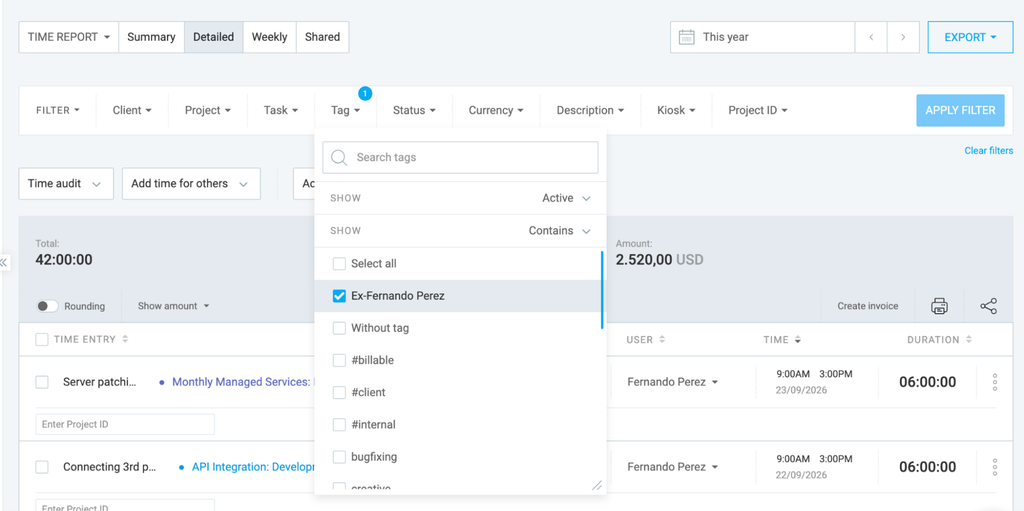
5. Select all the filtered entries, click Editar en masa, and change the user from the admin to the deactivated Limited Member. You can then safely delete the tag for that member.