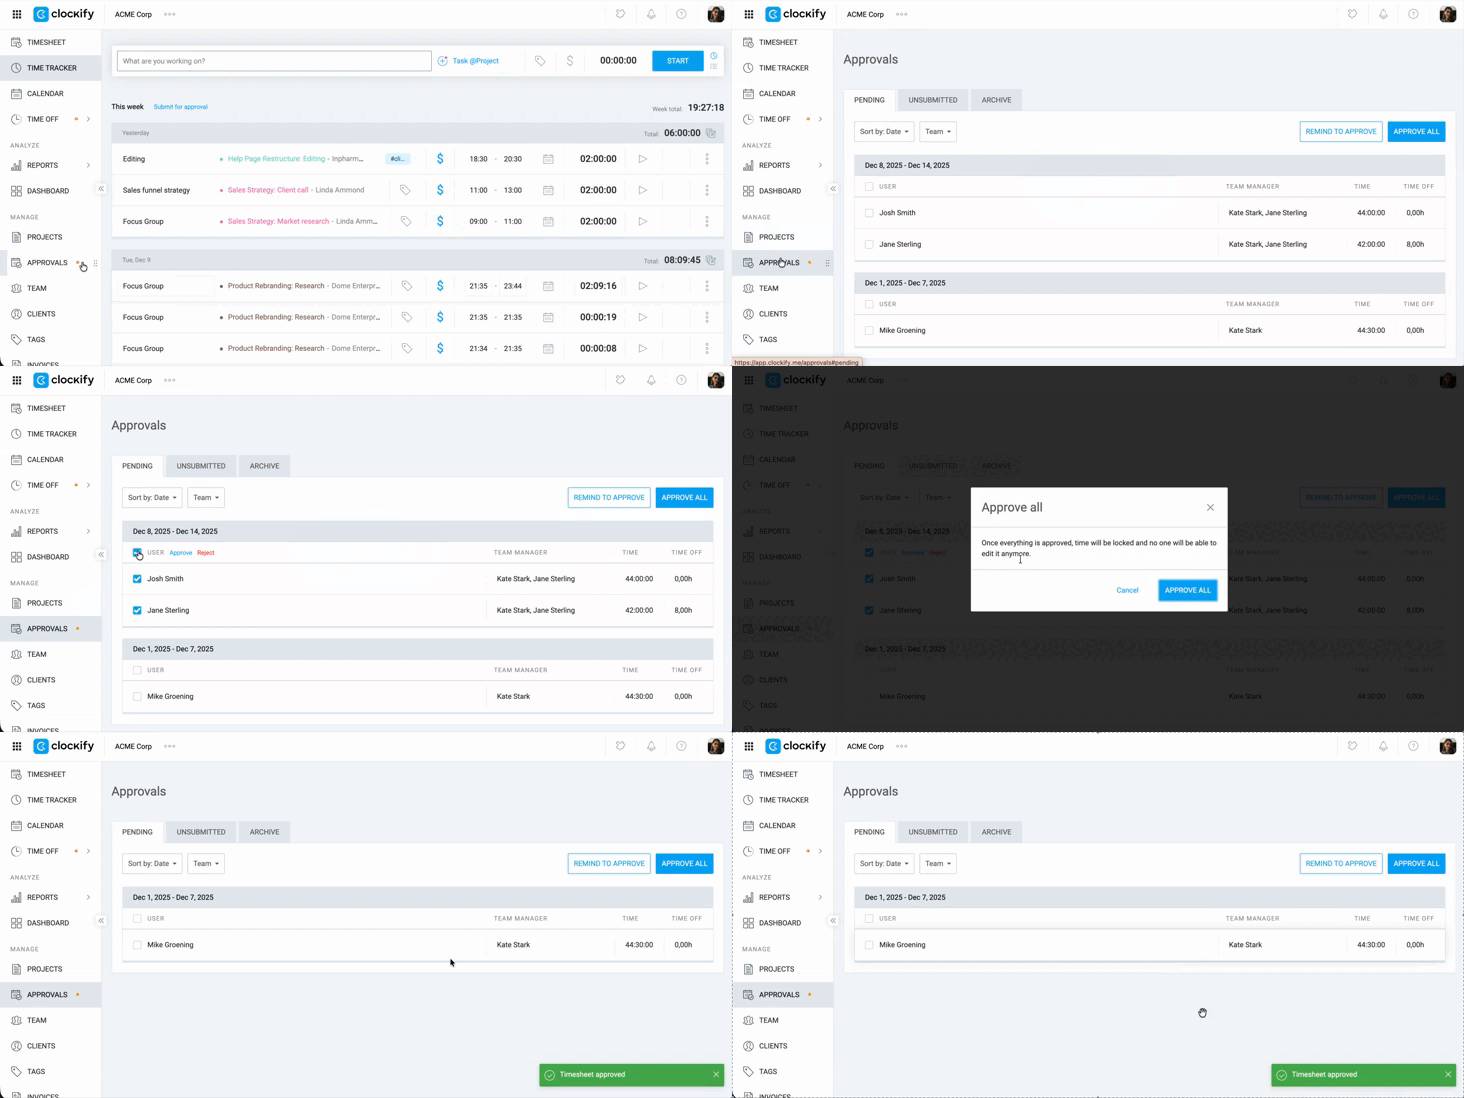
Edición masiva de entradas de tiempo para tu equipo
La función de edición masiva ayuda a los gerentes y administradores a actualizar, enviar o aprobar rápidamente múltiples entradas de tiempo o planillas de horarios a la vez para un seguimiento de tiempo preciso y constante dentro del equipo.
¿Qué es la edición masiva? #
La edición masiva te permite actualizar varias entradas de tiempo a la vez. Esto puede ahorrar mucho tiempo a la hora de modificar detalles como proyectos, tareas o etiquetas.
Permisos de acceso #
Los permisos para usar la función de edición masiva varía dependiendo del rol de usuario dentro de la plataforma, como se puede ver en la tabla a continuación:
| Rol de usuario | Página Rastreador | Página Planilla |
| Administrador | Tiene acceso completo a la edición masiva y eliminación masiva de todas las entradas. | Tiene acceso completo para enviar, aprobar y rechazar en masa. |
| Gerente de equipo | Puede editar y eliminar en masa las entradas de tiempo para sus miembros de equipo asignados. | Puede enviar, aprobar y rechazar en masa las planillas de horarios para sus miembros de equipo. |
| Gerente de proyecto | Puede editar y eliminar en masa las entradas de tiempo solo para sus proyectos asignados. | Puede aprobar y rechazar en masa las planillas de horarios solo para sus proyectos asignados. |
Editar entradas en masa #
Hay dos maneras principales de editar en masa las entradas de tiempo, dependiendo de si estás editando un solo día o un largo período de tiempo.
Editar desde la página Rastreador #
Este método es ideal para ediciones rápidas en las entradas de un usuario específico durante un solo día.
- Ve a la página Rastreador
- Encuentra la lista de entradas de tiempo para el usuario y el día que quieres editar
- Haz clic en el ícono de Edición masiva al lado del número total de horas registradas para ese día específico
- Marca las casillas al lado de las entradas que quieres editar
- Haz clic en Edición masiva
- Edita los elementos en la ventana de Edición masiva:
- Descripción
- Proyecto
- Etiquetas
- Facturable
- Tiempo
- Fecha
Haz clic en Guardar para aplicar los cambios
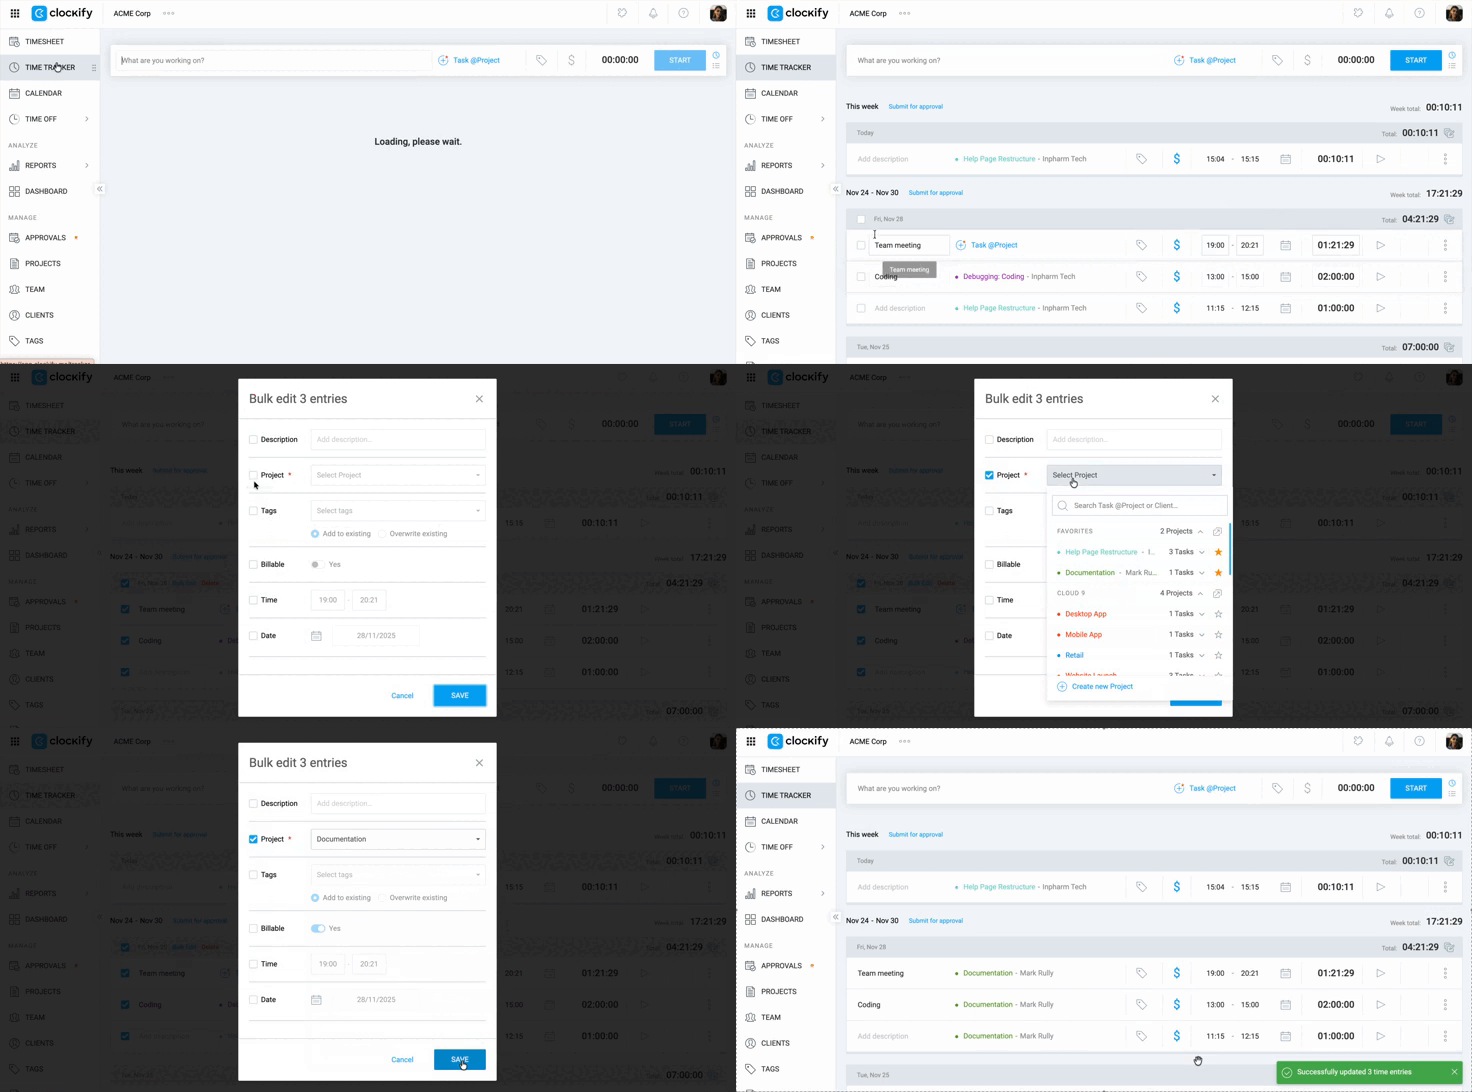
La página Rastreador te permite editar solo tus propias entradas.
Editar desde el Informe detallado #
Este es el mejor método para hacer cambios para múltiples usuarios, proyectos o fechas.
- Ve a la página Informe y selecciona Detallado
- Filtra tus datos por proyecto, cliente, usuario, rango de fechas, u otros criterios para reducir las entradas que quieres modificar
- Marca las casillas para seleccionar las entradas de tiempo que quieres editar. Puedes seleccionar todas las entradas filtradas haciendo clic en la casilla en el principio de la columna.
- Haz clic en el botón Edición masiva que aparece encima de la tabla
- Edita los campos relevantes en la ventana de Edición masiva
- Haz clic en Guardar para aplicar las actualizaciones en todas las entradas de tiempo seleccionadas
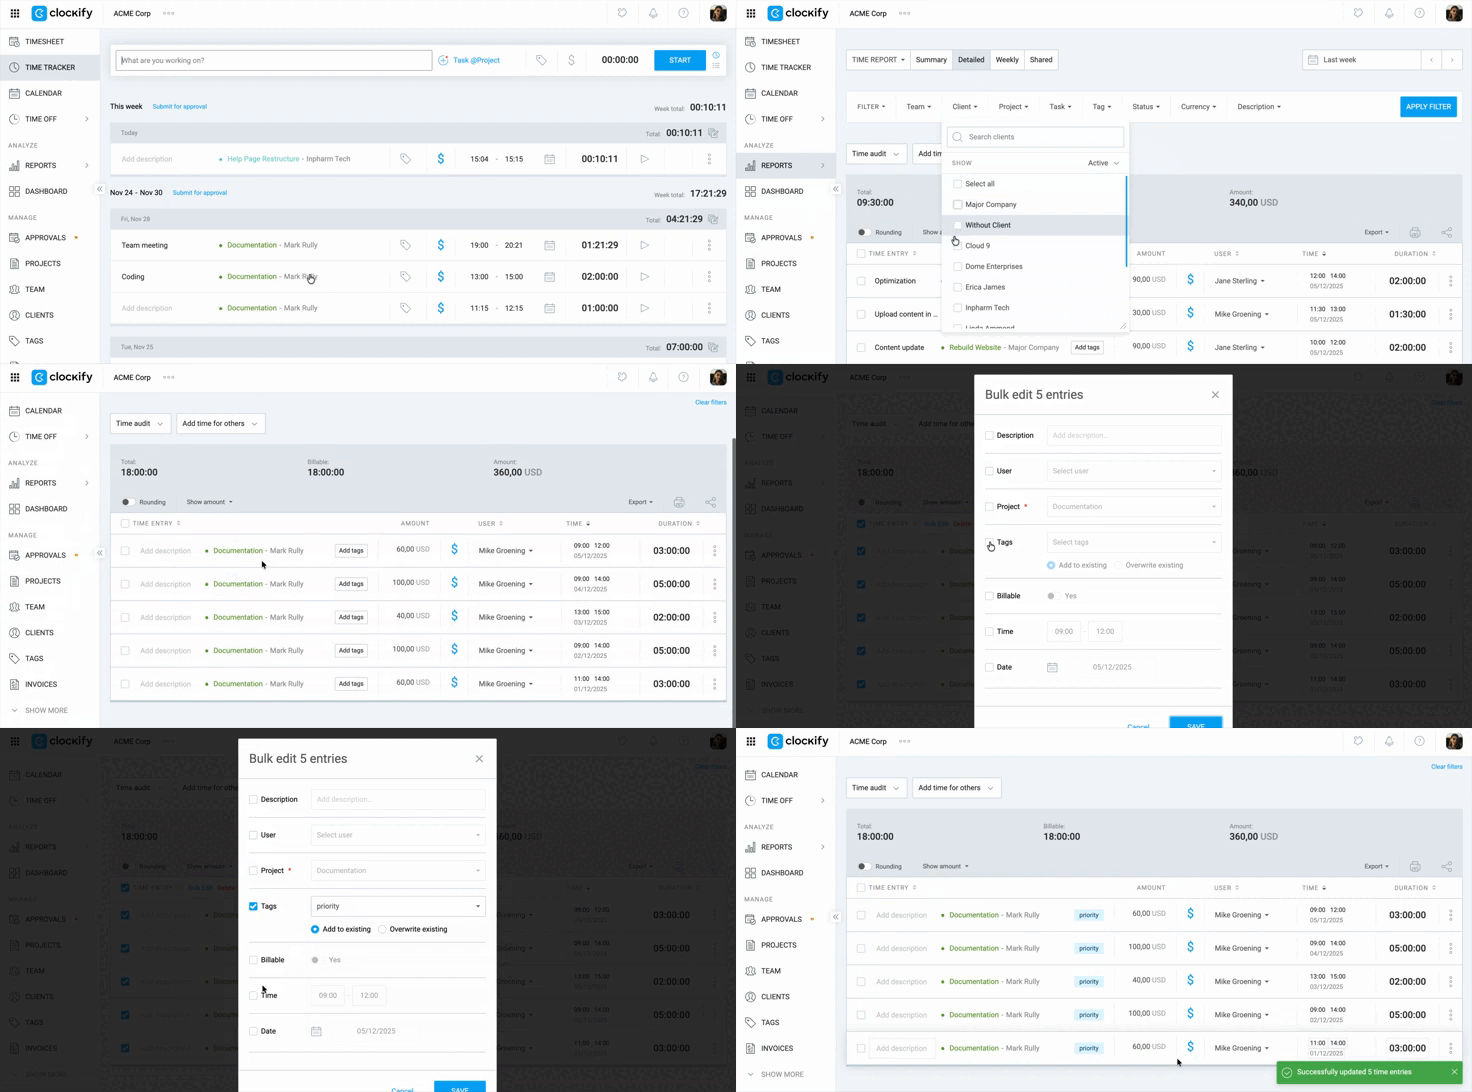
Siempre filtra tus datos por proyecto, usuario o fecha antes de seleccionar las entradas para la edición masiva, para evitar cambios accidentales en las entradas irrelevantes.
Usar etiquetas para ediciones masivas #
1. Selecciona las entradas de tiempo que quieres editar
2. En la ventana emergente, introduce la nueva etiqueta en el campo de Etiquetas
3. Selecciona cómo quieres añadir la etiqueta:
- Añadir a existentes: Asigna la nueva etiqueta en adición con cualquier etiqueta existente en las entradas seleccionadas
- Sobrescribir existentes: Reemplaza las etiquetas existentes con la nueva

Eliminar entradas de tiempo en masa #
Para eliminar múltiples entradas a la vez:
- Marca las casillas al lado de las entradas de tiempo que quieres eliminar o usa el ícono de edición masiva para eliminar un grupo de entradas
- Haz clic en Eliminar
- Escribe DELETE en la ventana emergente y haz clic en Eliminar para confirmar tu acción. Aparece un mensaje confirmando que las entradas han sido eliminadas.
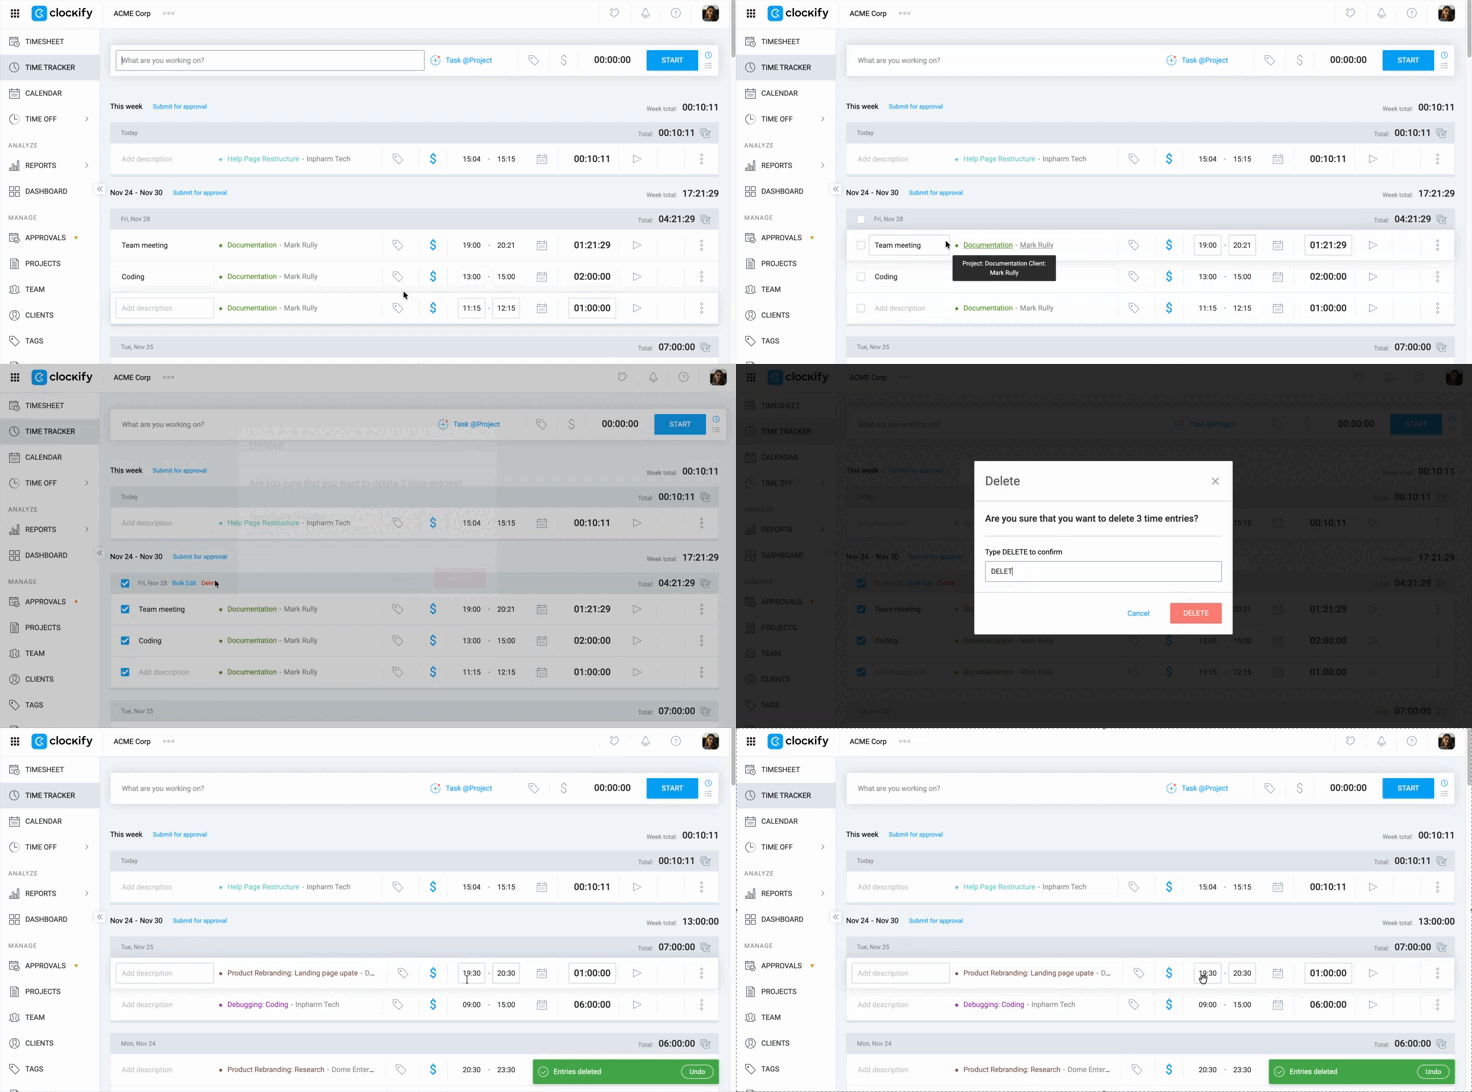
Deshacer una eliminación #
Para restaurar una eliminación, haz clic en el botón Deshacer en el mensaje emergente (en la caja verde) después de eliminar las entradas.
Tienes aproximadamente 20 segundos para hacer clic en Deshacer y restaurar la entrada con todos sus datos originales.
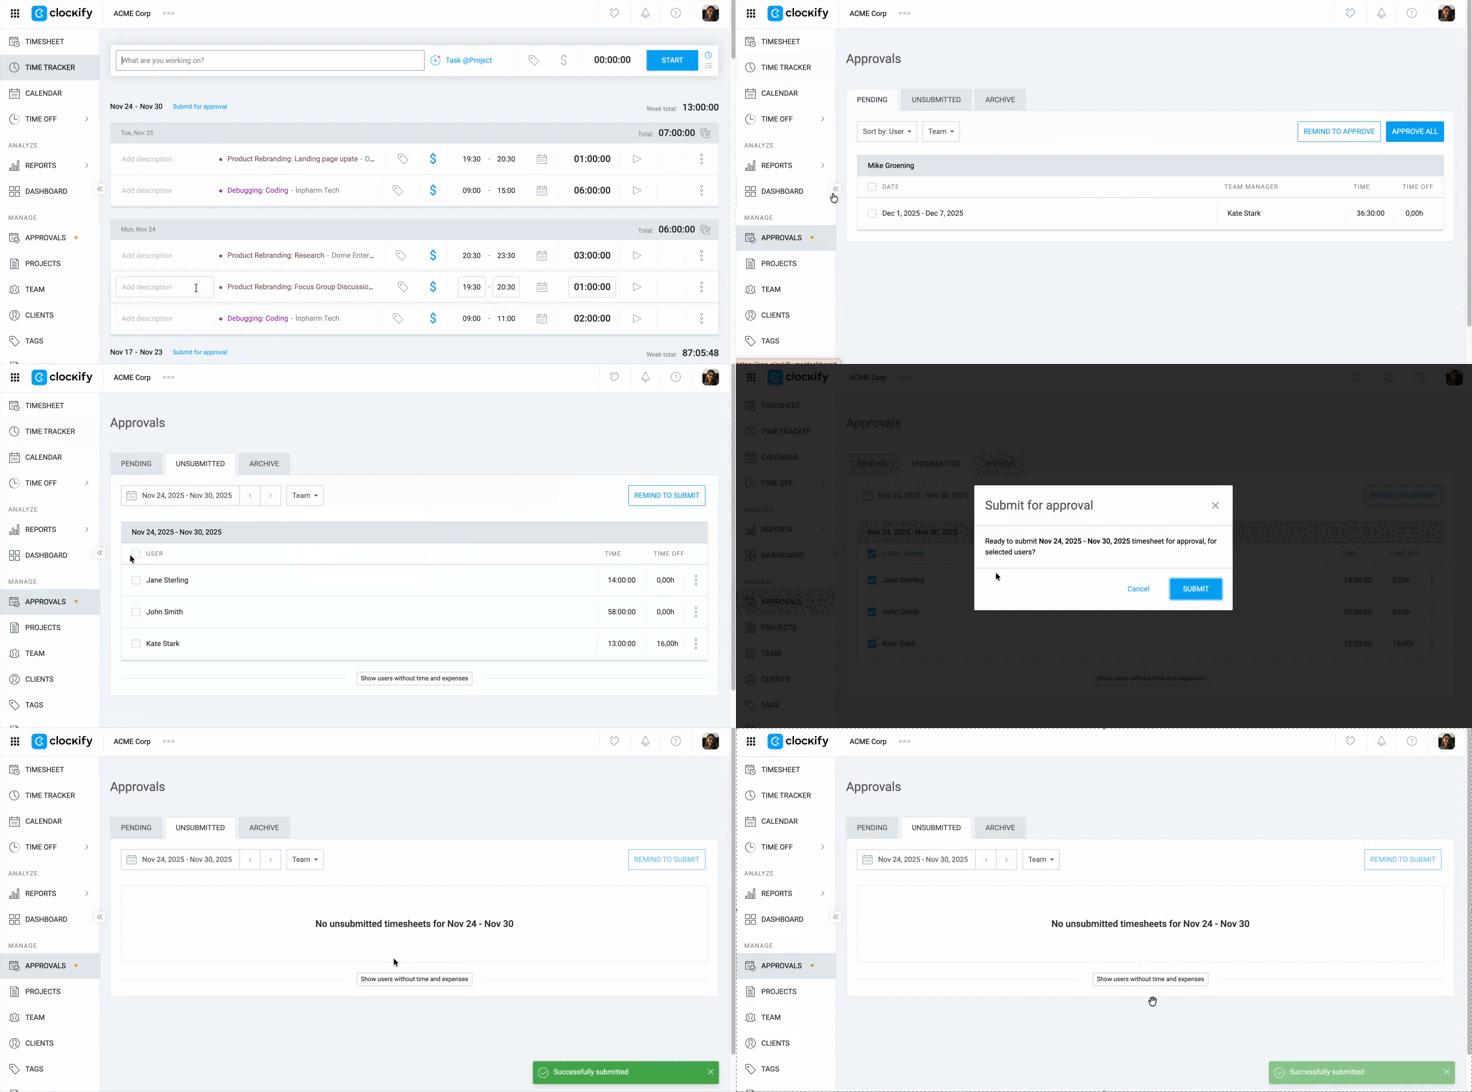
Enviar planillas de horarios en masa para otros #
Solo los gerentes de equipo y administradores pueden enviar y aprobar planillas de horarios de forma masiva.
- Ve a la página de Aprobaciones
- Selecciona la pestaña Sin enviar
- Marca las casillas para seleccionar las planillas que quieres enviar
- Haz clic en Enviar
Aprobar o rechazar planillas de horarios en masa #
- Ve a la página de Aprobaciones
- Selecciona la pestaña Pendiente
- Marca las casillas para seleccionar múltiples planillas pendientes
- Haz clic en el botón Aprobar o Rechazar que aparece
- Haz clic en Aprobar todo o Rechazar todo para confirmar tu acción
