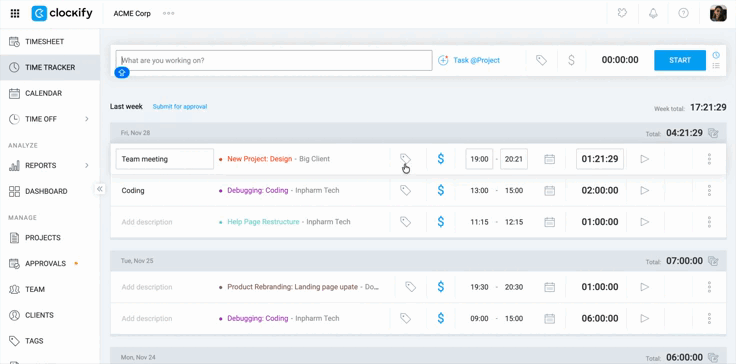
Crear y gestionar proyectos y clientes en nivel de espacio de trabajo
Puedes establecer y gestionar proyectos y clientes fácilmente en Clockify para organizar el tiempo de tu equipo, seguir el progreso de proyectos y generar informes precisos.
Proyectos vs. clientes #
Echemos un vistazo a la tabla a continuación para entender la relación entre los proyectos y clientes antes de que empieces a crearlos.
| Tipo de elemento | Descripción | Jerarquía |
| Proyectos | Esenciales para la clasificación y agrupación de las entradas de tiempo. Te ayudan a analizar el tiempo dedicado a diferentes tareas y a establecer estimaciones. | Un proyecto puede pertenecer solo a un cliente. |
| Clientes | Las entidades, personas o departamentos internos para los que estás haciendo el trabajo. | Un cliente puede tener múltiples proyectos. |
Visibilidad de proyectos:
- Público: Visible para todos en el espacio de trabajo
- Privado: Visible solo para los usuarios seleccionados asignados al proyecto
Solo puedes configurar la visibilidad del proyecto como Público en el plan gratuito. Actualiza a cualquier plan de pago para configurar los proyectos como Privados.
Crear un nuevo proyecto #
Por defecto, solo los administradores pueden crear proyectos. Puedes cambiar esto en la Configuración del espacio de trabajo para permitir a los gerentes de proyecto o a cualquier persona en el espacio de trabajo crear proyectos.
La opción Quién puede crear clientes/proyectos/tareas/etiquetas está configurada por defecto para Todos y no se puede cambiar en el plan gratuito.
Para crear un nuevo proyecto:
- Ve a la página de Proyectos
- Haz clic en el botón Crear nuevo proyecto
- Escribe el Nombre del proyecto
- Selecciona un cliente. Si el cliente no existe, simplemente escribe el nombre y haz clic en Crear cliente en el menú de selección
- Selecciona un Color del proyecto para destacar tu proyecto visualmente
- Establece la Visibilidad (Público o Privado)
- Haz clic en Crear
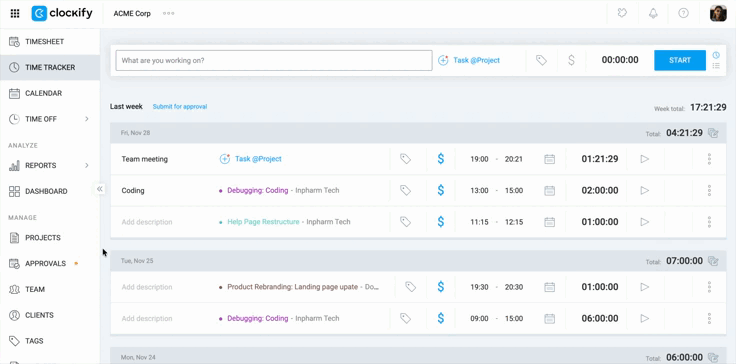
También puedes crear un nuevo proyecto rápidamente desde la página Rastreador. mientras creas una nueva entrada de tiempo:
1. Haz clic en el campo +Proyecto a la hora de añadir una entrada de tiempo
2. Empieza a escribir el nombre del proyecto
3. Expande el menú y haz clic en Crear nuevo proyecto si el proyecto no existe
4. Introduce los detalles necesarios (cliente, visibilidad, color)
5. Haz clic en Crear
Atajo: Usa el atajo de teclado Ctrl/^+Enter para guardar el nuevo proyecto.
Editar detalles del proyecto #
Puedes editar la configuración de un proyecto en cualquier momento:
- Ve a la página de Proyectos
- Haz clic en el proyecto que quieres editar
- Pasa a la pestaña Configuración
- Haz cambios al nombre, cliente y color del proyecto
- Actualiza el Estado del proyecto (por ejemplo, En curso, Terminado)
- Añade notas para proporcionar contexto a tu equipo
Establecer tarifas facturables del proyecto #
- Ve a la página Proyectos y haz clic en el proyecto que quieres actualizar
- Pasa a la pestaña Configuración
- Configura la Tarifa facturable para el proyecto
Si diferentes miembros del equipo necesitan diferentes tarifas en un mismo proyecto, navega a la sección Acceso del proyecto para definir tarifas específicas por usuario.
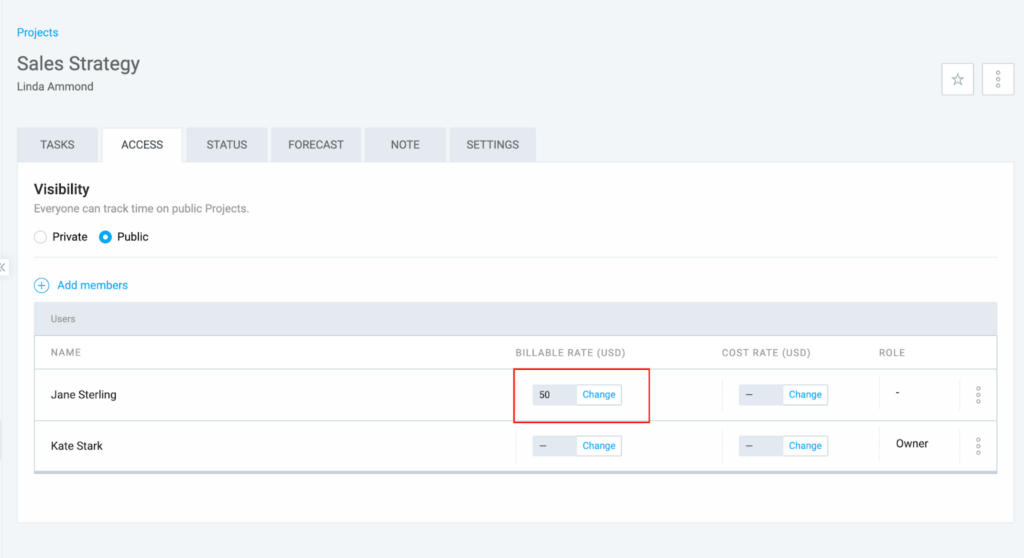
Gestionar accesos y permisos de proyecto #
Puedes controlar qué usuarios pueden acceder a un proyecto privado, modificar tareas y seguir el tiempo. También puedes asignar usuarios como gerentes de proyecto.
Para aprender más sobre cómo gestionar los usuarios en un proyecto, por favor consulta nuestro artículo de ayuda Gestionar usuarios en proyectos.
Archivar y restaurar proyectos #
Para mantener tu espacio de trabajo organizado, puedes archivar proyectos terminados.
Para archivar un proyecto:
- Ve a la página de Proyectos
- Haz clic en
 three dots next to the project name
 - Selecciona Archivar
- Marca o desmarca Marcar todas las tareas como hechas
- Haz clic en Archivar
Para restaurar un proyecto archivado:
- Cambia el filtro Activo a Archivado en la parte superior de la página Proyectos
- Haz clic en Aplicar filtro
- Click the three dot icon next to the archived project name
- Selecciona Restaurar
- Haz clic en Restaurar en la ventana de confirmación
Eliminar proyectos #
Los proyectos deben ser Archivados antes de poder eliminarse.
Para eliminar un proyecto:
- Ve a la página de Proyectos
- Cambia el filtro a Archivado
- Haz clic en Aplicar filtro
- Click the three dots icon next to the archived project name
- Selecciona Eliminar
- Escribe DELETE y haz clic en Eliminar para confirmar la acción
La eliminación de un proyecto lo elimina de las entradas de tiempo, pero los datos de tiempo históricos permanecen.
Combinar proyectos #
Mientras que no puedes mezclar directamente dos proyectos, puedes reasignar entradas de tiempo.
- Ve a la página de Informes
- Selecciona la vista Detallado
- Filtra por el Proyecto deseado y haz clic en Aplicar filtro
- Marca la casilla principal para seleccionar todas las entradas de tiempo mostradas
- Haz clic en Edición masiva
- Selecciona el nuevo proyecto para combinar
- Haz clic en Guardar
- Archiva y Elimina el proyecto antiguo
Gestión avanzada de proyectos #
Existen algunas funciones avanzadas para gestionar proyectos dentro del espacio de trabajo, algunas de las que son disponibles con planes de pago o roles de usuario específicos.
| Función | Descripción |
| Añadir y editar tareas en masa | Los administradores pueden añadir o editar tareas en varios proyectos a la vez usando la pantalla de edición masiva. Esto es útil para organizar un gran número de tareas. |
| Crear proyectos a partir de proyectos | Disponible en los planes de pago, las plantillas te permiten crear nuevos proyectos con configuración anteriormente establecida (tarifas facturables, tareas, estimaciones) para ahorrar tiempo. |
| Filtrar y ordenar proyectos | Usa los filtros en la parte superior de la página Proyectos para encontrar fácilmente lo que necesitas. Filtra por: • Estado activo • Cliente • Usuarios del proyecto • Facturabilidad • Nombre Ordena por: • Nombre • Cliente • Estado |
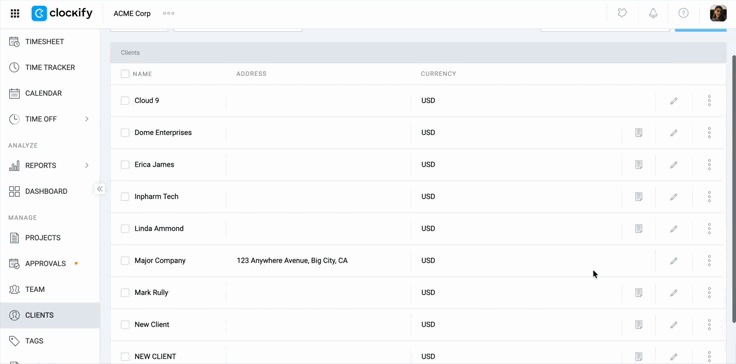
Crear un nuevo cliente #
Por defecto, los administradores y propietarios pueden crear clientes.
Si la configuración Quién puede crear proyectos y clientes tiene marcado Cualquiera en tu Configuración del espacio de trabajo, los usuarios regulares también pueden crear clientes, pero no tendrán acceso a la página Clientes
Para crear un nuevo cliente:
- Ve a la página de Clientes
- Introduce el nombre del cliente en el campo Añadir nuevo cliente
- Haz clic en Añadir
Editar información del cliente #
- Ve a la página de Clientes
- Haz clic en el icono de lápiz al lado del cliente que quieres editar
- Modifica los detalles como:
- Nombre del cliente
- Dirección de correo electrónico
- Destinatarios CC
- Dirección física
- Notas del cliente
- Moneda
Archivar un cliente #
- Ve a la página de Clientes
- Click the three dot icon next to the client’s name
- Selecciona Archivar y confirma la acción
- Marca la casilla También archivar todos los proyectos asignados a este cliente (opcional)
- Haz clic en Archivar
Eliminar un cliente #
Los clientes deben ser Archivados antes de poder eliminarse.
- Ve a la página de Clientes
- Selecciona Mostrar archivado del menú de filtro
- Click the three-dot icon next to the archived client
- Selecciona Eliminar
- Escribe DELETE y haz clic en Eliminar para confirmar la acción
Preguntas frecuentes #
¿Cómo puedo seguir el tiempo para un nuevo proyecto?
Una vez creado el proyecto, puedes seleccionarlo a la hora de seguir el tiempo en las páginas Rastreador, Planilla y Calendario. Si el proyecto es privado, solo los usuarios con acceso al proyecto podrán seleccionarlo..
¿Cómo puedo seguir el tiempo para un cliente?
Para realizar un seguimiento del tiempo dedicado a un cliente, primero crea el cliente en la página Clientes. Asigna el cliente a un proyecto. Asegúrate de seleccionar el proyecto al realizar el seguimiento del tiempo para atribuir correctamente las entradas de tiempo al cliente para la elaboración de informes y la facturación.
.
¿Puedo establecer una tarifa de cliente?
Aunque no es posible establecer una tarifa directamente en el perfil de un cliente, sí se pueden fijar precios específicos para cada cliente estableciendo una tarifa facturable a nivel de proyecto. Para ello, hay que asignar un proyecto a un cliente y definir la tarifa deseada en la configuración de ese proyecto.
¿Puedo cambiar el cliente al que se asigna un proyecto después de haberlo creado?
Sí, puedes reasignar un proyecto yendo a la página Proyectos, haciendo clic en el proyecto específico y navegando a la pestaña Configuración. Desde allí, puedes seleccionar un cliente diferente en el menú desplegable o crear uno nuevo, y el cambio se actualizará inmediatamente en todo el espacio de trabajo.