Créer et gérer des projets et des clients au niveau de l’espace de travail
Dans Clockify, vous pouvez facilement configurer et gérer vos projets et vos clients afin d’organiser le temps de travail de votre équipe, de suivre l’avancement des projets et de générer des rapports précis.
Projets vs clients #
Jetons un coup d’œil au tableau ci-dessous pour comprendre la relation entre les projets et les clients avant de commencer à les créer.
| Type d’élément | Description | Hiérarchie |
| Projets | Indispensables pour classer et regrouper les saisies de temps. Elles vous aident à analyser le temps consacré à différentes tâches et à établir des estimations. | Un projet ne peut appartenir qu’à un seul client. |
| Clients | Les entités, les personnes ou les services internes pour lesquels vous travaillez. | Un client peut être associé à plusieurs projets. |
Visibilité de projet :
- Public : Visible par tous les utilisateurs de l’espace de travail
- Privé : Visible uniquement par les utilisateurs sélectionnés
Avec la formule gratuite, vous ne pouvez définir la visibilité des projets que sur Public. Passez à n’importe quelle formule payante pour définir la visibilité des projets sur Privé.
Créer un nouveau projet #
Par défaut, seuls les administrateurs peuvent créer des projets. Vous pouvez modifier cela dans les paramètres de l’espace de travail afin d’autoriser les chefs de projet ou n’importe quel utilisateur de l’espace de travail à créer des projets.
Qui peut créer des clients, des projets, des tâches et des tags est défini par défaut sur Tout le monde et ne peut pas être modifié dans la formule gratuite.
Pour créer un nouveau projet :
- Allez à la page Projets
- Cliquez sur le bouton Créer un nouveau projet
- Saisissez le nom du projet
- Sélectionnez un client. Si le client n’existe pas, saisissez simplement son nom et cliquez sur Créer un client dans le menu déroulant
- Choisissez une couleur pour le projet afin de le distinguer visuellement
- Définissez la visibilité (Public ou Privé)
- Cliquez sur Créer
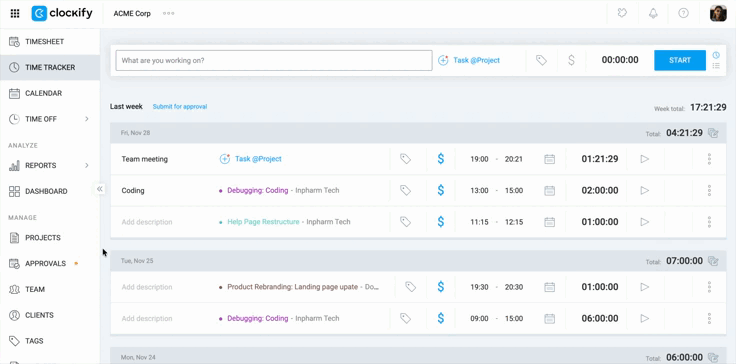
Vous pouvez également créer rapidement un nouveau projet directement depuis la page Suivi du temps.
1. Cliquez sur le champ +Projet lorsque vous ajoutez une saisie de temps
2. Commencez à saisir le nom du projet
3. Développez le menu et cliquez sur Créer un nouveau projet s’il n’existe pas encore
4. Remplissez les informations requises (client, visibilité, couleur)
5. Cliquez sur Créer
Raccourci : utilisez le raccourci clavier Ctrl/^ + Entrée pour enregistrer le nouveau projet.
Modifier les détails du projet #
Vous pouvez modifier les paramètres principaux d’un projet à tout moment :
- Allez à la page Projets
- Cliquez sur le projet que vous souhaitez modifier
- Passez à l’onglet Paramètres
- Modifiez le nom, le client et la couleur du projet
- Mettez à jour le statut du projet (p. ex. En cours, Terminé)
- Ajoutez des notes de projet pour fournir des informations contextuelles à votre équipe (facultatif)
Définir les taux facturables des projets #
- Rendez-vous sur la page Projets et cliquez sur le projet que vous souhaitez mettre à jour
- Passez à l’onglet Paramètres
- Définissez le taux facturable par défaut pour le projet
Si certains membres de l’équipe ont besoin de taux différents pour un même projet, accédez à la section Accès du projet pour définir des taux spécifiques par utilisateur.
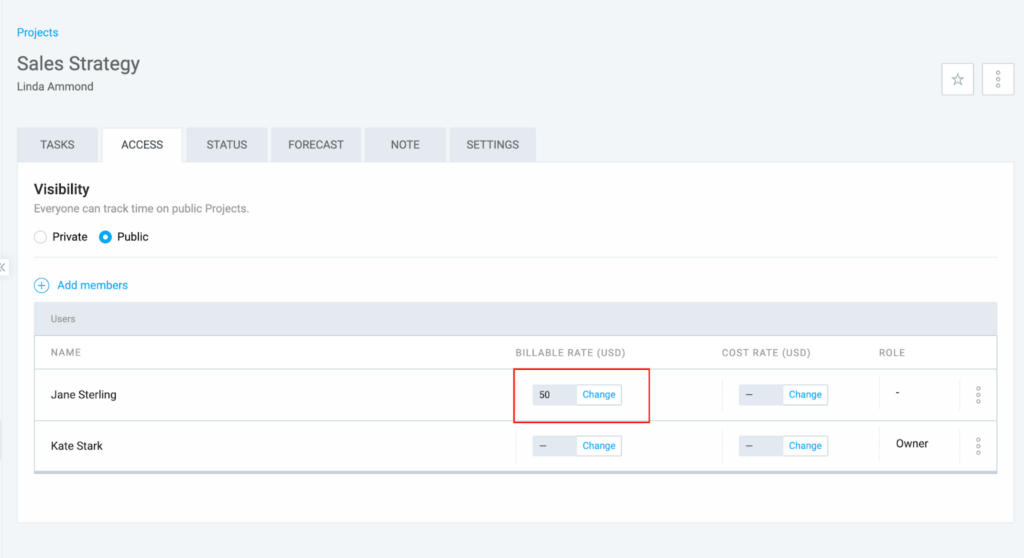
Gérer l’accès au projet et les autorisations #
Vous pouvez définir quels utilisateurs peuvent accéder à un projet privé, modifier les tâches et enregistrer leur temps de travail dans le cadre de ce projet. Vous pouvez également désigner des utilisateurs comme chefs de projet.
Pour en savoir plus sur la gestion des utilisateurs au sein d’un projet, consultez l’article Gérer les personnes dans les projets.
Archiver et restaurer des projets #
Pour garder votre espace de travail bien rangé, vous pouvez archiver les projets terminés.
Pour archiver un projet :
- Allez à la page Projets
- Cliquez sur le bouton
 three dots next to the project name
 - Sélectionnez Archiver
- Cochez ou décochez la case Marquer toutes les tâches comme terminées
- Cliquez sur Archiver
Pour restaurer un projet archivé :
- En haut de la page Projets, remplacez le filtre Actif par Archivé
- Cliquez sur Appliquer le filtre
- Click the three dot icon next to the archived project name
- Sélectionnez Restaurer
- Cliquez sur Restaurer dans la fenêtre de confirmation
Supprimer des projets #
Les projets doivent être archivés avant de pouvoir être supprimés.
Pour supprimer un projet :
- Allez à la page Projets
- Définissez le filtre sur Archivé
- Cliquez sur Appliquer le filtre
- Click the three dots icon next to the archived project name
- Sélectionnez Supprimer
- Tapez DELETE et cliquez sur Supprimer pour confirmer l’action
La suppression d’un projet le retire des saisies de temps, mais l’historique des données de temps reste intact.
Fusionner des projets #
Bien qu’il ne soit pas possible de fusionner directement deux projets, vous pouvez réaffecter les saisies de temps :
- Naviguez vers la page Rapports
- Sélectionnez la vue Rapport détaillé
- Filtrez par projet cible, puis cliquez sur Appliquer le filtre
- Cochez la case tout en haut pour sélectionner toutes les saisies de temps affichées
- Sélectionnez Modification en bloc
- Sélectionnez le nouveau projet à fusionner
- Cliquez sur Enregistrer
- Archivez et supprimez l’ancien projet
Gestion avancée des projets #
Voici quelques fonctionnalités avancées permettant de gérer les projets au sein de l’espace de travail. Certaines d’entre elles ne sont disponibles qu’avec des formules payantes ou pour certains rôles d’utilisateur.
| Fonctionnalité | Description |
| Ajouter et modifier des tâches en bloc | Les administrateurs et les propriétaires peuvent ajouter ou modifier des tâches dans plusieurs projets à la fois grâce à la modification en bloc. Cette fonctionnalité est utile pour gérer un grand nombre de tâches. |
| Créer des projets à partir de modèles | Disponibles dans les formules payantes, les modèles vous permettent de créer de nouveaux projets avec des paramètres prédéfinis (taux facturables, tâches, devis) afin de gagner du temps. |
| Filtrer et trier des projets | Utilisez les filtres situés en haut de la page Projets pour trouver facilement ce dont vous avez besoin. Filtrer par : • Statut • Client • Utilisateurs • Facturabilité • Nom Trier par : • Nom • Client • Statut |
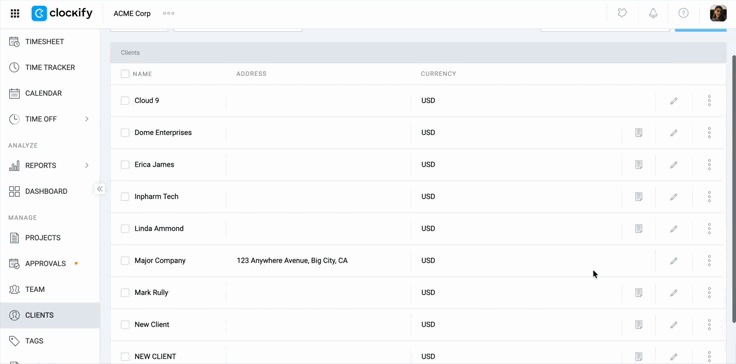
Créer un nouveau client #
Par défaut, les administrateurs et les propriétaires peuvent créer des clients.
Si le paramètre Qui peut créer des projets et des clients est défini sur Tout le monde dans les paramètres de votre espace de travail, les utilisateurs standard peuvent également créer des clients, mais ils n’auront pas accès à la page Clients.
Pour créer un nouveau client :
- Allez sur la page Clients
- Entrez le nom du client dans le champ Ajouter un nouveau client
- Cliquez sur Ajouter
Modifier les informations d’un client #
- Allez sur la page Clients
- Cliquez sur l’icône du stylo à côté du client que vous souhaitez modifier
- Modifier les informations suivantes :
- Nom du client
- Adresse email du client
- Destinataires en copie
- Adresse postale
- Notes sur le client
- Devise
Archiver un client #
- Allez sur la page Clients
- Click the three dot icon next to the client’s name
- Sélectionnez Archiver et confirmez l’action
- Cochez la case Archiver également tous les projets attribués à ce client (facultatif)
- Cliquez sur Archiver
Supprimer un client #
Les clients doivent être archivés avant de pouvoir être supprimés.
- Allez sur la page Clients
- Sélectionnez Afficher les éléments archivés dans le menu des filtres
- Click the three-dot icon next to the archived client
- Choisissez Supprimer
- Tapez DELETE et cliquez sur Supprimer pour confirmer l’action
FAQ #
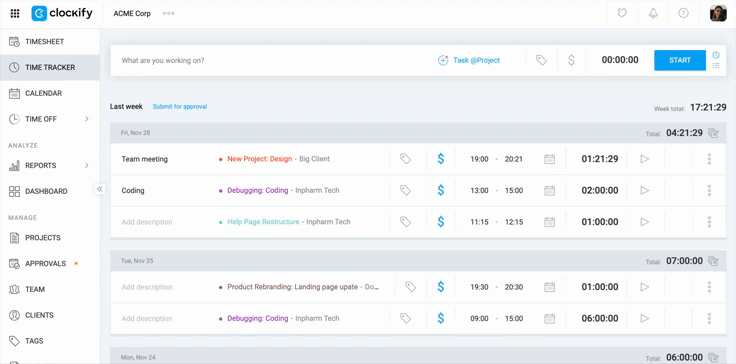
Comment suivre le temps consacré à un nouveau projet ?
Une fois le projet créé, vous pouvez le sélectionner lorsque vous enregistrez votre temps sur les pages « Suivi du temps », « Feuille de temps » et « Calendrier ». Si le projet est défini comme privé, seuls les utilisateurs qui y sont affectés peuvent le sélectionner.
Comment suivre le temps passé pour un client ?
Pour suivre le temps passé pour un client, commencez par créer ce client sur la page Clients. Affectez-le à un projet. Veillez à sélectionner ce projet lorsque vous enregistrez le temps passé afin que les saisies de temps soient correctement attribuées au client pour la création de rapports et la facturation.
Est-il possible de définir un taux client ?
Bien qu’il ne soit pas possible de définir un taux directement dans le profil d’un client, vous pouvez établir une tarification spécifique à chaque client en définissant un taux facturable au niveau du projet. Pour ce faire, attribuez un projet à un client et définissez le taux souhaité dans les paramètres de ce projet.
Est-il possible de modifier le client auquel un projet est attribué après sa création ?
Oui, vous pouvez réattribuer un projet en vous rendant sur la page Projets, en cliquant sur le projet concerné, puis en sélectionnant l’onglet Paramètres. De là, vous pouvez choisir un autre client dans le menu déroulant ou en créer un nouveau. La modification sera immédiatement répercutée dans l’ensemble de l’espace de travail.