Provisionnement des utilisateurs SCIM
La gestion des utilisateurs SCIM vous permet de gérer et de synchroniser automatiquement les membres et les groupes dans Clockify via votre fournisseur d’identité (IdP). De cette façon, l’accès des utilisateurs est à jour dans tout l’espace de travail Clockify.
Its benefits include:
- Efficiency for large teams: Automatically add hundreds of users at once without manual invites.
- Enhanced security: Ensure users lose access to Clockify immediately upon being deprovisioned from your company’s system.
- Centralized management: Sync both users and groups to keep your workspace structure consistent.
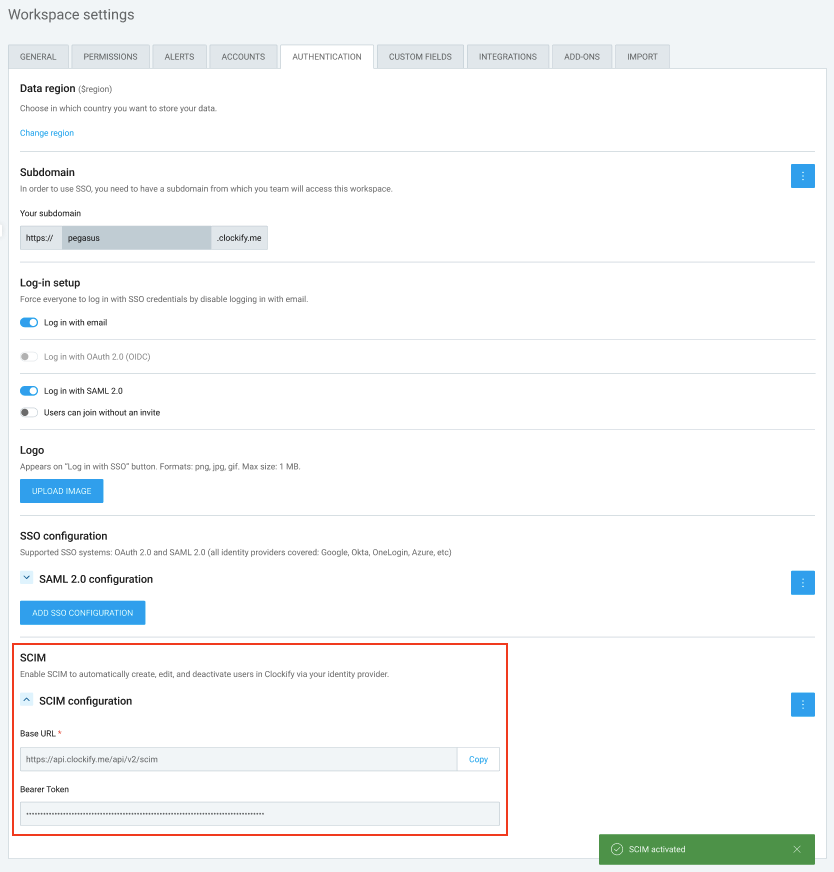
Enable SCIM #
To begin the integration, an Owner must generate the necessary credentials in Clockify to link with the IdP.
- Navigate to your Workspace Settings.
- Locate the SCIM section.
- Enable the SCIM option to generate your unique:
- Base URL
- Bearer Token
- Copy these values and paste them into your Identity Provider (e.g., Okta, Microsoft Entra ID, Google Workspace, or JumpCloud) when creating the SCIM application there.
Once SCIM is connected, Clockify will automatically handle the following actions based on changes in your IdP:
For users: #
- Users are created in Clockify as soon as they are added to the IdP.
- Changes to a user’s name or email in the IdP will automatically update in Clockify.
- When a user is activated or deactivated in the IdP, their status in Clockify will update instantly.
- The default timezone is initially taken from the IdP. However, if a user manually changes their timezone in Clockify (e.g., while traveling), Clockify remains the source of truth for that setting and will not overwrite it.
For Groups: #
- Existing Clockify groups are deleted once SCIM is enabled.
- Groups are created or deleted in Clockify based on your IdP setup.
- Users are automatically added to or removed from Clockify groups when their group membership changes in the IdP.
- Group names will always match the naming convention used in your IdP.
For Enterprise users, Clockify offers the capability to integrate with other applications through SCIM v2.
SCIM is supported for use with the following applications:
Connect to Jumpcloud
This action requires a Google administrator account.
Step 1: Create app in Jumpcloud #
To create the application:
- Log in to your Jumpcloud dashboard
- Go to SSO Applications (under User Authentication)
- Click Add New Application

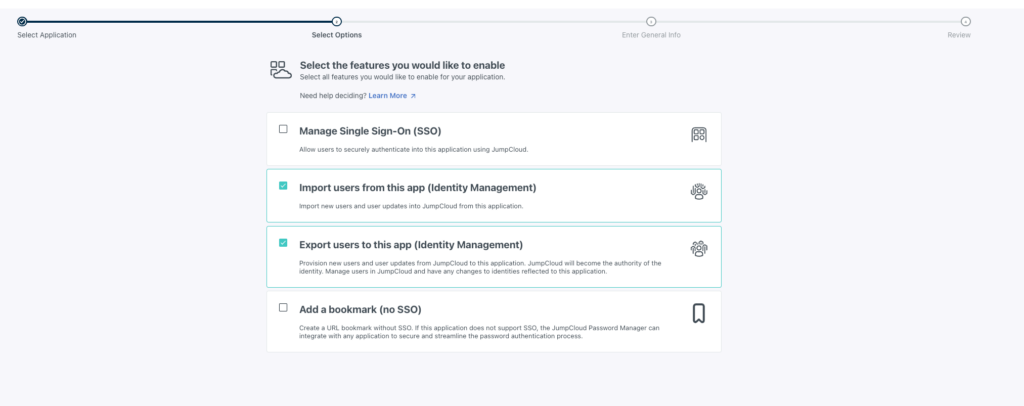
4. Select Custom Application
5. Check the following boxes:
- Import users from this app (Identity Management)
- Export users to this app (Identity Management)
6. Click Next
7. Enter a name for your application
8. Click Save application
Step 2: Enable SCIM in Clockify
- Se connecter à Clockify
- Click on the three dots icon next to your workspace name
- Sélectionnez Paramètres de l’espace de travail
- Click on the Authentication tab
- Click Enable SCIM
- Copy the Base URL and Bearer Token
Step 3: Finalize the connection #
In Jumpcloud:
- Go to the Identity Management tab
- Paste the Base URL and Bearer Token in their respective fields
- Click Test Connection. A pop-up window will appear to confirm that the connection is successful.
- Click Activate

Connect to Okta
This action requires an Okta administrator account.
Step 1: Create app in Okta #
To add SCIM provisioning in Okta:
- Log in to your Okta account
- Click Applications on the sidebar menu
- Click Applications
- Select the Browse app catalog button
- Search SCIM in the search field
- Select SCIM 2.0 Test App (Header Auth) from the search results
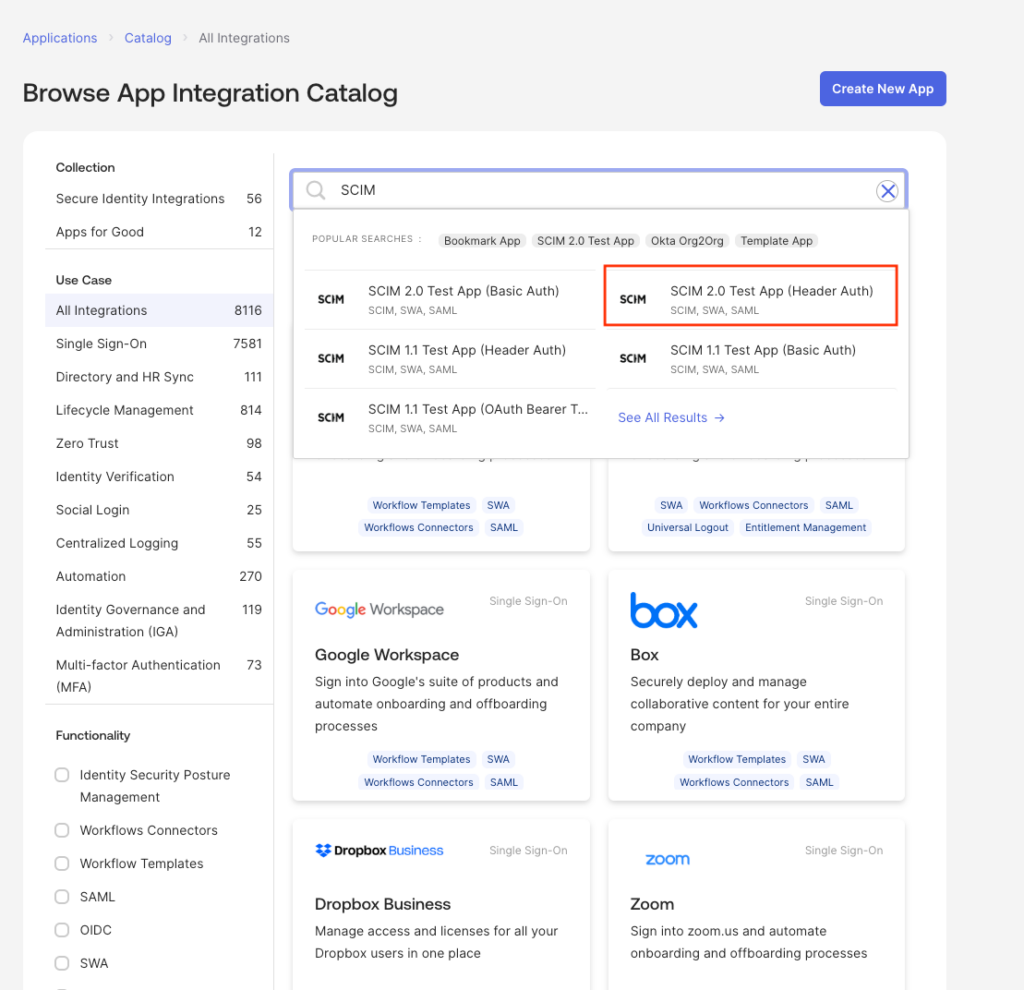
7. Click Add Integration
8. Click Next (leave the details as is)
9. Click Done
10. Go to the Provisioning tab
11. Click Configure API Integration
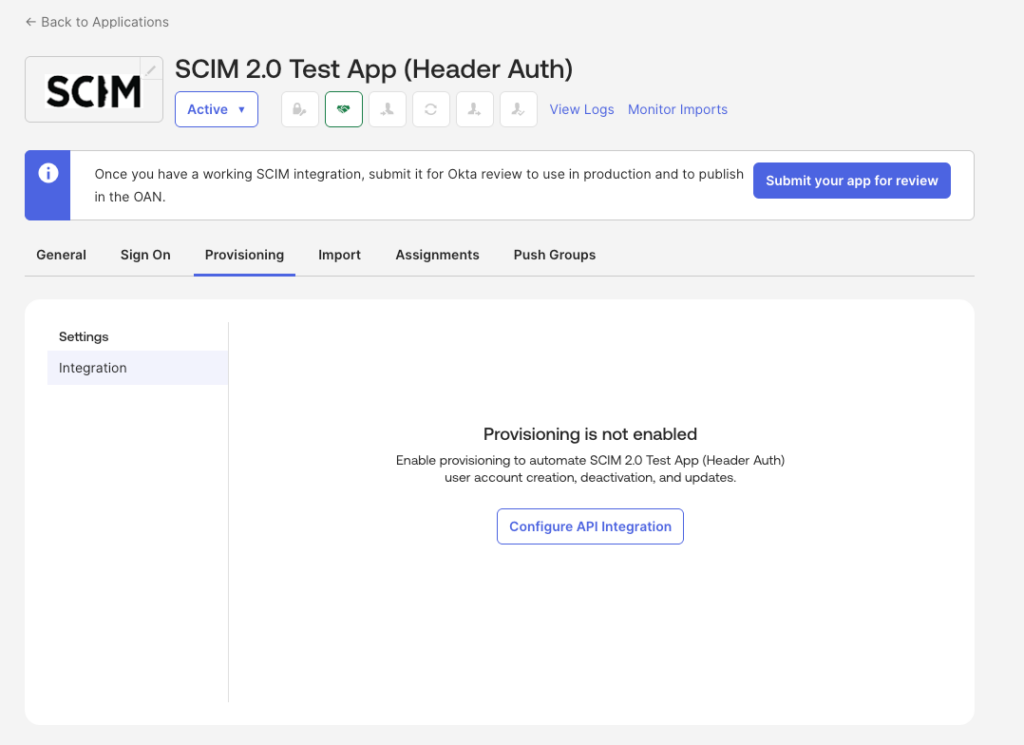
12. Tick the box for Enable API Integration
13. Enter the Base URL and Bearer Token (Get this from Clockify)
14. Click Test API Credentials
15. Click Save
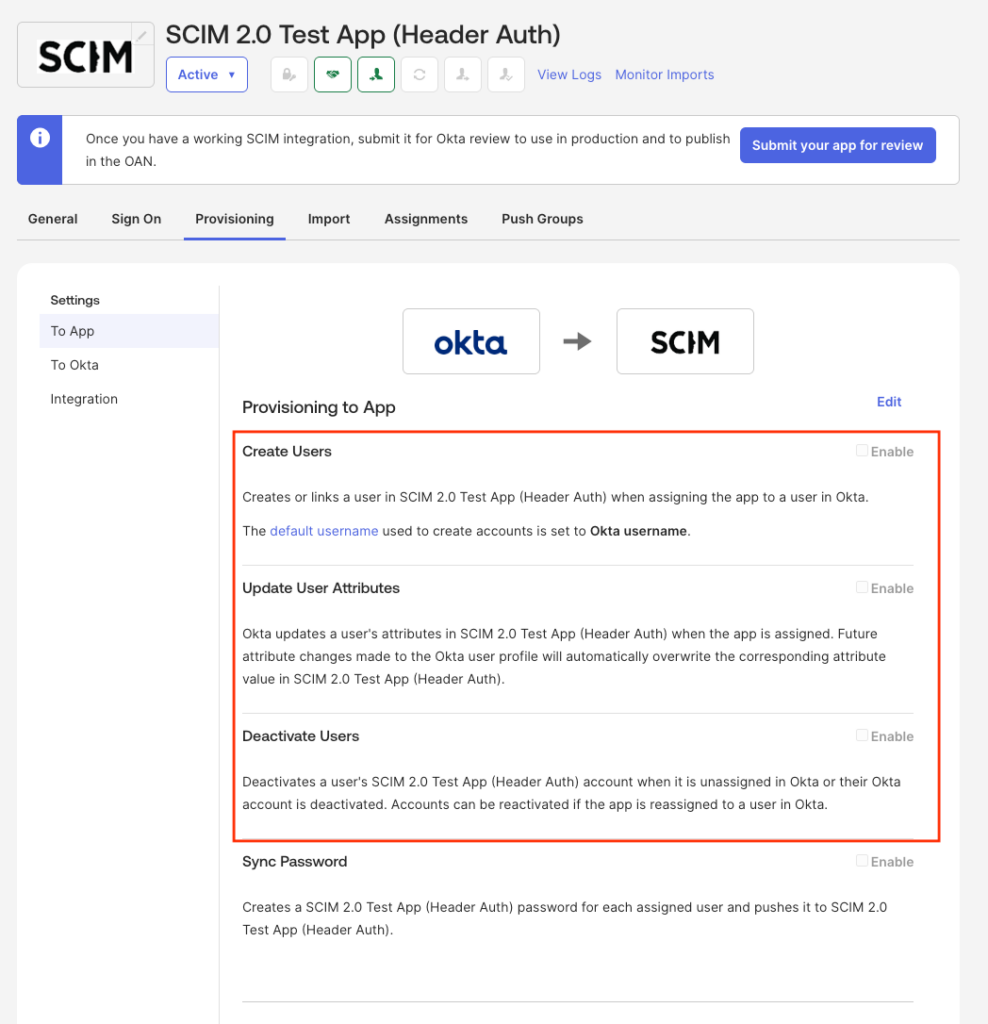
Step 2: Edit user configuration #
- Go to the Provisioning tab
- Click To App on the sidebar menu
- Check/enable the following:
- Create Users
- Update User Attributes
- Deactivate Users
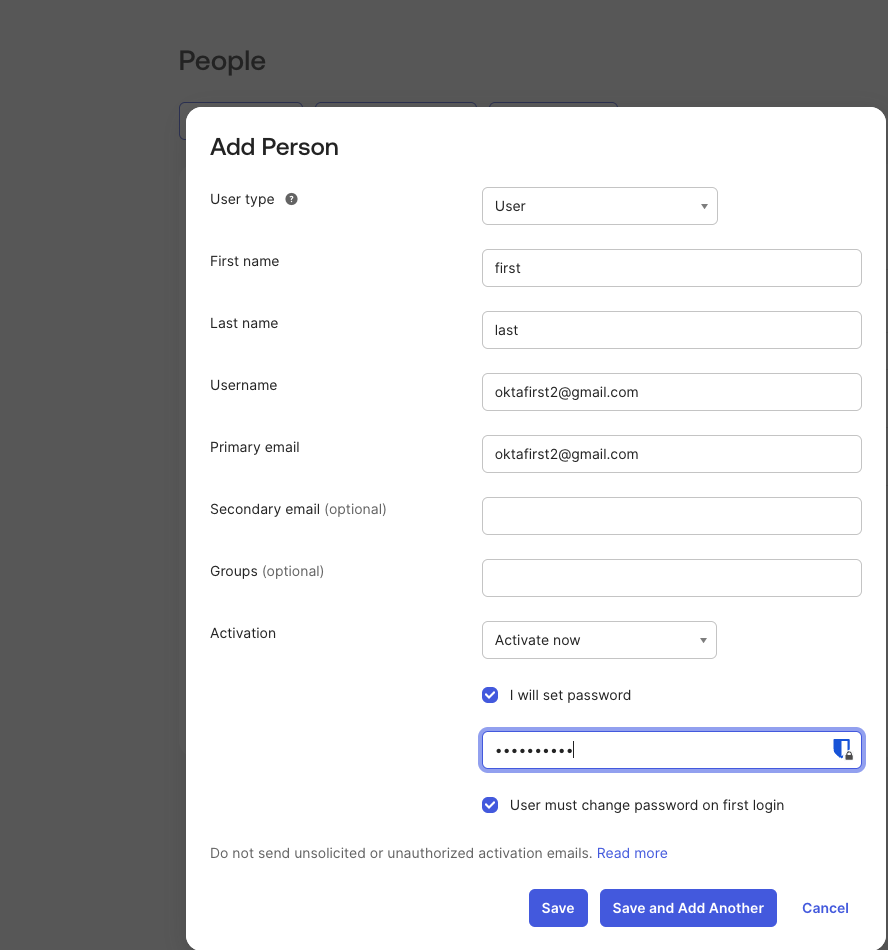
Create user #
To create a user:
- Go to Directory > People
- Click Add Person
- Enter the required information
- Click Save or Save and Add another
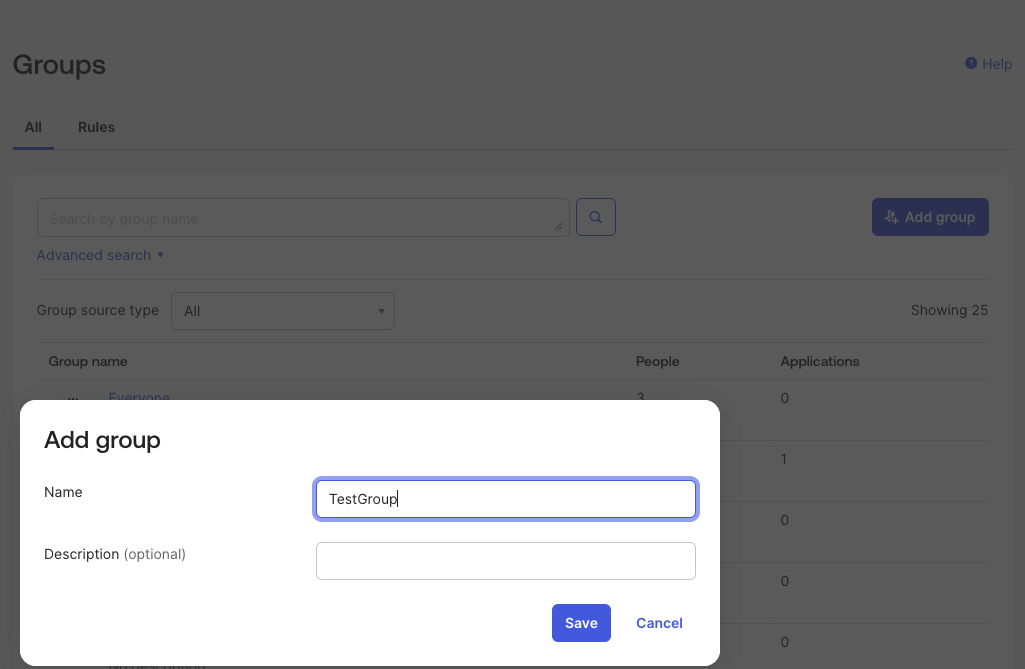
Créer un groupe #
To create a group:
- Go to Directory > Groups
- Click Add Group
- Enter the group name and a description (optional)
- Cliquez sur Enregistrer
Assign users to group
- Navigate to your Okta dashboard and find your list of Groups
- Select the group you have already created
- Click on the Assign people button
- Select the users you wish to add to this group
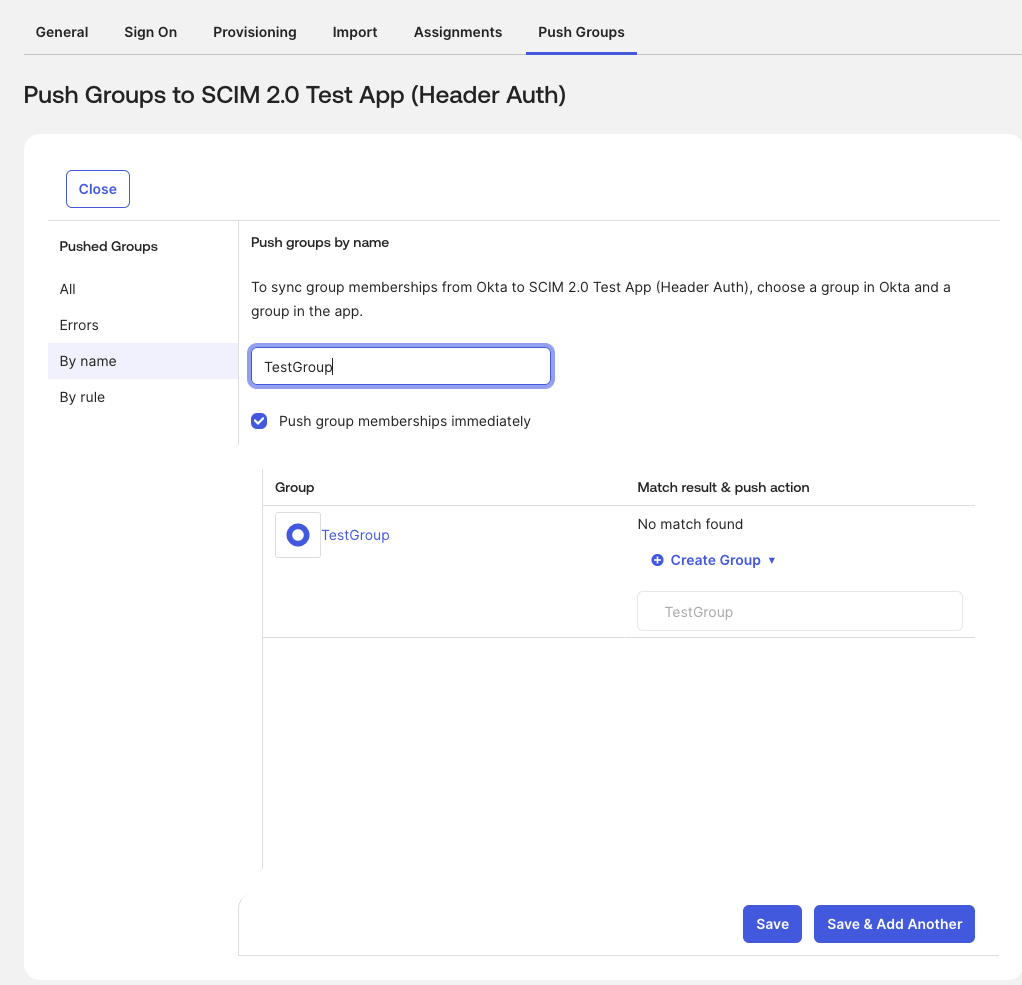
Push groups
Assigning a group only syncs the people inside it. To sync the group itself, you need to use the Push Groups feature.
To push groups:
- Go to the Push Groups tab
- Sélectionnez le groupe
- Check the box for Push group members immediately
- Cliquez sur Enregistrer
Connect to Microsoft Entra
Step 1: Create the Custom Application in Entra ID #
To connect Microsoft Entra:
- Log in to Microsoft Entra admin center
- Go to Applications > Enterprise Applications
- Click New application
- Select Create your own application
- Add a name for your application
- Select Integrate any other application you don’t find in the gallery (Non-gallery)
- Cliquez sur Créer
Step 2: Get Your SCIM Credentials from Clockify #
Step 3: Configure Provisioning in Entra ID #
Go back to Microsoft Entra admin.
- Open your newly created application
- Click on the Provisioning tab on the left menu
- Click New Configuration (or Edit Provisioning)
- Set the Provisioning Mode to Automatic
- Under the Admin Credentials section, enter the following details:
- Tenant URL: Paste your Clockify SCIM URL (it will look like your Clockify URL + /scim/v2).
- Secret Token: Type the word Bearer, add a single space, and then paste your Clockify API token (e.g., Bearer abc123def456).
6. Click Test Connection
7. Click Save or Create
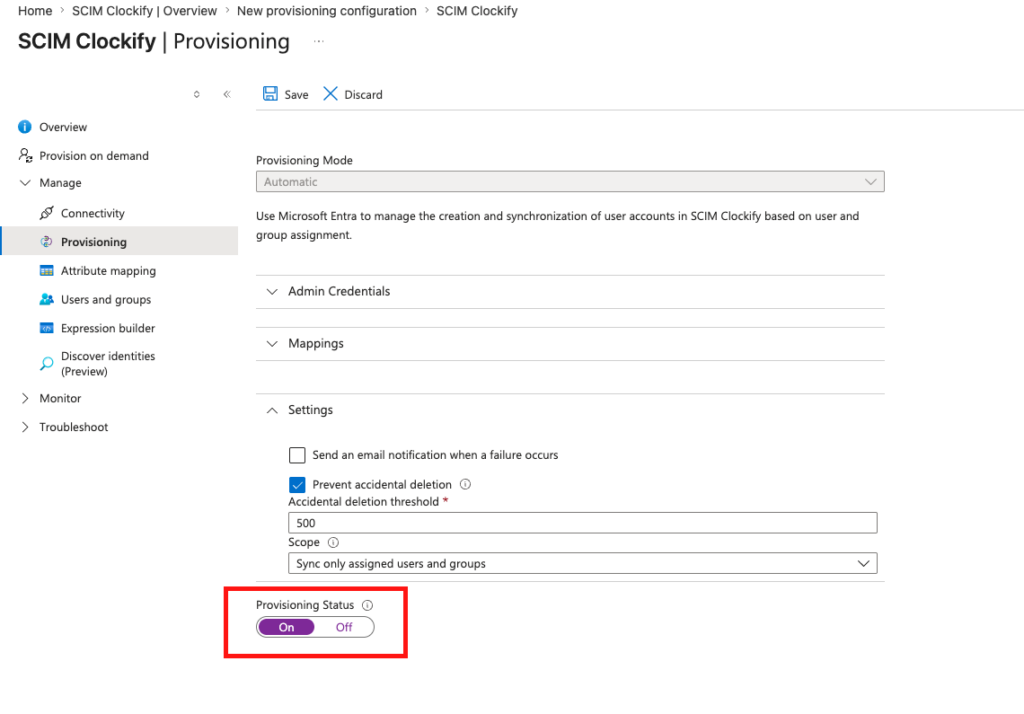
Step 4: Enable provisioning #
To turn the automation on, you need to enable the integration.
- Go to the Provisioning tab
- Toggle the Provisioning Status to On
- Cliquez sur Enregistrer
Create users and groups #
Once your provisioning app is set up and turned on, you can start assigning who gets access to Clockify.
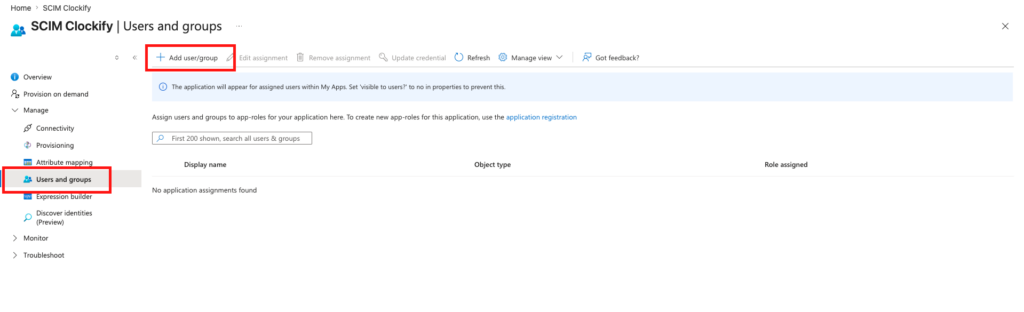
Assigning Users and Groups to the Clockify App #
- Go to Applications > Enterprise Applications and select your Clockify app
- Click on Users and groups in the left menu
- Click Add user/group to assign people to the app
The Basic Microsoft Entra package only allows you to assign and provision individual users. You must have an Entra ID P1 or P2 license to assign and provision groups.
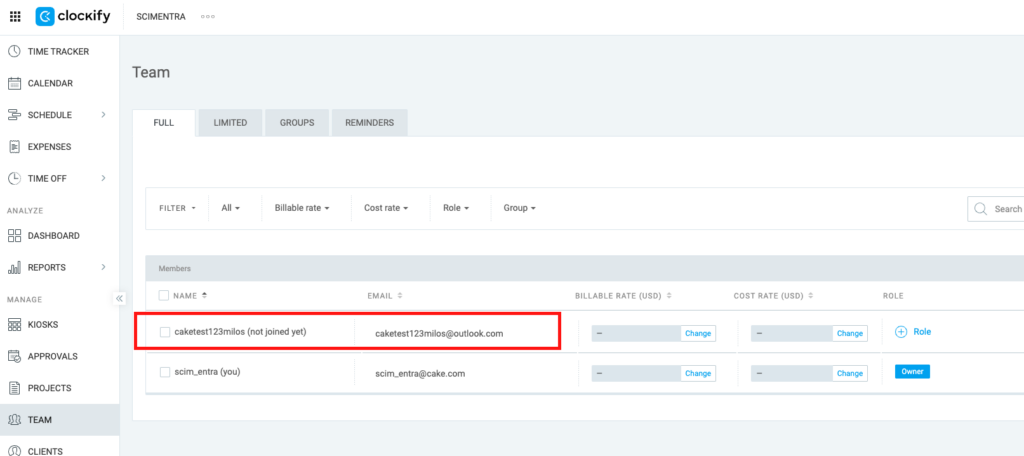
Check Clockify for added users
- Go to Team page on Clockify
- Check if user/s were added successfully
Important notes on sync
- Automatic Syncs: Microsoft Entra ID automatically syncs changes to Clockify on a fixed interval of every 40 minutes.
- Instant Syncs: If you make an urgent update and cannot wait 40 minutes, you can push changes immediately by clicking Provision on demand located in the left-hand menu of your provisioning app.
FAQ #
Can I set up my groups in Clockify before turning on SCIM? #
No, you cannot preload groups. However, there is a simple workaround to minimize disruption:
- Export your current group lists directly from Clockify
- Upload that list into your Identity Provider (IdP)
- Turn on SCIM
Once connected, your Identity Provider will automatically sync those groups right back into Clockify for you.
What changes for our team once SCIM is turned on? #
Because your Identity Provider takes over as the central control hub, many management features inside Clockify will be locked, such as adding and deleting users, revoking invitations, or managing groups.
Changes for everyday users:
- You will not be able to change your own name in Clockify.
- You will not be able to leave a workspace on your own.
- The feature that lets users automatically join a workspace will no longer work.
Changes for Admins and Workspace Owners:
- You can no longer add, update, or delete users directly inside Clockify. You also cannot revoke invitations or change “limited” users into “regular” users from the Clockify dashboard.
- You cannot create, delete, or update groups inside Clockify.
- All of these tasks must now be handled directly inside your Identity Provider.
Will user names update right away to match our system? #
Not instantly. The names in Clockify will update to match your system as soon as your Identity Provider sends its first “sync” update (provisioning request) for those specific users.
How does the system match our users to their Clockify accounts? #
You get to decide. You can choose the primary matching detail, such as a user’s email address or their username, directly inside your Identity Provider’s settings. Clockify follows whatever rule you set there.
Will Clockify pull in my entire company directory by mistake? #
No, it will not. Clockify does not actively search through your company directory. It only creates and updates the specific users your Identity Provider tells it to. As long as you select the “Sync only assigned users and groups” setting in your system (like Microsoft Entra), Clockify will only process those specific people.
What is the correct order to handle GDPR requests (like making a user anonymous before they leave)? #
You can follow a simple process: Deactivate ➔ Anonymize ➔ Remove. Keep in mind that you must make the changes to anonymize their name or email while the user is still actively assigned to the Clockify app inside your Identity Provider. If you remove or unassign them from the app first, the connection breaks, and Clockify will never receive the instruction to hide their data.
Can we pause the sync or manually control when updates are pushed? #
Yes. Clockify does not force a specific sync schedule on our end. You are free to use the “Pause/Start” or “Provision on Demand” features inside your Identity Provider to push updates manually instead of waiting for the default automatic sync.
Can we use our email Distribution Lists to create groups in Clockify? #
Yes, if your system allows it. Clockify relies entirely on what your Identity Provider sends over. If your system allows you to select a Distribution List and assign it to the Clockify app, Clockify will accept it and simply treat it as a standard group.
What happens to our existing groups behind the scenes when SCIM starts? #
Because SCIM deletes your old Clockify groups and replaces them with the groups from your Identity Provider, Clockify treats these synced groups as entirely new entities. This means the hidden “Group IDs” used in the background will change.