How to set up & use Clockify kiosk
Does your business operate in multiple locations or in a shift-based setting? Are your employees often moving from working sites or client locations?
If so, you need to ensure a way of capturing all employee billable hours at all times, no matter where they are.
One of the possible solutions is a clock-in kiosk that can track employee work hours in multiple locations. It’s a system established through a single device enabling multiple people to record their work hours.
Another way is to use a mobile app (iOS, Android) that permits time tracking on the go, with an additional GPS tracking feature to record employee routes during the day.
For example, if your business owns multiple mechanical shops, you will set up a different kiosk station at each location for employees to track their hours.
And if any of the workers need to occasionally visit the warehouse for restocking, their working hours spent getting from one place to another can be tracked through a mobile app.
This way you will have all employee billable hours synced on their timesheets and ready for payroll.
Table of Contents
Clockify’s kiosk: the basics
Clockify’s kiosk gives you the ability to:
➡️ Have multiple active kiosks
You can create multiple kiosks for different job sites and distribute employees accordingly.
➡️ Clock in with a personal PIN code and a universal PIN code
Users need to type in a PIN code to clock in. A personal PIN code is unique to a user, but universal PIN codes can be used to clock in and out for anyone.
➡️ Track breaks
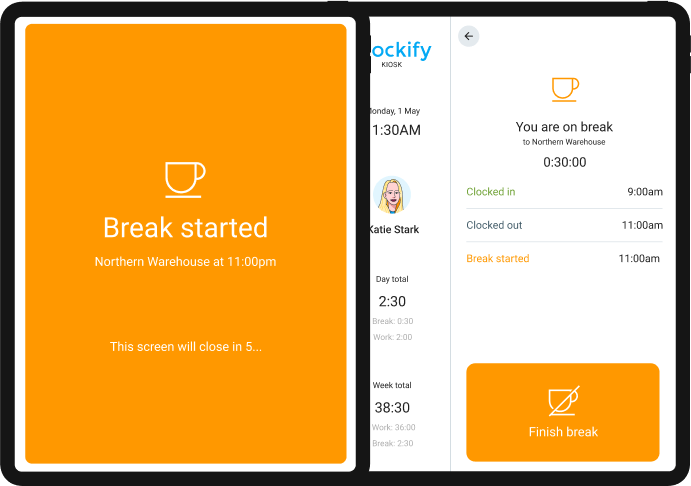
You can clock in for break time the same way you clock in for work time.
➡️ Customize session duration
Once launched, a kiosk will be active for 24h by default, but you can change the session duration in the settings.
➡️ Brand your kiosk
Instead of showing the Clockify logo, you can display your own company logo on a kiosk.
➡️ Launch it on any device – desktop, mobile, or tablet.
When onboarding new users, you want to keep in mind the difference between full and limited kiosk users.
A limited user can only use Clockify via a kiosk, while a full user can use features such as timer, timesheet, reports, time off, or any other feature from a plan you opted for.
Here is a short overview of the distinction between full and limited kiosk users.
| Full user | Limited user |
| Name and email | Name only |
| Can use Clockify via the web, mobile, or desktop app | Can only use Clockify through a kiosk |
| Can switch tasks and projects, and record location | Task, project, and location determined by the kiosk |
| Full seat price | Limited seat price |
See the pricing difference for full and limited kiosk users.
Now that you know the basics, let’s see how to set up and use Clockify’s kiosk.
How to set up & launch a kiosk
First, log in to your Clockify workspace on the web, and go to the Kiosk tab in the sidebar (it’s enabled by default).
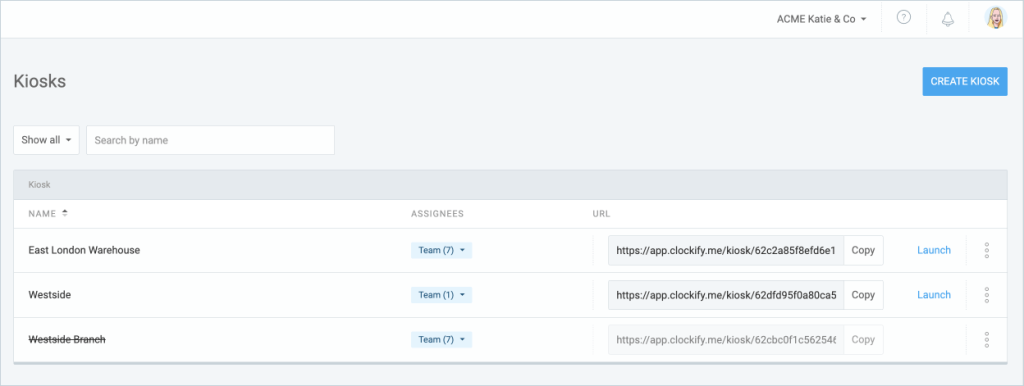
To create a new kiosk, you should give it a name, assign people who will track time on that kiosk, and choose a default project that will be shown during employees’ clock-in and out.
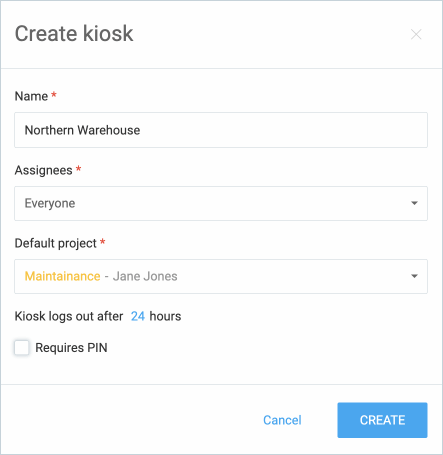
A kiosk is (by default) set as active for 24h, but you can change the session duration in the settings to meet the specific work hours of each team working on different sites.
For example, the Northern Warehouse might need to work in two or more shifts during some period of time, so you can edit the kiosk to shut down after 36h, or more.
This way your kiosk will remain open during that time frame for as long as employees need to come and leave their job site.
To start tracking time, users need to enter their personal or universal PIN code.
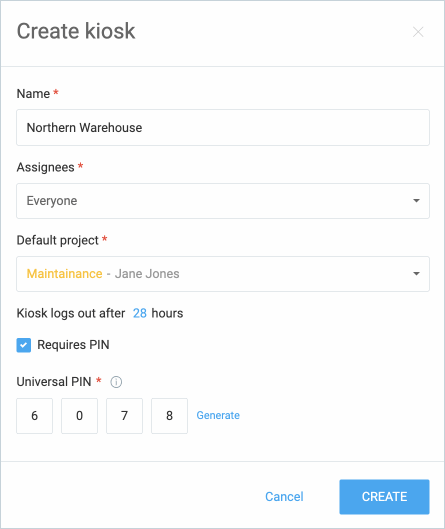
A universal PIN code can be used to log in instead of any user (except the Admin). Each user will still get their own personal PIN code.
For example, you can share a universal PIN code with a shift manager, so they can log in for any other member if needed.
A list of all PIN codes can be exported for internal records.
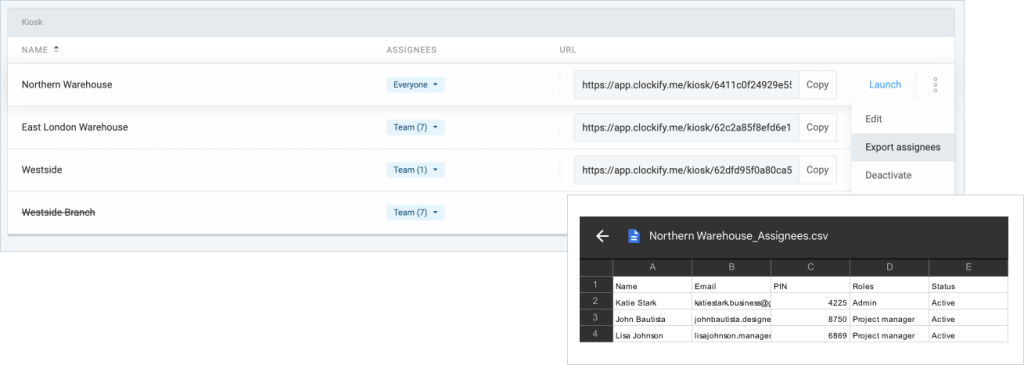
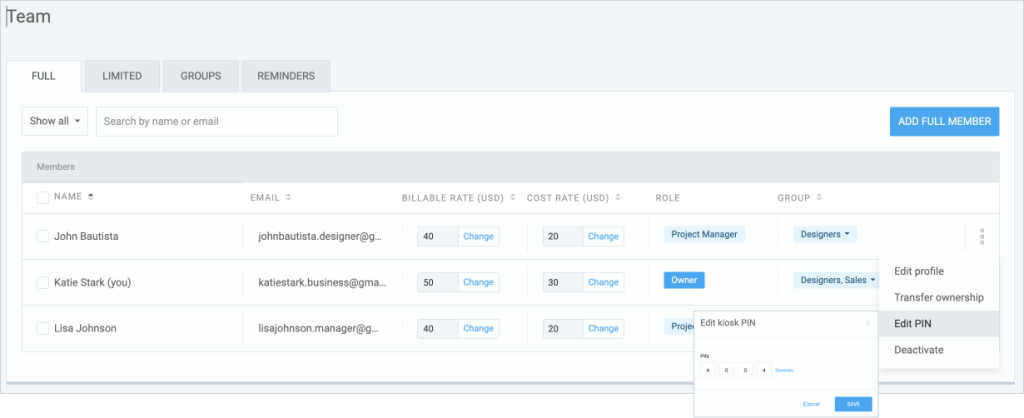
User PIN codes can also be edited on the Team’s page.
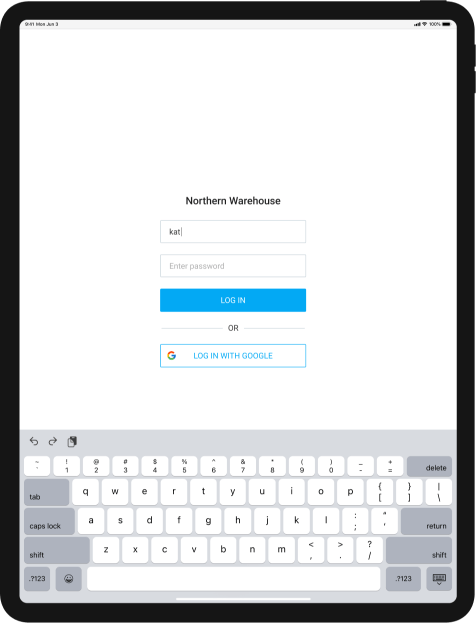
To launch a kiosk, choose a device you want to use as a clock-in kiosk – computer, tablet, or phone – and copy the kiosk link on its browser.

How to use a kiosk
Once a kiosk is launched on its device, each user should select their name from the list and clock in with their personal PIN code.
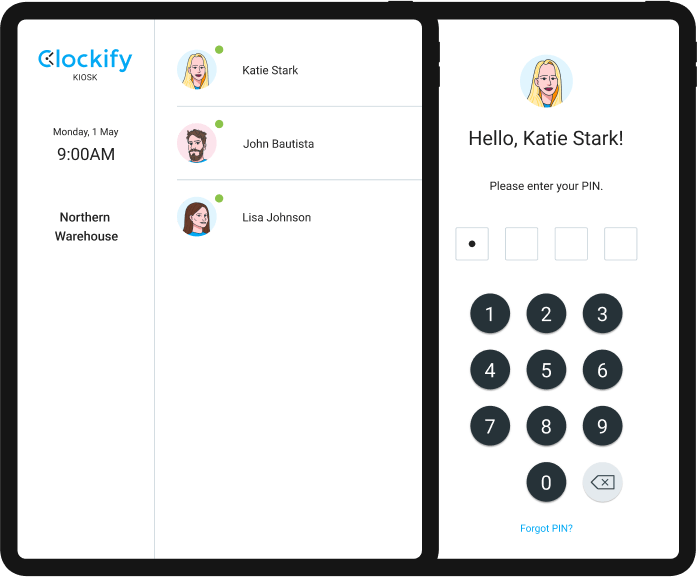
A forgotten PIN can also be replaced with the Admin’s assistance, if you just click on the “Forgot your PIN?” link. The Admin will receive an email and you will be able to reset your PIN.
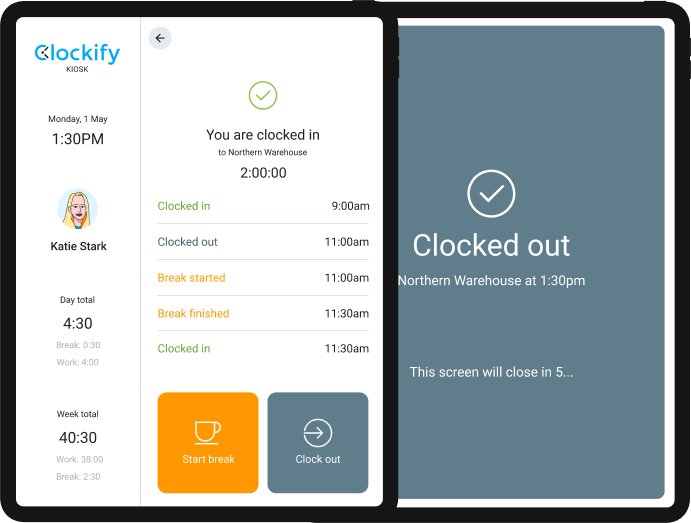
To start counting your work hours, click on the “Clock-in” button, and type in your PIN code once again.
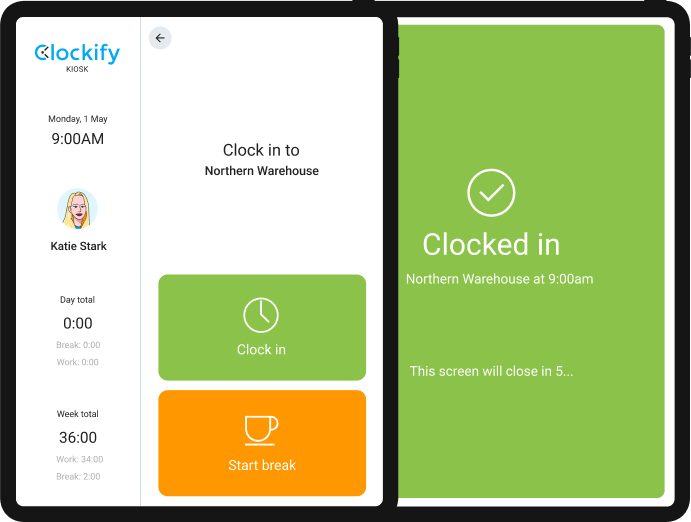
The same goes for starting your break. Click on the “Start break” button, type your PIN, and the break time will start.
To clock out, click on the “Clock out” button and enter your PIN code.
So, each time you want to start and stop the timer, you have to enter your PIN code.
When users clock in and out of the kiosk, the project for which they track time is automatically determined by the kiosk’s default project (switching projects on the kiosk will be available in the future).
If you want users to switch from projects and track time on them, the best option is to use the mobile app (Android, iOS).
Personalized mobile time tracking
With a mobile app, your employees can track via a timer or a timesheet on their own mobile phone, and they can also specify the projects they are working on.
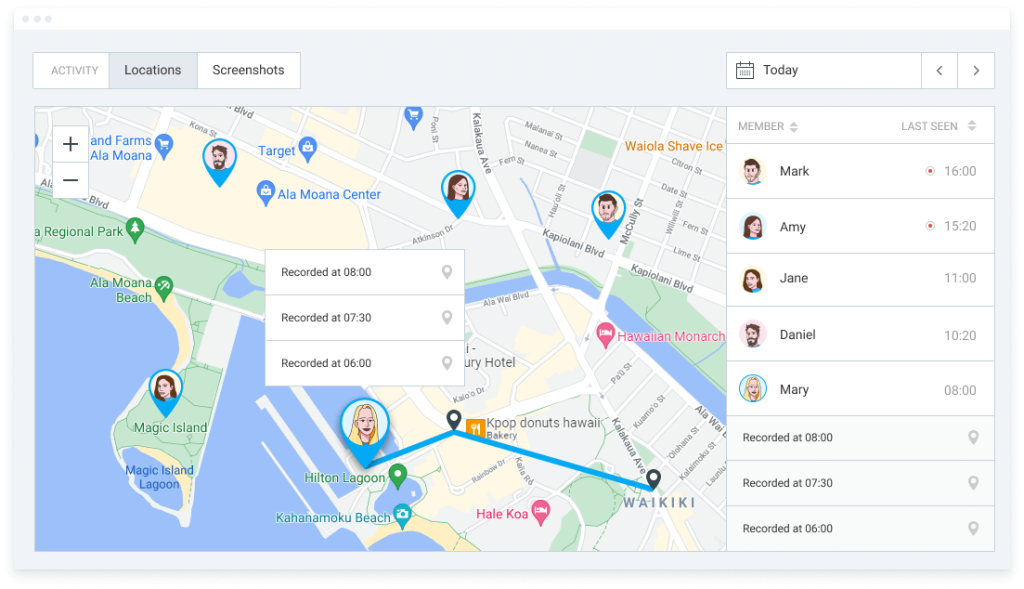
A mobile app also gives you the ability to track employee locations if they’re moving from one working location to another.
If your employees will track time on their mobile, you should create a list of projects from which they can choose.
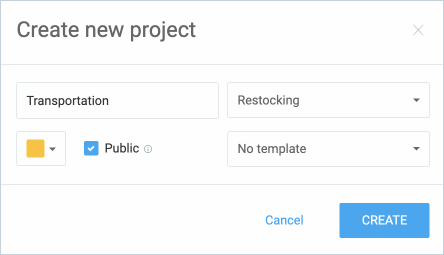
Then, when employees enter their mobile app, they will be able to select one from the list of projects and start the timer.
Categorizing time by projects, clients, and tasks will make it easier to filter and display the right information in the reports.
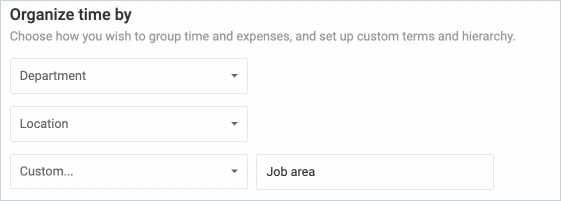
By default, time-tracking data in reports is organized through clients, projects, and tasks, but you can change it to something that better fits your business, such as department, location, job site, etc.
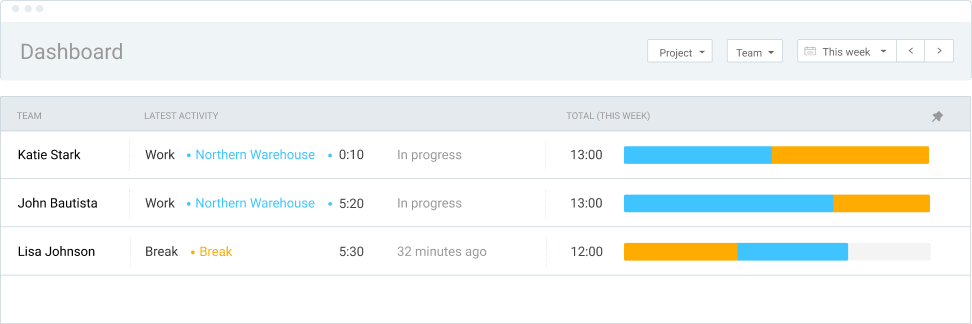
If you want to see which users are currently clocked in (via kiosk, mobile app, web, or desktop) and on which project, go to the Dashboard tab and check active users in the activity table.
Before employees start tracking time on their work, you can use scheduling to assign them a specific task or a project.
Once you publish the schedule, they will see their assignments on Clockify mobile calendar and can then start tracking time on them.
Preparing for payroll will demand you to go over the tracked time and review if each user reported their work hours correctly.
Clockify gives you access to a variety of reports, which you can customize for your needs.
You can customize and export reports by day, week(s), month(s), and even for a whole year.
Time & attendance reports
Attendance & overtime
At the end of each day, you can check the Attendance report to see individual user activity during the day – start, end times, overtime, breaks, time off, and total hours they worked.
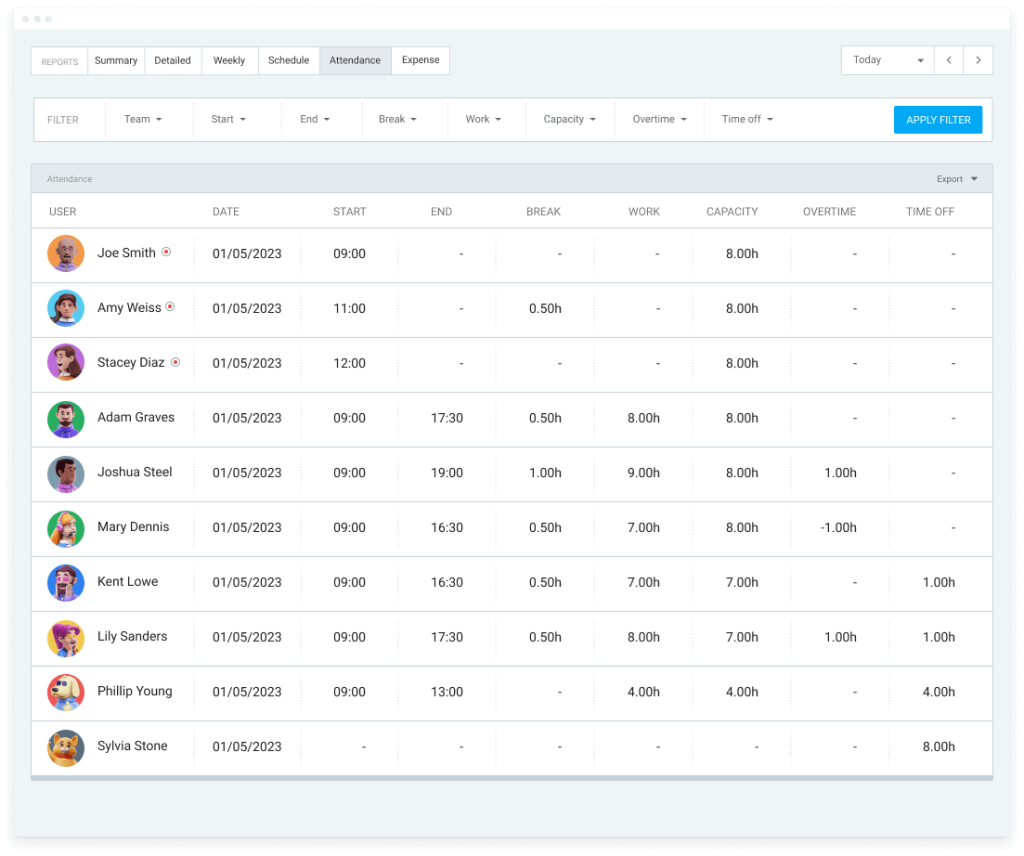
The attendance report allows you to see if some employees came in early or late, how much break time was taken, and who has overtime or time off during the week.
Time off
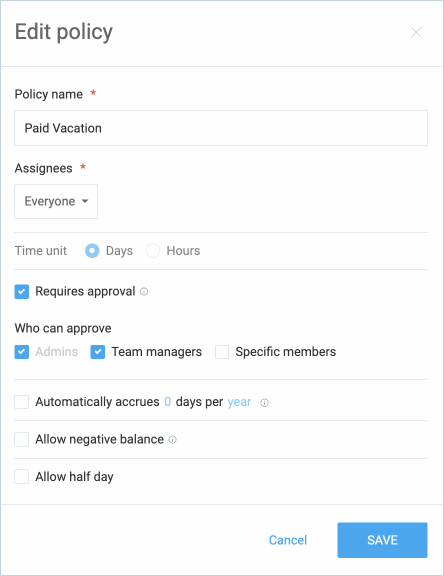
To manage employee time off, you should create vacation policies that apply to your company – paid vacation, earned vacation, maternity leave, sick days, etc.
For each policy, you must determine the people to which that policy applies.
For example, a Paid Vacation policy will apply to all employees, while maternity leave would apply to female team members only.
Those employees would then be able to request time off, while their team managers (or specific members) will approve or reject those requests.
Adding days off to the user’s balance will accrue to the total days off they have at their disposal.
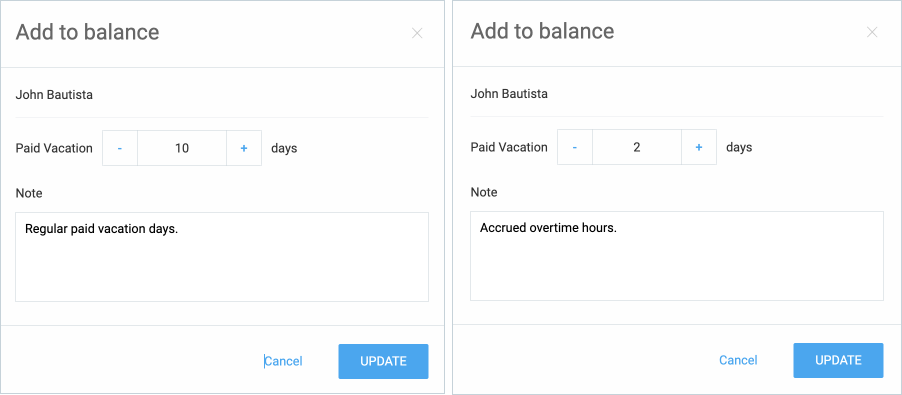
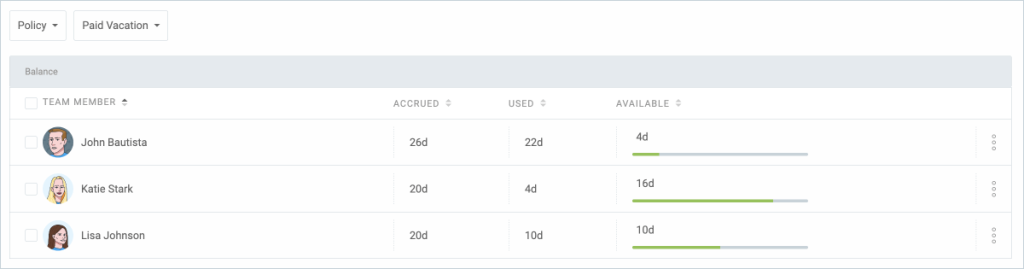
Time off balance for each employee can be tracked visually – you can see used, accrued, and available days at a glance.
The time off data will be visible on the Attendance report – you can see the hours someone requested as time off during the day. See more on how to set daily or hourly time off policies.
Customize & export reports
If you need more detailed information contained in your reports, here’s how to create custom user fields.
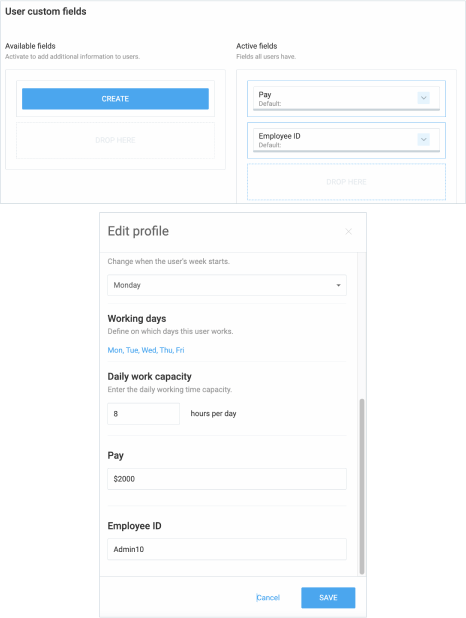
Once created, custom user fields will be visible in reports.
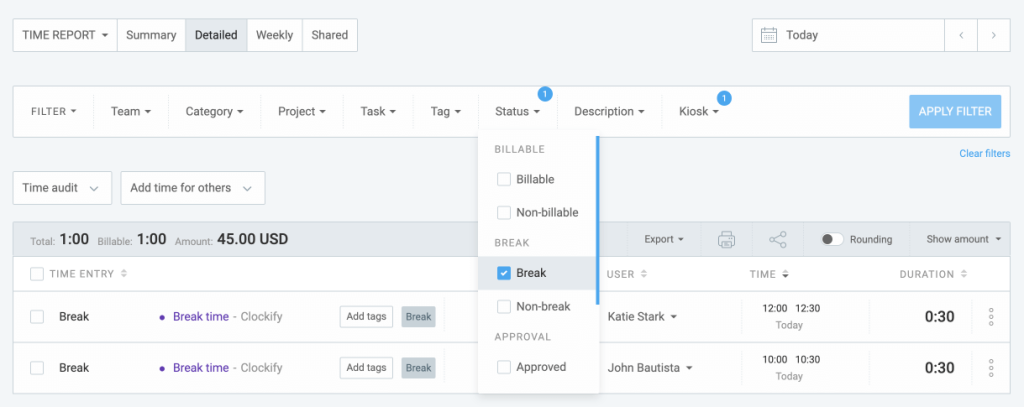
Before exporting, you can filter out the information shown on the Reports page by kiosk, user, dates, location, job area, or any other data you wish to see, and round time entries for cleaner reports and easier payroll calculations.
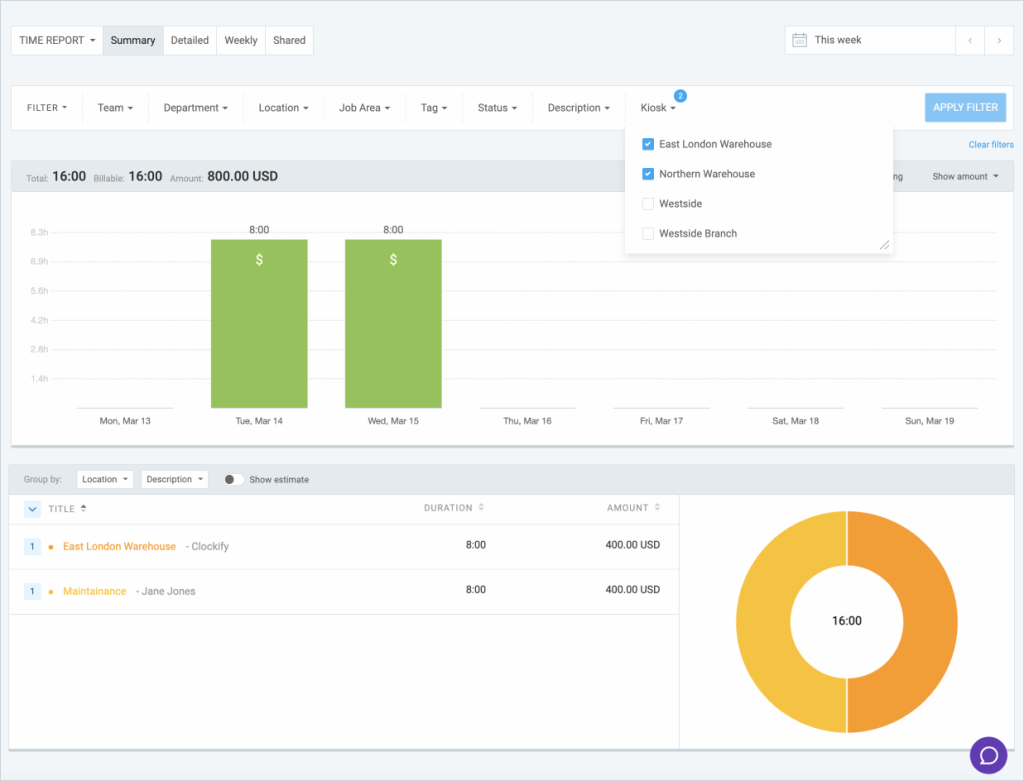
Time entries can also be filtered with or without breaks, and edited to make sure each user has a recorded break entry of a specific duration – if that’s important for your payroll process.
Reports can be exported as PDF, Excel, or CSV files to import into your payroll system.
Time tracking takeaways
Before opting for any of the time tracking methods, make sure to think about the nature of your business.
If your employees spend their whole daily working hours in one location and one particular project/task – then Clockify’s clock-in kiosk would be perfect for your business.
But, if they need to track time on different projects/tasks, or if they change locations during the day, then their working hours would be best recorded with the help of a mobile app.
Check out more on setting up & using Clockify kiosks, or mobile apps.