Time tracking is one of the most effective ways of keeping a record of your daily tasks. By monitoring your hours, you’ll have a better clue of how your workdays go by. Moreover, knowing how you manage your time at the workplace helps you see a bigger picture of your productivity.
If you have little or no experience at all when it comes to logging time, consider this article your manual. We’ll show you how to track time working on a computer and lead you through the major stages of the following time tracking methods:
- The paper method,
- the spreadsheet method, and
- two ways of using time tracking software.
The paper method
If you’re searching for an easy technique to track time spent on a computer/laptop, we recommend the paper method. Here’s what you’ll need:
- a paper,
- a pen, and
- a stopwatch or your mobile phone.
Now, before you start tracking your time, we advise you to make the list of activities for that day and add a date. Be sure to think about your priorities and put these assignments at the top of the list. For example, your priority is to implement the changes that the client requested. Give this task its name – “Implement client changes”. Do the same for other tasks.
Then, follow these steps of time tracking:
1. Start working on the first task.
Then, add the start time next to the name of the task. Let’s say it’s 9 am. So, this is your start time. Be sure to write it down next to the name of the task.
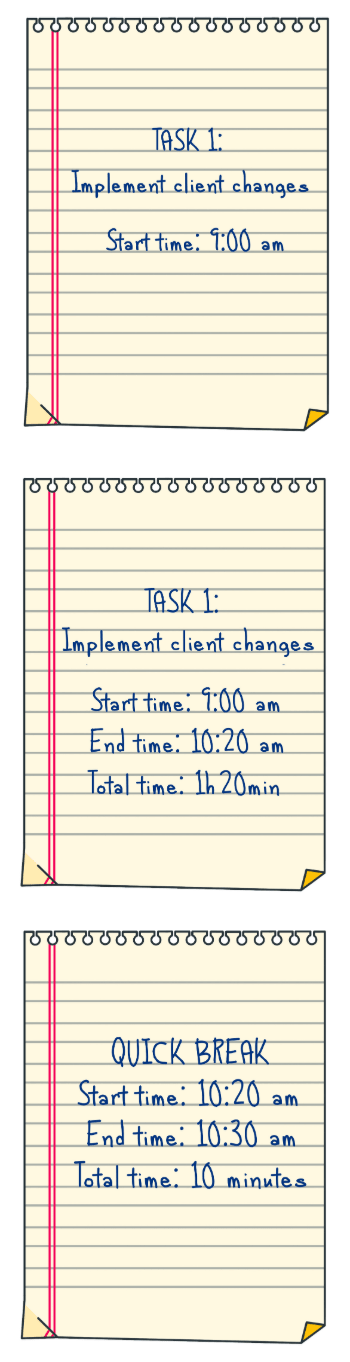
Task 1: “Implement client changes”
Start time: 9:00 am
2. Turn on a stopwatch and focus on work.
3. Turn off a stopwatch once you’ve finished with the task.
4. Add the end time and the total time. Look at the time results on the stopwatch and write them down. These results show you how much time you’ve spent dealing with the first task.
For instance, one hour and 20 minutes. This means that the end time will be 10:20 am.
Write down the end time and include the total time you needed for the task.
Here’s how that would look like:
Task 1: “Implement client changes”
Start time: 9:00 am
End time: 10:20 am
Total time: one hour and 20 minutes
5. Add your breaks, too. Remember to write down the start and the end time of each break:
Quick break
Start time: 10:20 am
End time: 10:30 am
Total time: 10 minutes
6. Repeat this process for every task throughout the day.
Although the paper method is convenient to use, it’s likely that you’ll misplace some significant reports, since they’re only on paper. The best way to avoid this situation is to scan the tracked date or take a picture of it once per week.
The spreadsheet method
This method consists of tracking time using Excel or Google sheet files, but a stopwatch as well.
We recommend logging your hours in one file for each month. For example, here’s how to do it for September:
- Open an Excel file or Google sheets.
- If you decide on Google sheets: click on “Untitled spreadsheet”.

Then, rename this file using your name and the month. For instance: “Time tracking data for Sep2020 – David Brown”.
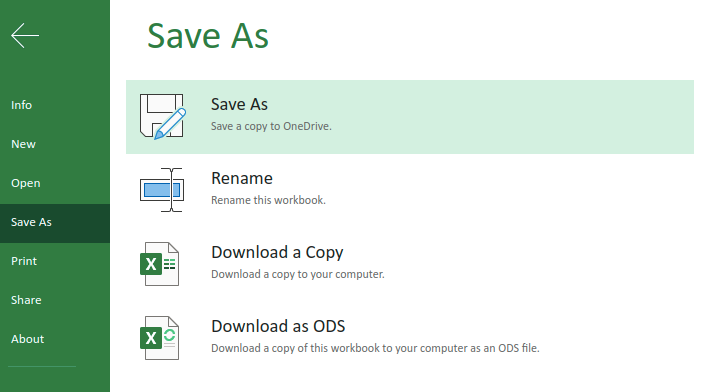
- If you choose to log in your time in Excel: go to File, Save as, Rename, then write down your name and the month.
Another practical tip is to log in each workday using a separate sheet. The method is the same for Google sheets and Excel:
- Add a new sheet by clicking on a plus sign on the left.
- Right click on each sheet to rename them. Finally, the sheets will be named by the dates.

Now, let’s take a look at the major steps of tracking time while working on a laptop, using a spreadsheet method:
- Choose the right sheet, based on today’s date.
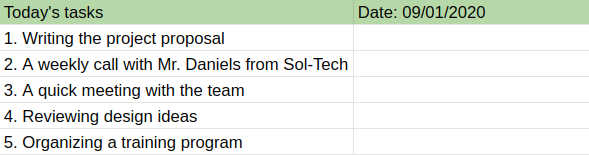
- The next step is adding the list of tasks. Much alike with the previous technique, think about your daily priorities. The most important tasks have to be at the top of the list. Other tasks can be done later. This is how that list should look like:
You can try making this list in advance. For example, at the end of the day, write down all your assignments for tomorrow. This way, you won’t waste any valuable time in the morning. In this case, be sure to add them in tomorrow’s sheet.
- Start working on your first task. Below your list of activities, you can create a new table of tasks, while performing them. Write down the name or a brief description of the task. In this case, the first task is “Writing the project proposal”. Adding a project name and client’s name is extremely useful, too.
- Turn on the stopwatch and add the start time. Once you note the start time, focus on your work.
- Turn off the stopwatch once you’ve finished with the task.
- Add the end time and the total time. When you write down these two components, you’ll know for sure how much time it took you to complete the task. This is an example of your first task:

- Remember to include your breaks. Let’s say you needed to take a break and have some lunch. The rule is the same as for the tasks: you have to add the start, the end time, and the total time.

- Repeat this process for every task and every break throughout the day. At the end of the workday, you’ll get a list like this:
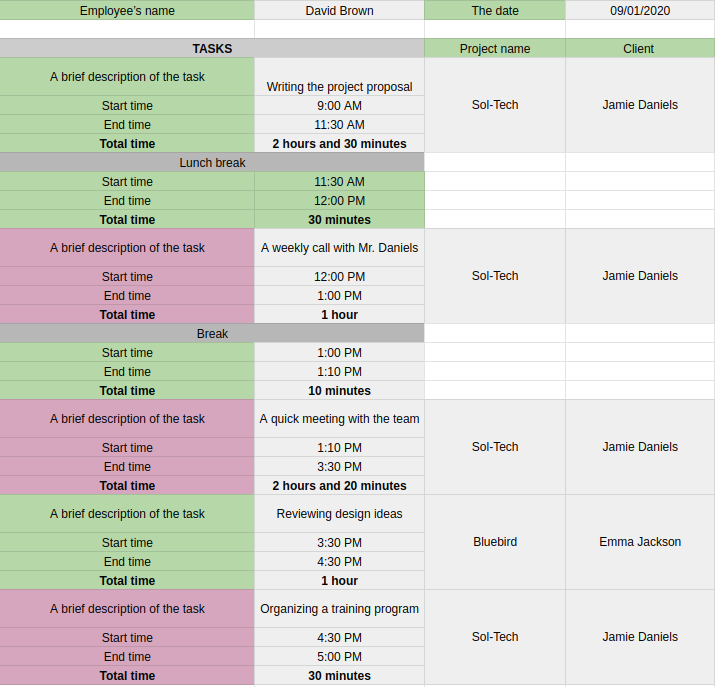
Tracking your hours with the spreadsheet method gives you a clearer idea of how much time you dedicate to each task, to particular clients, and particular projects.
The time tracking software
Unlike with the paper and the spreadsheet method, the time tracking software will automate the entire process of monitoring time. In addition, by employing the time tracking software, you can log in your hours directly from your desktop while working.
There are many ways of logging your hours with the time tracking software. We’ll show you two techniques that are quite straightforward:
- tracking time with a timer, and
- tracking time manually.
We’ll further explain both methods, but before we jump to that part, let’s clarify some details about opening the Clockify account. Based on your position within the company, there are two options:
- If you’re a manager/supervisor, you can create a Clockify account, and you’ll be an admin of the workspace. Then, you’ll be able to add your team by sending them invitations. So, your employees can start tracking time in the same workspace.
- If you’re an employee, you will receive an invitation from your manager.
Once you have opened an account, you can begin logging your work hours in your browser or you can install a desktop app. For example, if you’re using a Mac OS, just download a Mac desktop time tracking app.
Let’s review the major steps of these two time tracking methods.

Using a timer for tracking time
To be able to take advantage of this technique, you only need to log into your account in your browser.
Now, these are the stages of monitoring your hours with a timer:
- Select the Time tracker section on the left side of the screen.
- Add the name of the activity/task. You’ll see the box with the query “What are you working on?” on your screen.

So, this is where you’ll describe your task/activity, or add a simple task name.
- Add the project name. If this task belongs to the particular project, be sure to add the project name here, too.

- Add tags and billability status. Next to the Project button, there are Tags and Billability.

Tags are categories that help you organize your tracked tasks. So, if the name of the task is “Meeting with the client”, add a tag “meetings”. Speaking of billability status, you can choose between billable and non-billable activities. The main difference between these two categories is that billable activities are those tasks that contribute to the particular project and its progress. Besides, you’ll charge your client for these tasks.
- Start the timer by clicking the Start button when you begin working on the task.

The moment you click on Start, you’ll see that the timer is activated and there will be a Stop button next to it, like this:

- Stop the timer by clicking the Stop button when you’re done with the task.

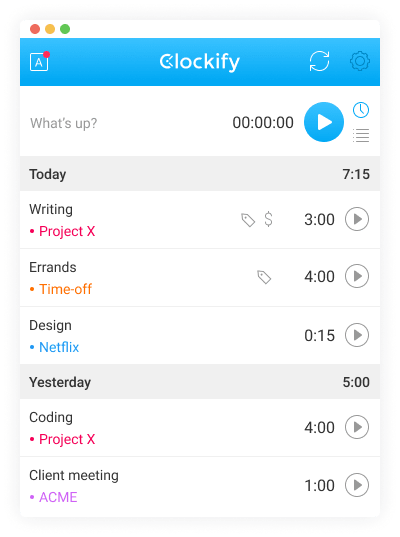
Here’s an example of tracking a couple of tasks during the day.
As you can see, each task has its name and a tag, as well as the time frame (the start time, the end time, and the total time). Only the second activity has been marked as billable here. In the upper right corner, you can see the total number of hours tracked that day. In this case, it’s 5 hours and 30 minutes.
- Whenever you take a break, remember to track it the same way.
Tracking time manually
If you pick to monitor your time manually, you’ll add your work hours at the end of the day. So, be sure to remember or write down the exact time when your workday started.
When it comes to tracking time manually, you’ll need to follow this set of actions:
- Log into your account and select the Time tracker section.
- Add the name of the activity/task. As you can see here, the question is “What have you worked on?”.

So, once you’ve completed your first task of the day, be sure to add it. Write down the name of the task or its brief description by clicking the box with this question.
- Next, add the project name. We mentioned this part earlier. You can assign the task to a particular project.
- Add tags and billability status. The rule is the same as when tracking your time with a timer.
- Add the start time, the end time, and the date. Instead of using a timer, you’ll need to add the start and the end time manually. Besides, choose the current date.

- Click the Add button to track your time.

- The routine will be the same for other tasks. At the end of the day, you’ll see the list of all tracked activities, as well as other details: their project names, billability status, tags, and total time tracked.

If you’ve been dealing with only one type of activity that day, you’ll input only that.

- When it comes to your breaks during the day, you can add them the same way.
No matter which method you pick, you can track your time straight from your desktop. Aside from the above-mentioned macOS, you can use Clockify as a Windows time tracker or a Linux time tracking tool.
Use Clockify integrations to track deadlines on tasks
With a paper method, you’re highly unlikely to track deadlines efficiently. Likewise, a spreadsheet isn’t a great way to go about reaching those goals and milestones.
But one thing that always works is a project-tracking system like Clockify by CAKE.com, which keeps tabs on your work hours via a timer.
To make your project tracking even more powerful, try a task management tool like Plaky to:
- Keep all your tasks in one place,
- Assign them to team members with a single click, and
- Add dates, tags, links, files, and more whenever you need a bit of inspiration.
Get a glimpse of the Plaky app below, and you’ll notice a nifty board — a perfect asset for staying on top of your work.
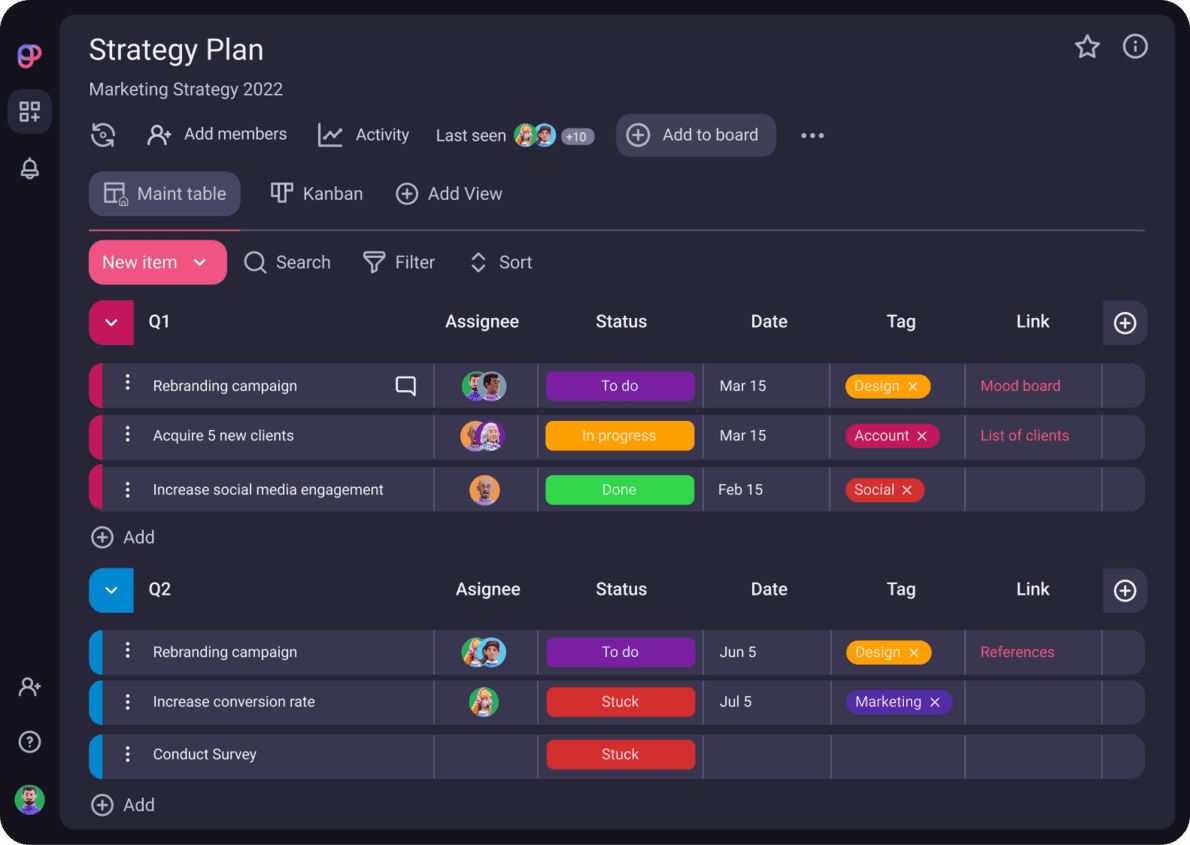
With its simple interface, you can easily set targets with Plaky notifications. For example, if you miss a deadline, you’ll get an email notification about this. You’ll also get a notification whenever someone tags you in comments or tasks — or completes an action that’s associated with your board.
So, you’re 100% covered, making it almost impossible to miss deadlines.
Now, you can supercharge your workflow by using the Clockify time tracker in Plaky. This way, you’ll record time spent on tasks in Plaky and make things as transparent as possible to everyone on your team.
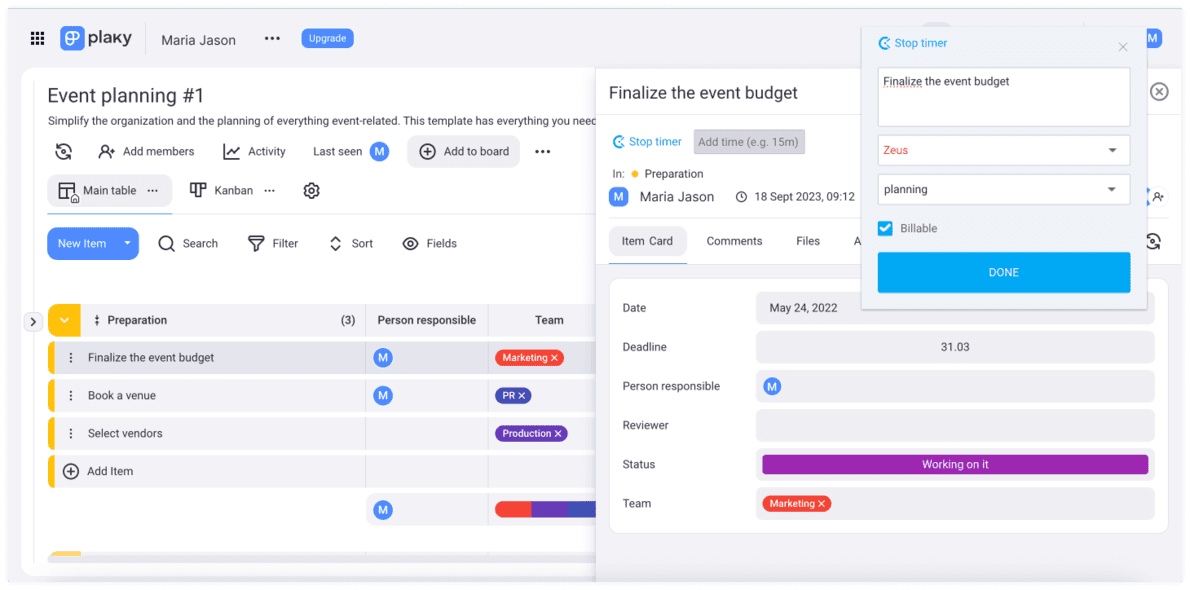
You just need to choose between Chrome, Firefox, and Edge browsers and click on Start timer in Plaky. This information will feed back into your Clockify account for you to review at any point and refine your workflows over time.
And for a more transparent, collaborative work environment, you can try Pumble. Pumble is a team chat app that simplifies communication within a team by sending messages, organizing video calls, sending files, and much more. In fact, you can have all 3 apps — Clockify, Plaky, and Pumble — to manage time spent on tasks even more efficiently at a special CAKE.com Bundle price.
Get started with CAKE.com today
How we reviewed this post: Our writers & editors monitor the posts and update them when new information becomes available, to keep them fresh and relevant.