API & webhook settings
Clockify allows you to manage and configure advanced settings for your profile such as webhooks and API keys. This way get more control over your account’s security and efficiency.
API keys #
There is a limit of 30 requests per hour per workspace for Free plan users.
Find your API key settings in the Advanced tab of your Profile settings.
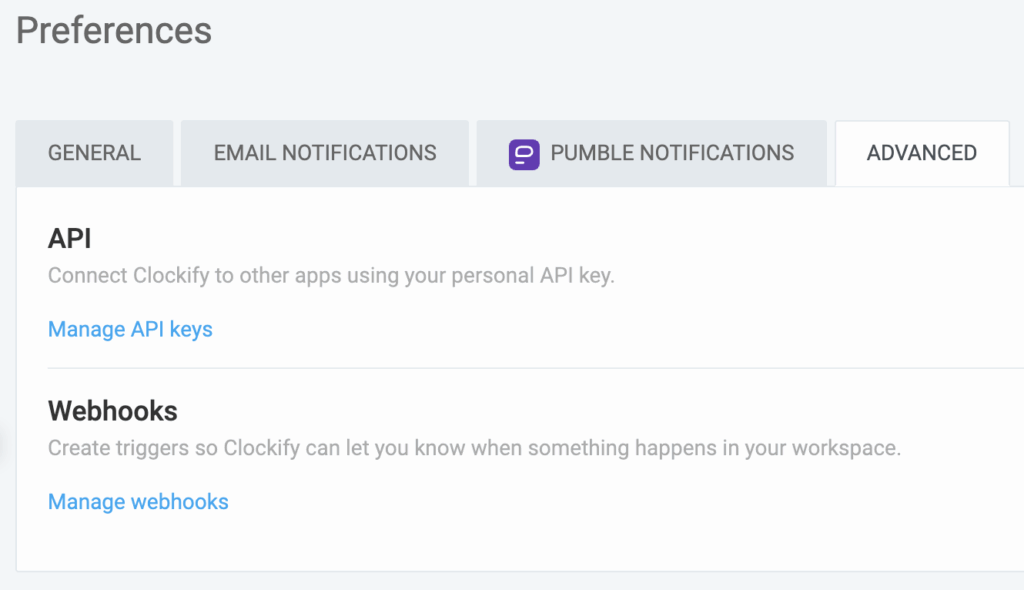
Click Manage API keys button and see a list of all the APIs you’ve generated on the page that opens.
Here, you can manage your API keys in a few different ways.
Generate API key #
To create a new key:
- Click Generate new at the top right corner of the page
- Generate API key window opens
- Enter a name for your new API key
Give a descriptive name, so that you know what it is for. - Click Generate
Your new key will be automatically created and added to the list on the Manage API keys page.
Edit API key #
If you need to make some changes to the API key:
- Click the three-dots menu next to the API key you want to disable
- Choose Rename/Delete option
- Enter new name or click Delete to confirm the action

New API key name is automatically updated on the Manage API keys page.
After being deleted, that API key can no longer be used and is automatically removed from the Manage API keys page and the Accounts tab in the Workspace settings.
Webhooks #
This feature is available to Workspace owners and admins. The webhooks section is not visible to other user roles.
There is a limit of 3 defined webhooks per workspace on a Free plan.
Create webhooks to receive real-time notifications and data updates.
Follow these steps:
- Go to Preferences
- Select the Advanced tab
- In the Webhooks section, click on Manage webhooks
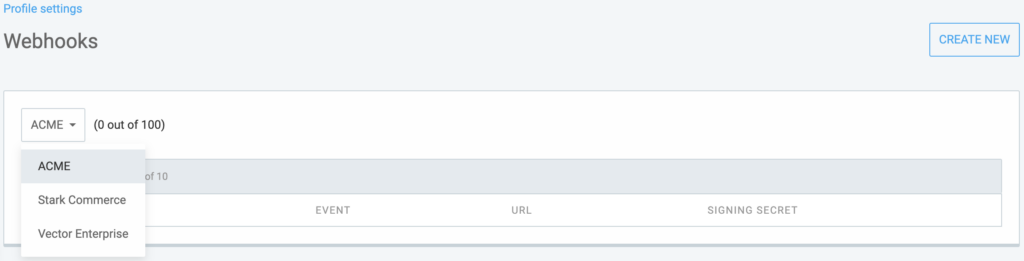
- You will be redirected to the Webhooks page
If you are part of multiple workspaces, choose the relevant workspace.
To create a new webhook:
- Click on the Create new button at the top right corner
- In the Create webhook window, provide the following details:

Name: Specify a name for your webhook
Endpoint: Enter the webhook’s endpoint URL
Event: Choose the event that will trigger the webhook - Click on Create to complete the process
If you are part of multiple workspaces, choose the relevant workspace.
Created webhook events are sorted in alphabetical order.
The webhook event can be disabled while created, if Clockify workspace is not on the subscription plan that supports this feature.
Webhook details #
If you’d like to see webhook details, you can do that by opening a three-dots menu of that webhook.
- Go to the webhook you’d like to examine
- Open Details in the three-dots menu
- New page opens with the list of Webhook attempts
Here, you can see the attempt time and status of the event.
Attempt time follows the format set in the preferences.
Test webhook can also be displayed in the Webhook attempts with the appropriate status and payload.
Webhook retry mechanism #
Clockify uses an automated retry mechanism to handle temporary outage or endpoint issues.
If your domain is unavailable, the system will automatically retry sending the webhook up to 4 times over a 72-hour period:
- Retry 1: 12 seconds after the failure
- Retry 2: 10 minutes later
- Retry 3: 30 minutes later
- Retry 4: 72 hours later (for long-term outage)
Only 2xx HTTP responses are marked as Succeeded. Timed-out or non-2xx responses are marked as Failed or Retrying.
You can click Resend on any webhook attempt, regardless of its current status. If the manual resend is successful, the status will be updated to Succeeded.
There is a color-coding to your Preferences tab to help you track statuses at a glance:
- Webhook status: Active, Disabled
- Attempt status: Succeeded, Retrying, Failed

Edit webhook #
If you’d like to modify any data related to the webhooks, you can do that by choosing the editing option.
- Go to the webhook you’d like to edit
- Open Edit in the three-dots menu
- New page opens with the list of Webhook attempts
Here you can modify all the elements of the created webhook:
- Change webhook name
- Change endpoint URL
- Choose another event from the dropdown
- Change (reset) Signing secret
Delete webhook #
If you’d like to delete webhook that is deprecated or you’re not using anymore, you can do that in the following way:
- Go to the webhook you’d like to edit
- Choose Delete in the three-dots menu
- Click Delete in the confirmation window
Marketplace webhooks #
In the Clockify marketplace, add-on users don’t have a Resend button in add-on webhook attempts.