Payment process
This article will walk you through the process of payment when signing up for the Clockify subscription plans. You’ll be guided through the flow of the successful payment and also get some tips on what to do if the payment fails.
When you subscribe to a paid plan on Clockify for the first time, you need to complete the following steps:
- Once you logged in, click the Upgrade button at the top right corner of the page
- You’ll jump to the Plans tab in the Subscription page
- Choose the plan you’d like to subscribe to and the billing cycle (monthly/annually)
- You’ll see the three steps you need to complete to activate your subscription
Step 1 Customer info #
In the first step, you need to provide some basic information about you or the organization you represent.
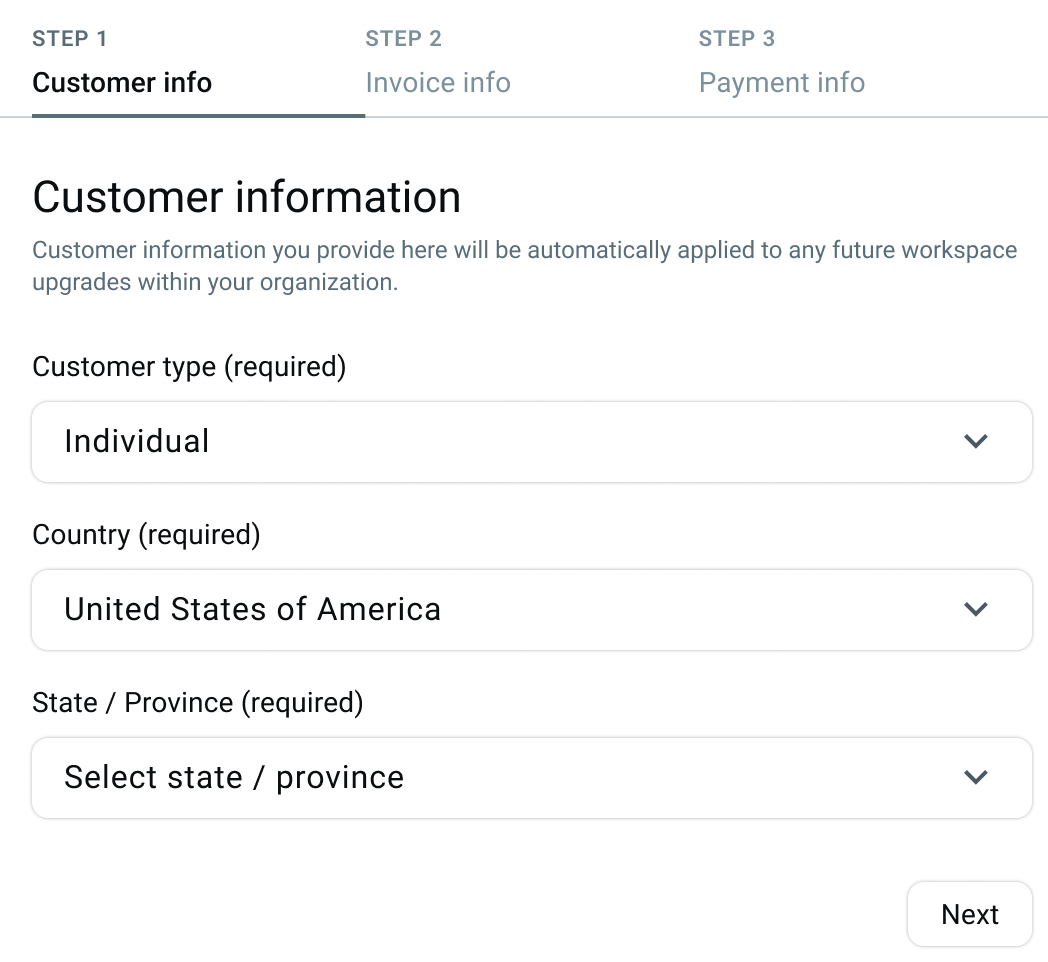
In the Customer type field, choose if you’d like to be registered as:
- Individual
or - Company / Organization
Individual implies that you, as a self-employed or freelance individual, are subscribing to the app. When filling out the information, country and company names are optional.
Billing and usage details associated with the subscription are linked to you as an individual.
This is suitable if an individual user is using Clockify as a productivity tool.
Selecting for Company / Organization indicates that the subscription is intended for a group, company, or collective entity. The billing and subscription details are tied to the organization’s name.
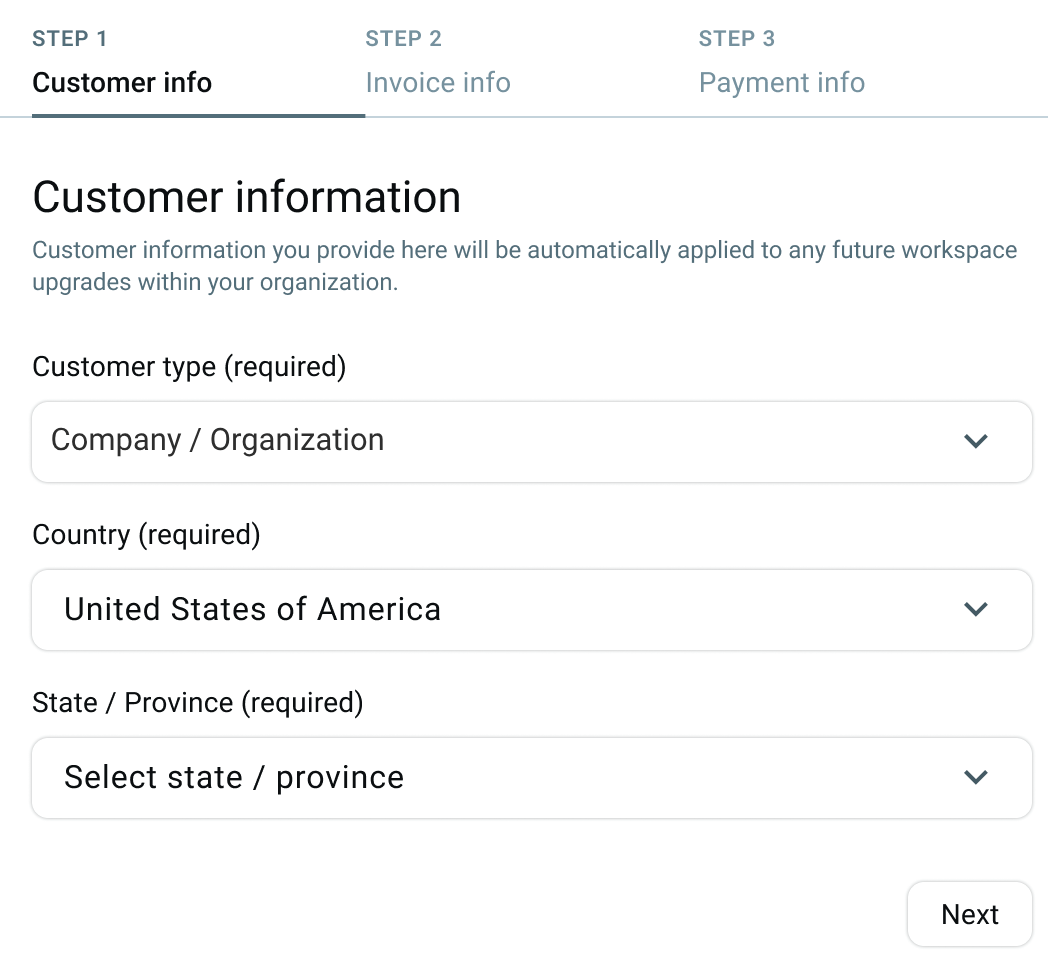
This is useful when Clockify is used as a productivity tool for a team or business, allowing teams within one organization to access and use the app under a single subscription.
Keep in mind that when you opt for a Company/Organization as a Customer type for the first time, or switch from Individual to Company/Organization Customer type, you need to choose the Country (required) you/your organization is based in. Tax policy of the country you choose here will determine the specific fields you’ll see in Step 2.
In case you’d like to switch from individual to company/organization, you have the option to add the info related to your company.
If you had set Customer type as Company / Organization in Step 1, you cannot switch to Individual after you subscribe. However, you can switch from Individual to Company / Organization Customer type.
The State/Province field may be required based on your selected country.
Only workspace owner can edit information provided in this step.
Step 2 Invoice info #
Here you should provide us with more details including email and additional details needed to properly invoice subscription payments.
The form differs based on the customer type you previously chose.
- Individual:
- City
- Postal code
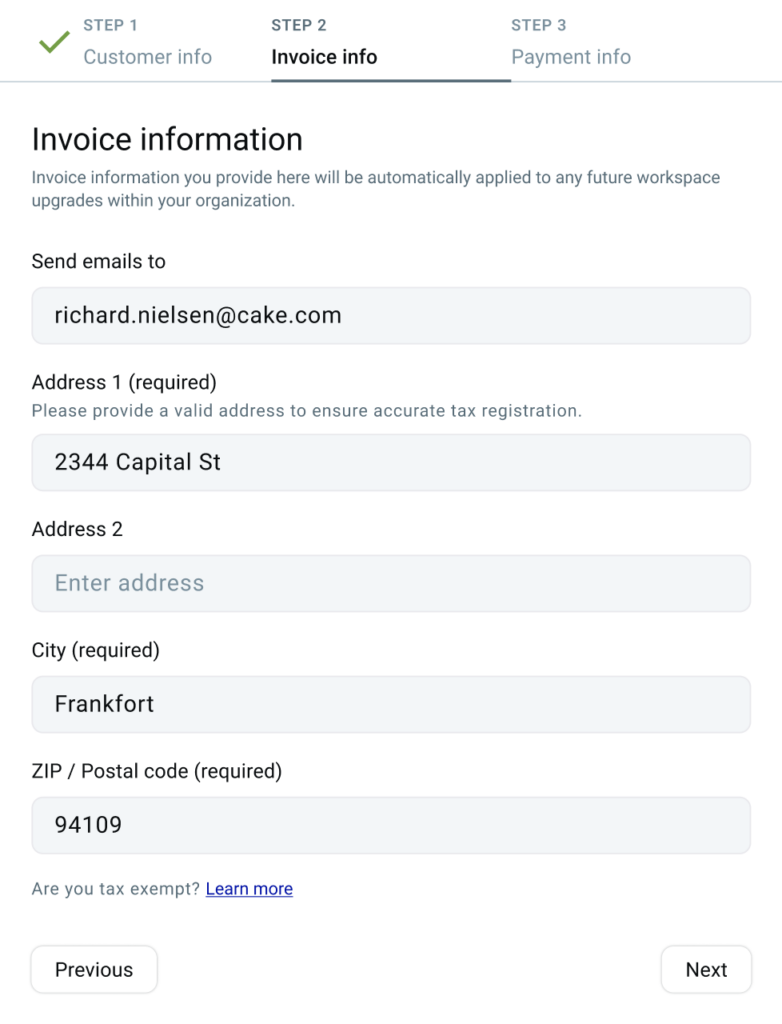
Individual customer type
- Company/organization:
- Company name
- Address (if required*)
*Address in the Invoice info tab is required for Individual and Company/Organization customer types based in the US only.
All prices are shown exclusive of taxes. If VAT applies based on your country’s regulations, it will be added to the final price, which you can review at checkout before completing your payment.
Example of how tax is added to the subscription fee:
Consider a scenario where a company located in the United Kingdom (UK) subscribes to Clockify. Since the UK applies tax to digital services, the subscription fee will include this tax. Now, let’s assume that their monthly subscription fee is $50. When the company proceeds to pay, they will be charged an additional 20% for tax, making the total amount $60 ($50 for subscription fee + $10 for the tax).
In specific cases when the Customer type is Company/Organization with the Country with multiple tax types, you’ll get Tax type and Tax ID fields that you need to fill out.
After you’ve filled out all the necessary information, click Next step and proceed to Step 3.
Only workspace owner can edit information provided in this step.
Tax exemption cases #
Some businesses in the US are eligible for tax exemption, meaning they do not need to pay sales tax on their subscriptions. To validate your tax-exempt status, please email us at billing@mail.cake.com with the following information:
- Tax Exemption Certificate addressed to CAKE.com Inc., 2100 Geng Rd STE 210, Palo Alto, CA 94303, USA
- Email address associated with your subscription or the email address of the account owner
We’ll review your submission and apply the tax exemption accordingly.
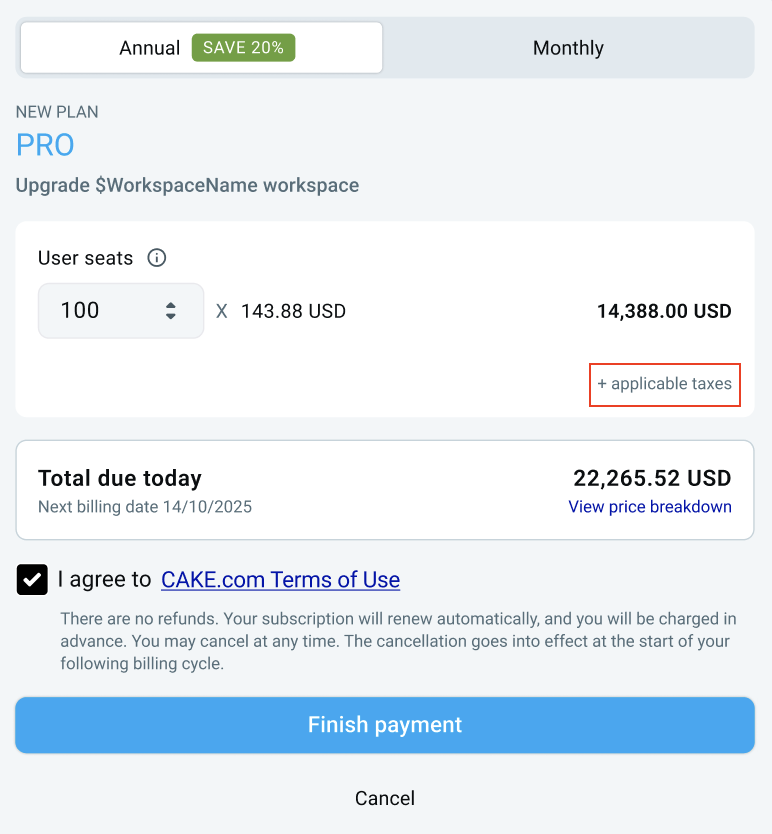
Step 3 Payment info #
In this step, you need to enter all payment information including information about your credit card and check our Terms of Use.
- Enter your credit card information
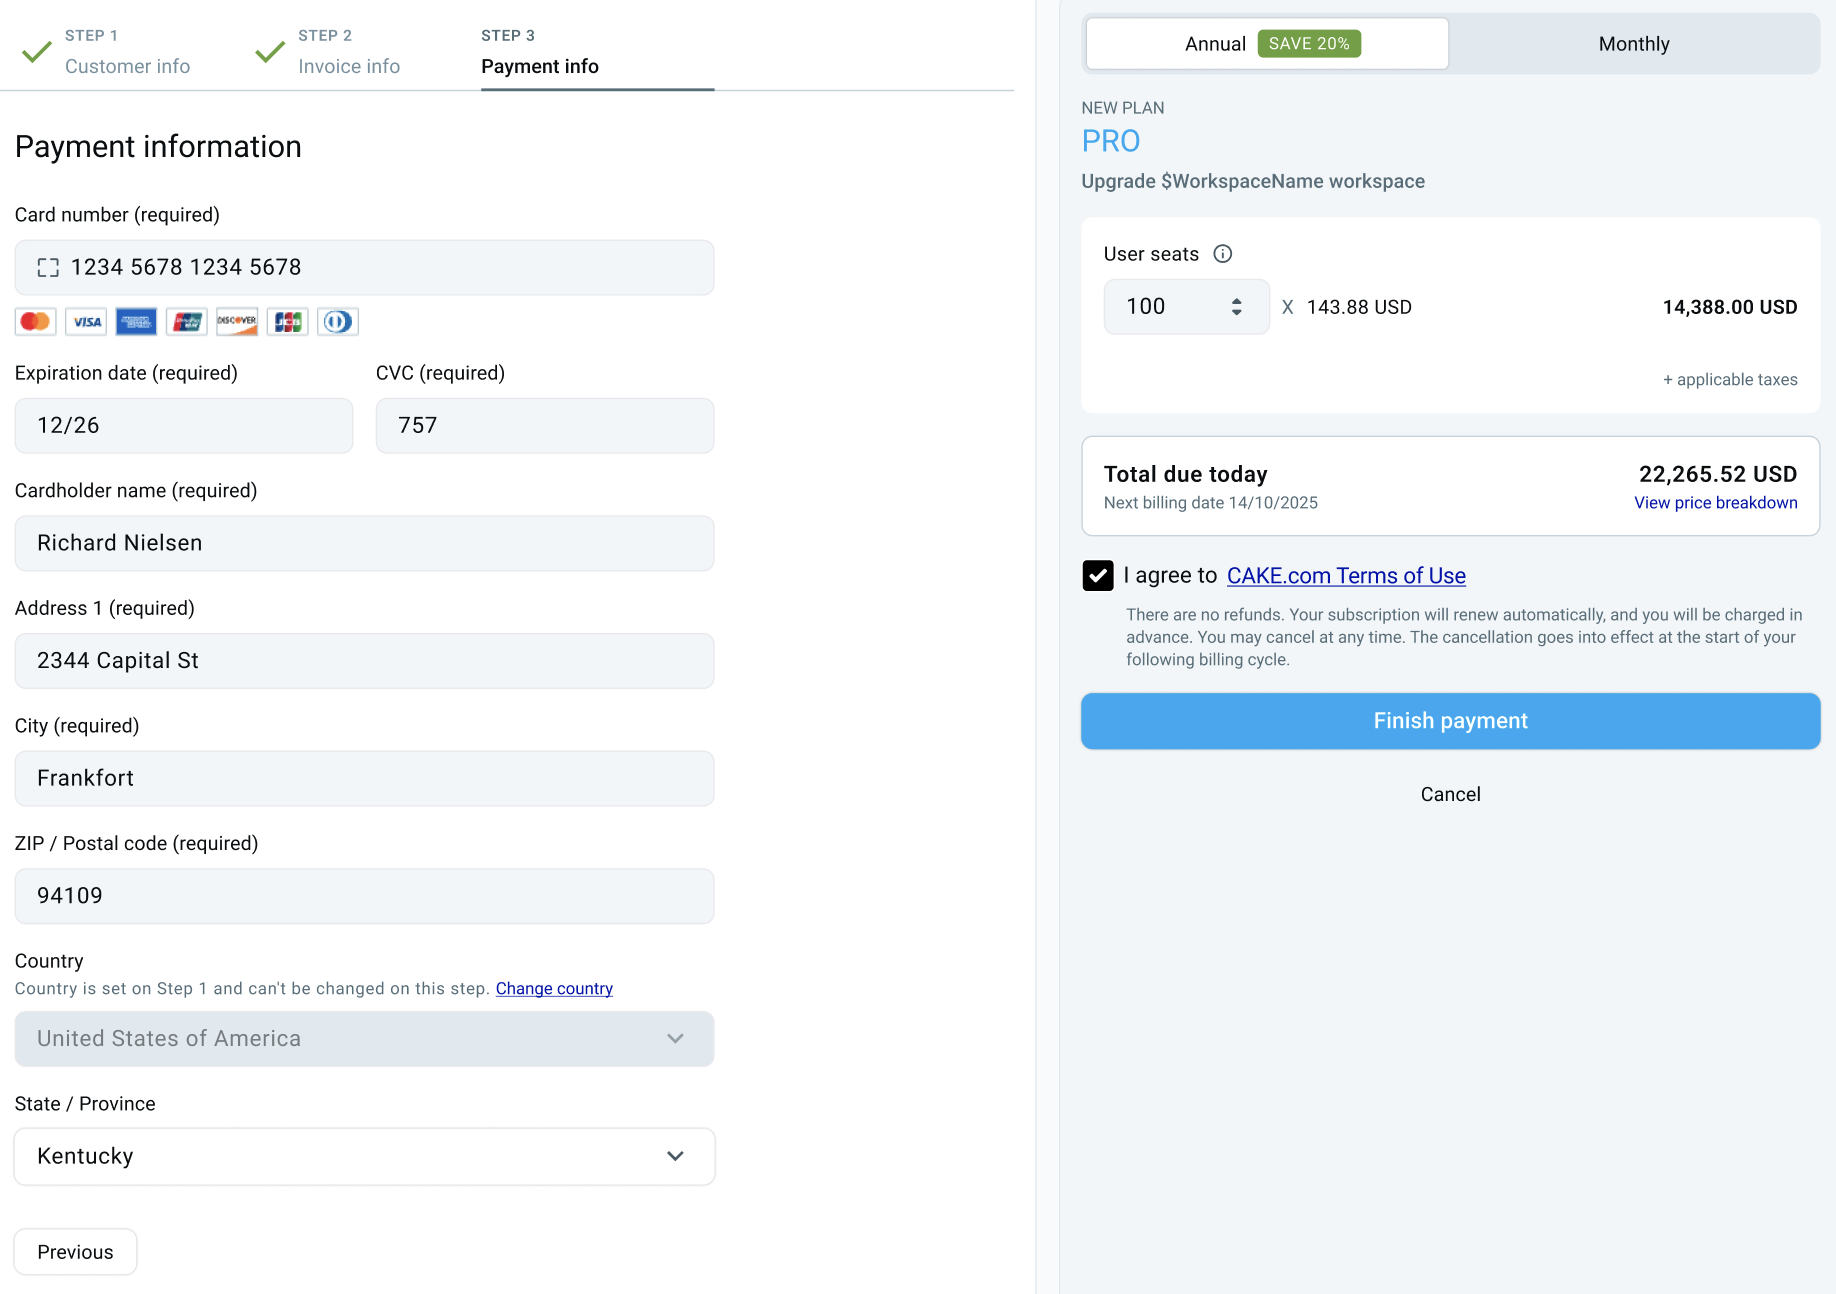
- Click Finish payment
You will be charged and will immediately get access to Clockify’s paid features
Clockify currently supports only payments made by credit card.
Based on country/state selected in the Customer info, the subscription cost are displayed in one of the currencies:
- USD
- EUR
- CHF
Important to note:
- Payment is tied to your workspace. If you have multiple workspaces, you need to pay a subscription fee for each workspace separately.
- Payment is done securely through Stripe. Clockify doesn’t store any credit card information.
- Your subscription is automatically renewed each month/year. This way, you don’t have to worry about forgetting to renew the subscription and disabling some features in the process (like locking timesheets).
- We generally don’t offer refunds, unless there was a system error. In that case, contact our support at support@clockify.me so that we can sort things out.
Subdomain #
If your workspace is on subdomain and it has an auto-join option enabled, new users can join only if there are available seats.
In case all seats are occupied, users will get a message that there are no available user seats. In case this happens, the owner or admin will receive a message that someone is trying to join their workspace, but that there are no user seats available.
To help you proactively manage your account, Clockify will also notify owner/admins when 90% or more of user seats are used up and provide instructions on how to purchase more.
Failed payments #
If you have a valid subscription, but your payment failed (e.g. incorrect payment information, insufficient funds, expired credit card), you’ll get a two-week grace period (payment overdue). During this grace period you can go to your Subscription page and update your payment information. After that, our payment processor will try to process the payment, again.
If the payment wasn’t processed by the end of the grace period, and the grace period ends, you’ll be downgraded to a free plan. As a result, you won’t lose your data, only access to paid features.
If your payment has failed, and you’re not sure why, feel free to contact Clockify support at support@clockify.me.
FAQ #
How to resolve failed payment? #
If your payment fails and you’re unsure of the reason, there are steps you can take to troubleshoot and resolve the issue.
First, verify if 3D Secure is enabled for your card. Making sure that 3D Secure is activated on your card can help prevent unauthorized transactions and provide added security during online payments.
Also, you need to confirm whether your credit card has been authorized for online payments. Some credit cards may have restrictions or require prior approval for transactions conducted over the internet. Verifying the authorization status of your credit card can help identify any potential issues that may have led to the payment failure.
Users with cards issued in India – how RBI regulation affects your subscription? #
As of October, 2021, if you are a holder of a card issued in India, you need to authorize merchants (such as Clockify) to make recurring charges to your card.
Since this regulation came into force, it led to an increased number of failed payments for our users with cards issued in India.
Rest assured that Clockify has done everything to comply with these regulations. This means that you need to authorize Clockify to be able to collect recurring payments. Before your subscription renews, you will receive an email to confirm your payment.
The email is sent to the address you entered in the Invoice information on your Subscription tab. Simply confirm the payment and everything should be alright from there.
For payments with a recurring charge greater than 5,000 INR (~66 USD), you need to authorize each recurring payment. This means that every time your subscription renews, you need to confirm the payment in the confirmation email you received from Clockify. Only this way will the payment be successful.
Helpful tips: #
- Make sure you’re using a card that supports AFA (if not, you can change your card by going to the Payment information section in the Subscription page
- Check your email to see if you have received an email to authorize the payment
- Contact your bank to confirm and authorize the payment