Manage scheduled team assignments
When managing a team, one of the key responsibilities is to efficiently manage team assignments. These are the steps and features that can help you achieve that.
Scheduling is a paid feature, which you can enable by upgrading your workspace to the PRO or ENTERPRISE plan.
Permissions #
| Action/role | Owner/admin | Project manager | Team manager | Regular user |
| Schedule project/assignment | ✔️ | ✔️for their own project* | ✖️ | ✖️ |
| Create assignment | ✔️ | ✔️for their own project* | ✔️for themselves only** | ✔️for themselves only** |
| Edit assignment | ✔️ | ✔️for their own project* | ✔️for themselves only** | ✔️for themselves only** |
*If permissions in Workspace settings are set to Admins and Project managers or Anyone
**If permissions in Workspace settings are set to Anyone
Create assignments #
The first step is to create an assignment:
- Navigate to the Project or Team tab
- Expand an existing project
- Click + to add new project or member
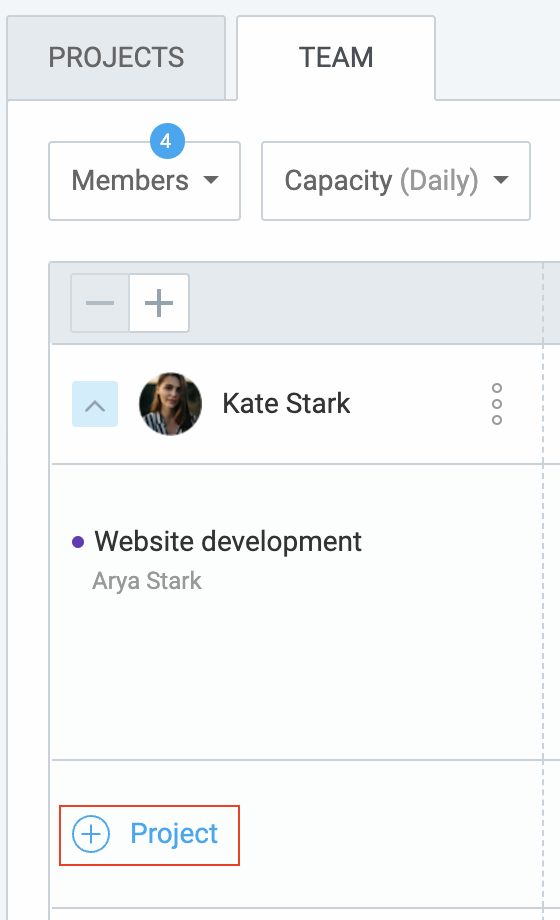
- After you choose project/member Create assignment window opens
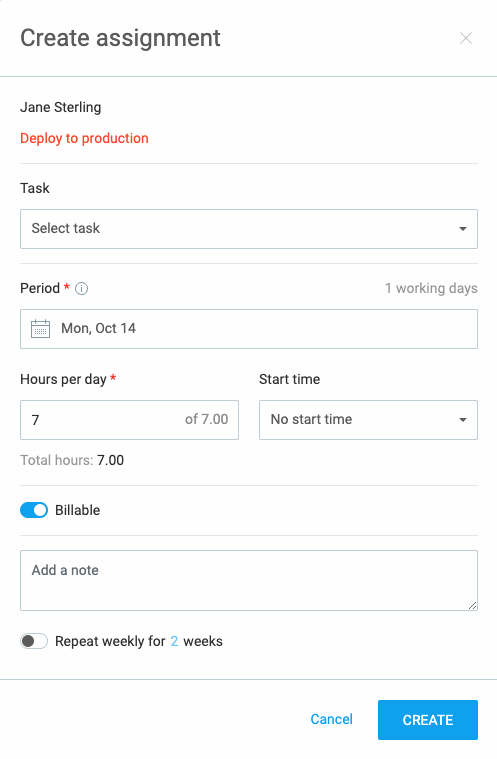
- Here, you can:
- Use the timeline to add a block or drag for a range
- Specify the hours and optional start time
- Add any necessary notes
- Set up billability
- Choose if the assignment repeats weekly
Click Create and complete the process.
Create multiple assignments #
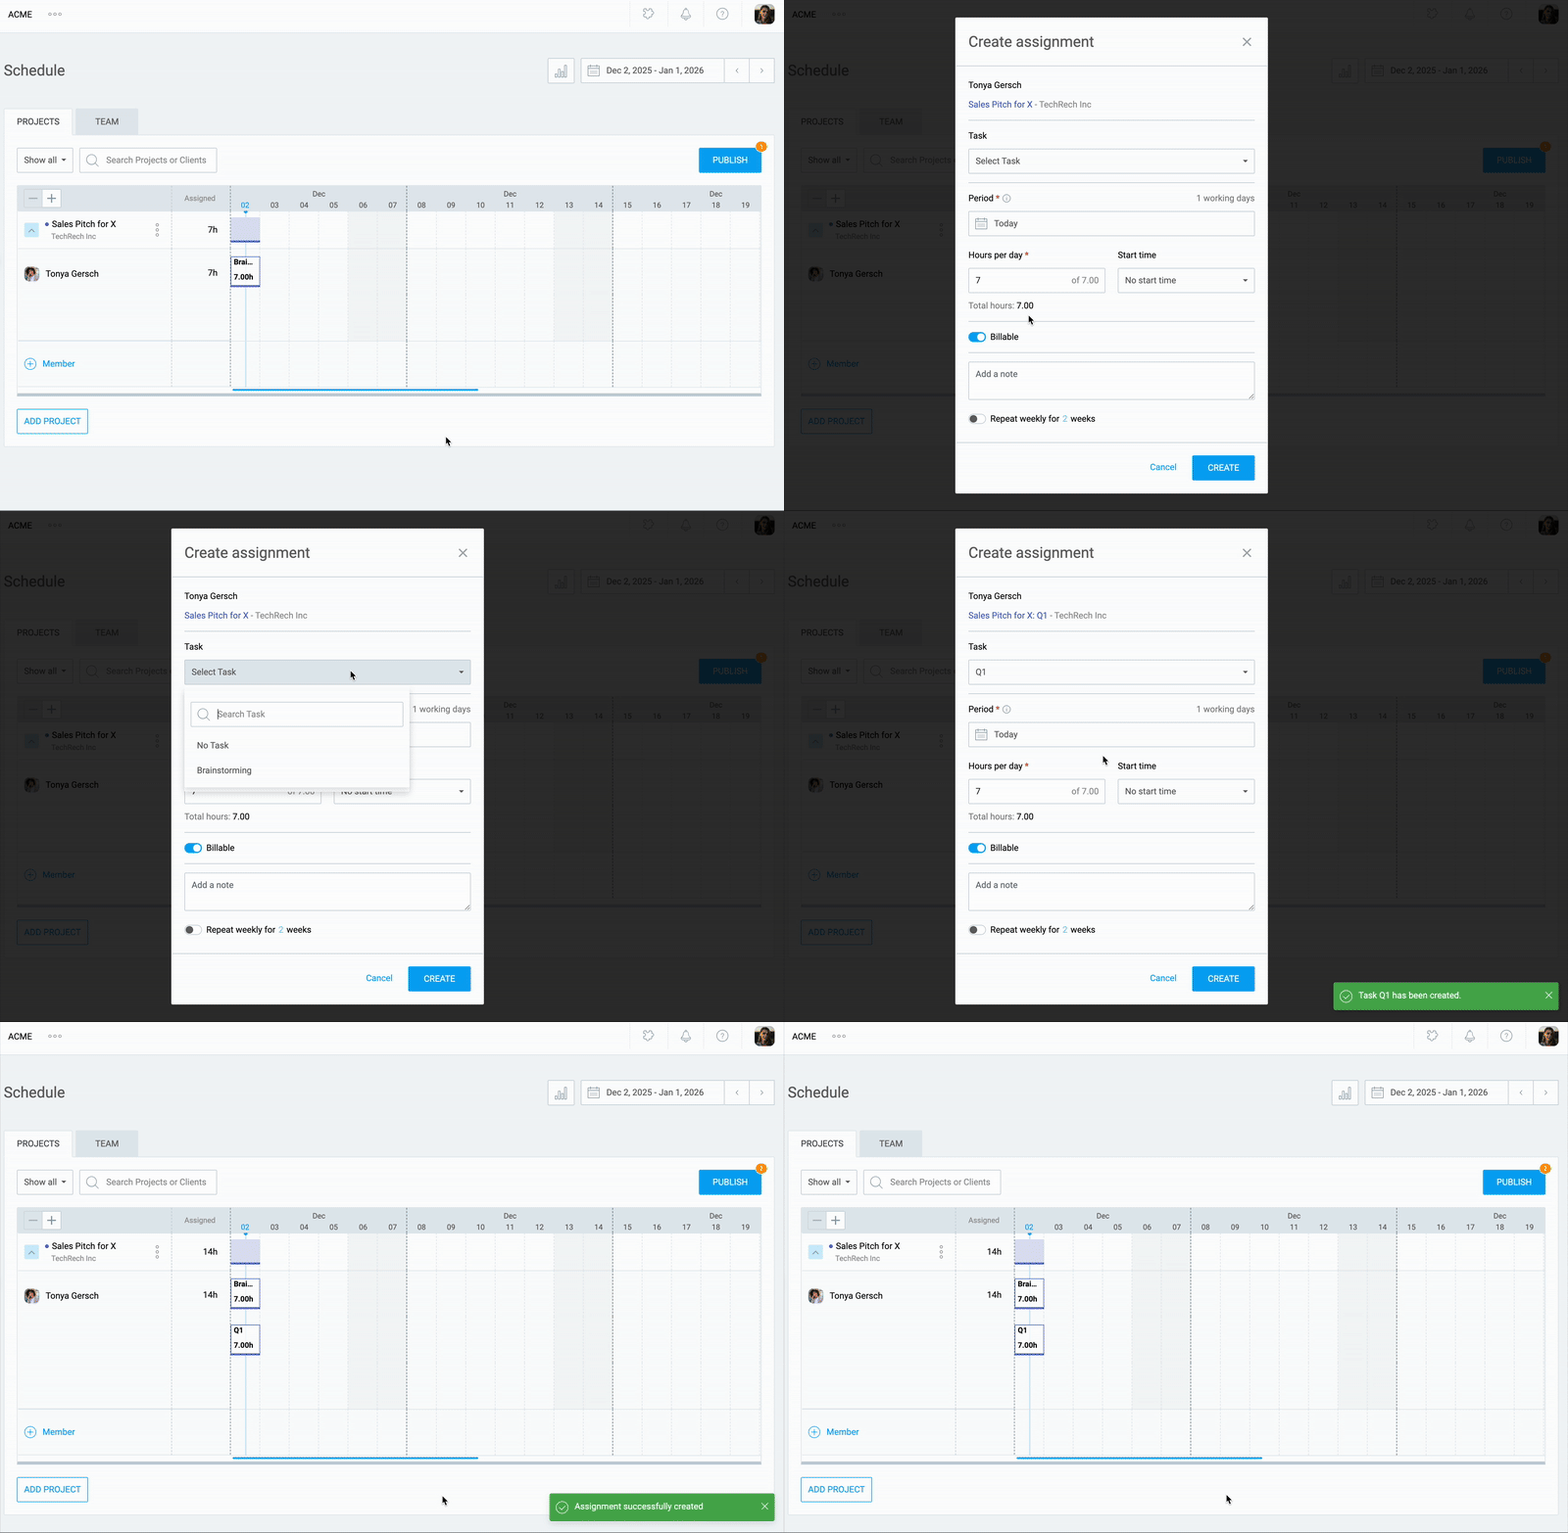
You can quickly create multiple assignments for the same project:
- Navigate to the timeline in the Projects or Team tab
- Hover over the timeline under the date you want the assignment to start (plus sign appears)
- Click the timeline
- Create assignment window opens
- Optionally make the changes and click Create
Edit and customize assignments #
Once assignments are in place, it’s important to know how to tweak them as needed.
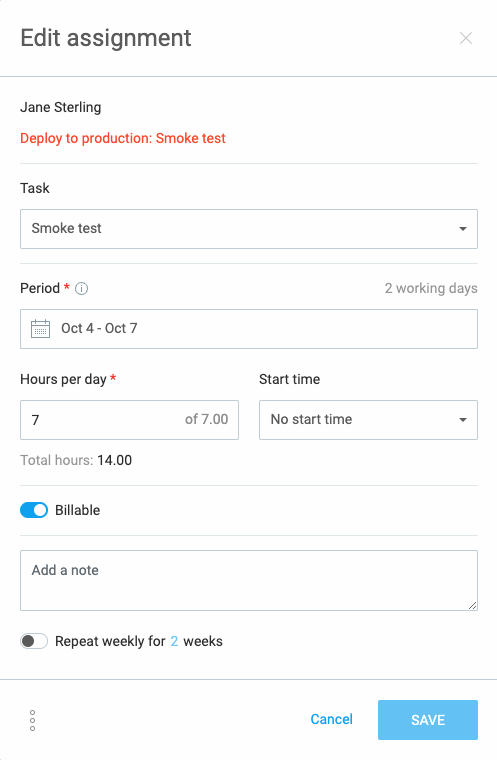
Edit assignment:
- Click on the assignment in the timeline
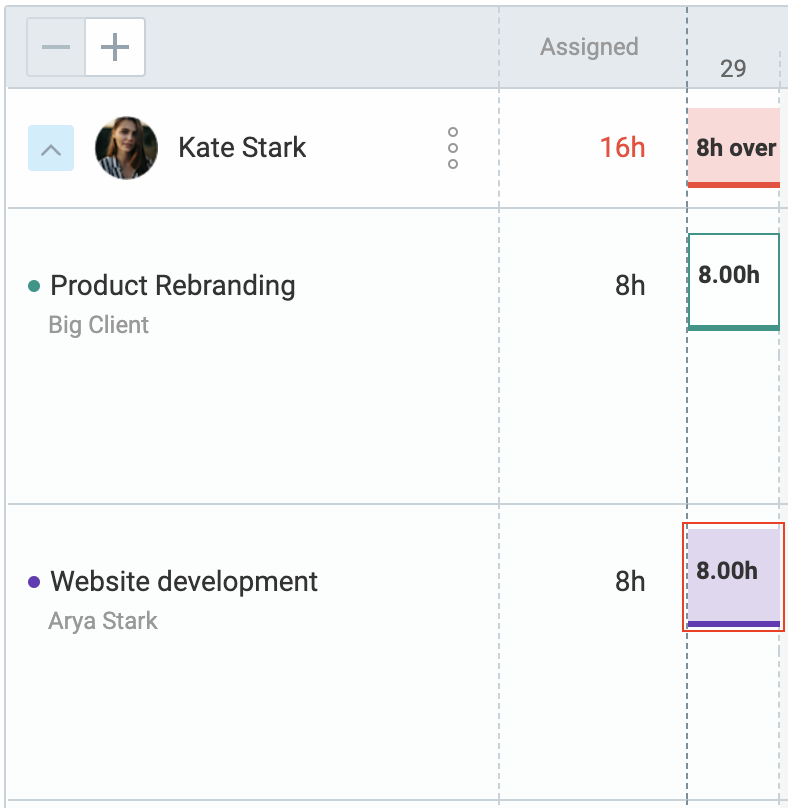
- Make changes, or drag manually to adjust dates
Split assignments #
- Hover over the line between days
- Click on the timeline to split

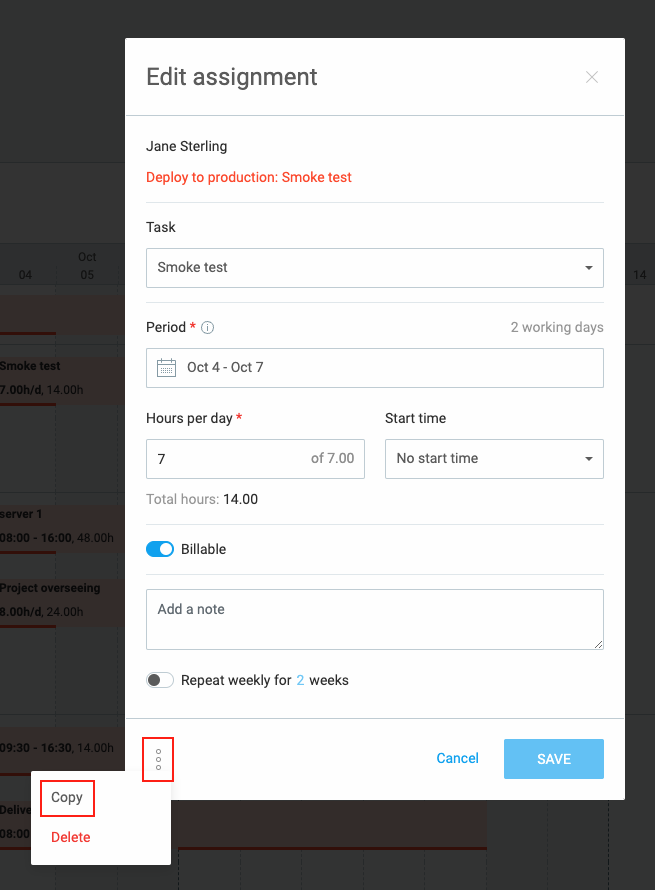
Copy assignments #
- Open assignment
- Click on the three dots
- Select the recipient
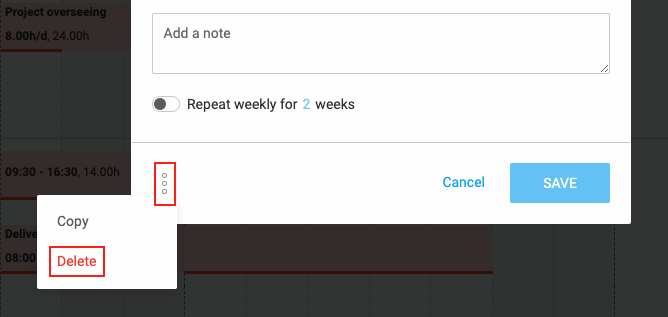
Delete assignments #
- Open the assignment
- Click on the three dots
- Choose Delete
Key points to remember:
- Total hours are calculated based on working days and assigned hours
- Users cannot have multiple assignments for the same project on the same dates
Repeat assignments #
For regularly occurring tasks, you can set up assignments to repeat:
- Open the assignment
- Check Repeat weekly
- Select the number of weeks
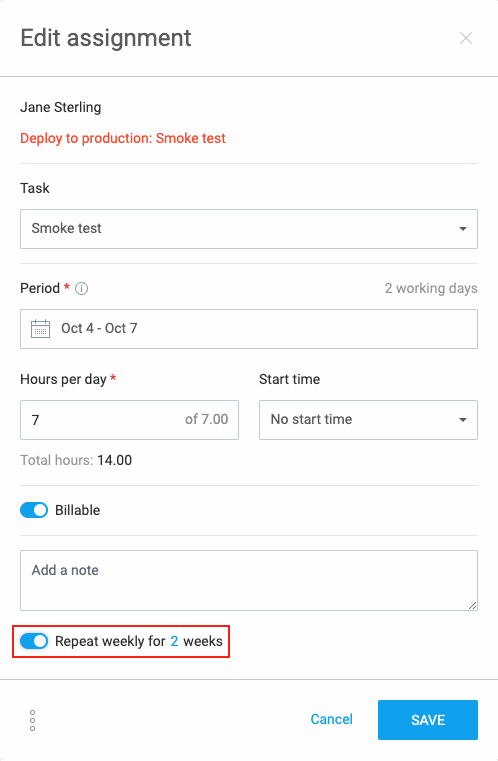
Assignments longer than 7 days can’t be repeated.
Publish assignments #
To share assignments with your team:
- Create a schedule
- When ready, publish it for members to see
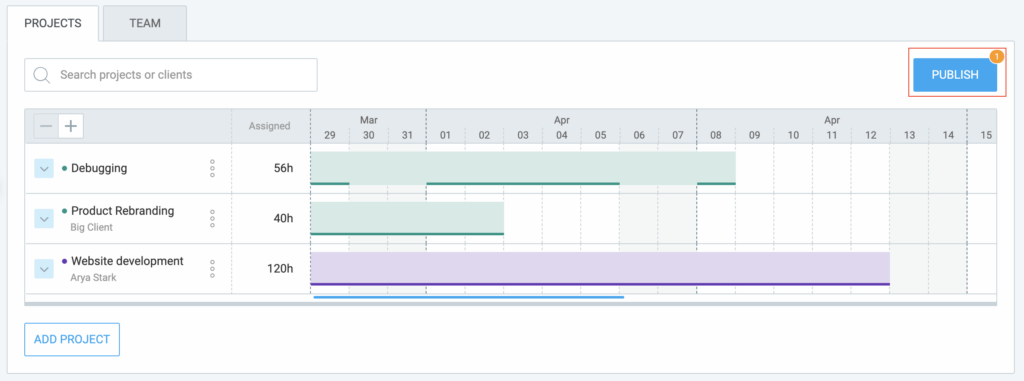
Unpublished assignments are visible to admins only. Use the Publish button to make assignments visible to assignees.
You can also optionally choose to notify the assignees of their published assignments.
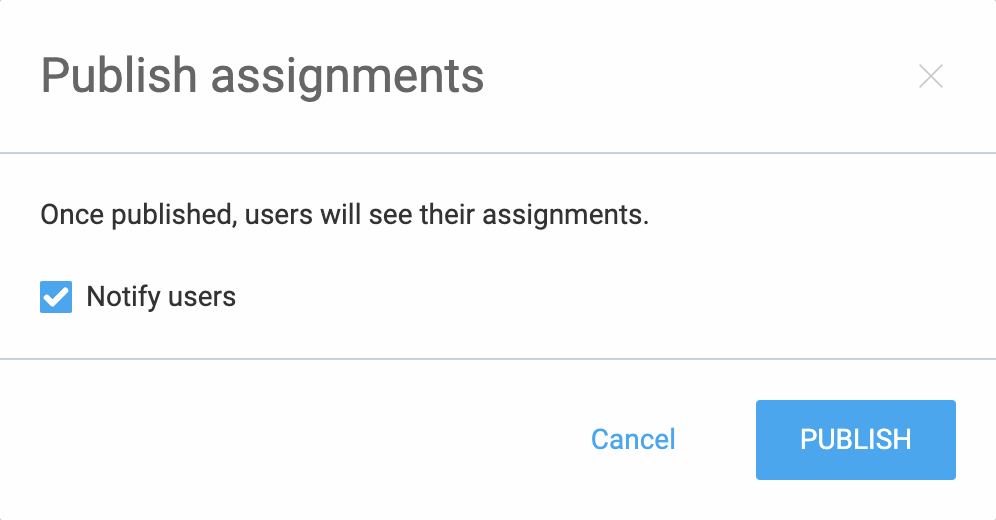
Permissions #
- Owners, Admins, and Project Managers can create, edit, and publish schedules
- Team Managers can create/view/edit their assignments and view published schedules for their team
- Project Managers can access schedules for their projects
- Regular users can create/view/edit their assignments and view their published schedule
For details, check out User roles & permissions.
Track cost and billability per user #
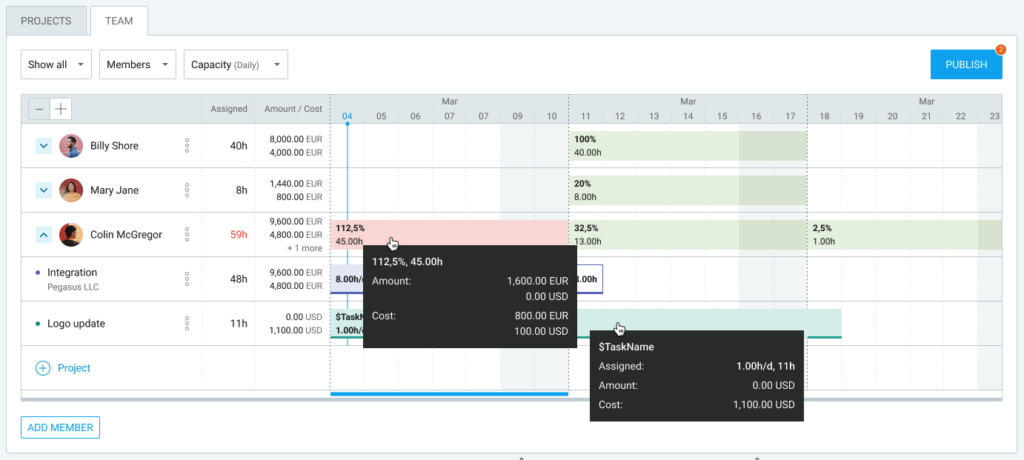
Team tab allows you to track costs and billable amounts per user alongside scheduled projects and tasks.
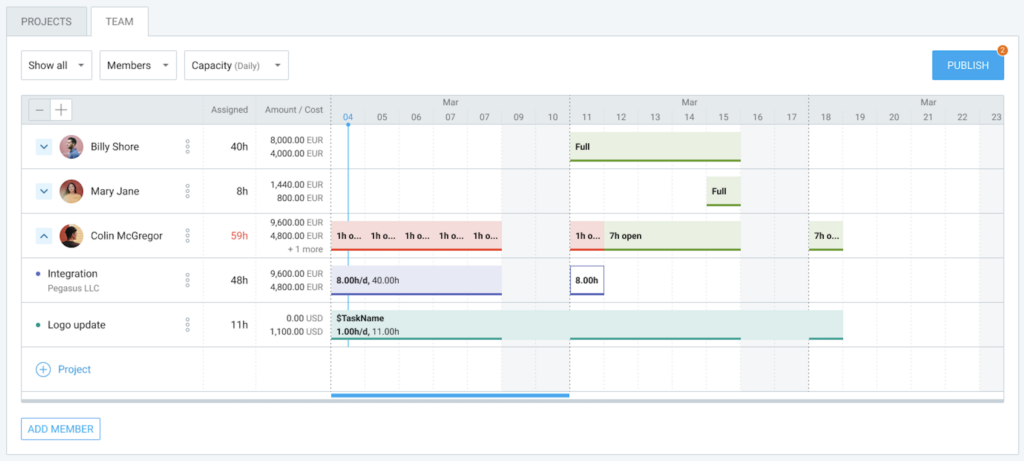
To view cost amounts and billability for a project or task, make sure both cost rate and billable hours are enabled in the Workspace settings. If either is disabled, you won’t see this information on the Scheduling page.
To enable billabile hours on a workspace:
- Open Workspace settings
- Switch to the Permissions tab
- In the Billable hours section, enable Activate billable hours

To enable cost rate on a workspace:
- Open Workspace settings
- In the General tab, Cost and profit analysis section, enable Activate cost rate
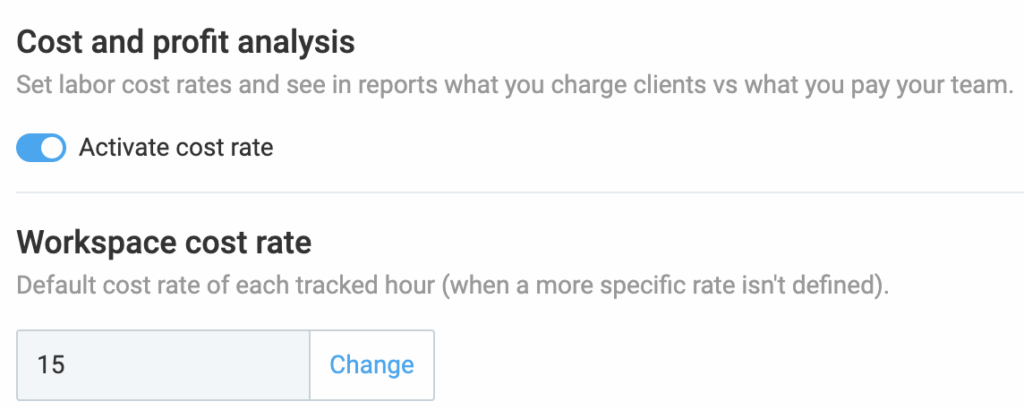
Additionally, a Workspace cost rate field will appear, allowing you to set the default cost rate for each tracked hour in your workspace.
Optionally, set additional permissions regarding who can view hourly rates, amounts, and the billable status of entries.
To enable cost rate and billability on Schedule page:
- Open Workspace settings
- In the General tab, under the Scheduling section, enable See billable cost and amount

To see total billable and cost amount per user:
- Check the Amount/Cost column for totals
- Expand users to see more details on scheduled projects/tasks
Collapsed view
- Assigned hours: Total hours assigned to each user
- Amount/Cost: Total cost data for each user, similar to the Projects tab
Expanded view
When expanded, the Amount/Cost column shows financial data for each project. If a user has multiple projects in different currencies, the default currency is shown first, followed by others in alphabetical order. Hovering over the notation reveals all amounts.
Daily and weekly capacity #
Use the Daily capacity option to see if users are under, over, or at full capacity for that day. Hovering shows Amount and Cost rates. This applies to the Weekly view as well, just on a weekly level.
Amount and cost values are displayed in the number and currency format set up in the Workspace settings.
If you downgrade your subscription plan or disable billability, Amount and Cost data won’t appear the timeline.
Performance tracking #
To keep track of performance, use Assignments report to compare assigned vs actual working hours.