Manage scheduled projects
Manage scheduled projects from the Schedule page and modify them according to your needs. Expand the project to see more details and information.
See who is assigned to the scheduled project and the number of hours they are assigned to.
Add members to scheduled project #
Extend the team working on scheduled project or assignments by adding new members:
- Navigate to the Schedule page
- Choose the Project tab
- Click on +Member
- Search for and select a member
- Create assignment window appears allowing modifications
Optionally:- Select or create task
- Define time range
- Specify working hours/days
- Add any necessary notes
- Enable billability
- Define if assignment recurs
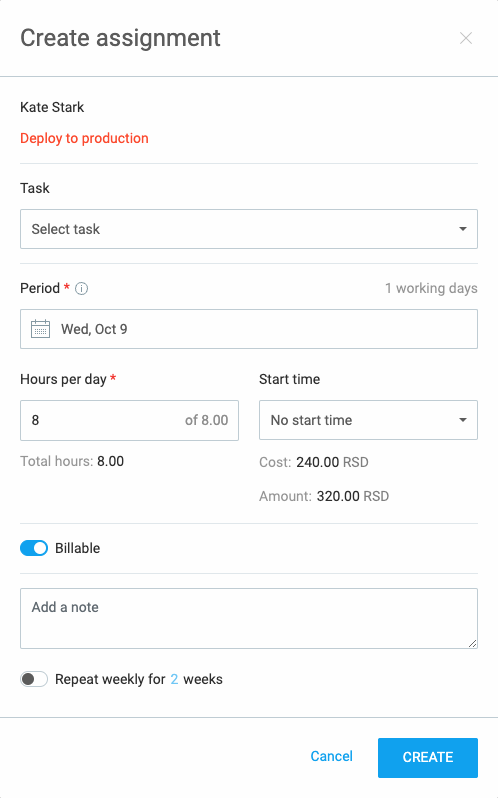
Click Create to complete the action.
Track project cost and billability #
Along with seeing scheduled projects and tasks, you can also see cost and billable amount allocated to the project and/or task in question and financial resources needed for users assigned to work on them.
In order to see cost amount and billability for a project or task, cost rate and billabile hours need to be enabled in the Workspace settings.
Enable cost rate & billability #
To enable billabile hours:
- Open Workspace settings
- Switch to Permissions tab
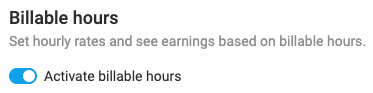
- In Billable hours section enable Activate billable hours
- Optionally set additional permissions of who can see hourly rates and amounts and billable status of the entries
To enable cost rate:
- Open Workspace settings
- In Cost and profit analysis enable Activate cost rate
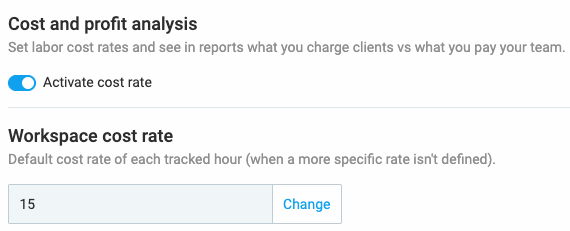
- Additionally, Workspace cost rate field appears where you can set default cost rate of each tracked hour in your workspace
To enable cost rate and billability:
- Open Workspace settings
- In General tab, Scheduling section, enable See billable cost and amount
You can enable cost rate or billable hours or both depending on which of these options are already activated in the Workspace settings.
See cost & billable amount #
If you’d like to see cost amount and billable amount for a certain project/task:
- Navigate to the Schedule page in the sidebar
- You’ll land on the Projects tab
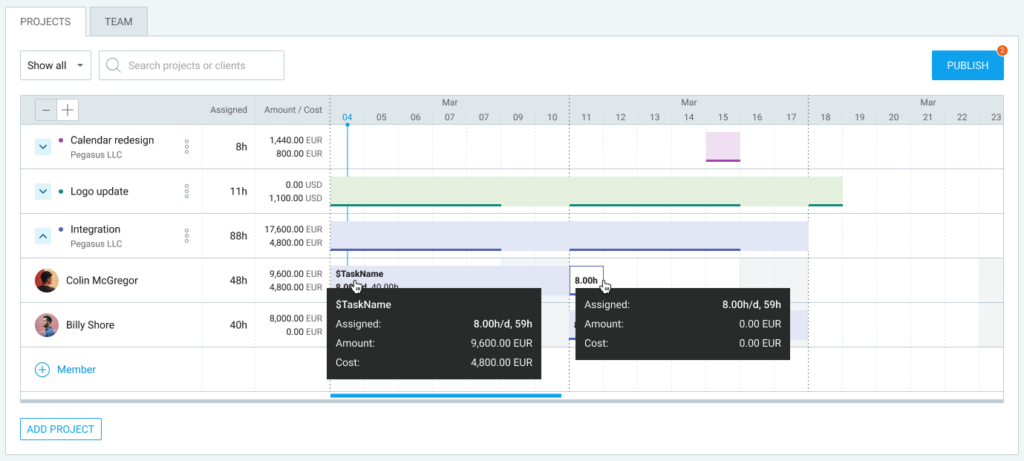
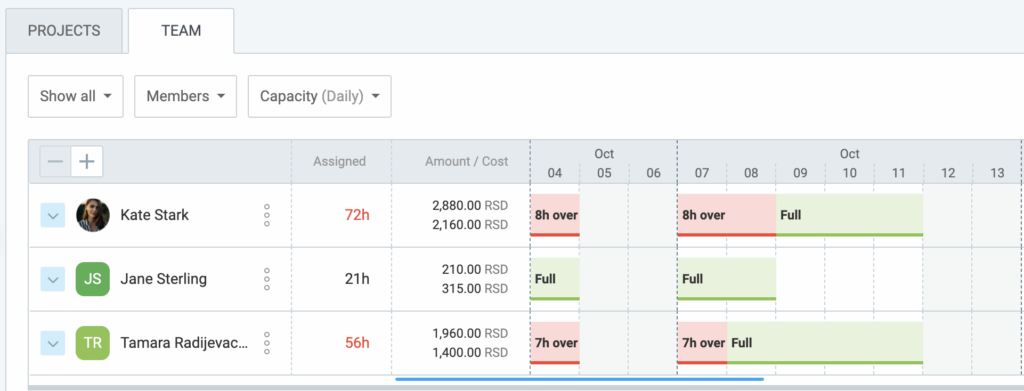
- Once you expand a project, you’ll see users with their corresponding assignments and time
The Amount/Cost column reflects totals of calculated billable and cost amounts, for that user, based on assignments, during the selected period. The same data is also displayed if you hover over the assignments whether they are published or not.
Also, any time assignment rates are updated, all related totals will automatically refresh to reflect accurate values.
Values are displayed in the number and currency format set up in the Workspace settings.
If you downgrade your subscription plan or disable cost & billable amount, Amount and Cost data won’t appear in the timeline.
Important considerations:
- If only Billable rate is activated, only Amount will be displayed
- If both rates are activated, both Amount and Cost will be visible
- If relevant rate is activated but not set, the value will be displayed as 0
Search project or client #
Search for a particular project or client based on the dates when the projects were scheduled.
To do that:
- Navigate to the top right corner of the page
- Adjust the date range using the date picker
- See assignments for a different time periods like this week, next month, or any custom period (e.g. next 30 days)
The range can be from 1 week to a maximum of 8 weeks.
Use arrows to navigate between previous and next time periods. Project blocks with an underline indicate a person is scheduled to work on that project all day. A red overline indicates they are over their capacity. Zoom in and out for a detailed view of assignments.
See total hours assigned for each project in the selected time range, displayed next to the project name.
Understand the status of projects/tasks:
- Active – New assignments can be created
- Completed – Only existing assignments are visible
- Public – Any member can be scheduled
- Private – Members need to be added before scheduling
- Archived – Only existing assignments are visible
See team member’s schedule #
For a detailed view of a team member’s schedule:
- Click on a team member in the Projects tab
- You’ll be redirected to the Team tab where you can see their timeline in more detail
In case your initial plan and schedule changed and you’re either behind or ahead of the schedule with your project, you can shift the start day.
Shift timeline #
- Choose the project
- Click on the three dots
- Choose Shift timeline
- Choose the new start date of your assignments
- Click Shift to complete the process
After shifting the timeline, all assignments and tasks will be automatically adjusted accordingly.
For more details on how to schedule assignments for your team, check out Schedule team assignments.