Activity Monitoring quick start setup guide
This article acts as a simplified guide to help workspace owners and admins set up activity monitoring for their team.
Please use a desktop or laptop to access this feature, as it’s not currently supported on mobile.
Before you start #
Activity monitoring needs to be enabled in Workspace settings.
To do this:
- Click the
 three-dot icon next to your workspace name
 - Select Workspace settings > User activity
- Locate the Activity monitoring section
- Turn the toggle to ON for Activity monitoring

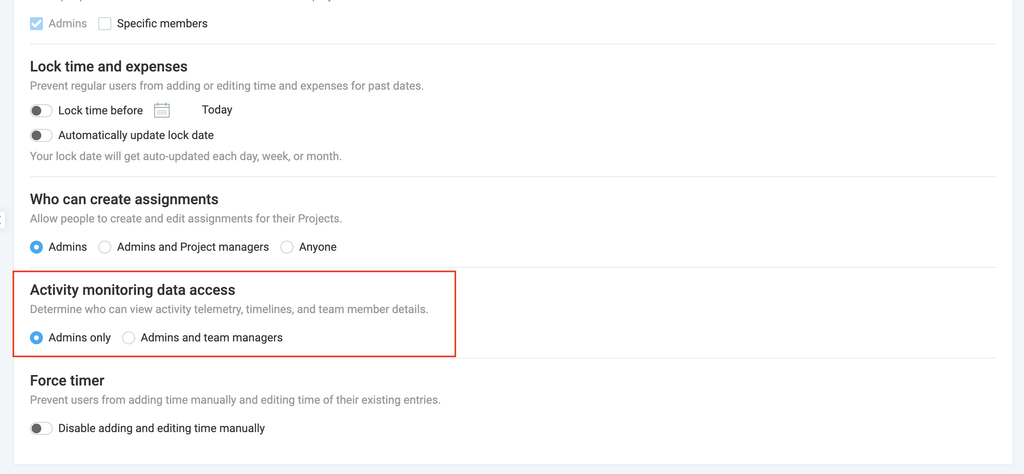
Next, check which roles are able to access activity monitoring.
To do this:
1. Go to Workspace settings
2. Click the Permissions page
3. Select which roles you want to provide access to:
- Admins only
- Admins and team managers
Step 1: Configure your workspace settings #
To configure your activity monitoring settings:
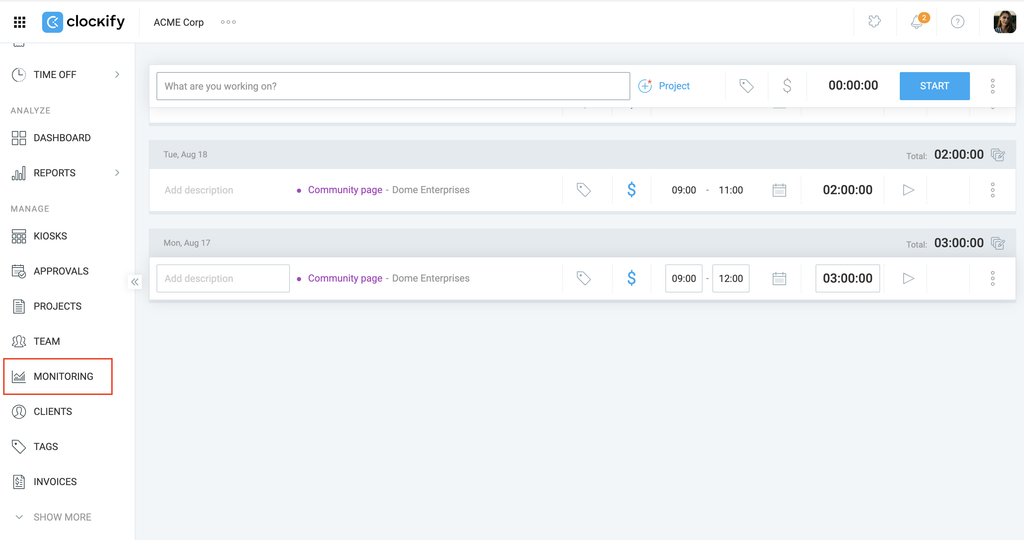
- Navigate to Monitoring on the left sidebar
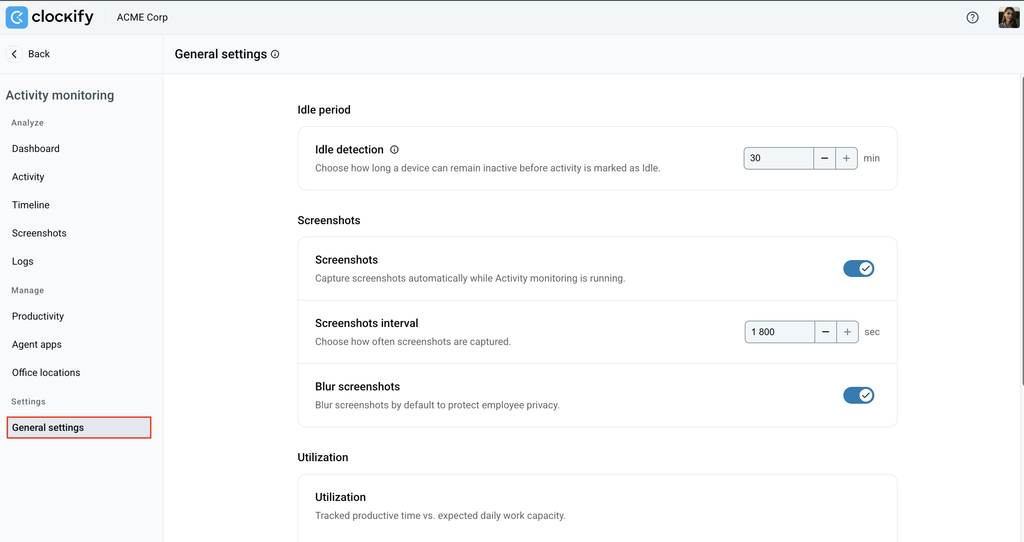
2. Click General settings (located under the Settings section on the left sidebar)
Set idle detection #
Set your inactivity threshold (between 1 and 30 minutes) to define when the system should mark a user as away from their desk.

Turn screenshots on #
To turn on screenshots for your team:
- Toggle Screenshots to ON
- Set the Screenshots interval to define how often captures occur, ranging from a minimum of 30 seconds up to a maximum of 30 minutes
- Toggle Blur screenshots OFF if you want to unblur them
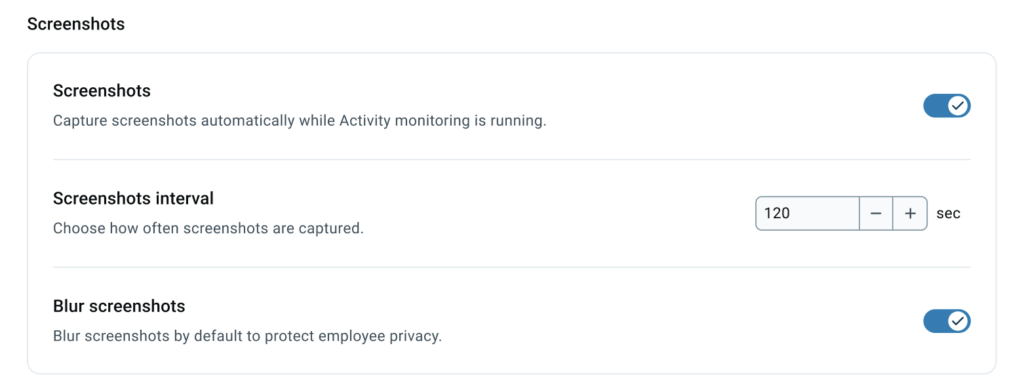
Blur Screenshots setting is enabled by default. Turning it off will allow screenshots to appear clearly without blur.
Define utilization #
Select which types of apps and websites count as productive time:
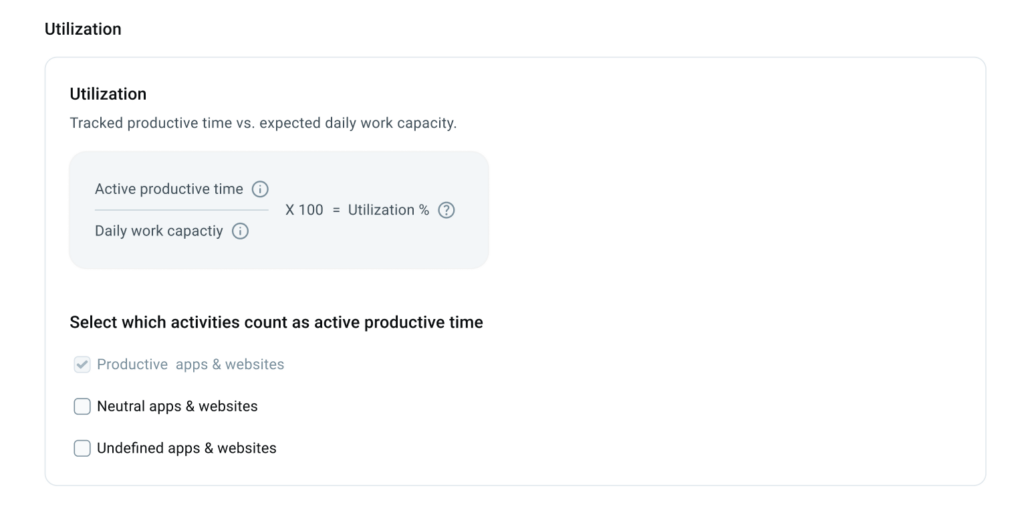
Check out Activity Monitoring basics to learn how productive time is measured.
Step 2: Install the desktop agent #
To begin collecting data, you must ensure the tracking agent is installed on host machines. You have two ways to deploy it:
1. For users
- Admin needs to ensure that users are already added to Clockify workspace.
- Go to Agent apps > Install Agent app and click Copy link.
- Send the link to your team via chat or email.
- Users simply open the link to download and install the app.
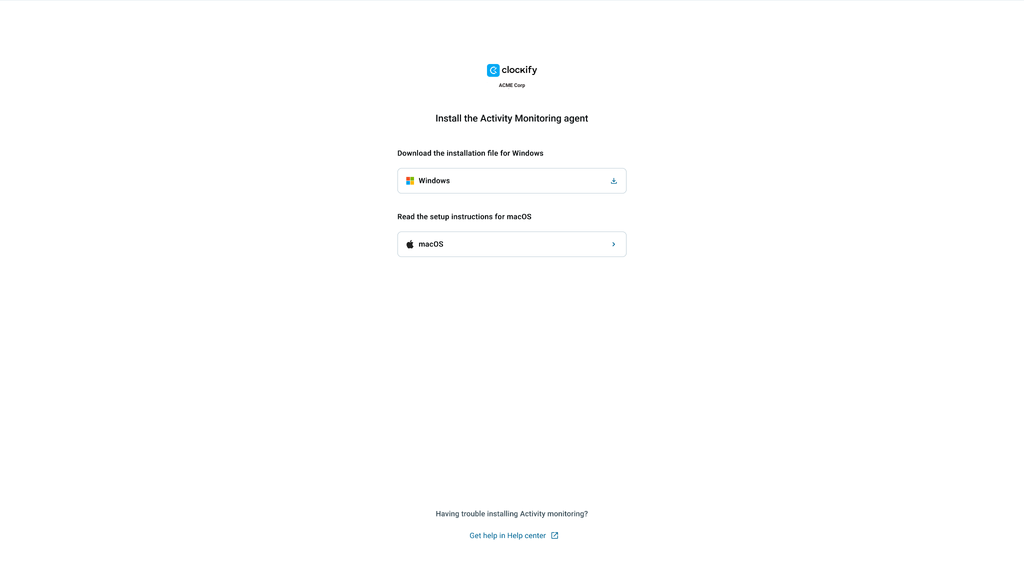
2. For admins
Follow these steps to install the tracking agent (to track your own utilization):
- Go to Monitoring > Agent apps
- Click Install agent app
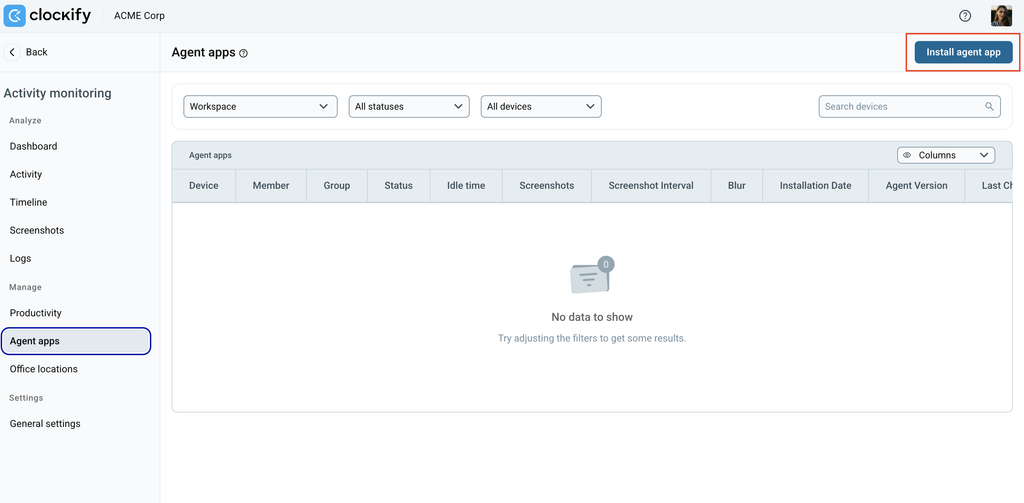
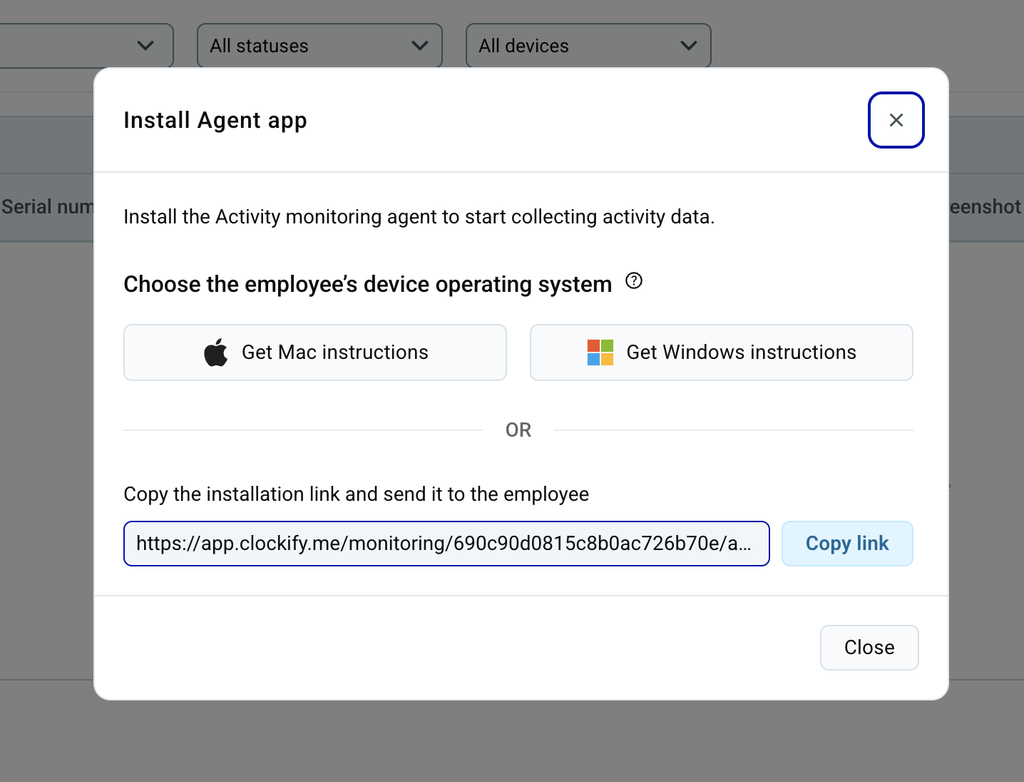
3. You have three options:
Install on Mac
- Go to Monitoring > Agent apps
- Click Install agent app
- Select Get Mac instructions
- Copy the code that appears on the pop-up window
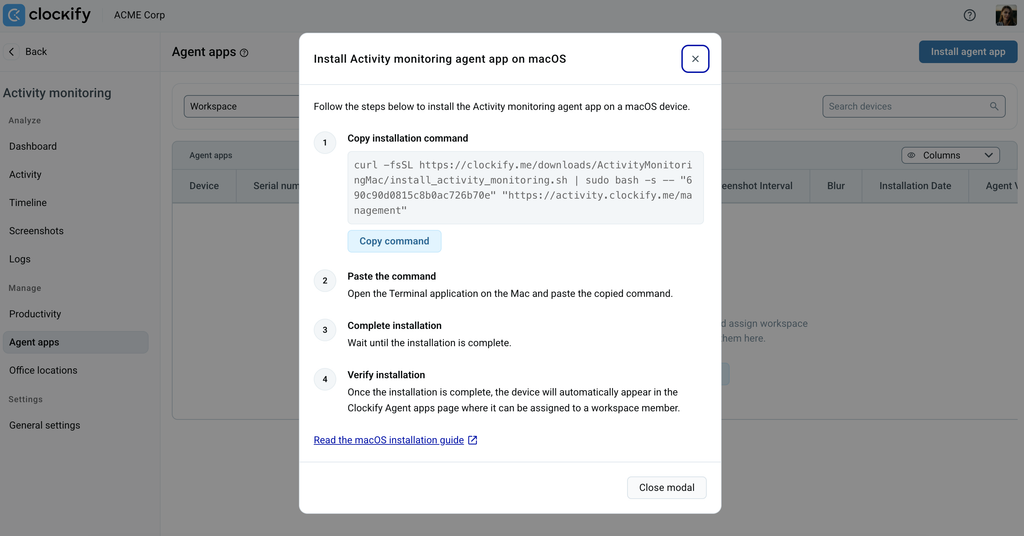
5. Follow the rest of the instructions to install the agent app
Install on Windows
- Go to Monitoring > Agent apps
- Click Install agent app
- Select Get Windows instructions
- Copy the code that appears on the pop-up window
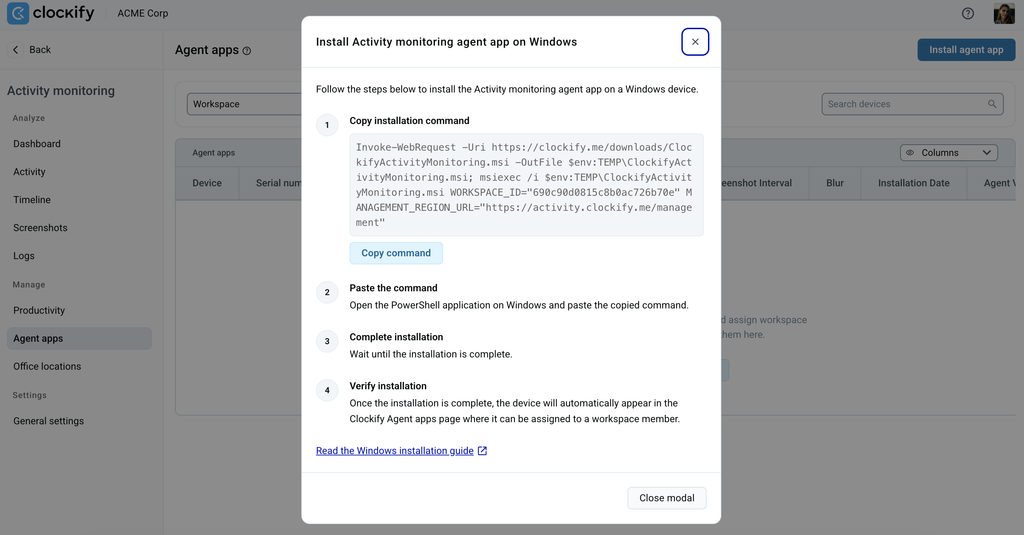
5. Follow the rest of the instructions to install the agent app
Copy link
You can copy the installation link and send it to the team member who needs to install the agent app on their device.
Step 3: Assign members to installed agents #
Newly installed agents immediately start collecting data, but they will initially appear in an Unassigned state. Admin need to assign agent apps to each member after successful installation.
To do this:
- Navigate to Monitoring
- Go to Agent apps
- Click the dropdown list in the Member column select the member you want assigned to a device
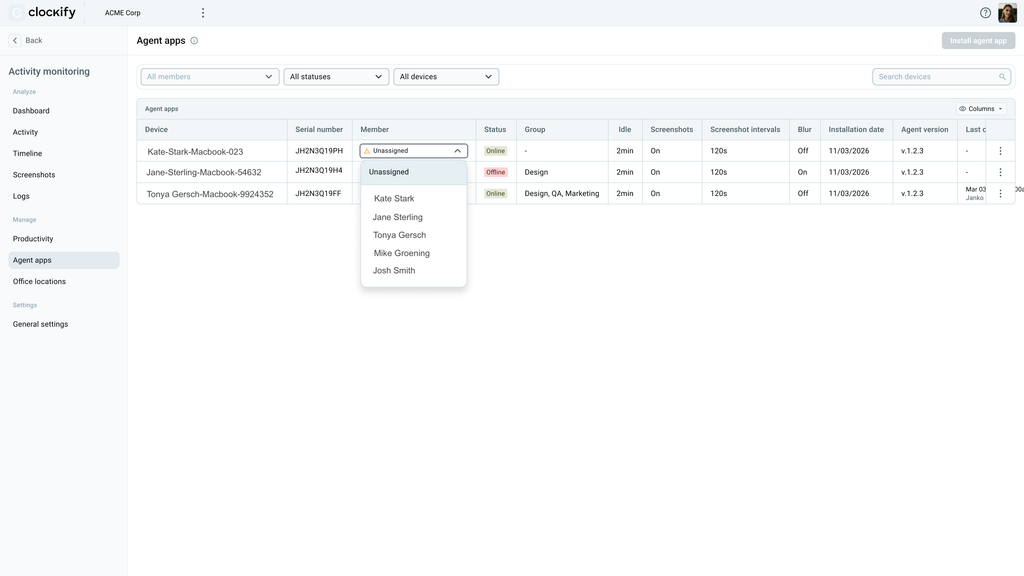
Data collected while an agent is in the Unassigned state is preserved in the database, but it is not retroactively linked to the user upon initial assignment.
Step 4: Define your initial productivity classifications #
Raw activity tracking data initially enters your system as Undefined. Because your team’s utilization scores depend directly on these classifications, you need to define what counts as work.
- Navigate to Monitoring
- Select Productivity
- Review the directory table of detected apps and websites, and classify them as
- Productive – Time you spend using apps, programs, or websites that your company has marked as work-related
- Neutral – A category for “gray area” apps or websites that the company chooses not to label as strictly work-only or completely unproductive
- Unproductive – Time spent on apps or websites that are not related to your daily work tasks
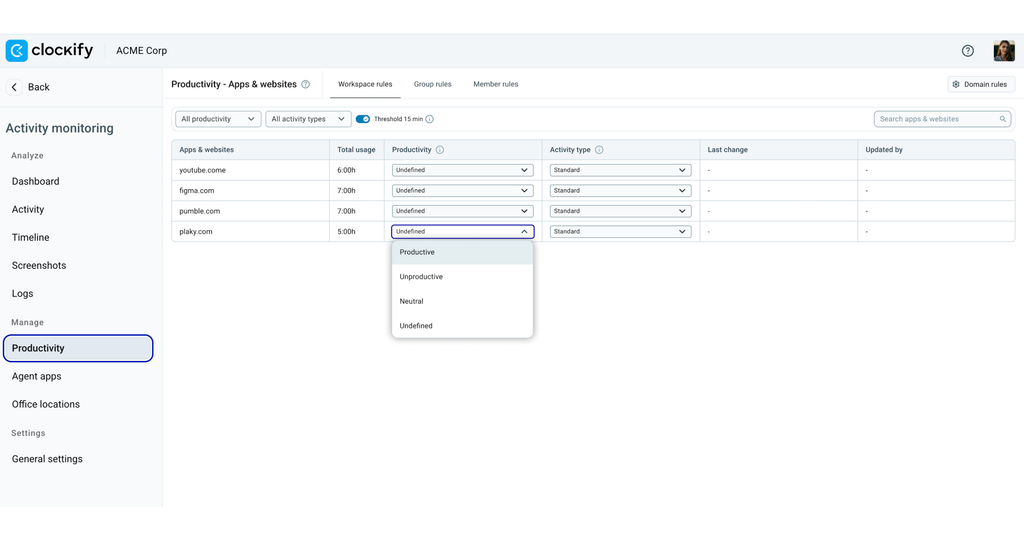
To speed up your initial setup, click the Domain rules icon at the upper left corner to create a catch-all rule (for example, typing *.google.com will instantly classify all Google subdomains at once).
Frequently Asked Questions (FAQs) #
How do I deploy and install the activity monitoring agent app for my team?
Admins and managers share an installation link with team members to let them install the agent on their own. Once installed, devices will appear in Monitoring > Agent apps as Unassigned. You would then need to assign each device to its respective user.