Send invoice emails
After creating an invoice you have the option to send it directly from Clockify to your client.
This feature is available to workspace admins and owners on Standard, Pro, or Enterprise plans.
For step-by-step guidance on how to send invoices in Clockify, watch the video and follow the instructions below.
Send invoice emails from Clockify #
To send an invoice email:
- Go to the Invoice tab
- Choose the invoice
- Click the Send invoice button
- Send invoice screen opens with pre filled out info from the invoice
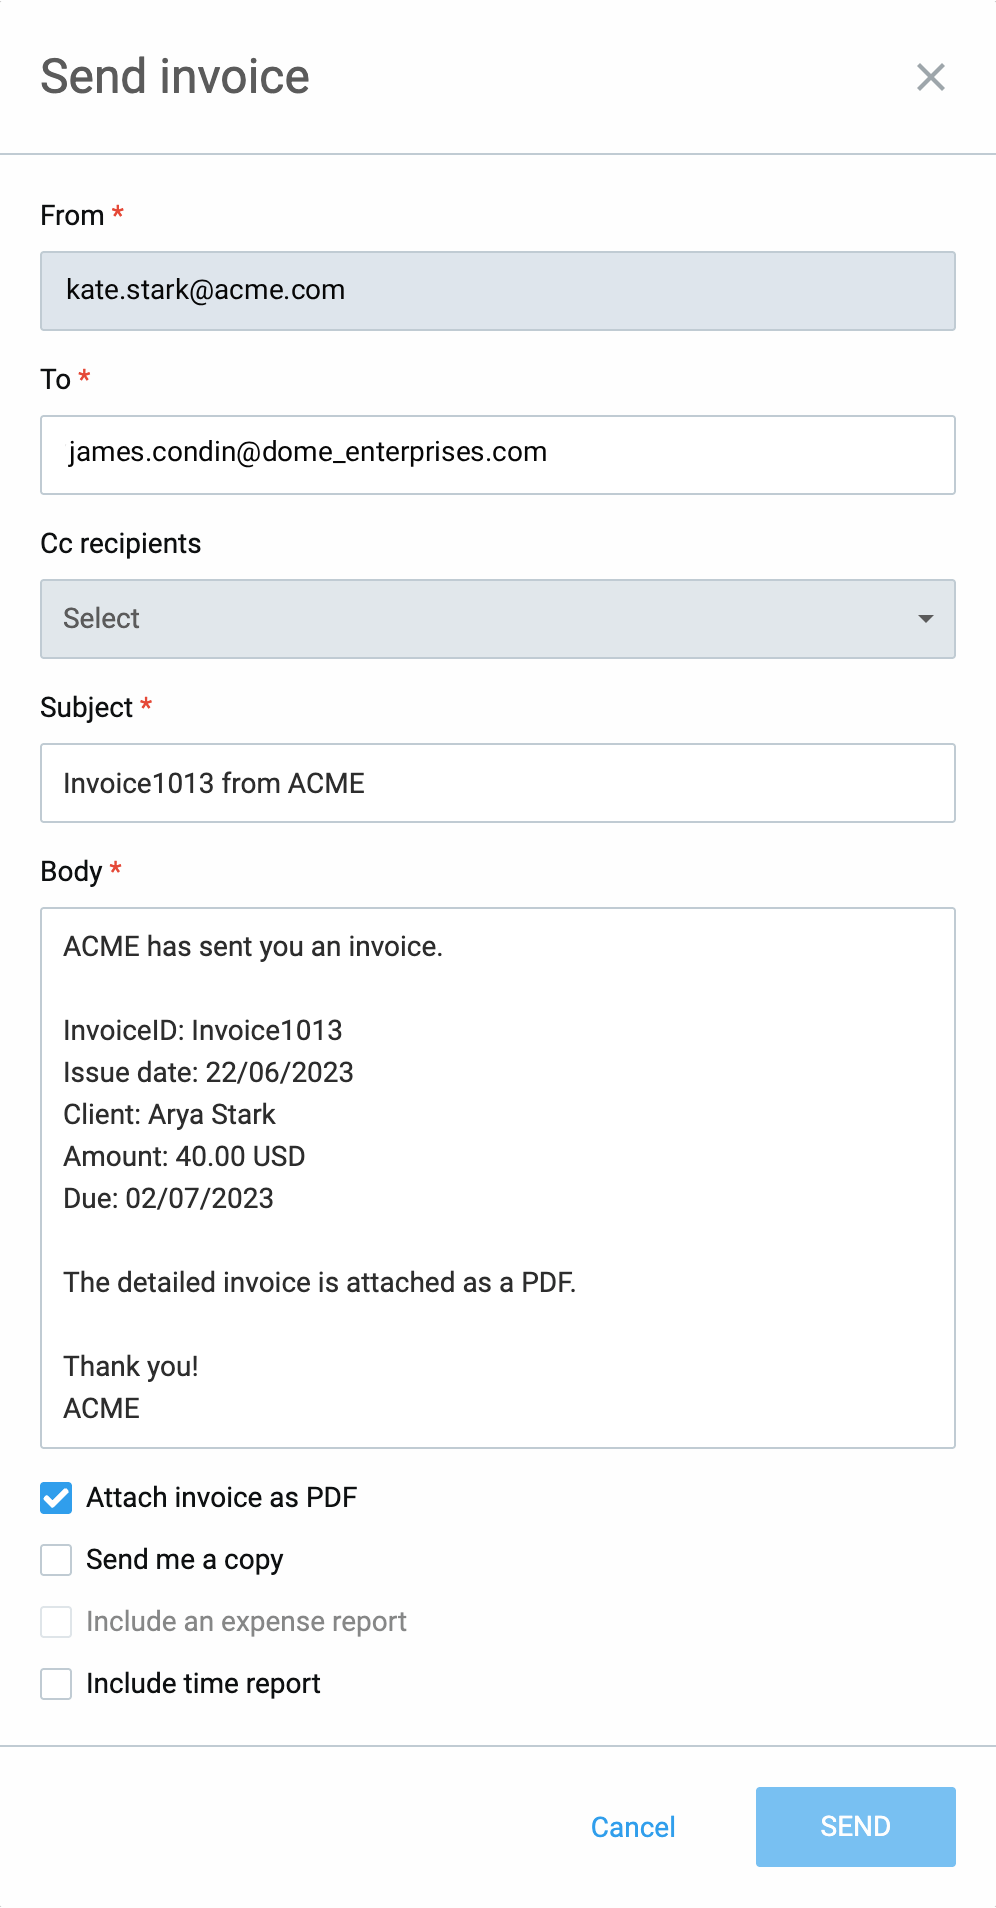
- Optionally check the Include an expense report, Attach invoice as PDF, Send me copy or Include time report boxes
- Click Send to conform the action
Checking either option sends all expenses included in the invoice to the client in PDF format.
As a result, the email is sent to your client based on the parameters defined in the Invoice settings.
To make sure your information stays safe, we added a PIN code access to your expense report. You’ll get this code in the invoice email. Just use it to open the report. The code expires seven days after the email is sent.
Include time report #
With this option you can include a link to a Detailed time report, so that a client can review work details before processing the payment.

The time report should match the invoice content including date range, project, tasks and billable hours.
Client will receive the invoice email that contains a link to the report.
The report is hosted securely online, so in order to see it, client needs to enter the code provided in the invoice body.
Send invoices to multiple emails #
You can also send an invoice to multiple email addresses, making sure it reaches everyone who needs to see it, from the primary contact, to the finance team.
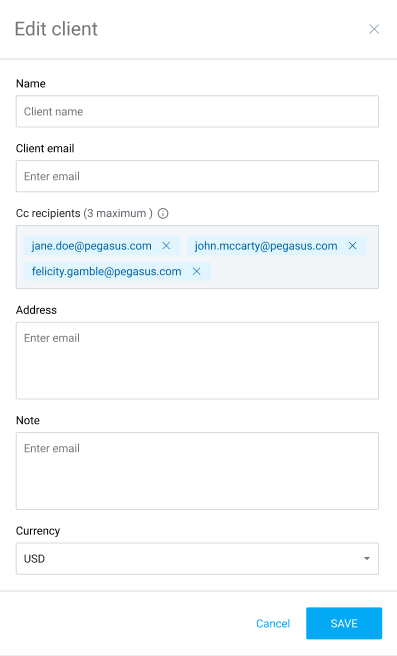
Define up to three additional email addresses for a client when adding or editing their details.
The invoice will always be sent to the primary email address, but you can also CC it to any of the additional email recipients.
To add new recipients:
- Create, or open created invoice
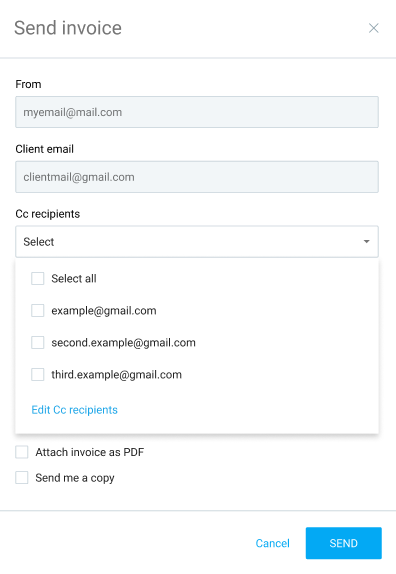
- Before sending, you can add/edit/remove any additional email addresses
- Select the email addresses you want the invoice to be sent to
- Click Send
If you have permission to manage clients, any email address you edit will be saved to the client’s profile.
If you don’t have permission, you can still edit the address, but the update won’t be saved.
Send a reminder
When sending an invoice reminder, you can also select any of the additional email addresses to receive it.
For more information about invoice reminders, check out this section in the Create & manage invoices article.
Email templates and configuration #
Choose the corresponding email template which will be sent to your client when you send them an invoice through Clockify.
For projects that require frequent invoicing, email templates can help you keep a consistent format and save time.
To configure email templates:
- Go to Invoice settings
- Click the Emails tab
- In the Email parameters section, find a list of parameters to include in the email

Set up email parameters, invoice email template, and reminder email template according to your preferences.
The invoice email template is the actual content of the email and is customizable to suit your needs.
The Reminder email serves as a friendly prompt for overdue invoices.