Manage your profile settings
You can easily customize your profile settings to make your time tracking experience more personalized. This guide will help you update your profile information, set your preferences and manage your account settings.
Access your profile settings #
If you’d like to update your personal information, such as your email address or profile picture, you can do so directly from your CAKE.com Account.
- Log in to Clockify
- Navigate to the app switcher at the top left corner of the screen
- Choose your CAKE.com account
- Click on your profile at the top right and choose My account
Update your personal information #
To update your personal details:
- Go to My account in CAKE.com
- Click the pen icon or Edit button to update the following information in your profile:
- Profile photo
- First and last name
- Email address
When changing your email address, you’ll need to verify your new email address before the change reflects in your profile.
Set your profile preferences #
Customize your theme, timezone, notifications, and other profile configurations according to your preferences.
To access your profile settings:
- Click on your photo in the top-right corner (Profile settings)
- Select Preferences
These settings apply to the Clockify app only and not your CAKE.com account.
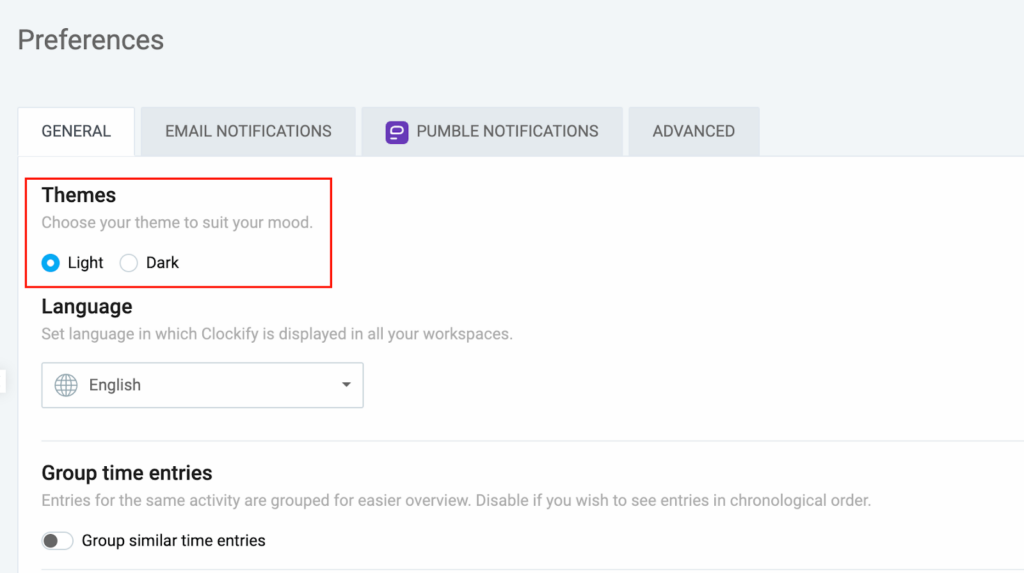
Set up your app theme #
- Go to Profile settings > Preferences
- Select Light or Dark theme under the Themes section in the General tab
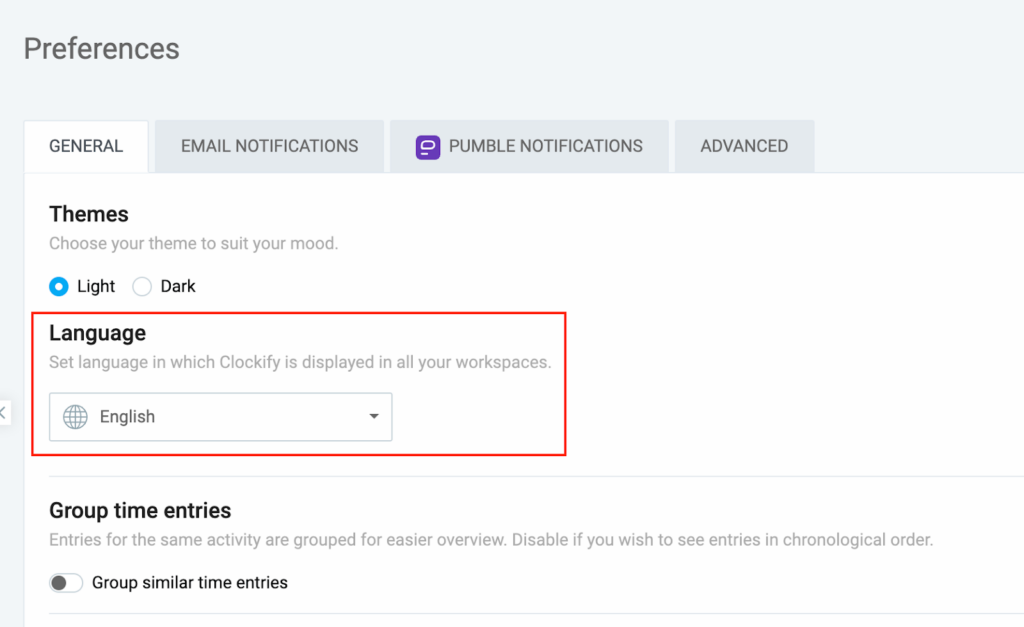
Choose your language #
- Go to Profile settings > Preferences
- Choose your language under the Language section in the General tab
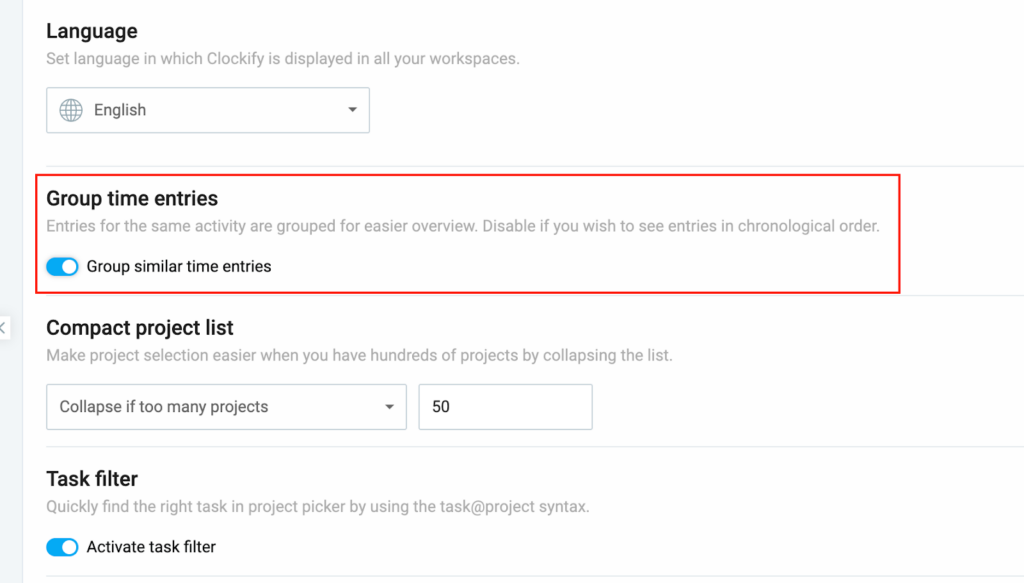
Change how you view data #
You can do any or all of the following to change the look of your time entries, depending on your need or preference:
Group similar time entries – Entries for the same tasks/activities will be grouped together.
To enable grouped entries:
1. Go to Profile settings > Preferences
2. Enable Group similar time entries
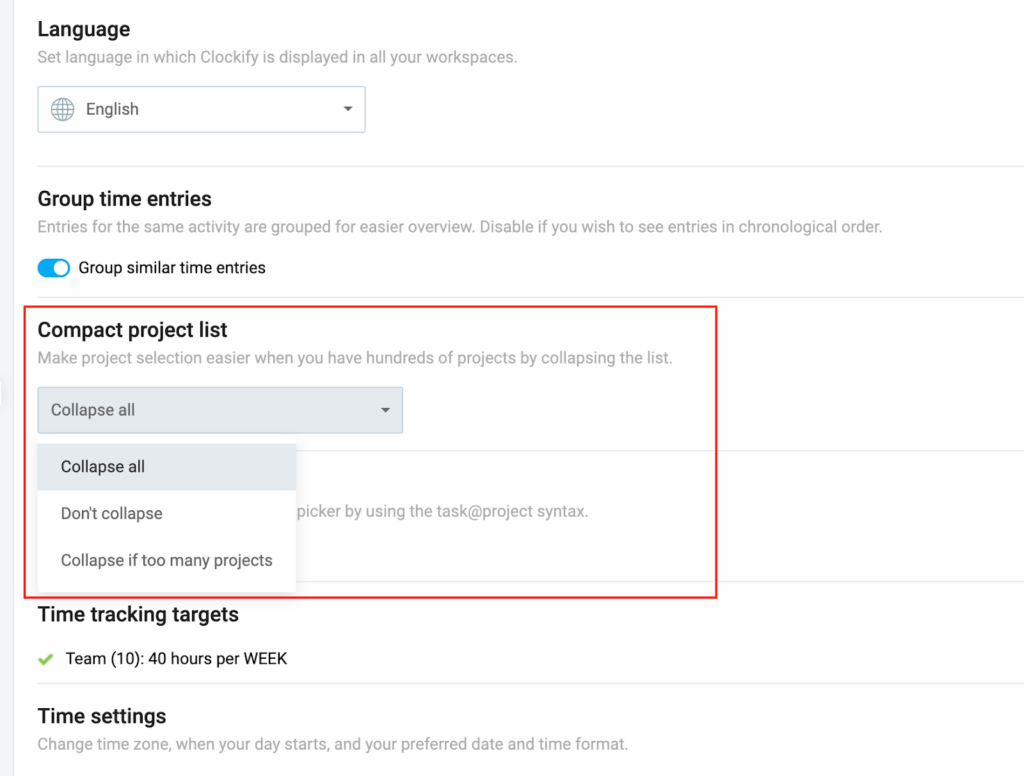
Collapse project lists – Provides an option to collapse projects in the Projects menu when adding a task/project to a time entry.
To collapse project lists:
- Go to Profile settings > Preferences
- Select the three options in the dropdown menu under Compact project list:
- Collapse all – Collapses all projects for all clients
- Don’t collapse – Show all projects for all clients
- Collapse if too many projects – Set a maximum number of projects before collapsing
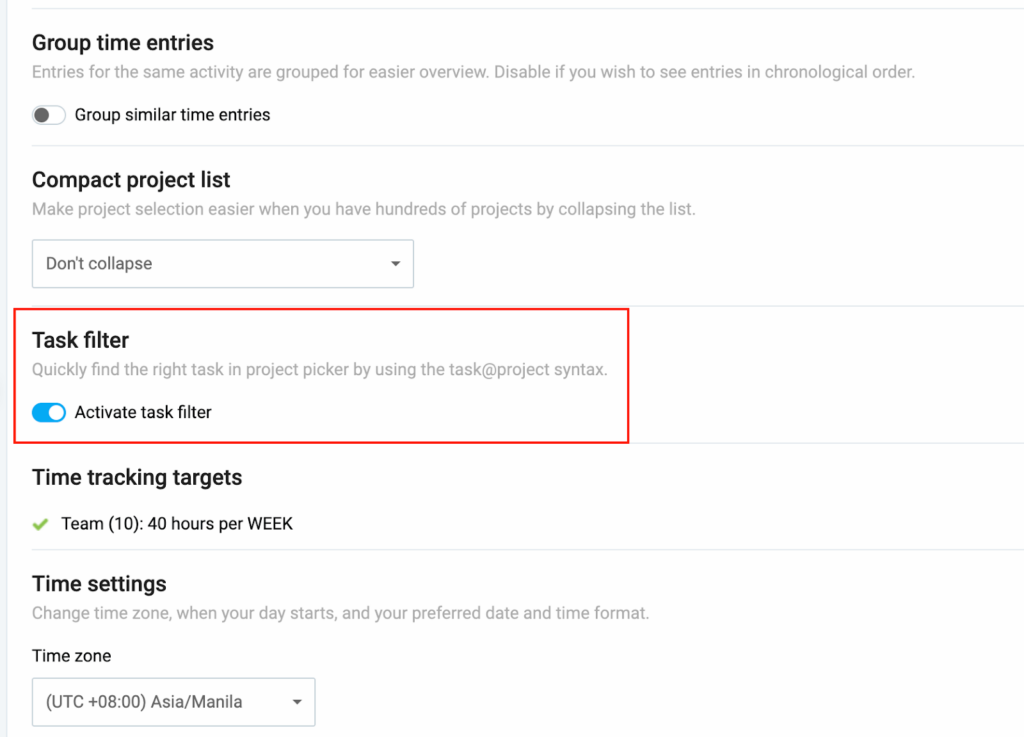
Activate task filter – Lets you use the task@project syntax to quickly find tasks.
To activate the task filter:
- Go to Profile settings > Preferences
- Enable Activate task filter
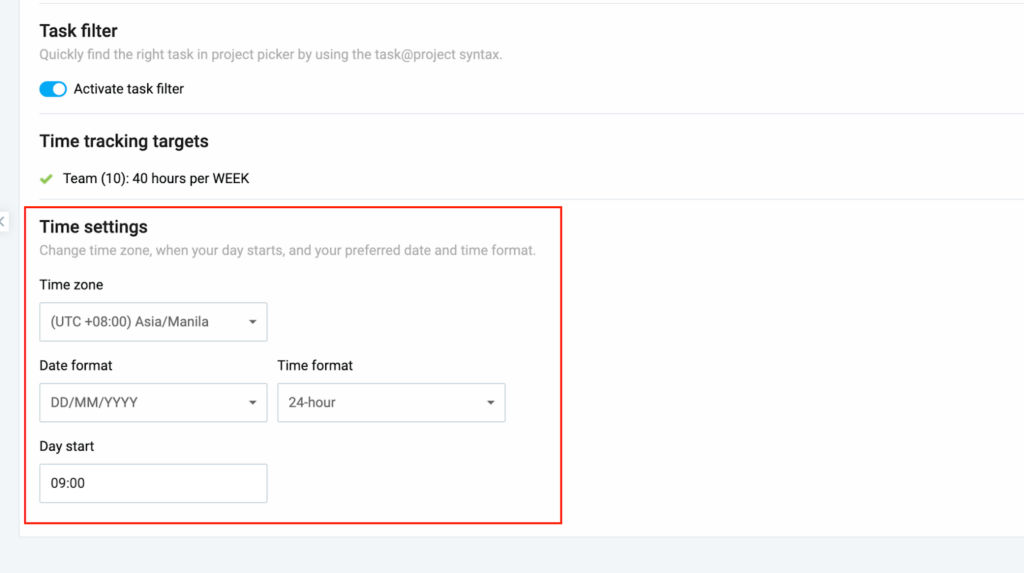
Change time and date settings #
To change your time and date settings:
- Go to Profile settings > Preferences
- Scroll down to Time settings and change the following:
- Time zone
- Date format
- Time format
- Day start
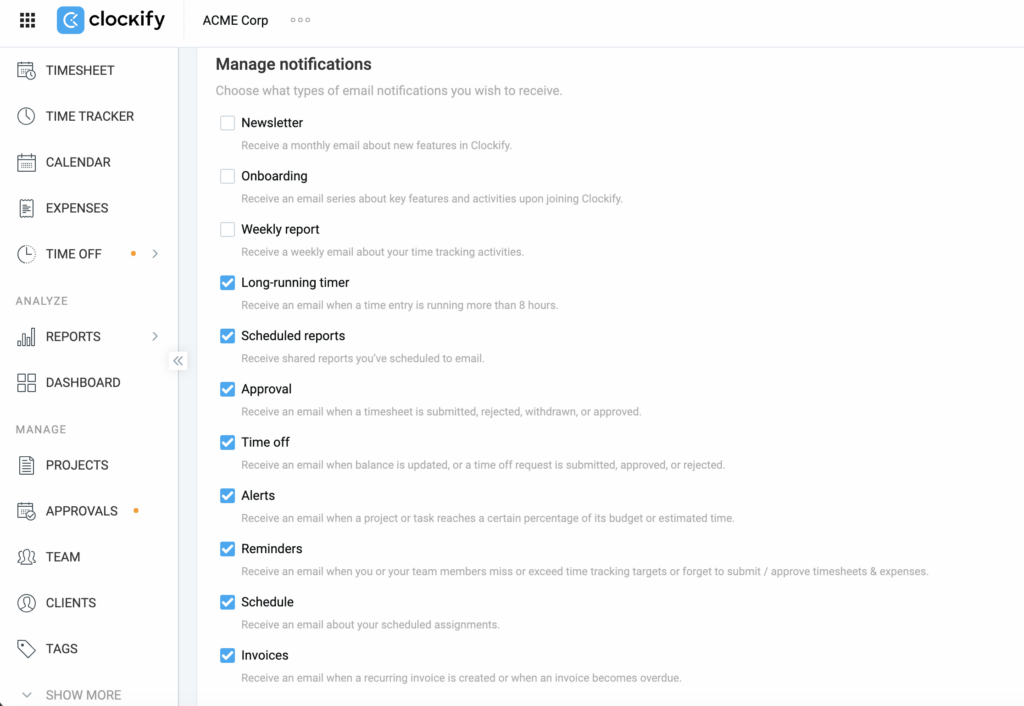
Change email preferences #
1. Go to Profile settings > Preferences
2. Click the Email notifications tab and check which notifications you want to receive.
Generate API key #
An API key allows you to integrate Clockify with other apps or systems.
To generate an API key:
- Go to the Profile settings > Preferences
- Switch to the Advanced tab
- Click Manage API keys
- Click the Generate new button on the top-right corner
- Enter a name for your key and click Generate
- Click Copy
- Paste the key to another location where you can save it
IMPORTANT: Paste the key immediately after clicking Copy and make sure to save the document or file as you can no longer view the key after it’s generated.
There’s a limit of 30 requests per hour if you’re on the Free plan.
For more information, check out the Clockify API collection.
Create a webhook #
This feature is available to workspace owners and admins. There is a limit of 3 webhooks per workspace for those on the Free plan.
Webhooks allow you to automatically send data from Clockify to other apps or systems when specific events occur (e.g. when a time entry is created or updated).
To create a webhook:
1. Go to the Profile settings > Preferences
2. Switch to the Advanced tab
3. Click Manage webhooks
4. Click the Create new button on the top-right
5. Enter the following details:
- Name of the webhook
- Endpoint URL
- Event
6. Click Create
For more information about creating webhooks, check out API & webhook settings.
FAQs #
How does the task filter work?
Once activated, you can quickly locate a task by entering the task’s name in the description field on a time entry page, then use the “@” symbol to search for the specific project. Check out Find projects/tasks quickly for more information.
Can I change my date and time format?
Yes, you can change your date and time format in Time settings.
Can I edit someone else’s information?
No. You can only update your own name, email, profile picture, and preferences. However, there are certain settings that Admins can change for team members. Check out Changing team member’s personal information to learn more.