Schedule report
Receive custom reports by email each day, week, or month.
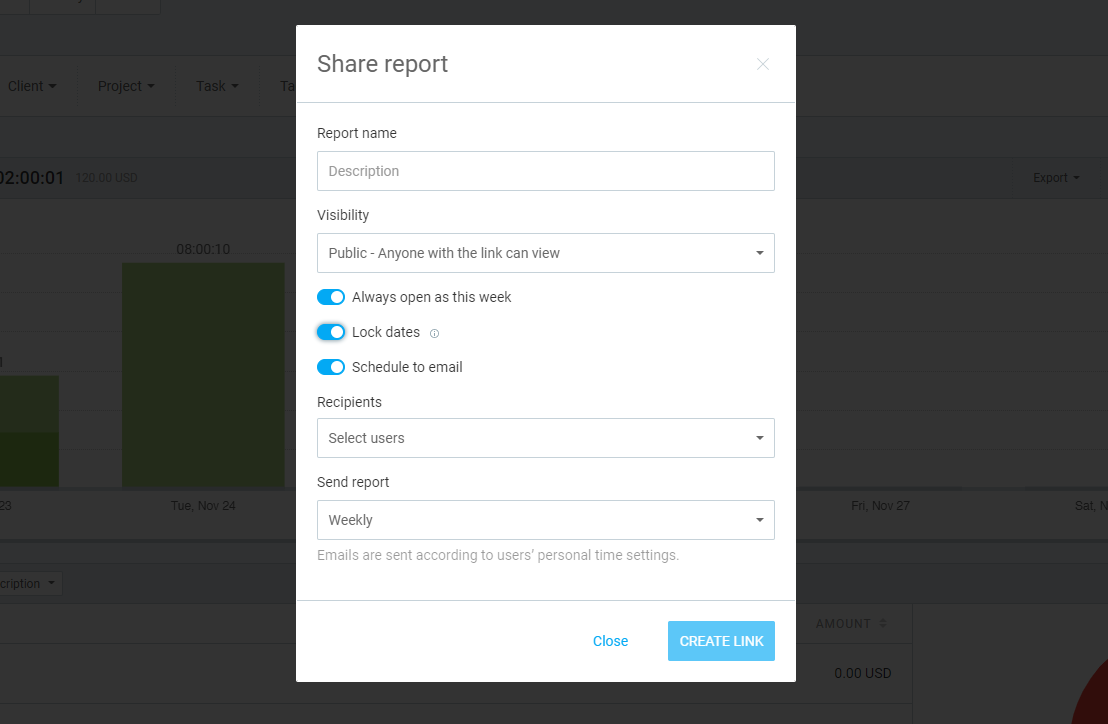
When you filter and share some report, you can also specify for it to be sent by email to you or anyone else in your account so they always receive the latest tracked information for that or previous day, week, or month.
Only Owner and Admins can create Scheduled reports.
Scheduled reports is a paid feature, which you can enable by upgrading your workspace to Pro or Enterprise plan.
Steps to schedule report #
To schedule a report:
- Go to any report
- Apply necessary filters you wish the report to have (e.g. filter by user, client, etc.)
- Choose a relative date range (e.g. This Week, Last Month, etc.)
- Click Share icon
- Name a report (this name will be used in emails, on the page of the report, and in exports)
- Choose recipients
- Choose how often you wish to receive the report (daily, weekly, or monthly)
- Click Create link

Reports with custom date ranges can’t be scheduled and only admins can schedule reports.
You can see all your scheduled reports on the Shared reports page. Reports that are sent to email will have the scheduled tag next to them.
You can turn scheduling on/off for existing shared reports from the Shared reports page, by clicking on the three dots next to to a report.
Admins can choose for the report to be sent only to themselves, or select other users in their Clockify workspace.
Receive scheduled reports via email #
- Daily emails are sent each day according to the recipient’s Day start setting in Profile settings
- Weekly emails are sent at the beginning of each week according to the recipient’s Week start in Workspace settings and Day start setting in Profile settings
- Monthly email are sent each 1st of the month, and according to the recipient’s Day start setting in Profile settings
Email content #
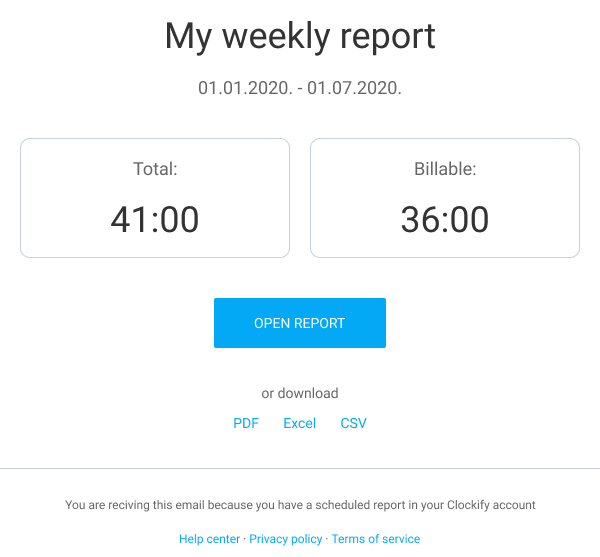
- Name of the report
- Exact dates for which the report is sent
- The total tracked time and breaks and how much of it is billable (as calculated at the moment the email is sent). If you don’t want the email to display billable time, make sure Don’t show amount is selected before you share the report.
- The link to the live time report for more information (always shows the relative range you’ve saved)
- Direct links to download the report as PDF, CSV, and Excel (download will be for the dates from the email)
If there’s a new total because you’ve added or edited existing timesheets, the email will contain outdated information, but the link will display the current information.
If you’ve locked the dates in the report, the download links from the email will respect the locked dates (e.g. if you’ve saved Yesterday and locked the date, each earlier email will point you to the same download, i.e. yesterday).

Email reports to people outside Clockify #
If you wish others to receive a scheduled report, you’ll need to set up email forwarding.
You’ll need to create a filter in your email client for emails that contain the subject you need, and then create a rule for those emails to be forwarded to another email.
For example, you can filter a report by client, name the report ClientX Weekly Report and schedule it to be sent once a week, and then create a filter and rule for those email to be sent automatically from your inbox to the client’s email address.
How to set up email forwarding for: Gmail / Outlook / Mail (Mac)