Manage non-working days
Define and manage holidays and policies on the Time off page.
Time off is a paid feature, which you can enable by upgrading your workspace to Standard, Pro, or Enterprise plan.
To manage your non-working days:
- Navigate to the Time off page
- Click on the Settings icon
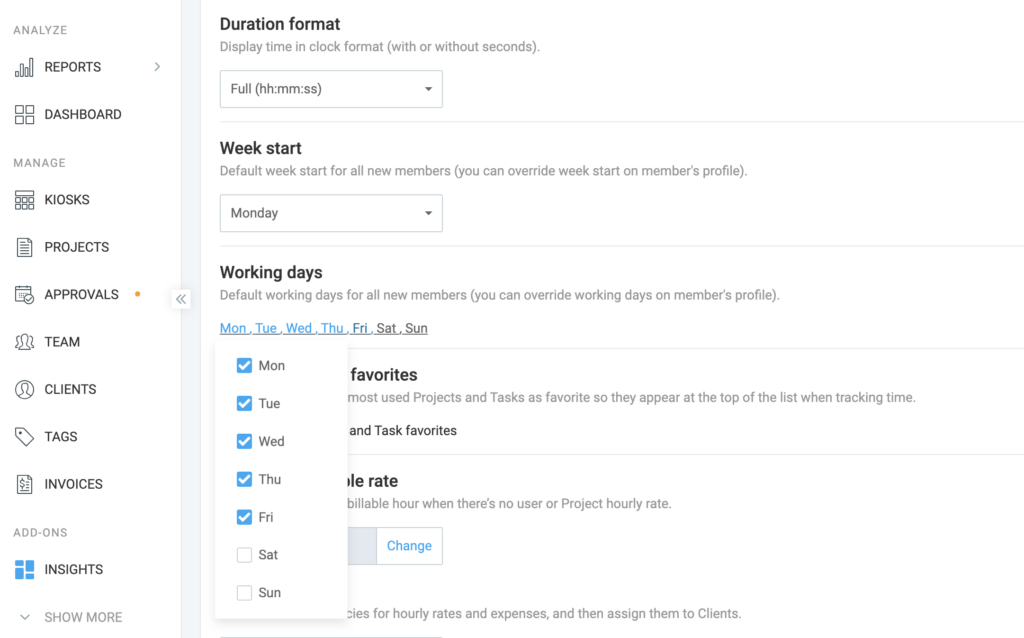
- Define working days in the Workspace settings (Saturdays and Sundays are marked as non-working days, by default).
Manage holidays #
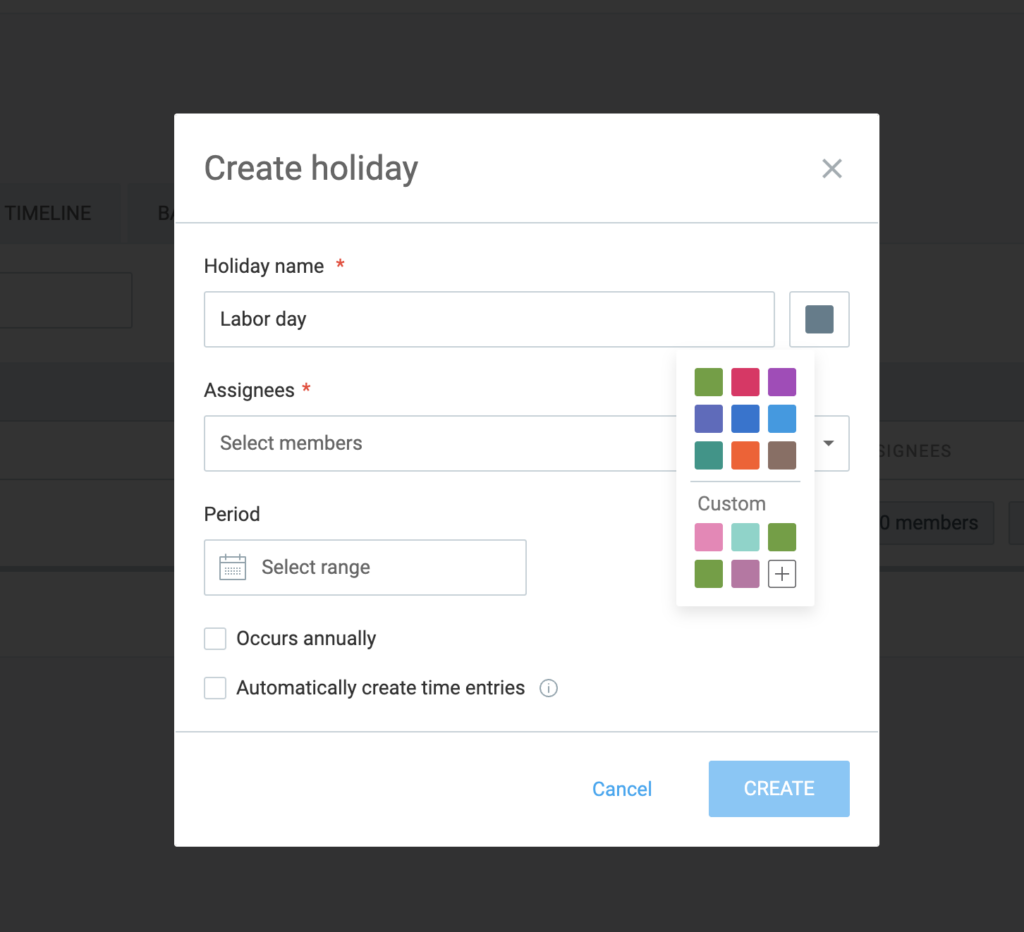
Manage holidays by creating multiple ones, assigning different people to different holidays (e.g. if some people don’t get time off for a specific holiday), specifying if you’d like the holiday to occur annually and defining a holiday color. Choose one, or make a custom holiday color.
When people request time off, holidays and weekends won’t count.
For example, if someone requests Jan 1 – Jan 7 for time off – and Jan 1 is holiday, Jan 2 is Saturday, and Jan 3 is Sunday – their total request will be 4 days for time off.
Created holidays are displayed in descending chronological order.
Annual holidays without a specific year are sorted by date, either for this year or the next, depending on today’s date.
To edit or delete holidays:
- Go to the Time off page
- Click on the Settings button at the top right corner of the page
- Choose Manage holidays
- Click on three dots > Edit next to the holiday in the Holidays screen
You can edit the holiday name, people assigned to it, period of time, its annual occurrence and color.
Deleting or changing working days doesn’t impact existing time off requests.
Manage policies #
Holiday policies can be managed in the same way as holidays.
You can:
- Create multiple policies
- Assign different people to different policies (e.g. if certain policy doesn’t apply to certain people)
- Check if the policy requires approval and needs to be approved by admin or manager, or some other specific member
Define policy #
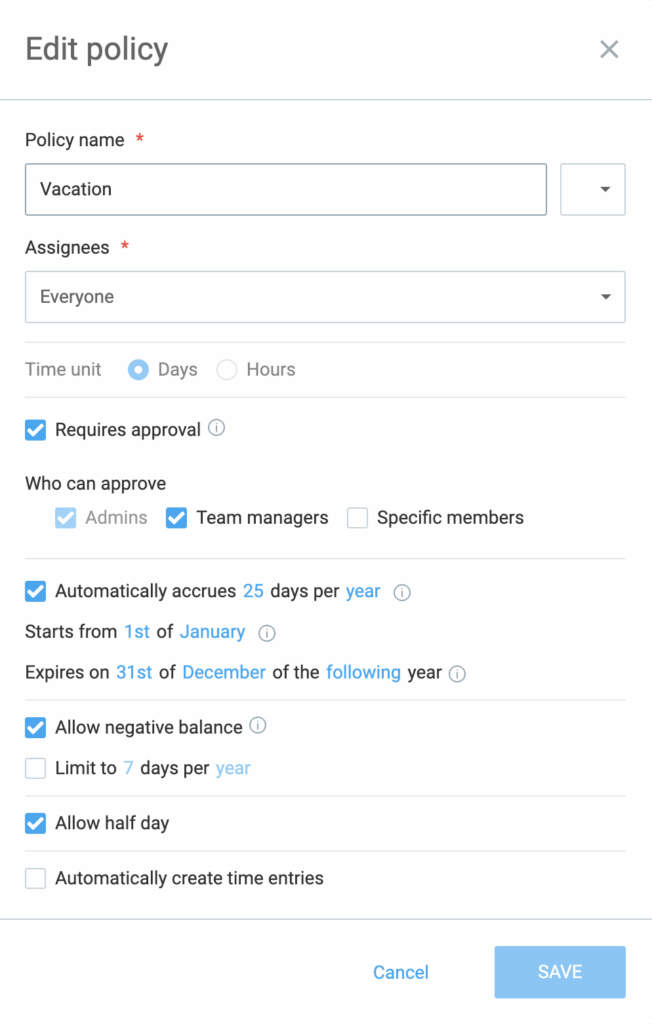
- Enter a policy name
- Choose members or groups of members to which the policy will be applied
- Define time unit (days or hours) – optional
- Define if policy requires approval of admins, managers or specific members (optional)
- Choose if policy can be accrued after a certain period of time
- Select if negative balance or half day off is allowed
- Specify a policy color: Choose one, or make a custom policy color.
Edit or delete policy #
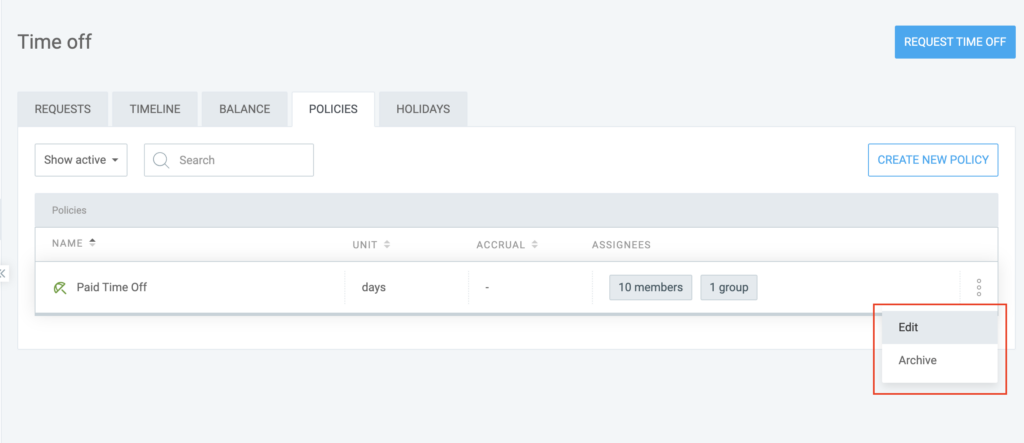
To edit or delete policies:
- Go to the Time Off page
- Click the Policies tab
- Click on three dots next to the policy
- Choose to Edit/Archive the policy
When managing holiday and time off policies, please note that you can enable automatic creation of time off and holiday entries. Approved time off requests and holidays can be tracked for the project you choose with the billability pulled from that project or task.
Holiday and policy colors previously defined are visible on Timesheet, Calendar, Time off and Schedule pages.
Only archived policies can be deleted.
For more details, refer to our article on Tracking holidays & time off.