Create & manage time off policy
Manage holidays, vacations, and other types of leave, and track accrual and balances.
Enable time off #
Before anyone can request time off, you first need to enable Time off in workspace settings and define a time off policy.
- Open the
 three-dots icon at the top left
 - Choose Workspace settings
- Scroll down to the Time off section
- Enable time off
- Choose if Regular users can see Time off outside their teams (optional)
You can have multiple policies, one for each type of employee.
Each policy has several fields that affects only that policy:
| Policy setting | Definition |
| Assignee | People who can request time off based on this policy. |
| Time unit | Can be days or hours. |
| Requires approval | If enabled, team members need to submit time off requests for approval. If left unchecked, all requests are automatically approved when submitted. |
| Balance expiry | Never expires (default): Balance for this policy won’t have a start or end date and won’t expire. Has expiry dates: Accrual and every balance for this policy need to have a start and end date defined. |
| Automatically accrues | When enabled, all active policy members will automatically receive a set number of days or hours on their balance, with a set start and expiry date. Clockify sends notification when an accrual period is changed or expires. |
| Start/end date | Defined timeframe when the time off balance can be used. |
| Allow negative balance | If checked, team members can request time off even if they don’t have enough available days/hours (e.g. for Sick leave). You can also limit the number of allowed negative balance. |
| Limit to number of days per period of time | Set a limit to a number of days a user can request per defined period. |
| Reset negative balance | If enabled, the negative balance will reset at the end of the year to automatically clear all negative time off and return the balance to 0 at the end of each year. |
| Allow half day | If enabled, team members can request for a half-day leave, choose the first or second half of a day off for any number of days. |
| Hours | If enabled, team members can request for time off in hours instead of days. |
| Automatically create time entries | Automatically create time off and holiday entries. Track approved time off requests and holidays with the project you choose. |
Keep in mind that new days added to a balance will not automatically clear a negative balance. They will simply be added to the total amount available. Any “leftover” amount will appear as a separate negative balance.
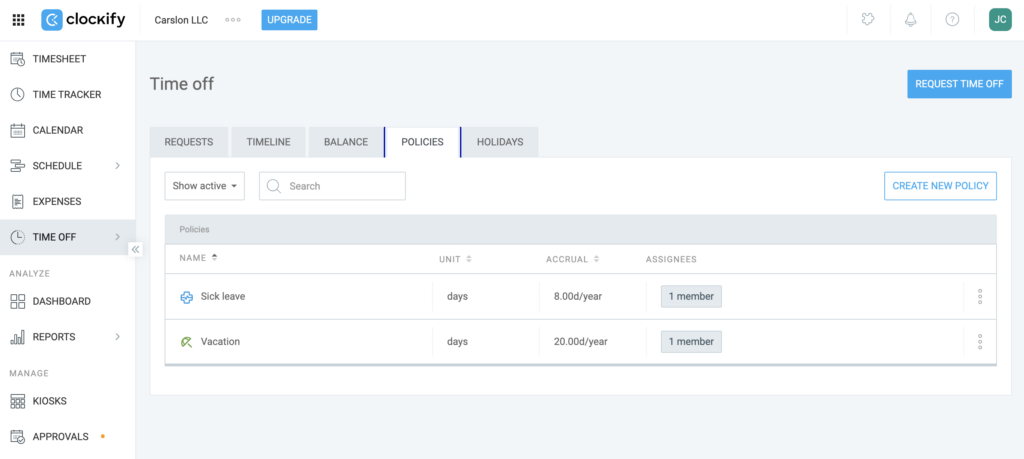
Default policies #
Newly created workspaces will have two default, pre-made time off policies:
- Sick leave
- Vacation
Admins and workspace owners can edit or delete these policies.
To check these policies:
- Go to the Time Off page
- Click the Policies tab
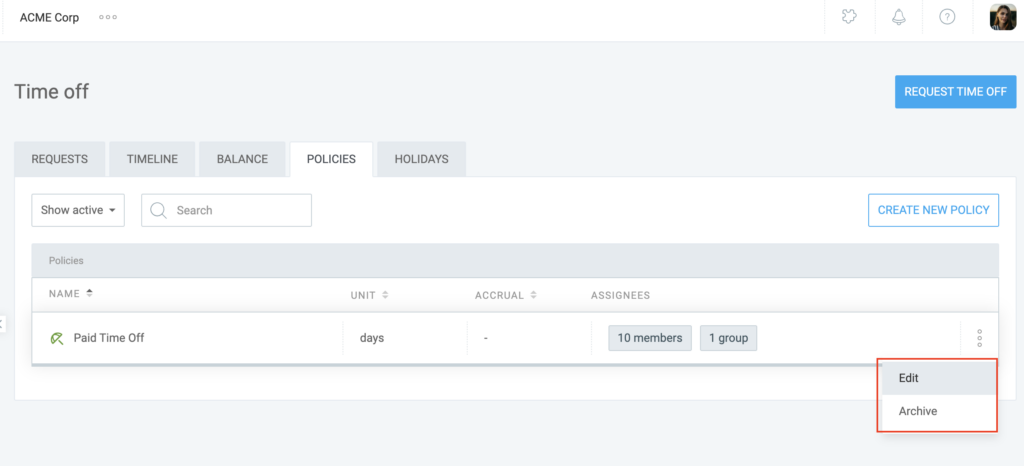
To edit or delete the policies:
- Click on the
 three dots icon next to the policy
 - Select Edit or Archive
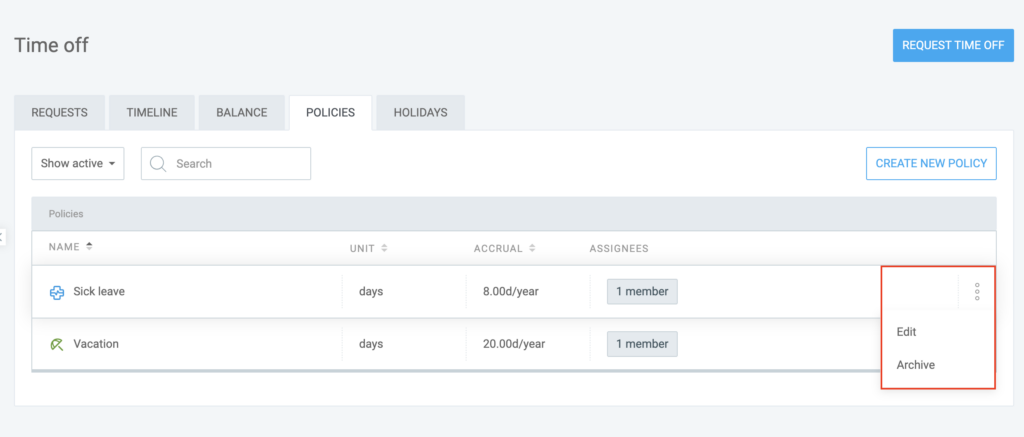
If you want to delete the policy, Archive it first, then it will show you the option to delete.
Create time off policy #
To create a new time off policy:
- Go to Time Off > Policies
- Click Create Policy
- Enter a name for the policy
- Select the team members for whom the policy applies
- Select the time unit (Days, hours) and allow half day (optional)
- Check Requires approval if you want to approve time off requests
- Select who can approve time off requests (if enabled)
- Select whether or not the time off balance expires
- Assign expiry date and automatic accrual rules for balance expiry (optional)
- Enable negative balance and automatic time entry creation under Advanced options
- Click Create
- Add initial balance and balance expiry (if enabled) for each member in the pop-up window
- Click Add
The new policy should now appear under the Policies tab. You can click on the ![]() three dots icon next to the policy to edit or archive it.
three dots icon next to the policy to edit or archive it.
Create holiday policy #
To create a new holiday policy:
- Go to Time Off
- Click on the Holidays tab
- Click Create Holiday
- Enter a name for the holiday
- Select team members who can request for the holiday
- Set the date/s of the holiday
- Check the box for Occurs annually (optional) if the holiday happens every year
- Enable automatic time entry creation (optional)
- Click Create
Manage time off balance #
Clockify also allows you to manage when and how time off balances can be used by your team members.
Set policy expiration
You can define if the balance for a specific time off policy expires or never expires. This setting affects all users under that policy.
- Go to Time off page and open Manage policies in Settings
- Click Edit next to the policy you want to change
- Go to the Balance expiry section and choose one of two options:
- Never expires (default)
Balance doesn’t have expiry date - Has expiry dates
All future accruals and balances for this policy require defined start and end date
- Never expires (default)
Important to note:
- If you switch policy to Never expires, all existing start and end dates on user balances will be removed
- If you switch policy to Has expiry dates, all existing balances get a start date of today and all future balances will require a start and end date
Manage user’s balance #
Owners and admins can apply a specific validity period (start and end date) to any user’s balance. This makes sure that users request time off during a specific timeframe. Once the period ends, the balance will expire and be automatically removed.
To add or edit user’s balance:
- Go to the Time off page and open the Balance tab
- Choose policy at the top of the page
If you’d like the page to display information based on users, choose User at the dropdown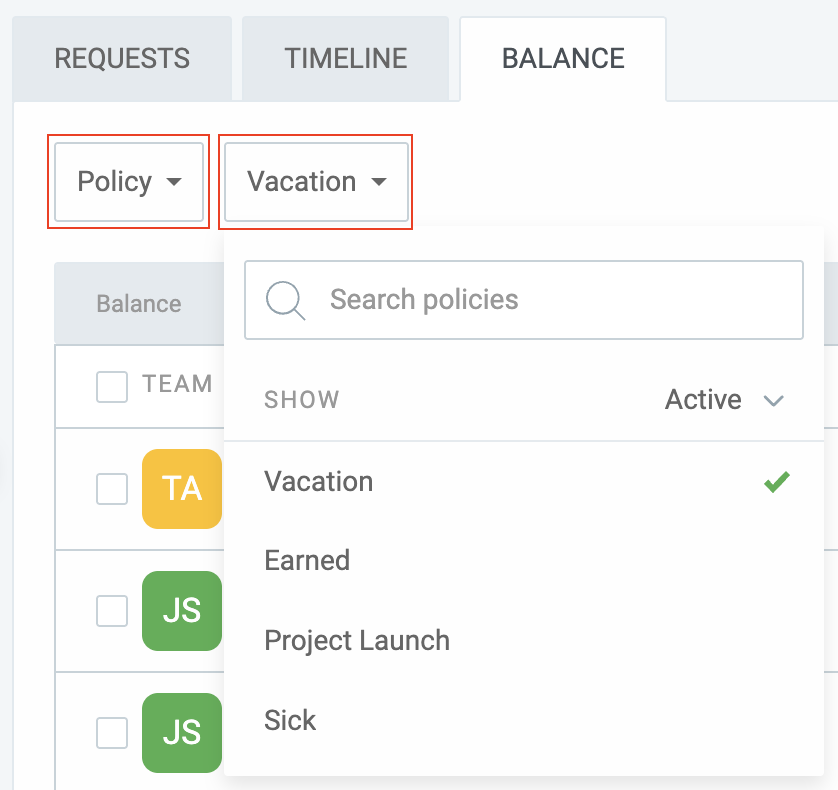
- Click Manage balance from the three-dots menu next to the user’s name
- In Manage balance popup:
– Enter number of days added to balance
– Define timeframe for the balance to be valid
– Optionally add notes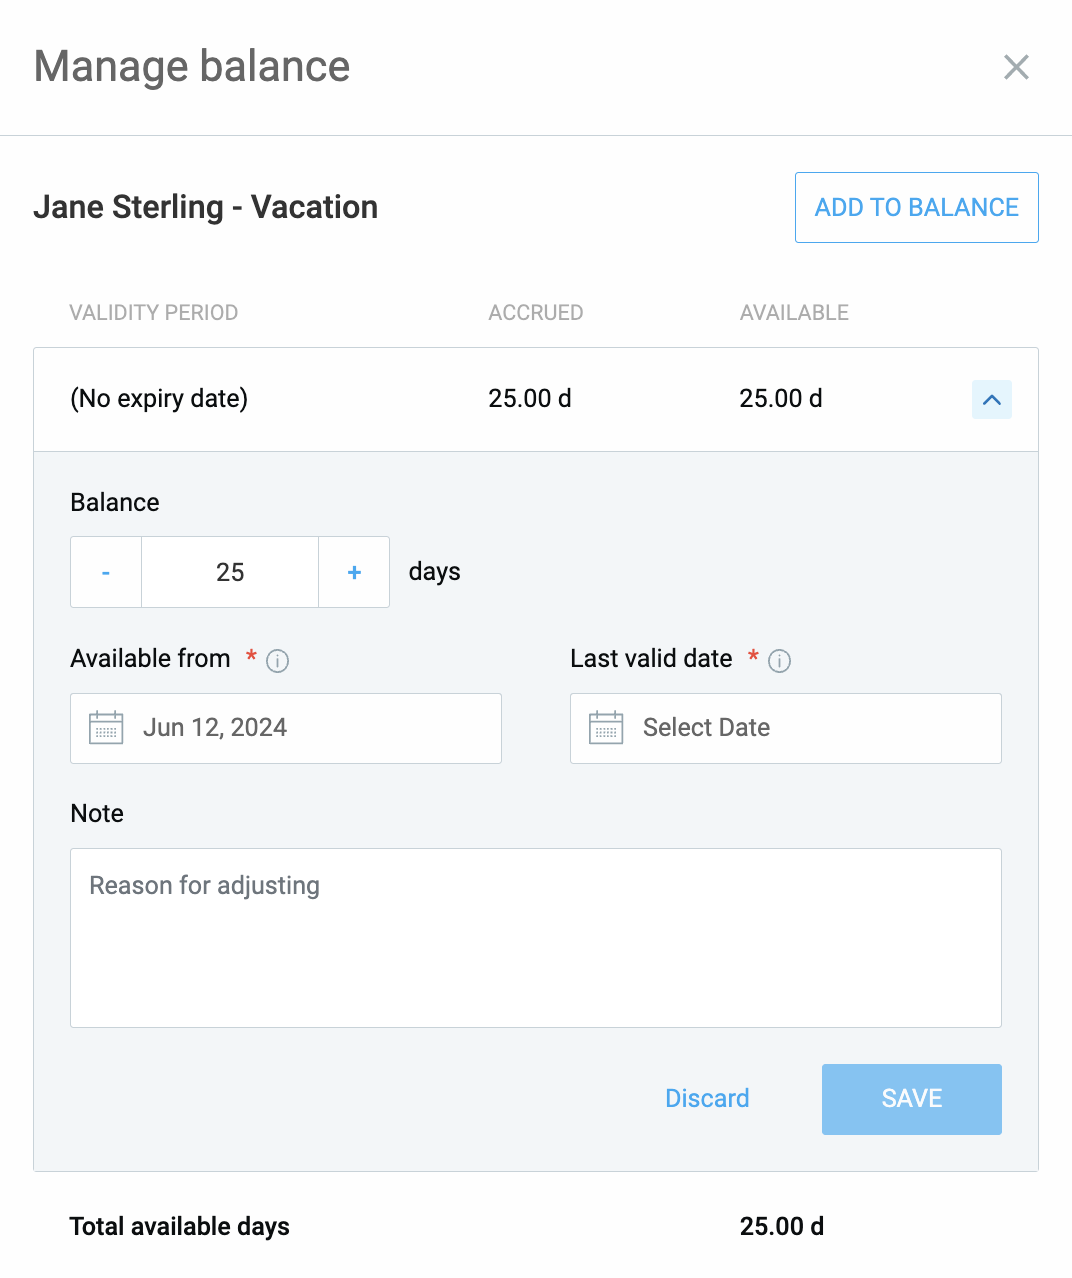
- Click Add to save changes
You can also click Add next to a user’s name in the list to open the same popup.

When a user requests time off, Clockify always deducts days from the balance that is expiring the soonest.
Bulk add balances #
You can add balances to multiple users on a single policy at once.
To do that:
- Go to the Time off page and open the Balance tab
- Check the box next to each team member you want to edit, or click Team member
- It will select all the members listed
- Click Add to balance
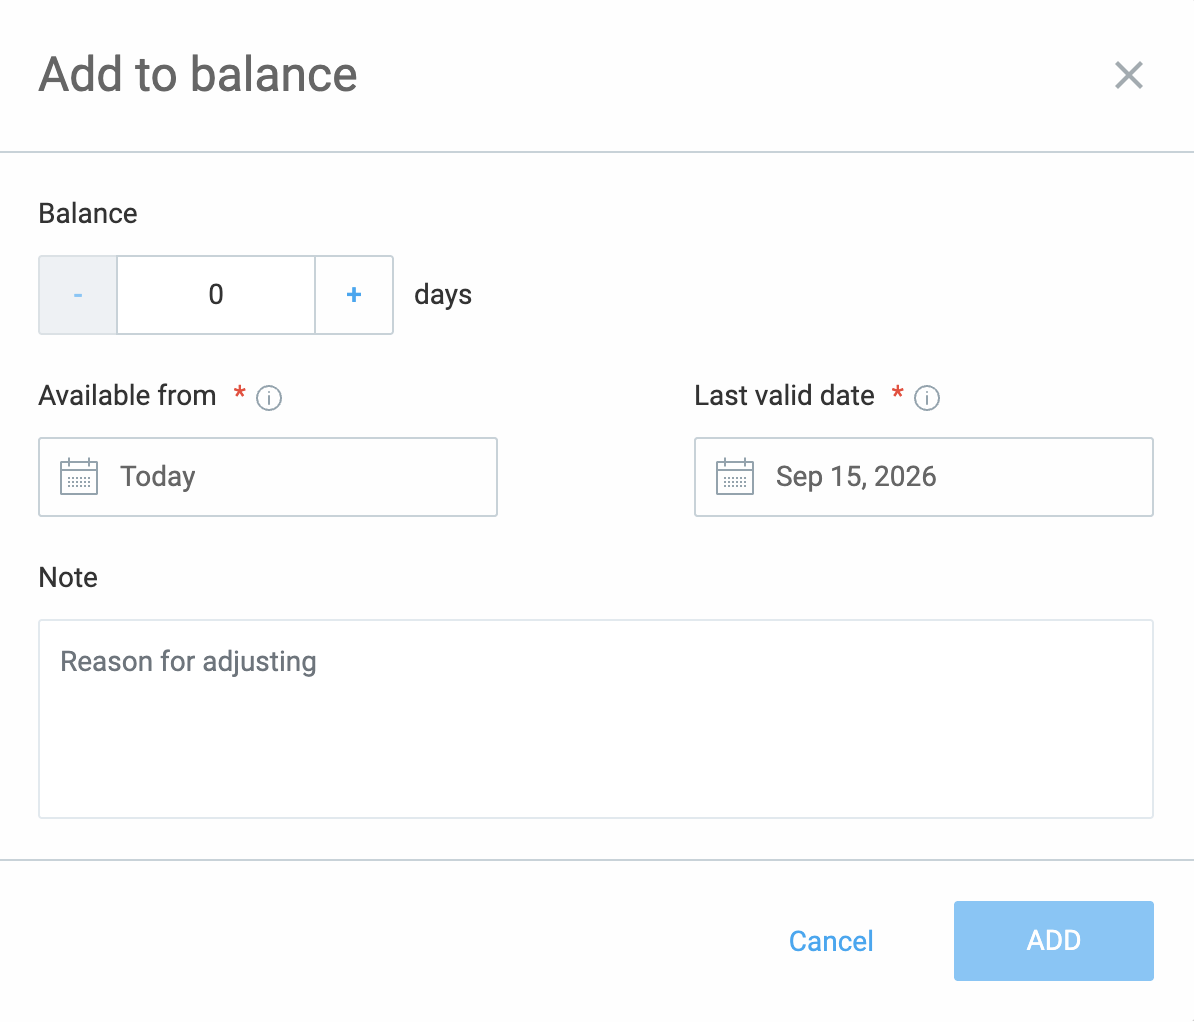
- Enter number of days and timeframe and click Add to complete the process
Balance history and notifications #
You can view a user’s balance history for a specific policy by selecting History from the ![]() three-dot icon next to their name.
three-dot icon next to their name.
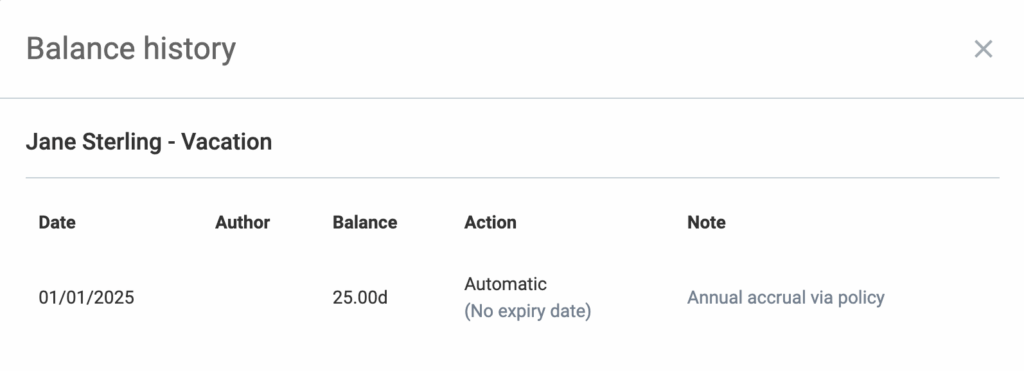
When a user’s balance is updated (either manually or automatically through accrual), they will receive an email with details about the new validity period.
Archive policies #
You can archive policies that are no longer used (e.g. Vacation 2021).
- Click on the three dots icon next to the policy
- Choose Archive from the dropdown
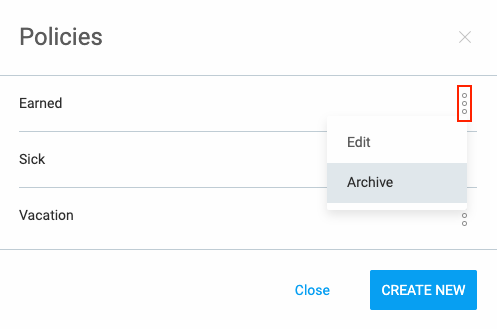
You can restore or delete the policies in the same way.
When you archive a policy, all balances and requests remain, but team members can’t choose the archived policy when requesting time off. Deleting a policy deletes all the requests and balances for that policy.