Approve time off
Approve, reject, and track your team’s time off requests in the Time Off page.
Time Off is a paid feature and is available when you upgrade to Standard, Pro, or Enterprise plans.
Important to note: #
- These roles have permission to approve or reject time off requests:
- Workspace Owners
- Admins
- Team Managers
- Specific user assigned as approver in the policy
- Before users can request for time off, check that:
- Time off is enabled in Workspace settings.
- Users have sufficient leave balance or negative balance is enabled in the Policy settings.
- Users are added to a Time off or Holiday policy. (Check out Create & manage holidays & time off policies for more information).
Manage pending requests #
All requests awaiting your action are located in the Requests tab. This is where you can view, approve, and reject time off requests.
Approve requests #
- Go to Time Off
- Click the Requests tab
- Find the team member’s request
- Click Approve

Reject requests #
- Go to Time Off
- Click the Requests tab
- Find the team member’s request
- Click on the three dots next to the request
- Select Reject
- Type in a reason for the rejection in the pop-up window
- Click Reject to confirm the action
Reject previously approved request #
You can reject a time off request that you have previously approved.
To reject an approved request:
- Go to Time Off
- Click the three dots next to the approved request
- Click Reject
- Type a reason for the rejection
- Click Reject
Filter requests #
Use the filters at the top of the Requests tab to sort by:
- Status: Pending, Approved, or Rejected.
- Team member: Find requests from specific individuals or teams (if you created any).
- Date range: View requests for specific periods.
Timeline tab #
Use the Timeline tab to see a bird’s-eye view of your team’s leaves for the next 30 days (or a custom range).
Color coding
- Green: Approved time off
- Light green: Pending request (awaiting approval)
- Gray: Public holidays
Visibility rules
- Admins: Can see time off for everyone in the workspace
- Team Managers: Can see time off for their specific team members
- Regular Users: Can see their own leave and their team’s leave (if enabled in Workspace Settings, they can see everyone’s)
Notifications #
Email notifications are sent to relevant user roles depending on the time off actions.
| Action | Requester | Team manager | Admin / owner | Policy approver |
| Time off request submitted | ✖ | ✔ | ✔ | ✔ |
| Request approved | ✔ | ✖ | ✖ | ✖ |
| Request rejected | ✔ | ✖ | ✖ | ✖ |
| Weekly leave summary* | ✖ | ✔ | ✖ | ✖ |
| Request made on behalf of user | ✔ | ✖ | ✖ | ✖ |
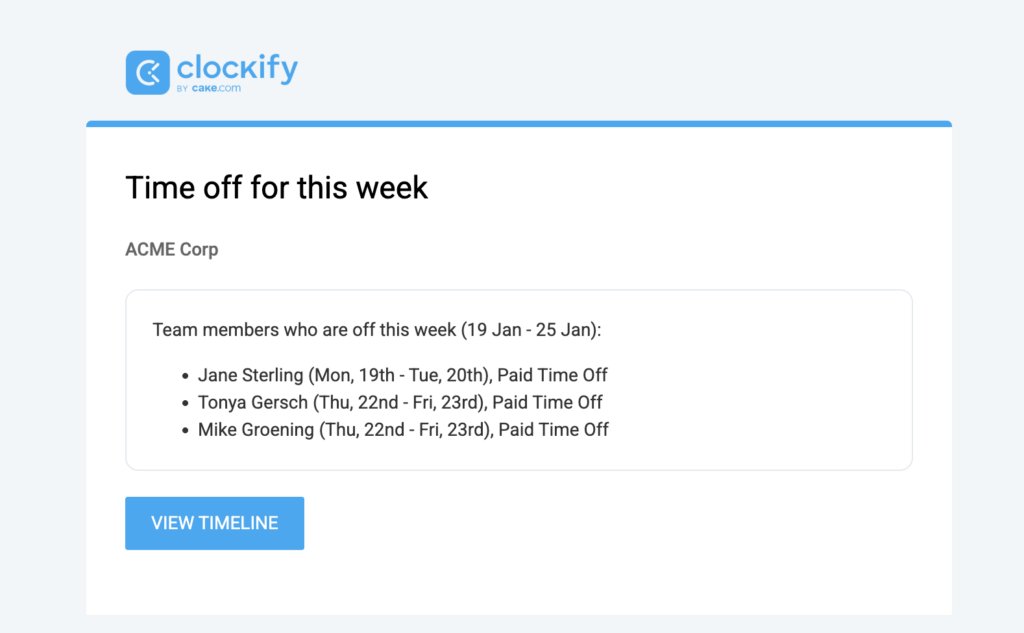
*Clockify sends a weekly email notification listing all approved time off for their team members in the upcoming week.
Admins only receive notifications if they are the designated approvers or if no Team Manager is assigned to the user.
FAQ #
Why can’t I approve a specific time off request?
If a request’s total is displayed in red and the Approve button is unavailable, it is usually because the team member does not have enough accrued days or hours in their balance. This occurs when the specific time off policy is set to disallow negative balances. To fix this, an admin must either adjust the user’s balance or edit the policy to allow negative balances.
How can I see who originally approved a request?
In the Requests tab, you can hover over the status label (e.g., the green Approved tag) of any request. A tooltip will appear showing the name of the person who approved it and the exact timestamp of when the action was taken.