Screenshot recording app
Capture screenshots as you work on tasks and have the timer running, and later review how your day looked like.


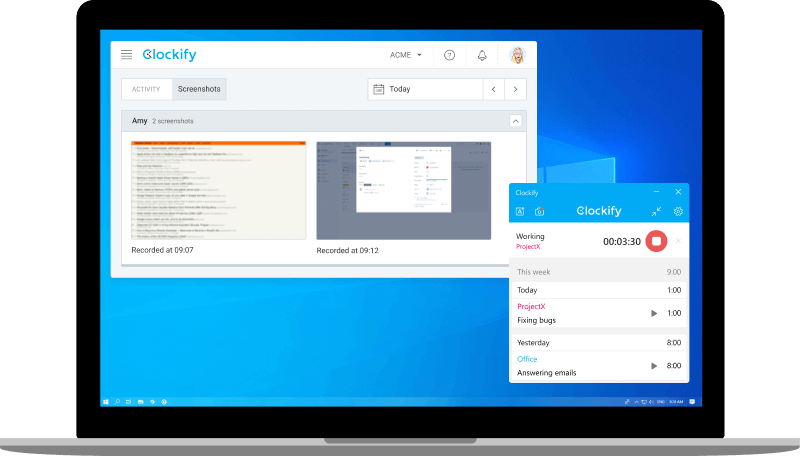
How screenshot recording works
Step 1
Enables "Capture screenshots"
Once admin enables screenshot capturing in workspace settings, all users in the workspace will receive a notification.
Step 2
Install desktop app
Screenshots are captured only if you have the Clockify desktop app installed and running. Web app, browser extension, and mobile app can't capture screenshots.
Step 3
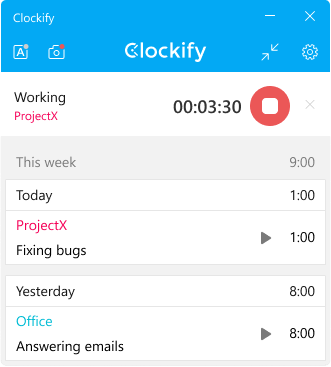
Start timer
Select an activity and start the timer. While the timer is running, screenshots will be captured randomly once every 5 minutes.
Step 4

Review captured screenshots
You can see all your generated screenshots when you open Clockify web app and go to Activity page.
- Screenshots are low-resolution and blurred by default for privacy and security reason.
- You can delete any of your screenshot at any time (just keep in mind that the time between the previous and current screenshot will be subtracted from your timesheet). Screenshot deletion is permanent (there is no undo).
- Each screenshot is tied to a time entry. If the time entry is deleted, its screenshots are deleted also.
- Regular team members can see and delete all their personal screenshots, and workspace admins can see and delete everyone's (if an admin deletes a screenshot, there will be no time subtraction).
- Screenshots older than one year are not accesible and are automatically deleted from the system.