Expense policy non-compliance, late expense report submissions, delayed approvals… Does any of this sound familiar to you?
If so, your expense approval system might be broken.
Read on to learn what expense approval involves and how to set up an efficient expense approval system.

What is expense approval?
Expense approval refers to authorizing each purchase employees make on behalf of a company. A typical expense approval workflow involves the following steps:
- Employee incurs an expense,
- Employee submits an expense report,
- Approver examines the report to determine whether it aligns with the expense policy,
- Approver approves or rejects the request, and
- Employee gets reimbursed if the expense was approved.
For an expense report to align with the expense policy, it needs to contain the details outlined in the policy. This usually includes:
- Type of expense,
- Amount, and
- Date.
Additionally, it’s common to require employees to submit receipts for each expense.
In the following section, you’ll find more information about expense categories and policies.
Steps to set up an expense approval system
Now that you know what an expense approval system looks like — here are 3 steps to building an efficient system.
#1: Define expense categories clearly
The first step when setting up an expense approval system is to categorize expenses. In fact, vague categories create confusion among employees, especially regarding what expenses are reimbursable.
For that reason, make sure your expense categories are clearly defined, without overlaps.
Common expense categories include:
- Office supplies,
- Advertising,
- Travel,
- Meals, and
- Entertainment.
An expense management app like Clockify allows you to easily create expense categories. In Clockify specifically, you simply name your category, define the amount and unit — and click Create.
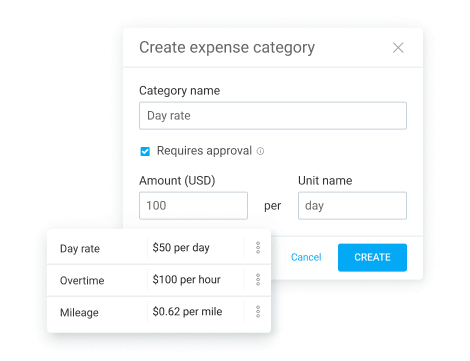
Having specific expense categories allows you to monitor spending more effectively and set budget limits for different kinds of expenses. That way, you avoid cost overruns.
Categorize expenses with Clockify
#2: Refine your expense policy
Once you’ve defined expense categories, it’s time to create an expense policy or revise an existing one.
An expense policy aims to outline what expenses are eligible for reimbursement and how to submit expenses for approval.
In contrast, an ambiguous expense policy makes it difficult for employees to understand what to do. This will likely lead to increased unintentional non-compliance.
For that reason, make sure the policy covers all the essential details, including:
- Who the approvers are,
- What expenses are reimbursable,
- When the submission deadline is,
- What documentation is required, and
- What the spending limits are.
Using Clockify for company expense tracking vastly improves expense policy compliance.
Namely, Clockify enables employees to submit expenses quickly and accurately — without delays.
Moreover, project, category, and amount are required fields when creating an expense in Clockify. Therefore, since your employees can’t submit reports without these details, you won’t receive any incomplete reports.
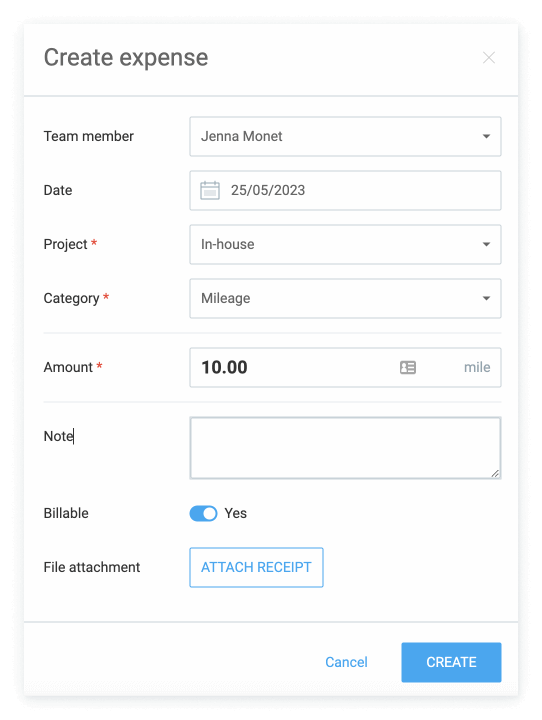
A well-defined expense policy is one of the key elements to establishing an expense management process that runs smoothly.
💡 CLOCKIFY PRO TIP
Having remote employees makes the matter of who pays for what a little more complicated. For clarification, read this article:
#3: Automate the expense approval workflow
The manual expense approval workflow is time-consuming and error-prone.
Companies surveyed in the Emburse Travel Expense Trends Report cited the improvement in report submission timeliness as the biggest advantage of switching to a cloud-based expense approval solution.
Apart from that, the Association of Certified Fraud Examiners Report suggested that companies using a manual system are more susceptible to expense reimbursement fraud. This type of fraud involves employees exaggerating expense amounts or making up non-existent expenses.
The report revealed that companies suffered a median loss of $1,400 a month due to expense reimbursement schemes.
As a remedy, a trusted and secure app like Clockify makes it possible to spot such fraud attempts more easily.
You can see all the expense details in detailed expense reports, which you can filter by:
- Team,
- Client,
- Project,
- Task,
- Tag,
- Status, and
- Description.
The filters allow you to quickly discover any discrepancies, as you can focus on one team or project at a time.
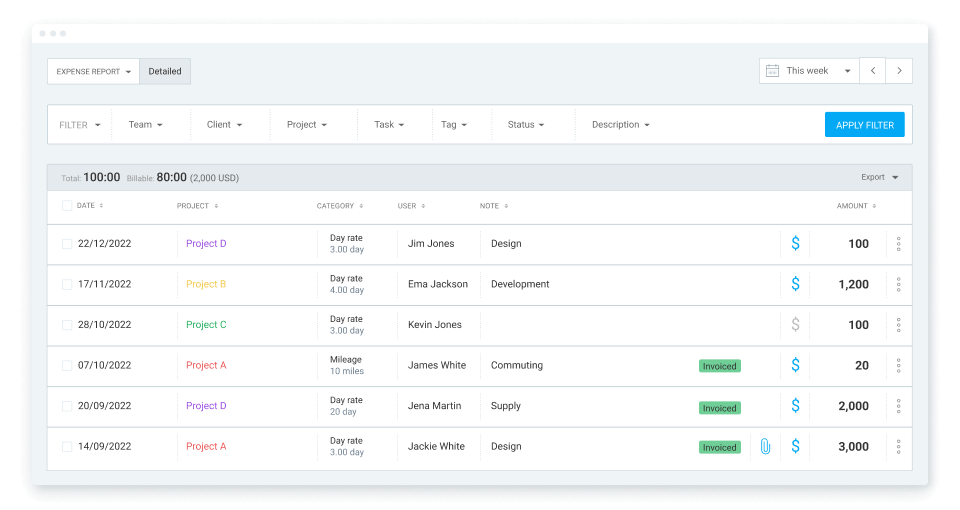
Automating expense approvals with powerful software speeds up the whole process, reduces the risk of errors and fraud, and allows you to monitor your budget easily.
💡 CLOCKIFY PRO TIP
For a detailed explanation of how to keep track of expenses, read this:
Enhance your expense approval process with Clockify
As an easy-to-use time and expense management app, Clockify makes the expense approval process so much simpler.
First, decide to whom you want to give the permission to approve/reject expenses. You can choose one of the 2 options:
- Admins and project managers, or
- Admins and team managers.

After that, you can create expense categories and employees can add their expenses quickly.
Instead of keeping a pile of paper receipts that can get lost or damaged, users can attach photos of receipts to each expense they create in Clockify.
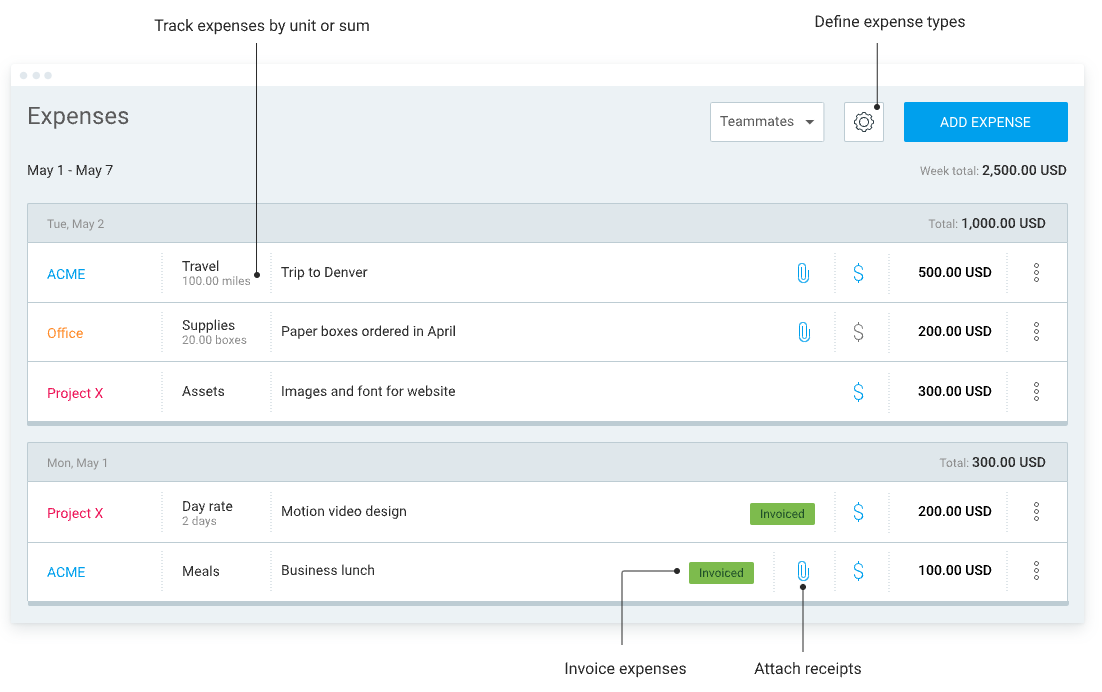
Expense approval couldn’t be simpler — all approvers need to do is click on approve or reject. If rejecting an expense, the approver is prompted to add a note explaining their decision. They can also approve all expenses at once by selecting approve all.
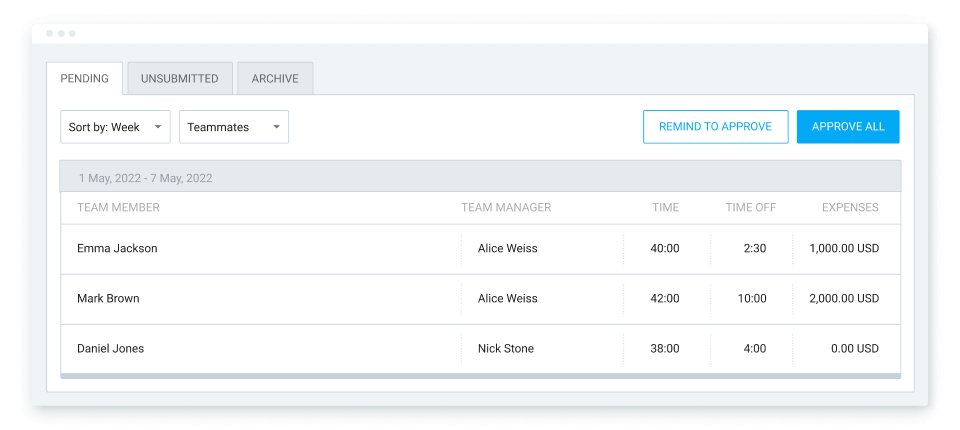
Additionally, you can share live expense reports with external users so they can monitor expenses in real time. For example, you can share the reports with the finance department so they can review the expenses after the manager approves.
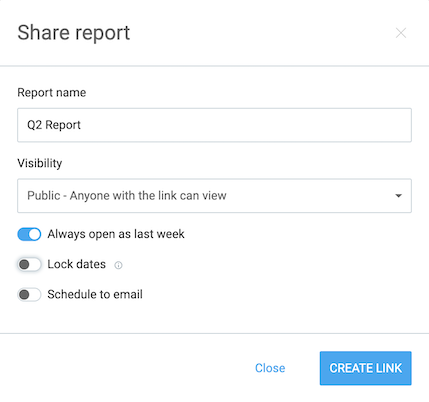
When it comes to the expense approval process — Clockify follows you every step of the way, from creating expense categories to expense report approval and sharing.
Get your expenses in order.


