Expense report
This feature is available on Pro and Enterprise subscription plans.
Permissions #
- Admins can see and edit all expenses
- Team managers can see all expenses for their team members
- Project managers can see all expenses for members working on their projects
- Team managers can edit expenses for their team members (if enabled Who can edit time and expenses for others in workspace settings)
- Regular users can see and edit only their own expenses (unless they are locked)
For an overall guidance on how to manage expenses, watch the video and follow the instructions below.
See and manage tracked expenses #
To see all tracked expenses, open Expense report either from the sidebar, or by going to any Report and clicking on Time report, and selecting Expense report.

You can get the report for any date range you need by choosing the range in the upper left corner and choosing a predefined range or selecting a custom one.
You can filter the report by the following criteria: billable (billable, non-billable), type (time off, holiday, regular entry), approval (approved, unapproved) and invoicing (invoiced).
You can sort expenses by clicking on the column header in the table.
Expenses that are invoiced are marked as invoiced. Hover over the invoiced tag to see which invoice picked them up.
You can manually mark expenses as invoiced by selecting them via bulk edit and then choosing Mark as invoiced. To mark as uninvoiced, select only the invoiced expenses.
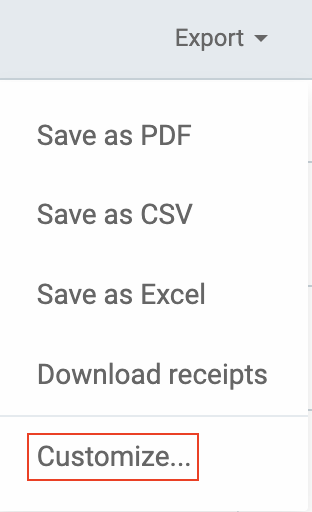
You can export all the expenses to PDF, CSV and Excel by clicking Export.
Once you downgrade your subscription from Enterprise or PRO to a lower plan, previously created expenses won’t be visible and cannot be exported anymore.
To edit or delete an expense, click on the three dots next to the expense.

Undo the ‘delete’ action immediately after the deletion in the success toast message at the bottom-right corner.
Customize export #
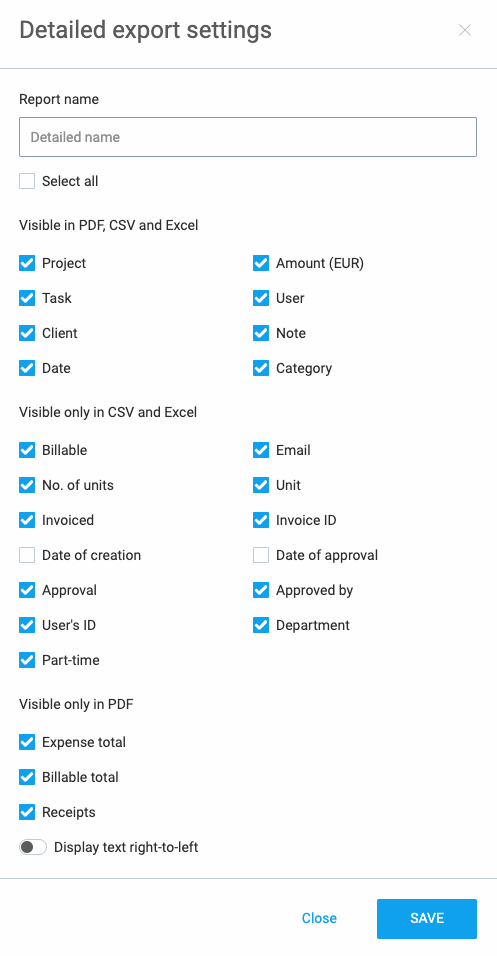
You can also customize a PDF, Excel or CSV export of the expense report in the Detailed expense report page.
To do that:
- Go to report
- Click Export

- Choose Customize
- Choose which information you’d like to get

- Save
Each report you export in PDF, Excel or CSV will contain the selected data.