Create & manage holidays & time off policies
This guide will walk you through creating, managing, and configuring time-off policies and holidays in your workspace. As a Workspace Admin or Owner, you have full control over these settings, ensuring that your team’s time off is accurately tracked and managed.
Enable time off #
To start managing holidays and time off policies, you first need to enable the Time Off feature in your workspace.
To enable time off:
- Click the three-dot icon next to your workspace name
- Select Workspace settings
- Scroll down to the Time off section
- Enable the toggle for Activate time off
- Enable the option to let Regular users see time off outside their teams if needed (optional)
Create and manage time off policies #
Time off policies determine how your team can request and track different types of leave, such as vacation days, sick leave, or personal time off.
To create or manage time off policies:
- Select Time off from the sidebar
- Click on the gear icon in the top-right corner of the page
- Select Manage policies
- Enter the settings for your policy
- Click Create New
Clicking Create New creates a new Time off policy and you can edit it at any time.
Here’s a guide to each setting when creating a new policy:
| Feature | Description |
| Policy name | The name of the new policy. You can also choose a color and symbol for the policy. |
| Assignee | Members or groups to which this policy applies |
| Time unit | Set the time off in Days or Hours |
| Requires approval | Choose whether time off requests require managerial approval. If unchecked, requests will be auto-approved. If enabled, check the choices for: Who can approve: • Admins • Team managers • Specific members |
| Balance expiry | • Never expires (default) – Balance for this policy won’t have a start or end date and won’t expire • Has expiry dates – Accrual, and every balance for this policy needs to have a start and end date defined |
| Automatically accrues | Automatically adds days or hours to team members’ balances monthly or yearly |
| Allow negative balance | Allow users to request time off even if they have a negative balance. Enabling this unlocks the following settings: • Limit to x days per year/month – Limit negative balances to a specified number of days per year or month • Reset negative balance at the end of the year – Clears negative balances at year’s end |
| Allow half day | Allow users to request partial days off or specific hour blocks of the working day |
| Automatically create time entries | Automatically generate time entries in the Timesheet for approved time off |
Adding new days to a time-off balance will increase the total available amount, but it will not automatically eliminate or clear any existing negative balance.
Create and manage holidays #
You can create multiple holidays, customize them, and assign them to specific users or groups.
To create and manage holidays:
- Go to the Time Off page
- Click on the gear icon in the top-right corner
- Select Manage Holidays
- Click Create New
- Enter a name for the holiday
- Select the members you want to apply the holiday to in the Assignees dropdown
- Set the date or date range for the holiday in the Period section
- Enable the following settings (optional):
- Occurs annually – The holiday is set to occur every year
- Automatically create time entries – Approved holidays will create time entries
9. Click Create

By default, Saturdays and Sundays are marked as non-working days. You can change this by customizing the working days in the Workspace settings.
Manage non-working days #
Non-working days (holidays and weekends) can be defined and customized in your workspace settings.
To manage non-working days:
- Click the three-dot icon next to the workspace name
- Select Workspace settings
- Locate the section for Working days
- Click on the days and check all the days that you and your team work

When an employee requests time off, holidays and weekends are excluded from the total time off.
For example:
If someone requests leave from Jan 1 to Jan 7, and Jan 1 is a holiday, Jan 2 is a Saturday, and Jan 3 is a Sunday, their request will be reduced to 4 days of time off.
Edit a holiday #
To edit a holiday:
- Navigate to the Time off page
- Click the gear icon in the top-right corner
- Select Manage holidays
- Click the three-dot icon next to the holiday you want to edit
- Select Edit
- Edit the holiday settings as needed
- Click Save
Important notes about editing a holiday:
- If you add a holiday or change its date after a team member has already submitted a leave request for that period, their balance automatically updates to reflect the new non-working day.
- If you’ve recently hired new people or changed teams, double-check that they are assigned to the holiday. If they aren’t assigned, the system will treat that day as a normal workday and deduct it from their balance.
- Any color changes you make to a holiday will update instantly across the Calendar, Schedule, and Time Off timeline views for everyone assigned to that holiday.
Delete a holiday #
To delete a holiday:
- Navigate to the Time off page
- Click the gear icon in the top-right corner
- Select Manage holidays
- Click the three-dot icon next to the holiday you want to delete
- Click Delete
- Click Delete again to confirm the action

What happens after deleting a holiday? #
- If a user had a time off request that spanned across the deleted holiday, the system will no longer exclude that day.
- Example: If a user was off Monday–Wednesday and Tuesday was a holiday, they were originally charged 2 days. If you delete the Tuesday holiday, their request will now be worth 3 days, and their balance will decrease accordingly.
- If Automatically create time entries was enabled for holidays, deleting the holiday does not automatically delete the generated time entries in the Timesheet.
- The holiday will immediately disappear from the Time Off, Calendar, and Schedule views for all assigned members.
- Unlike archiving a policy, deleting a holiday is final. If you delete it by mistake, you will need to recreate it and re-assign it to the correct members or groups.
Archive a policy #
You can archive or delete outdated policies, such as old vacation policies or specific leave policies no longer in use.
To archive a policy:
- Go to the Time off page
- Click the gear icon
- Select Manage policies
- Click the three-dot icon next to the policy you want to archive
- Select Archive

What happens after archiving a policy? #
- All past time off requests, approved leave, and historical balance logs remain intact. Your reports will still show accurate data for that period.
- Existing balances for that policy are preserved but will no longer accrue new time (even if auto-accrual was enabled).
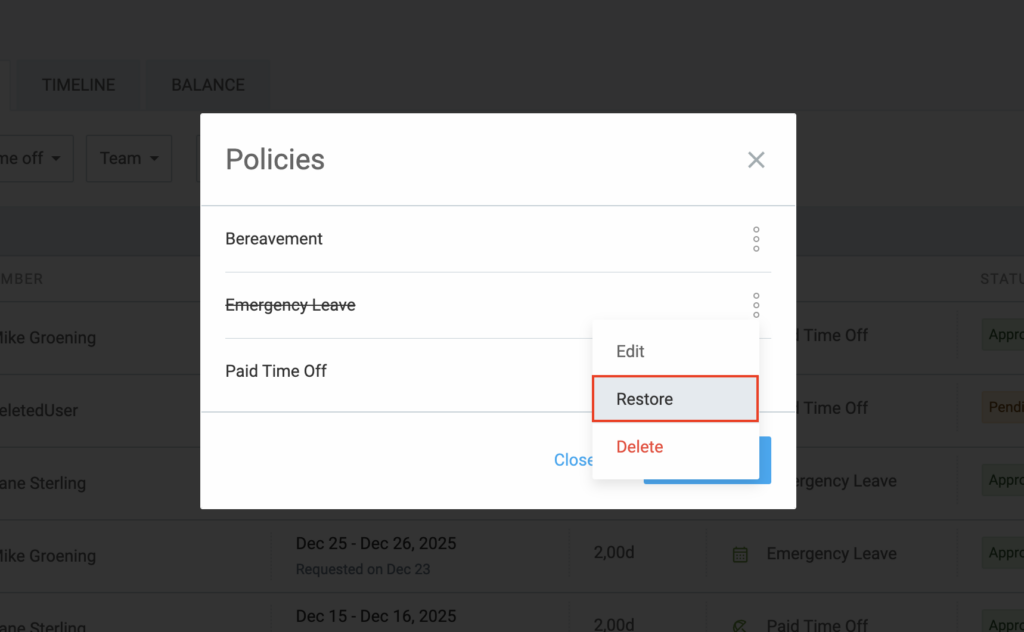
- If you archived a policy by mistake, you can restore it at any time to make it active again.
Delete a policy #
Policies should be archived first before they can be deleted. If you don’t see an option to delete a policy, archive it first.
To delete a policy:
- Go to the Time off page
- Click the gear icon
- Select Manage policies
- Click the three-dot icon next to the policy you want to delete
- Select Delete
- Type DELETE in the text field
- Click the Delete button to finalize the action
Reminders before deleting a policy #
Unlike archiving, deleting a policy is permanent and has a significant impact on your workspace data. Before you hit delete, here is what you need to know:
- Every request (approved, pending, or rejected) associated with that policy will be permanently removed from the system.
- All user balances tied to that policy, including any tracked accruals will be erased.
- Your historical reports will no longer show leave taken under this policy which can lead to gaps in your time-tracking records.
- There is no “Undo” button for deleting a policy. Once it’s gone, you would have to manually recreate the policy and re-upload everyone’s balances and past requests from scratch.
Only delete a policy if it was created by mistake and contains no real data. For everything else, Archive it instead to keep your records safe.
Manage time off balance #
Clockify also allows you to manage when and how your team members use time off balances.
Set policy expiration
You can define whether the balance for a specific time-off policy expires or never expires. This setting affects all users under that policy.
- Go to the Time off page and open Manage policies in Settings
- Click Edit next to the policy you want to change
- Go to the Balance expiry section and choose one of two options:
- Never expires (default)
Balance doesn’t have an expiry date - Has expiry dates
All future accruals and balances for this policy require a defined start and end date
- Never expires (default)
Important to note:
- If you switch the policy to Never expires, all existing start and end dates on user balances will be removed
- If you switch policy to Has expiry dates, all existing balances get a start date of today and all future balances will require a start and end date
When a user requests time off, Clockify always deducts days from the balance that is expiring soonest.
View and track time off #
Once you have set up your time off policies and holidays, you can track your team’s time off requests on the Timesheet, Calendar, Time off, and Schedule pages.
FAQ #
Can I have different policies for different types of leave (vacation, sick leave, etc.)? #
Yes, you can create multiple time off policies and assign them to different members or groups based on the type of leave.
Can I set different holiday calendars for teams in other countries?
Absolutely. When creating or editing a holiday, use the Assigned members field to select only the specific users or groups located in that region. This ensures that a holiday in the UK doesn’t accidentally give your US-based team a day off on their Clockify calendar.
Can users see each other’s time off requests? #
Admins can view all time off requests. Team managers can view their team members’ time off. Regular users can only view their own time off, unless the setting Allow regular users to see time off outside their teams is enabled.
Can I track time off across multiple days? #
Yes, if your time off policy is set to days, you can allow half-day leave across multiple days. If it’s set to hours, you can allow hourly requests across multiple days.