Linux app
Download Clockify desktop app for Linux →
Read more about features available on the Linux app below.
Sign up #
If you don’t have a Clockify account yet, you need to create one in order to track time.
- You’ll be redirected to the web app Signup screen
- Once you sign up to the web app, you’ll automatically be able to use the Linux app, as well.
Log in #
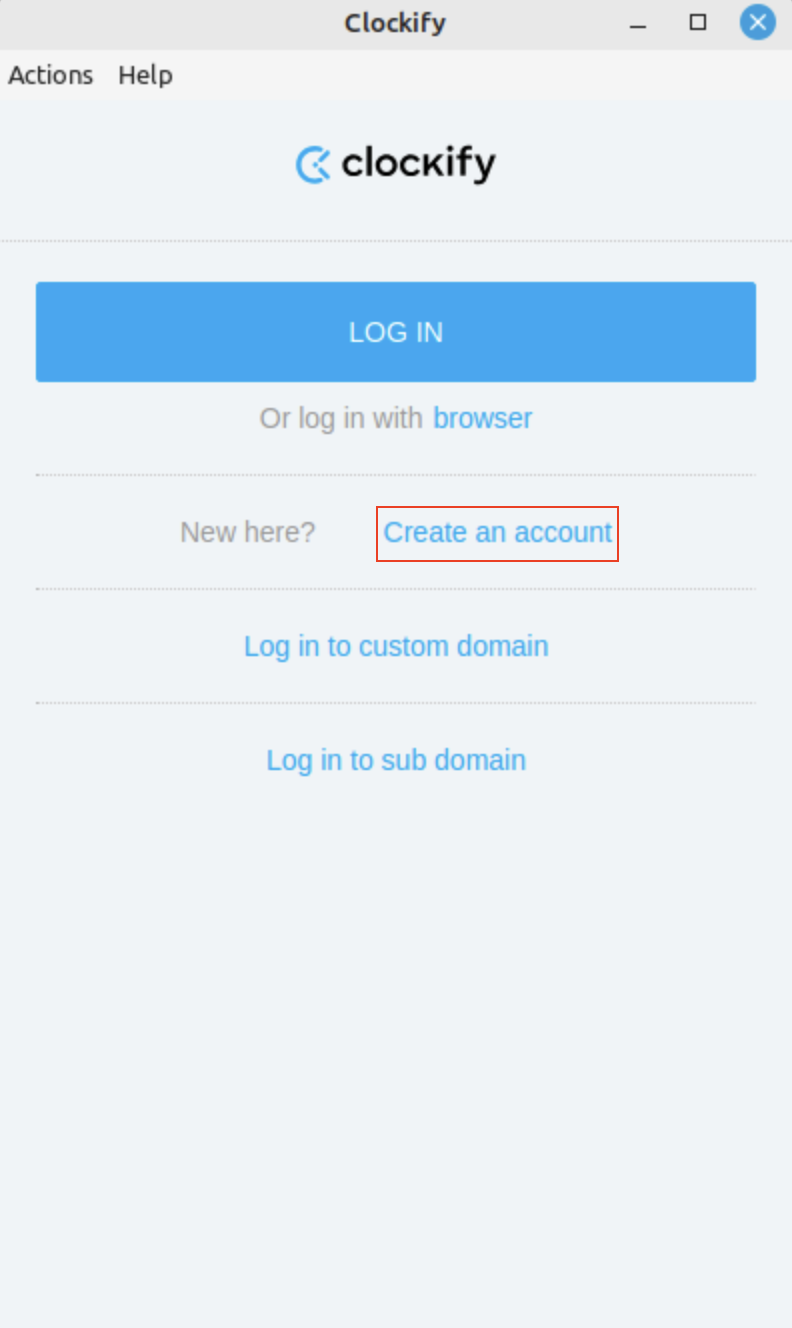
If you have Clockify account, you need to log in to start tracking time:
- Open the app
- Click the Log in button in the Login window
You’ll be redirected to the web app Login screen.
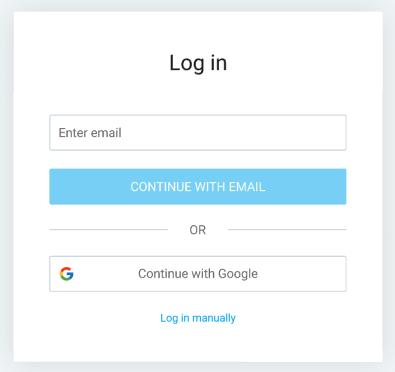
Once you log in to the web app, you’ll automatically be logged in to the Linux app, as well.
Log in via browser #
Once you’ve logged in the web app, allow Clockify to Open in browser.
You’ll automatically log in to the Linux app in browser and can start using the app and tracking time.
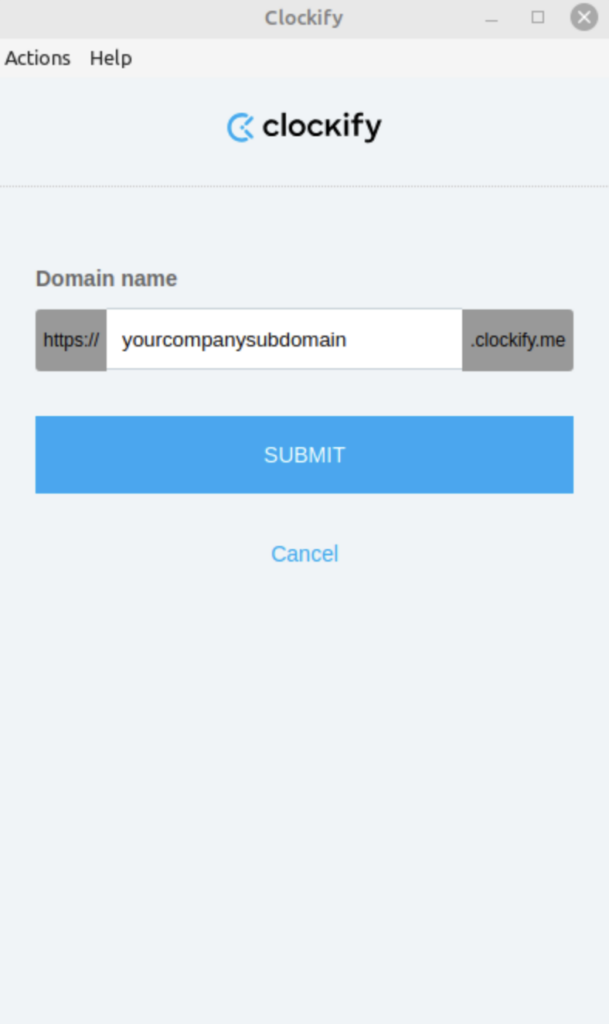
Custom domain and subdomain login #
If your workspace is on a custom domain or subdomain you have to choose your custom domain or subdomain then log in through the browser.
Time tracking #
You can keep track of your time in Clockify Linux app in two ways:
- Use a timer – Track your time in live mode, while completing your tasks
- Add time manually – Enter how much you’ve worked (e.g. 1.5 for 1h 30min) and click Add
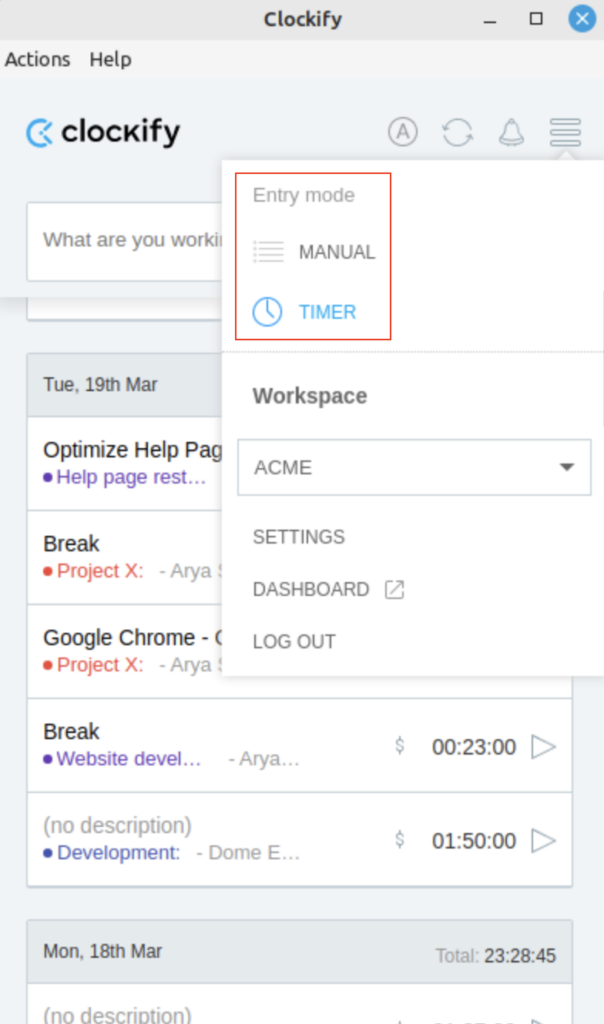
Add time using timer #
The timer mode is used to track live time during some activity. But first, make sure that the timer mode is activated. Click on the menu icon in the upper right corner and select Timer. After that, simply start the timer with one click.
Usually the timer mode is set automatically, so you don’t need any previous setup.
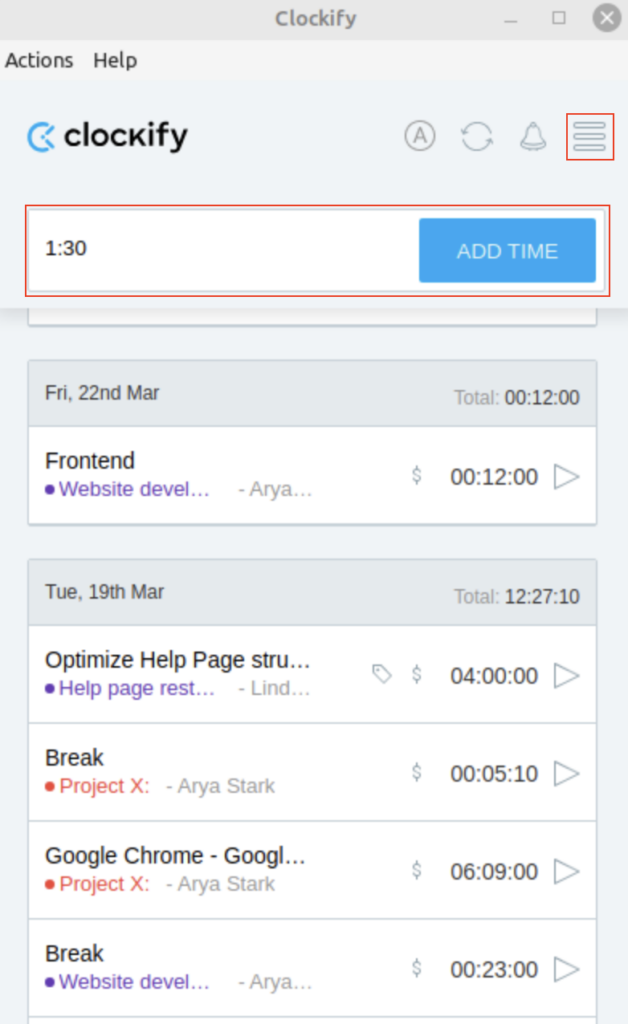
Add time manually #
To add time manually, activate this tracking mode by clicking on the menu icon in the upper right corner and selecting Manual. After that, you can enter the duration, and click Add. You can also type what you’ve worked on, or add a category such as project, task, tag in the next screen.
Track time off & holidays #
Clockify also supports tracking holidays and time off on the web app. Time off and holiday entries are distinctly displayed in the tracker.
Time off and holiday entries can be created by Owners and Admins on the web app.
For more information on how to create time off and holiday entries, check out Track holidays & time off.
Options with time entries #
Continue timer #
You can quickly continue a timer from a previous time entry:
- Find time entry for which you want to continue tracking time
- Click on the play button ▶
- A new timer will pick up that time entry’s details (description, project, tag, billability) and start ticking
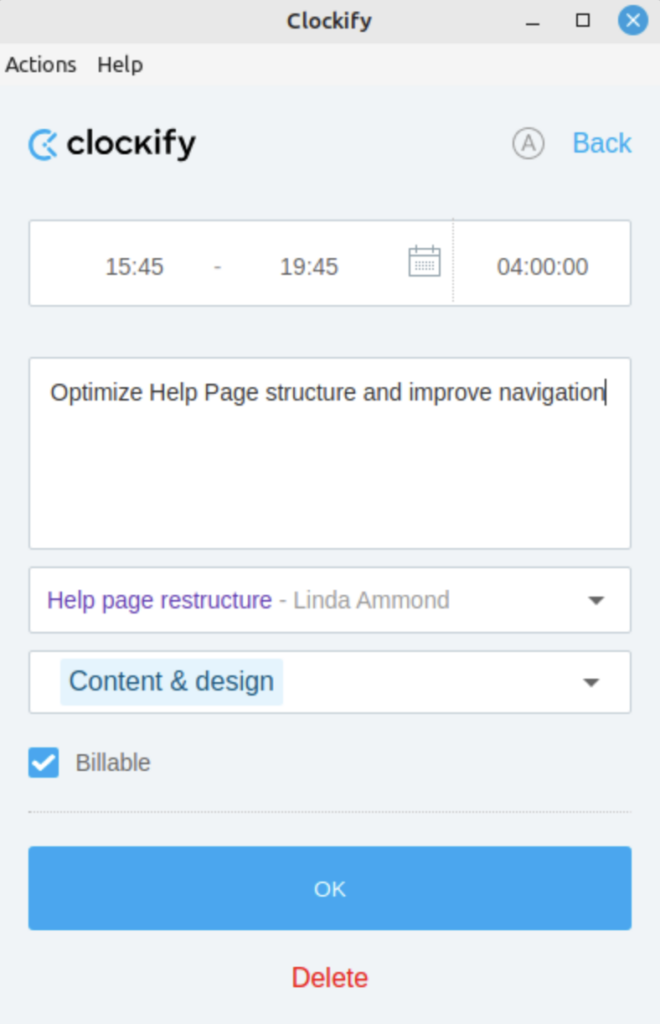
Editing time entries #
You can modify any time entry simply by clicking on them and changing what you want.
Modify time entry in one of the following ways:
- Add project and task
- Add tags
- Add/edit custom fields
- Change description
- Change start/end time and duration
- Mark as billable
Delete entry #
To delete a time entry:
- Click on a time entry
- Click Delete in Time entry details screen
- Confirm the action
Restore deleted/discarded entries
Clockify lets you restore any entries you’ve accidentally deleted or discarded.
This feature is available to all users, regardless of their role or subscription plan.
If you accidentally delete an entry:
- Immediately after deleting, a quick message with Undo button will appear
- Click Undo
- Deleted entry will be restored on all relevant tracking pages
Restore a discarded running entry in the same way.
Create project, task, tag or client #
How to create a project, task or tag #
You can create a Public project on a Free plan. If you want to set a project to Private, you need to upgrade your Clockify account to any paid plan.
If you wish to create a project or tag follow these steps:
- Click to create or edit a time entry
- Select Add project/Add tag
- In the dropdown click Create new project/task or Create new tag
If adding a project:
- Enter project’s name
- Select color
- Click Add Project
- Optionally, select client
- Select the project’s billability status and visibility
If adding a task:
- Click Add project
- Select Create new task
- Enter task name
- Click Add
If adding a tag:
- Enter tag name
- Click Add
How to create a client #
If you wish to create a client keep in mind that this is only possible while creating a new project. So, follow these steps:
- Click to edit a time entry
- Select Add project
- In the dropdown click Create new project
- Click Select client then Create new client
- Enter client’s name and click Add

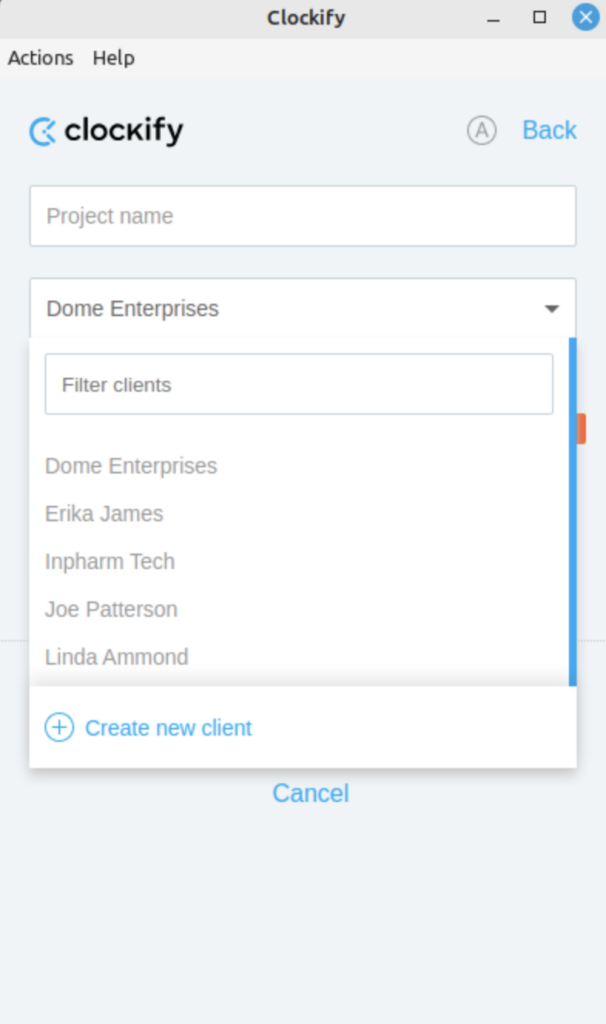
It’s possible to create only a new client without saving a new project. Simply cancel the project creation and the created client will remain.
Regular (non-admin) users aren’t able to create clients, projects, and tags if they are not granted these permissions. To give them such permissions, log in via Web browser and enable this in the Workspace settings.
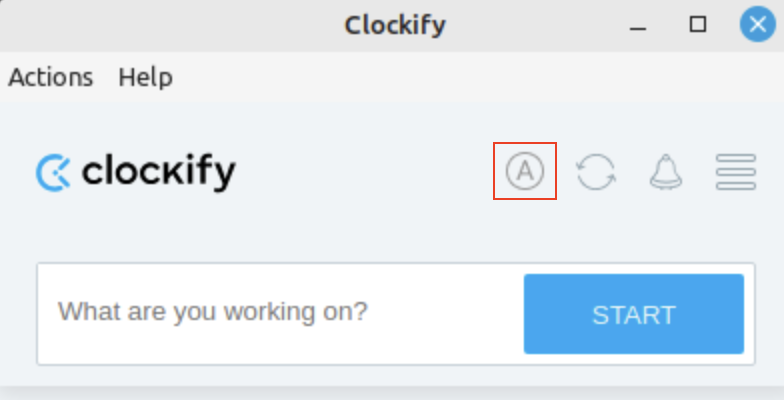
Auto tracker #
Auto tracker tracks your time across apps and sites you are visiting. This feature can give you a detailed look at how much time you spend across programs and it lets you create timesheets based on your activity.
Auto tracker is enabled by default.
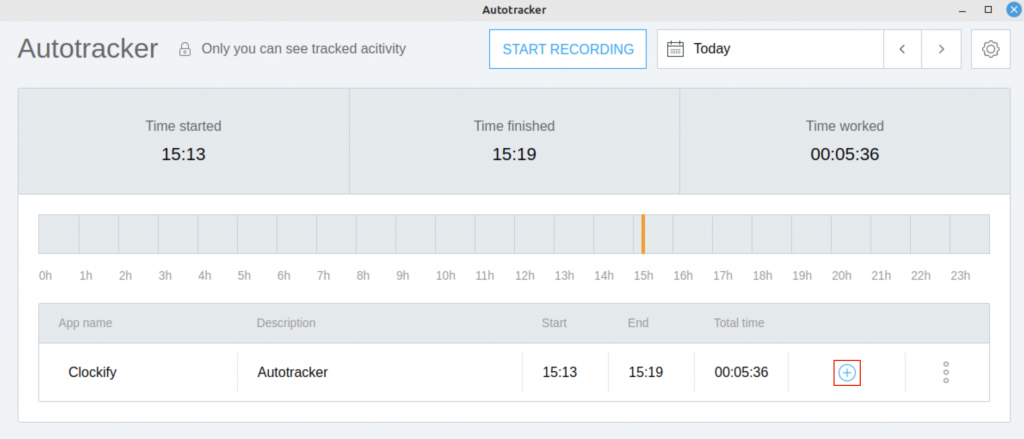
To start recording activities automatically, click on the A icon and then on Start Recording.
Auto tracker will track websites and programs that you view for more than 5 seconds (apps you use less than that won’t show up). Any time longer than 5 seconds can be customized in the Auto tracker settings.
What should you know about Auto tracker?
- All recorded data is stored locally on your computer (nothing is sent online)
- Only you can view your recorded activities
- You can view past data up to one week
- Data older than 7 days is automatically deleted forever
- Auto tracker tracks changes that last minimum 5 seconds
- URLs of visited websites are not tracked
- App usage is automatically organized alongside the auto-tracked entry table, with the time spent on each app summarized
- You can select these grouped entries and add them as individual time entries
- To narrow your options, filter auto-tracked entries by app name, description, or URL
- The table will display relevant results, allowing you to select and merge them into a single time entry
- Selected items are merged into a single time entry in Clockify, with descriptions included, start time from the earliest record, and total duration used to calculate the end time
- You can adjust the start time, end time, and duration before creating the merged entry
- The duration reflects the total time of the merged entries, and the start time is based on the first auto-tracked entry
Importing auto tracked time #
You can create time entries in Clockify based on the recorded activities. Just click on the plus (+) sign next to the activity.
Add more details to the entry in a new window that pops up, and then simply click OK.
If you don’t want to see items you’ve already added to Clockify, you can check Hide added items in the Auto tracker’s settings.
Deleting auto tracked time #
If you’d like to delete a recorded entry, you can to that in the edit entry screen. Once you click on the plus (+) button, click Delete in the pop-up window. Click Delete in the conformation screen to complete the action.
You can also click on the three dots next to the entry and choose Delete.

Notifications #
Check out the latest notifications under the bell icon at the top right corner of the screen.
Notifications in the Linux app are synchronized with the notifications on the web app. Therefore, if you’re logged in the web app and have read some of them, they will be marked as read in the Linux app, too.
Each time you get a new notification, it will be indicated with an orange dot and the number of notifications you received. Click on the bell to read new notifications.
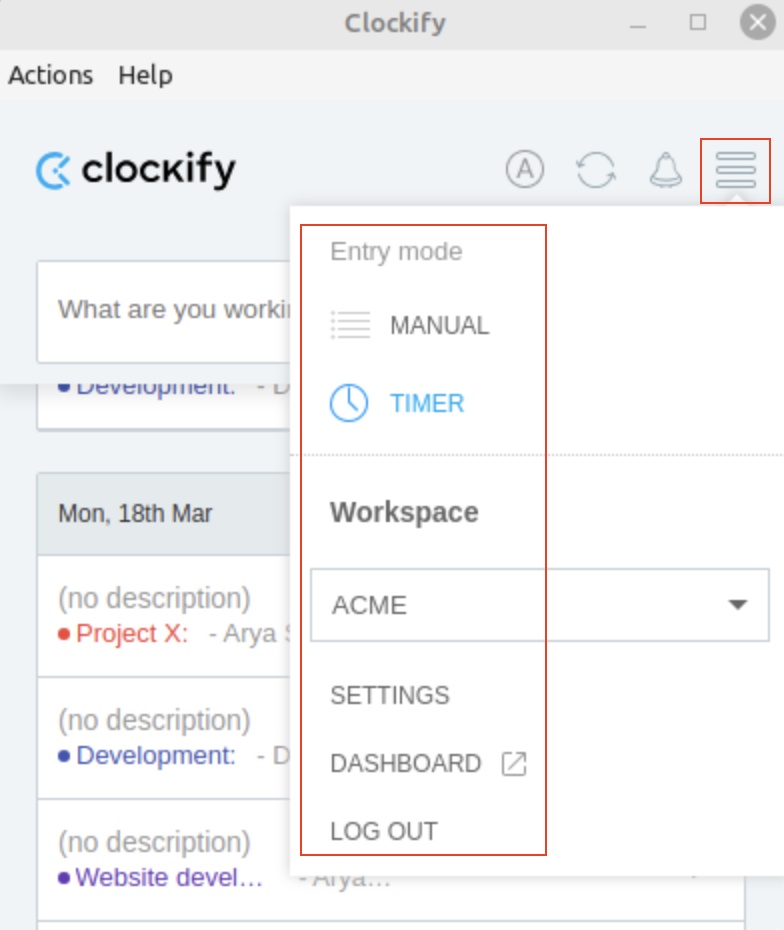
Menu options #
The menu is located in the upper right-hand corner. Just click on the little hamburger icon and you will find options:
- Choose Manual or Timer entry mode
- Switch workspaces across one or multiple organizations
- Go to Settings
- Visit the dashboard on the web
- Log out
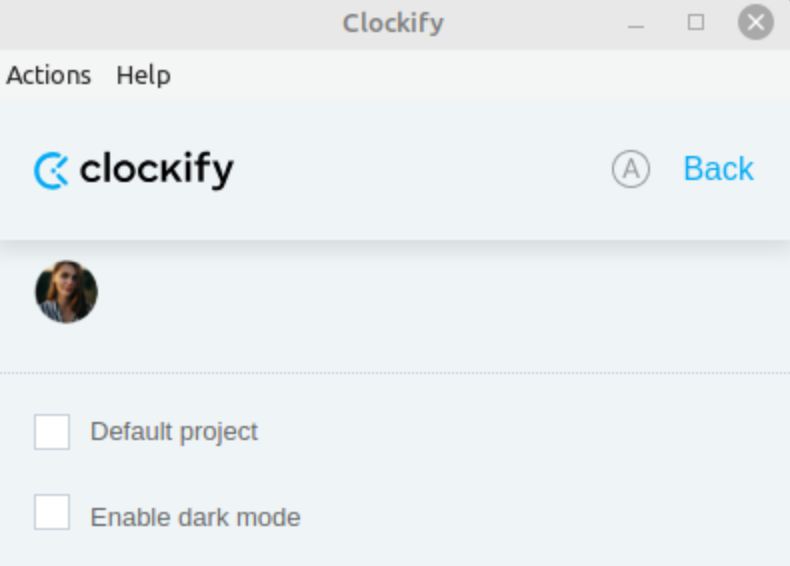
Settings #
Settings are located in Menu, the hamburger icon in the top right. In the app’s settings, you will find the following options:
- Set a default project
- Enable dark mode
Default project #
If you work on the same project every day, perhaps you could set a default project. Then, all you have to do is type what you’re working on and start the timer, and the project will be selected automatically.
You can choose between:
- A fixed project, which will be always used when you start a timer for an entry without a project (until you change the default project), or
- Last used project, and the timer will pick up the most recently used available project from your list of time entries
To configure any additional settings for your profile, go to the Profile settings in the web app.
Offline tracking mode #
You can track time in Clockify Linux app even if you’re offline. You don’t need to specifically turn on offline mode, it will happen automatically if you are not connected to the internet.
You can create time entries manually or start/stop the timer. Entries made while offline will be saved locally on your computer. Once you get back online they’ll get synced with your web account.
Projects, tasks, and tags are not available while offline, therefore if those fields are required, you will be able to edit time entries before they are synced.
When you’re offline, you won’t be able to see your other time entries, only those that were created while you were offline and which haven’t been synced yet.
If you are using the app in the offline mode, please make sure you’ve synced your time entries with the cloud prior to logging out. If you fail to do that, all the data that is not synced at the moment of logging out, will be lost.
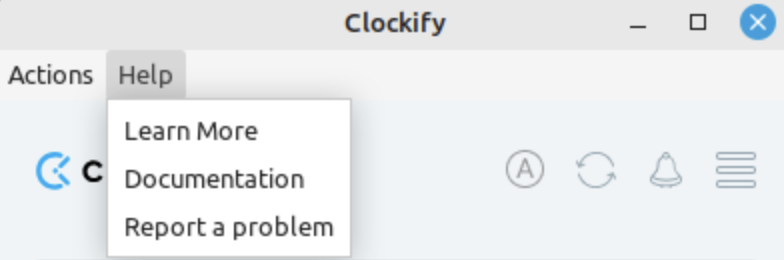
Troubleshooting menu #
In an effort to anticipate any issues you may encounter when using the app, we’ve added a menu at the top left corner of the app.

There are two types of activities you can perform:
- Actions
- Reload app: Refresh the app
- Log out: Same as log out option in app’s menu
- Reset app: Log out and delete all configurations (Auto tracker, dark mode, project preferences and so on)
- Help
- Learn more: Visit Clockify’s website
- Documentation: Visit Clockify’s help page
- Report a problem: Contact support