Edit time entries
You can easily modify any time entry directly in your timesheet on the Time Tracker page by clicking directly on the time entry. Changes are automatically saved as you make them.
- What you can edit: You can edit the description, project, billability, tags, start/end time, and date of time entries.
- Who can edit:
- The person who created the time entry can edit it at any time unless it’s approved or locked.
- Admins can edit all time entries (and also use bulk edit) in the Detailed report, regardless of the creator.
Edit time entries in Detailed report #
Editing time entries directly in Detailed report is commonly used:
- When you’re cleansing data and want to fix incomplete time entries (e.g., entries with no description, no associated project, or missing a tag).
- If you’ve logged more billable hours than you want to charge your client, you can write off those excess time entries by changing them to non-billable.
Bulk edit overview #
You can bulk edit in two different locations depending on your goals. Use the table below to determine which method fits your current workspace plan and user permissions.
| Time Tracker | Detailed Report | |
| Best use case | Quick fixes to multiple entries within the same day. | Cleaning up data across large date ranges, teams, or multiple projects. |
| Who can use it | Everyone (for their own entries). Admins can edit for others by switching views. | Admins (for everyone). Regular users (for their own entries). |
| Price | Available on all plans. | Available on any paid plan. |
Bulk edit in Time Tracker #
You can also bulk edit your time entries on the Time Tracker page when you click the little edit icon near the total number of hours you tracked that day. Bulk edit will then be enabled for that specific day.
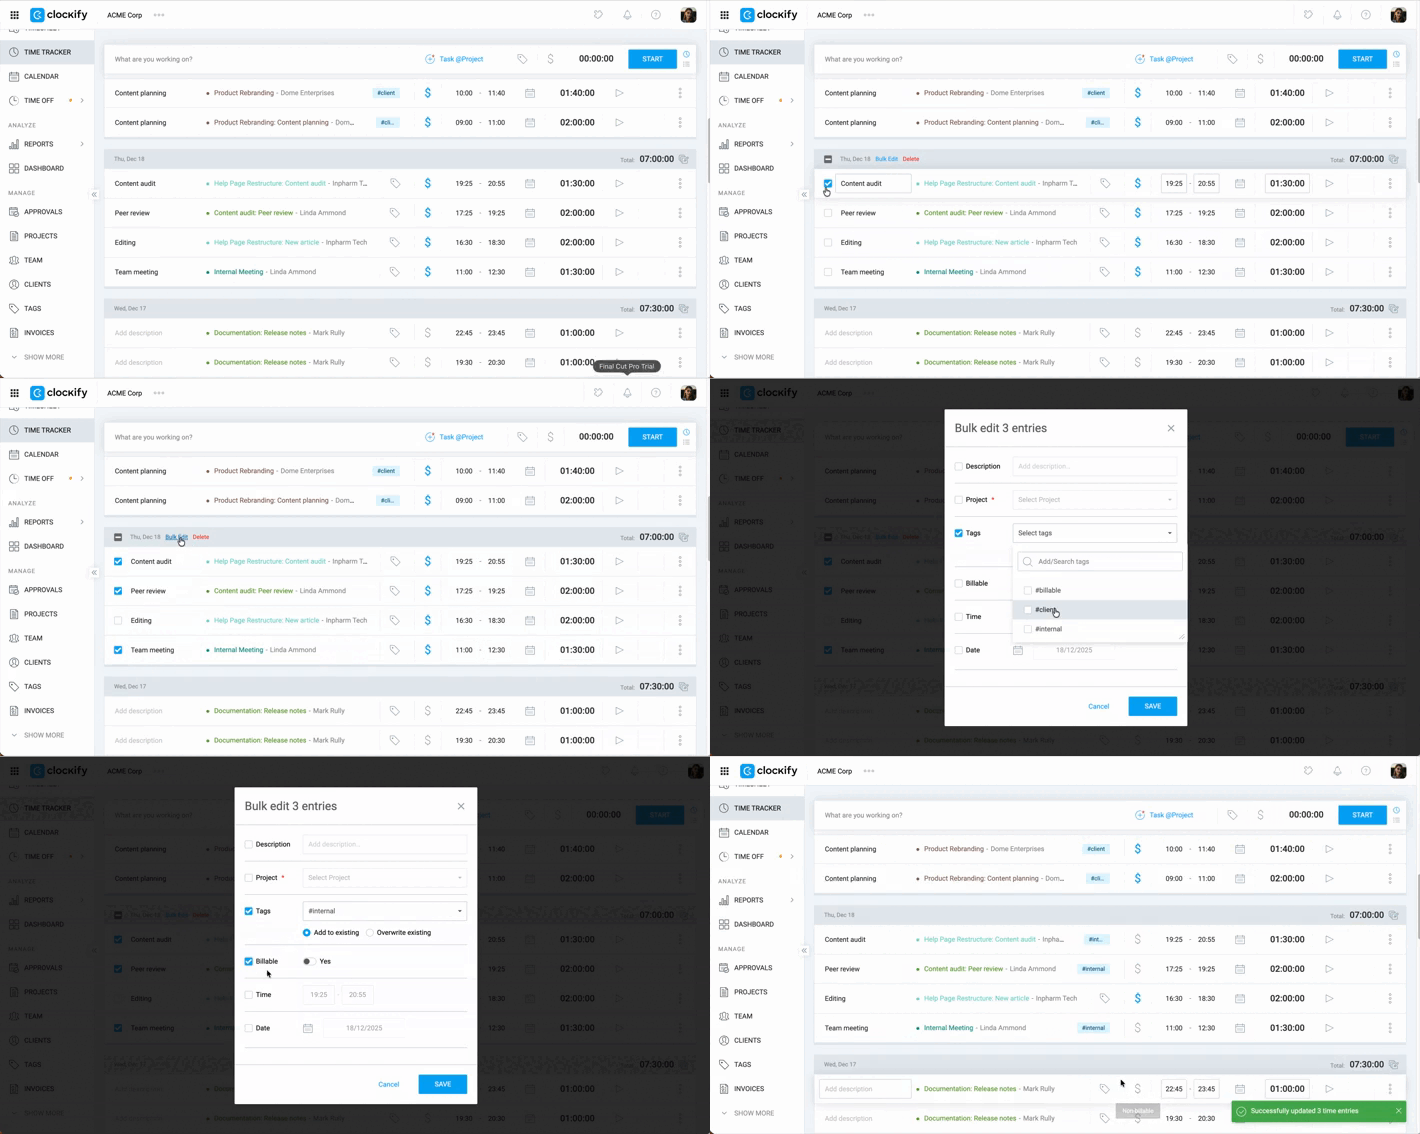
If you use bulk edit to change tags for time entries, use Add to existing so old tags won’t be overwritten.
Bulk edit in Detailed report #
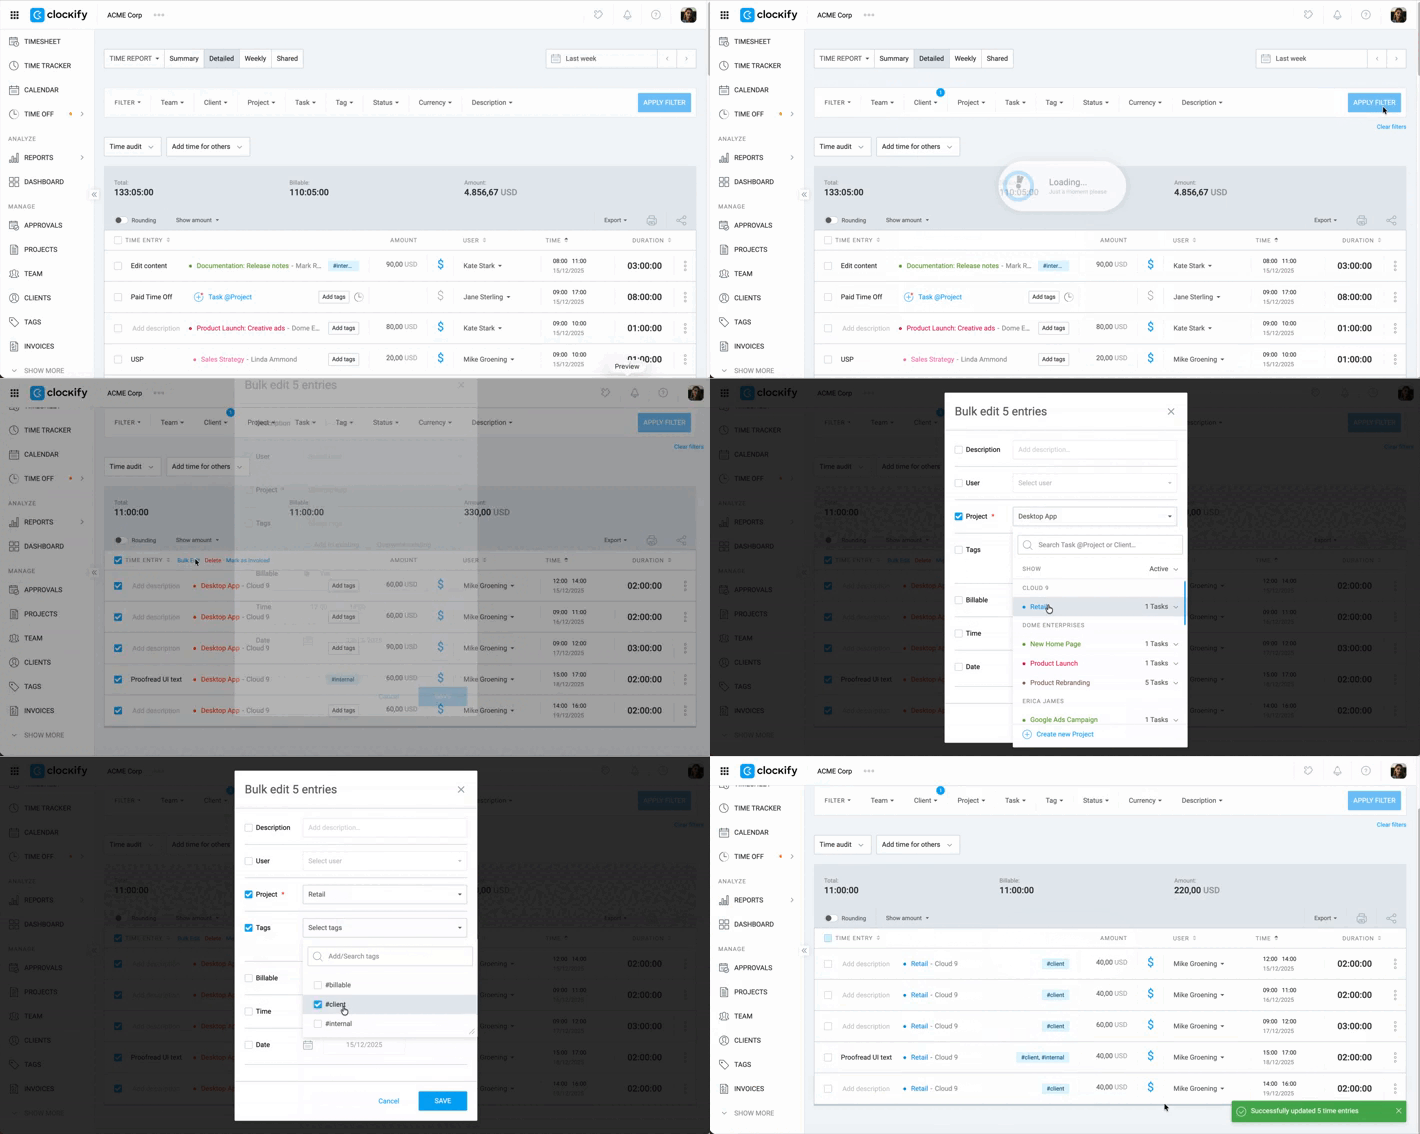
Bulk edit is a paid feature that you can enable by upgrading your workspace to any paid plan.
- Go to Detailed report
- Apply filters as needed
- Check the box in the top-left corner of the time entry table to select all time entries (or select time entries individually)
- Click Bulk edit
- Click on the details you want to edit
- Click Save
Mark time entries as favorite #
This is a paid feature available to users on basic or higher subscription plans, and for users on trial.
If you work on many projects, it can be overwhelming to keep track of progress. By marking time entries as favorites, you can easily access the most commonly used time entries in the Time Tracker.
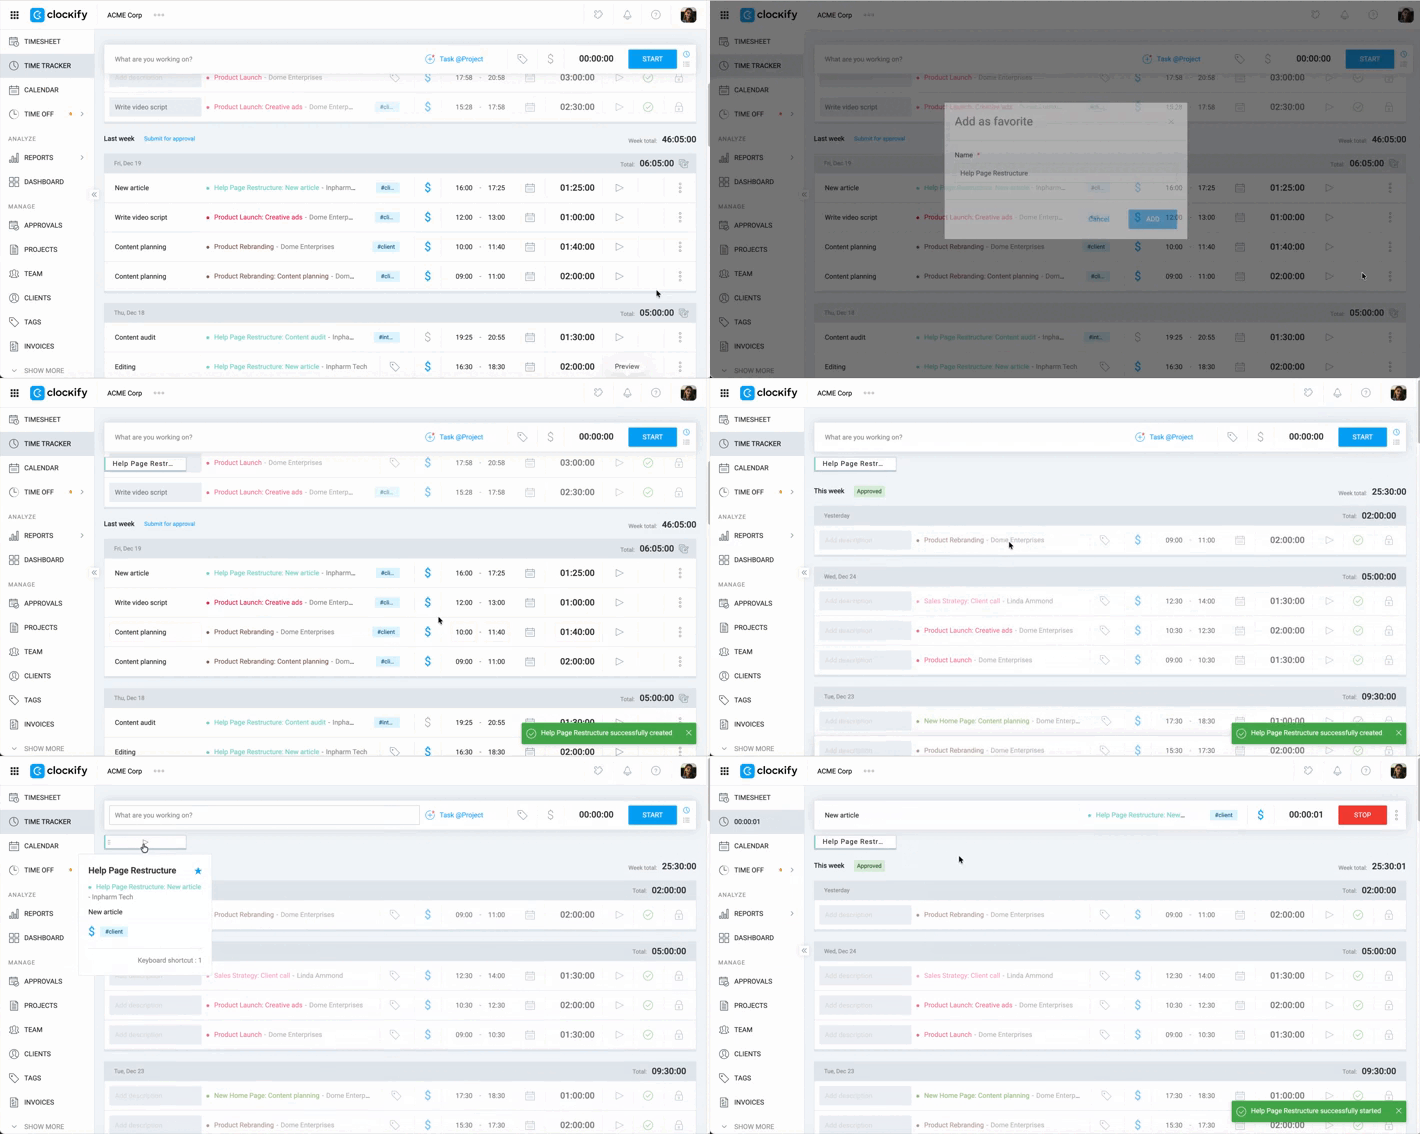
For more information on favorite entries, check out Favorite time entries.
Move time entries to a different workspace #
In case you need to move a lot of time entries to a different workspace, you can use the Export and Import time features.
Check out Import data in Clockify for more information about this feature. If you get errors when importing, check these troubleshooting steps.
Delete time entries #
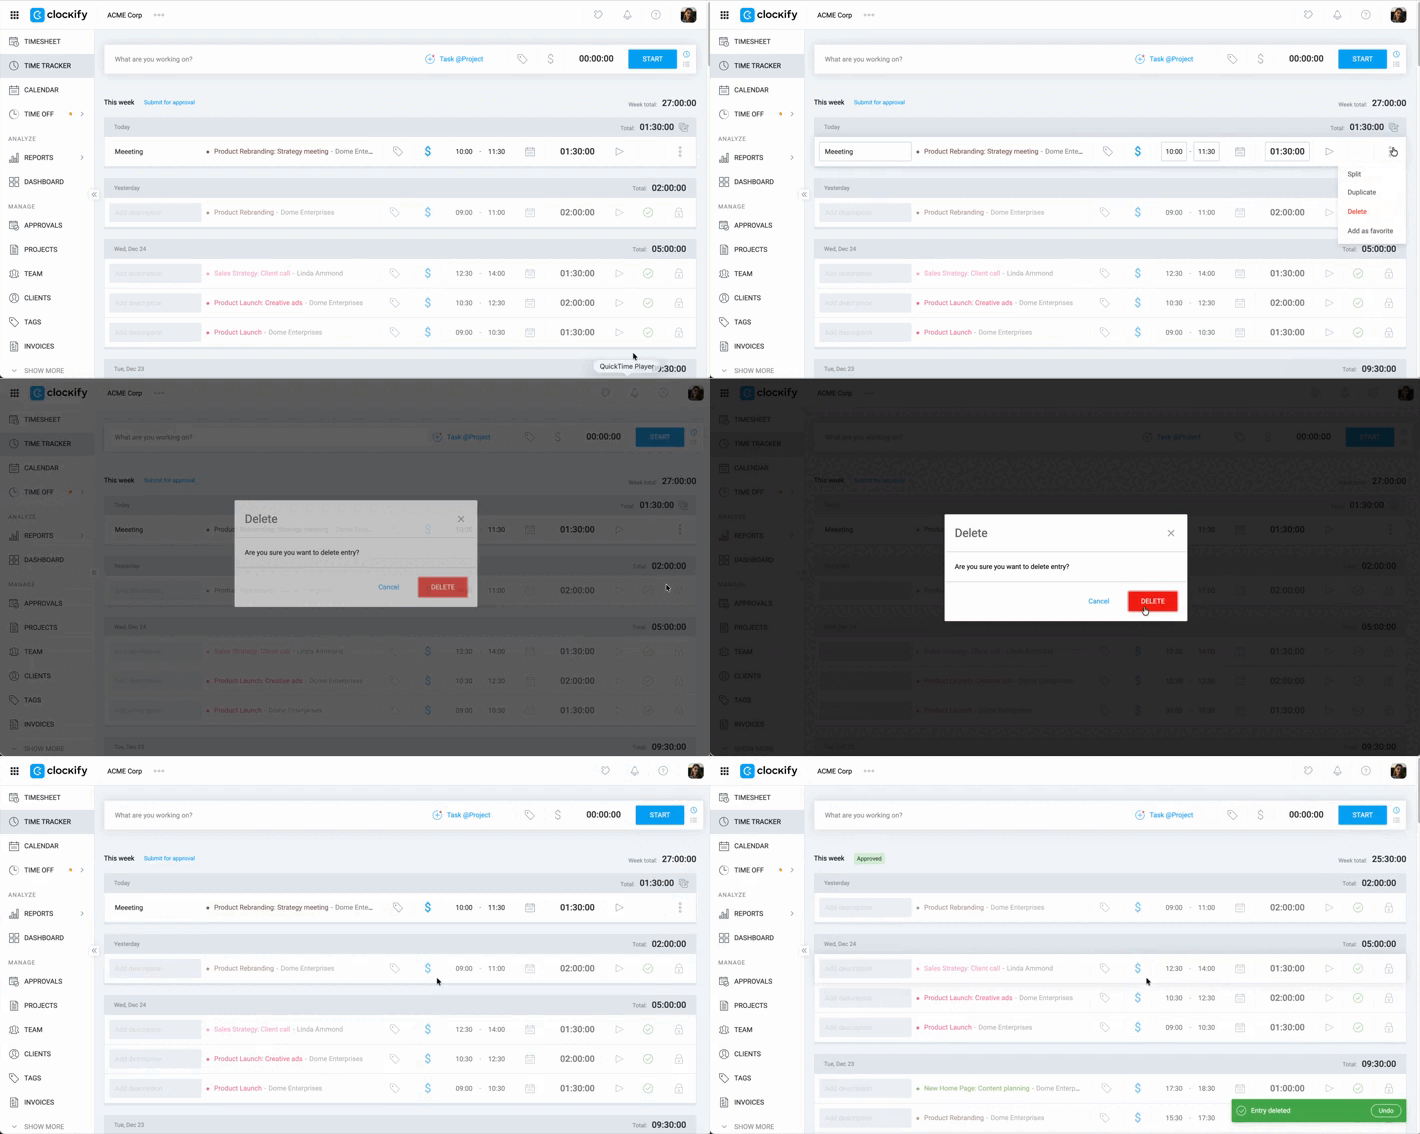
To delete a time entry on the Time Tracker page:
- Click on the three-dot icon next to the entry
- Select Delete
- Click Delete again to confirm
Undo delete action
If you accidentally delete a time entry and need to restore it, you have 20 seconds to undo this action by clicking the Undo button in the pop-up that appears in the bottom-right corner.
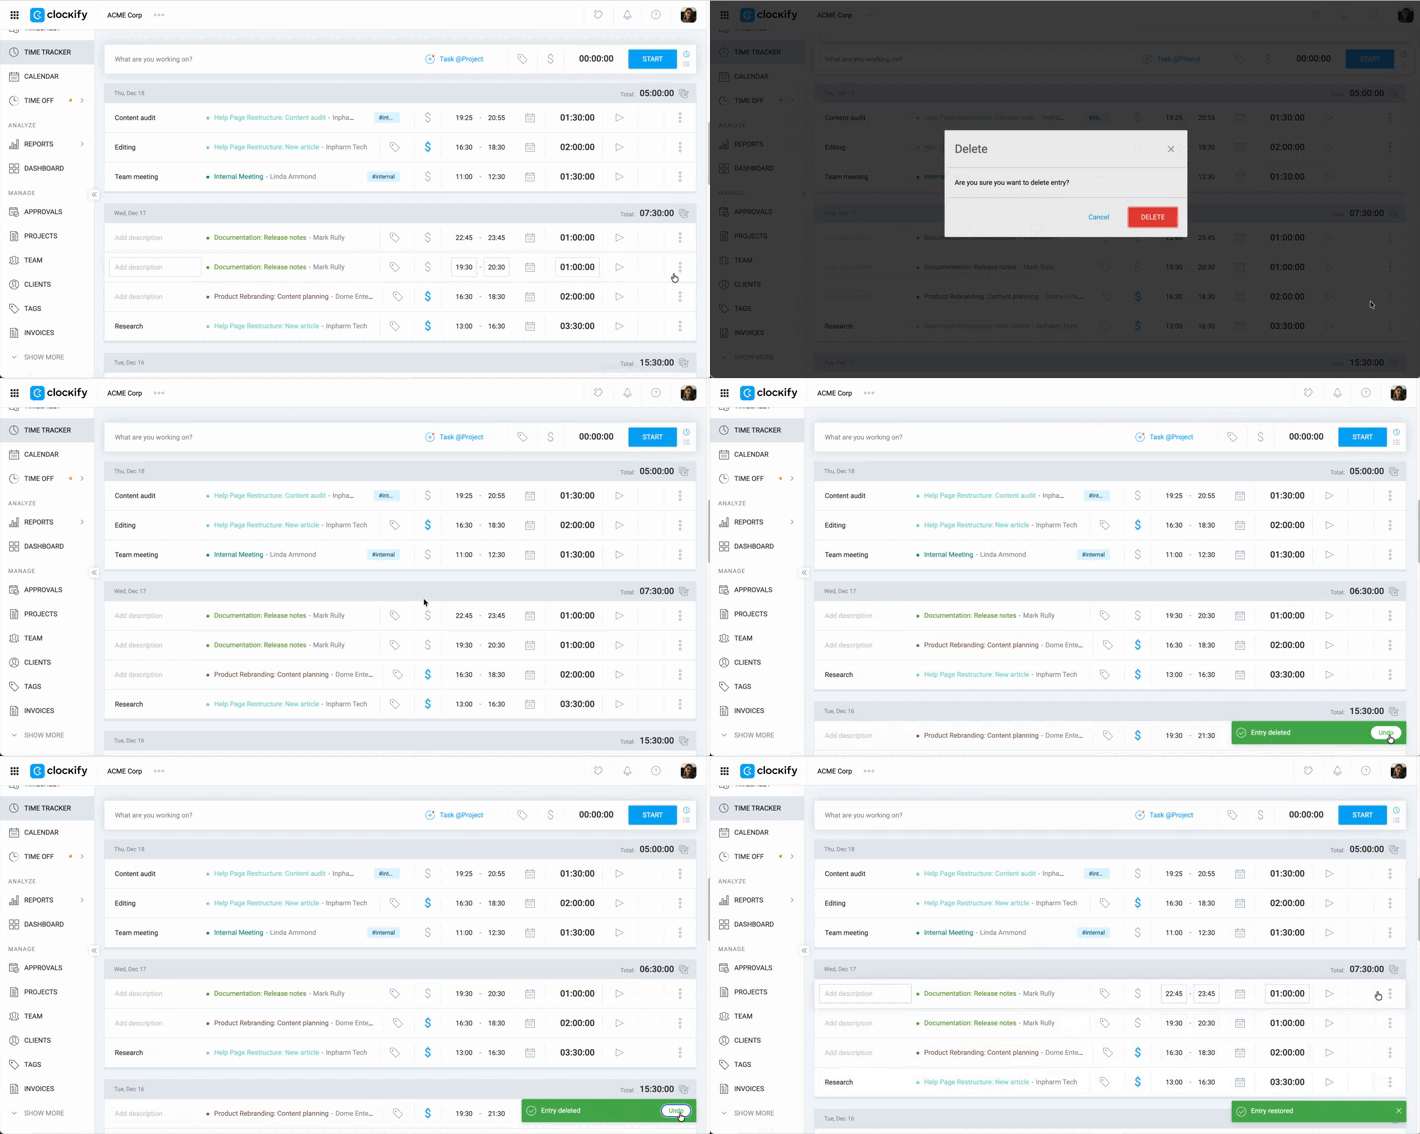
When an entry is undone, all its associated data, such as GPS location, required fields, and screenshots, is restored. This applies to all entries deleted simultaneously in a bulk action.
Using the Undo feature automatically restores deleted entries and all its data across the Time Tracker, Timesheet, Calendar, and Detailed reports.