Import data into Clockify
If you have historical timesheets data in Excel, or if you’re moving from other apps, you can import your workspace data, including projects, tasks, clients, tags, time entries and their custom fields into Clockify using a CSV file.
What’s in this guide: #
Import types
Before you import
Import projects, clients, tasks, and tags
Import timesheets and custom fields
Import users
Import types
Clockify supports three different imports:
- Projects, Clients, Tasks, Tags: Use this to set up your workspace by bringing over your existing organizational structure from a file or another tool
- Timesheets: Use this when you are switching software and need to migrate historical time logs to maintain continuous reporting and billing records
- Users: Use this when you need to onboard a large team or company in bulk
Before you import
To ensure your data maps correctly and to avoid import failures, review these requirements first.
Roles and subscription
| Data | User role | Subscription plan |
| Projects, clients, tasks, tags | Workspace owner/admin | Any plan |
| Timesheets | Any paid plan | |
| Users | Any paid plan |
User import is not supported during the free trial period.
Data fields #
Use this guide when creating your CSV file.
| Field name | Definition | Import type | Formatting rule | Example |
| Unique identifier for the user | Timesheet import | Must match an active user email in the workspace | dev@company.com | |
| Start date | Date the entry occurred | Timesheet import | Must exactly match your profile settings (e.g., MM/DD/YYYY) | 12/25/2025 |
| Start time | Time the entry began | Timesheet import | Must match your profile settings (12h vs 24h) | 09:00 AM or 13:00 |
| Duration | Length of the time entry | Timesheet import | Must match workspace settings (Clock HH:mm or Decimal 1.5) | 01:30 or 1.5 |
| Project | Name of the project | Optional | Max 250 characters. Case-sensitive to existing projects | Website UI |
| Client | Client associated with project | Optional | Max 100 characters. Use Project: Client syntax in Project column to link | ACME Corp |
| Task | Sub-unit of a project | Optional | Max 1,000 characters. Project must exist for Task to import | Bug Fix |
| Description | Notes on the work done | Optional | Max 3,000 characters. Plain text only | Updated API docs |
| Tag | Category labels | Optional | Max 100 characters. Separate multiple tags with a comma | Urgent, Internal |
| Billable | Billing status of the entry | Optional | Use Yes/No. Inherits from Project if blank | Yes |
| Custom Fields | User-defined metadata | Paid feature | Header must match the exact name of the field created in Clockify | NYC-Office |
Formatting requirements #
- File Format: Must be a CSV file (maximum size 10 MB)
- Import files have a limit of 200,000 rows
- Headers: All column headers must be in English and match Clockify’s naming conventions exactly, even if your app is set to another language
- Required fields: If you have required fields (like Task or Tag) enabled in your workspace settings, those columns must be filled in your CSV.
- Character Limits:
- Description: 3,000
- Task: 1,000
- Project: 250
- Client/Tag: 100
Clockify automatically matches your data, including date and time settings, based on your specific profile and workspace settings.
How to map fields on Import #
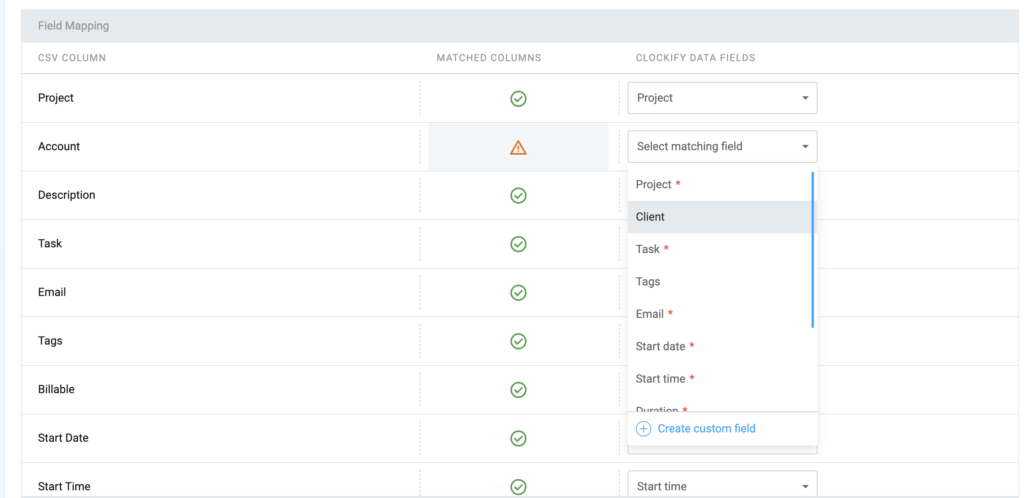
Field mapping lets you directly match the columns in your CSV file to the corresponding entities in Clockify, which ensures all your data is successfully imported.
After uploading your CSV file, Clockify will match the headers on your file (left column) with its data fields (right column).
Data fields will vary depending on the import type. You can change the data fields using the dropdown menu to match them with the corresponding headers in your CSV file.
If a field or header in your CSV file does not have a matching data field in Clockify, you can create a custom field (paid feature limited to workspace owners and admins) or remove it from the file and try the import again.
Import projects, clients, tasks, and tags
What is imported?
On the Free plan, you can import:
- Projects
- Clients
- Tasks
- Tags
Step 1: Create your CSV file #
You can create your CSV file following the format below:
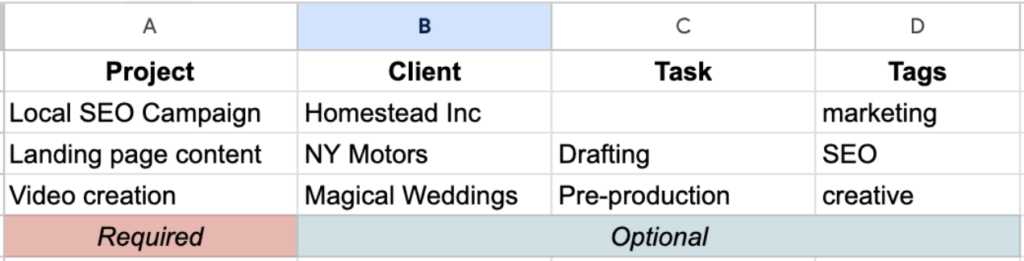
If you don’t group projects by client, you can remove the client column.
You can also download the Clients & Projects template to ensure a smooth import process.

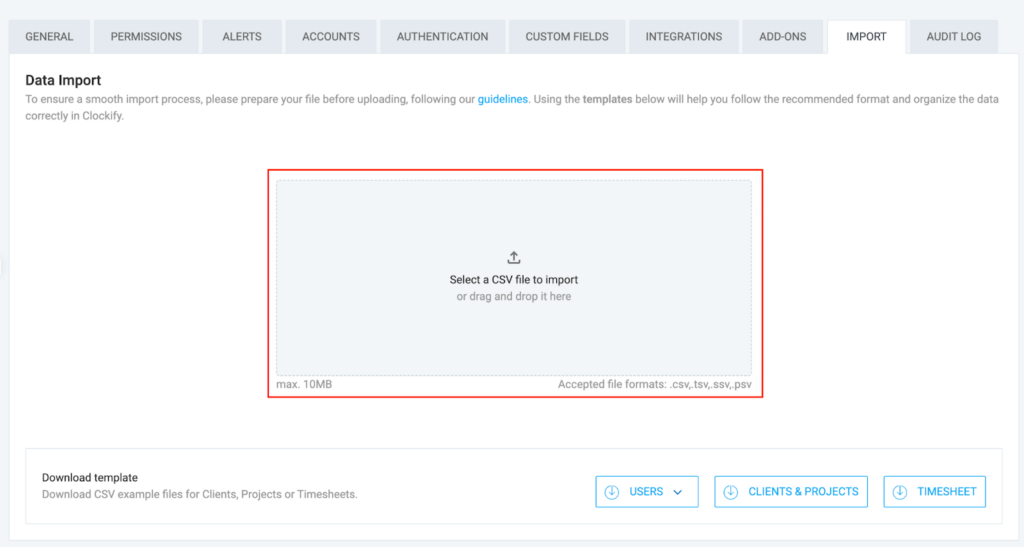
Step 2: Upload your file #
- Click on the
 three dots next to your workspace name
 - Select Workspace settings
- Click the Import tab
- Drag and drop your file into the designated box or click the upload box to select the file
Step 3: Map your data
Ensure all fields in your file matches the data in Clockify. If not, use the dropdown to match them before continuing with the import.
Click Continue to proceed to the next step.
If a field in your CSV file doesn’t have a match in the Clockify data fields, remove it from your file first then try to import it again.
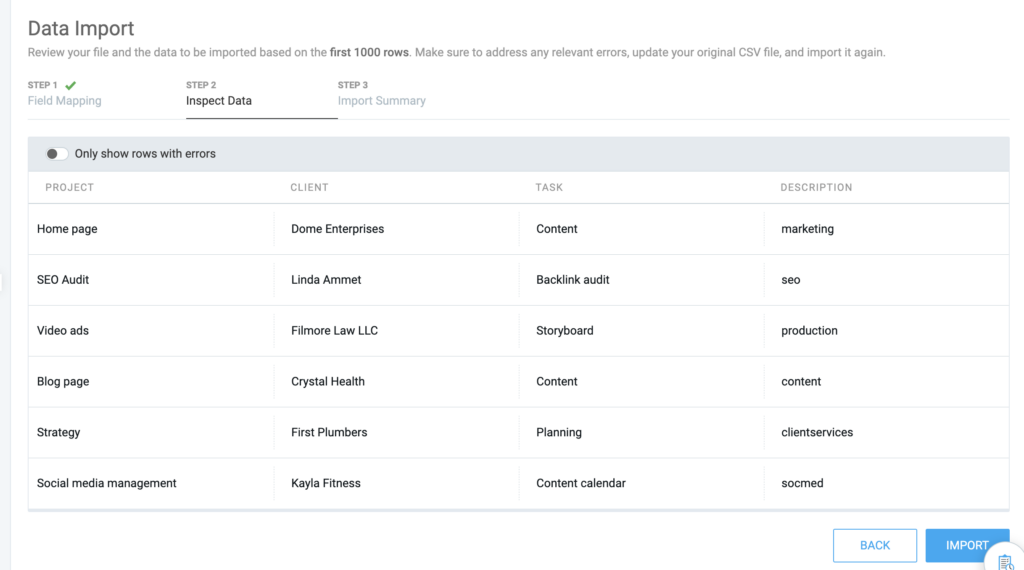
Step 4: Review and import your data
- Review the preview of your data
- Click Import if there are no errors
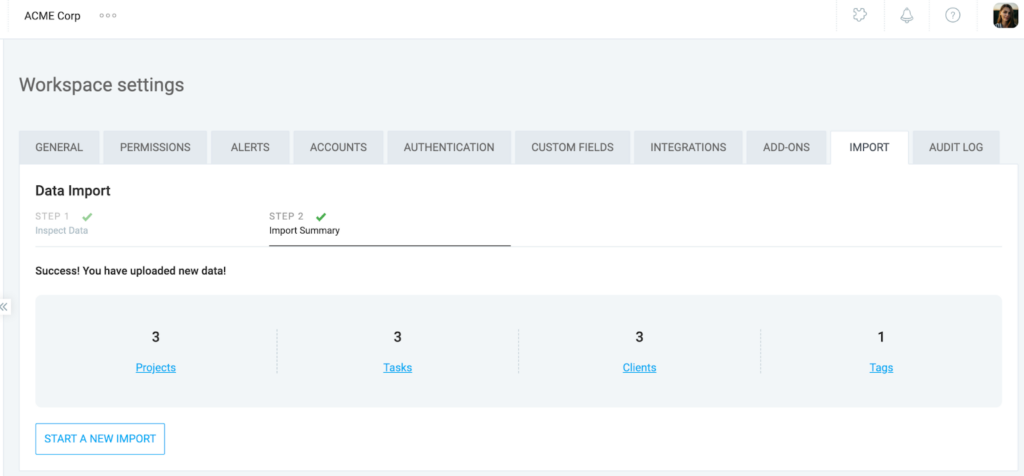
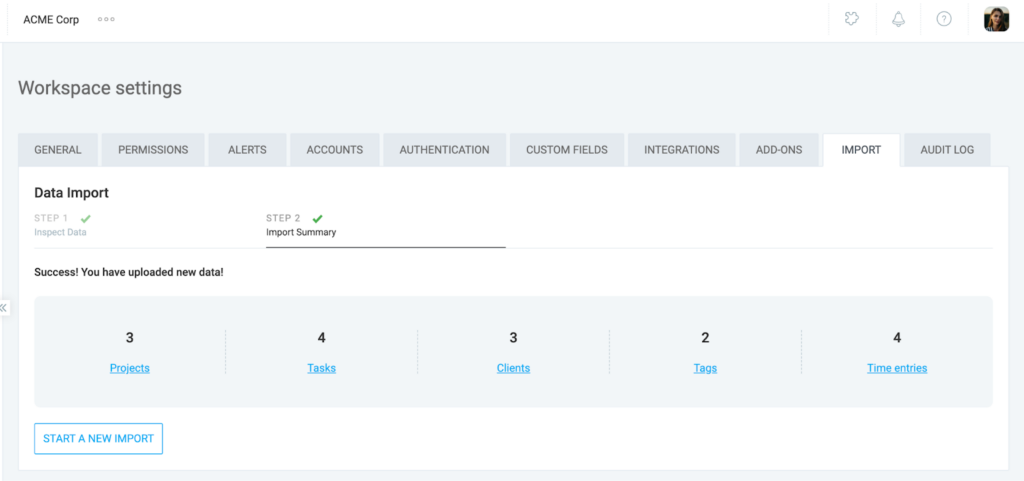
Step 5: View import summary
After your data successfully imports, you’ll land on the Import Summary page. This page breaks down the imported project data, showing you how many projects, clients, tasks, and tags were brought in. You can click the links to go see these items in more detail.
Clockify prevents duplicate projects, clients, tags, and tasks by matching the exact name in your CSV to existing items. If a name matches, the data is linked instead of creating a new item. Be aware that this matching is case-sensitive. Marketing and marketing are treated as separate fields and will result in a duplicate.
Import timesheets and custom fields
What is imported?
On paid plans, you can import:
- Time entries
- Emails
- Project
- Client
- Task
- Tags
- Billable
- Description
- Start date
- Start time
- Duration
- Description
- Custom fields
Step 1: Format timesheet data
You can create your own CSV file with the format below:

- Required columns:
- Email: User’s email address
- Start date: Date the time entry was created
- Start time: Time the entry started
- Duration: Number of hours logged for a time entry
- Time entries are imported according to the time zone of the person performing the import.
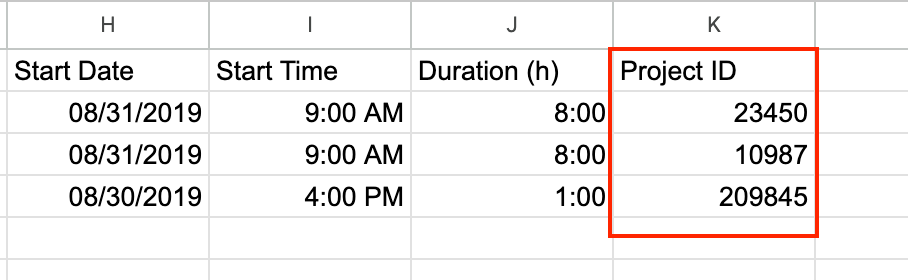
Custom fields in timesheet import #
Custom time entry fields (e.g., Project ID, Mileage, etc.) can be imported alongside timesheets, provided the custom field already exists within your workspace. It’s important to note that imported custom fields will only be visible in the time entries themselves, not throughout the entire workspace.
Example custom field in CSV file:
Custom field imports will show in the time entries in Time Tracker and Detailed Report when imported.

Step 2: Start the import
- Go to Workspace settings > Import
- Select your CSV file or drag and drop it into the data import box
- Confirm the date and time formats used in your file in the pop-up window
Step 3: Map your data
As with other import types, you can map your data fields with Clockify by choosing from the dropdown on the right column.
Step 4: Verify users
Clockify will notify you if your CSV contains emails for users not yet in your workspace.
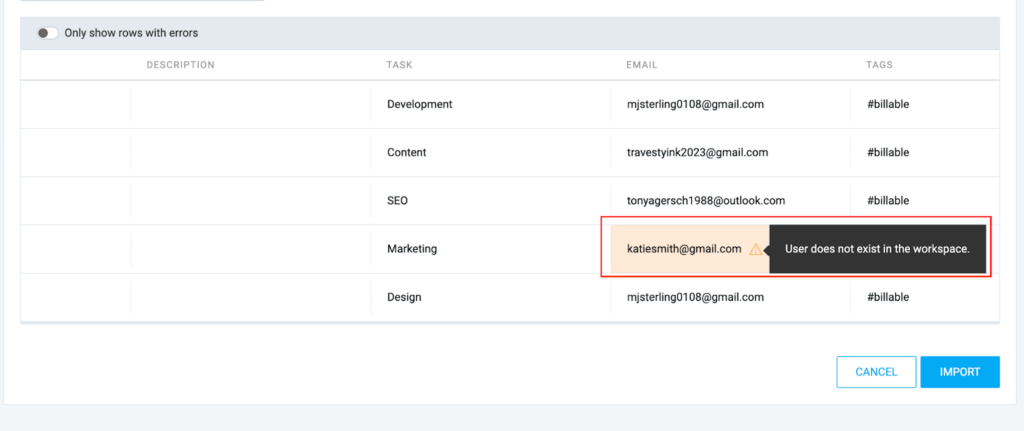
Ensure all team members have accepted their workspace invitations before importing their time, or the entries for those users can’t be imported.
Step 5: Summary review
- Review the data in the preview
- Click Import
Once finished, the Import Summary will provide links to the imported data in your Detailed Report.
If you didn’t specify a Billable status in the CSV, the entry will automatically inherit the billable status of the Project it is assigned to.
Import users
What is imported?
- Limited users: For users with restricted access
- Name
- Full users: For standard team members
- Name
- Role
- Projects managed
- Groups managed
- Employees managed
- Assigned team manager
- Group
- Billable rate
- Cost rate
- Week start
- Working days
- Daily work capacity (hours)
- User custom field (e.g., Department, Location, etc.)
User custom fields can only be imported for new users and not for existing ones in your workspace.
Step 1: Create CSV file
Include all required columns when creating your file.
The email address is required for Full user imports. If a user is being added as a manager, you must also fill in the Projects Managed/Groups Managed/Employees Managed columns.
Example CSV of full user import

In a Limited user import, Name is the only required field.
Download the User template to avoid import errors.

Multiple values
To assign multiple roles, managed projects, managed employees, or groups to a single user, separate each entry with a comma.
Project & client association
If a project belongs to a specific client (e.g., Project A under Client A), use the following format in the Projects Managed column:
Project Name:Client Name

The system will automatically recognize the project and its associated client using this syntax.
When left blank, optional fields will inherit your workspace defaults.
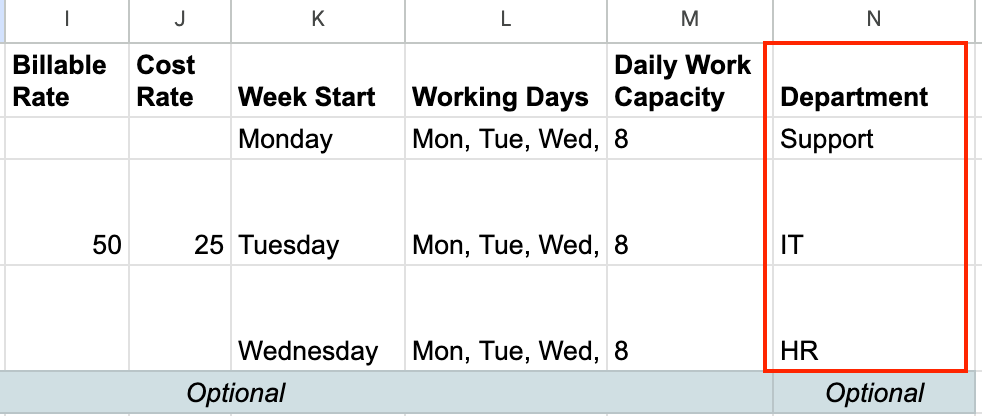
User custom field in user import #
When you import users, you can include user custom fields like Department, Location, or Employee ID. Just make sure these user custom fields are already set up in the workspace before you start the import.
Example user custom field in CSV
Step 2: Upload your file
- Go to Workspace settings > Import
- Click the
 upload button
 - Select the CSV file you want to import
Step 3: Map your data
Use field mapping to make sure all your data matches with Clockify. Click Continue to proceed to the next step.
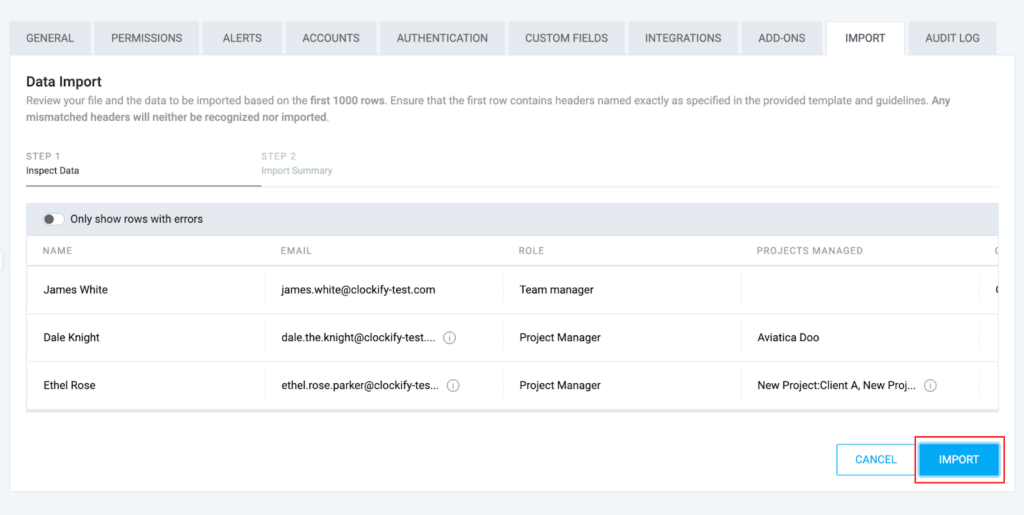
Step 4: Review your data
- Check that all data is correct and properly mapped in the table
- Click Import if there are no errors
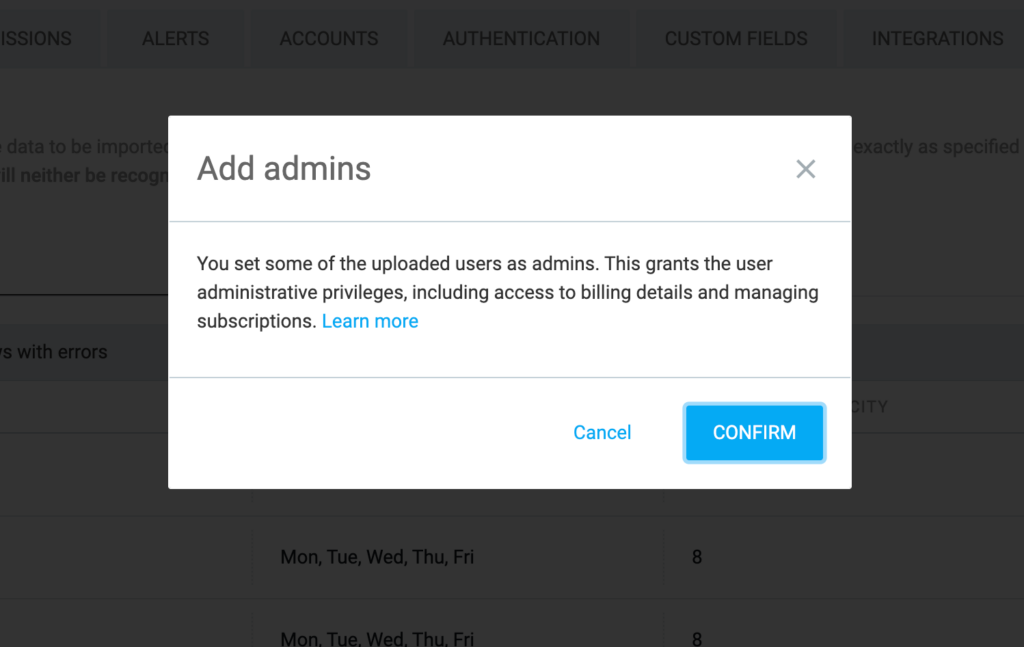
Adding admins will trigger a pop-up window informing you of their privileges. Click Confirm to continue.
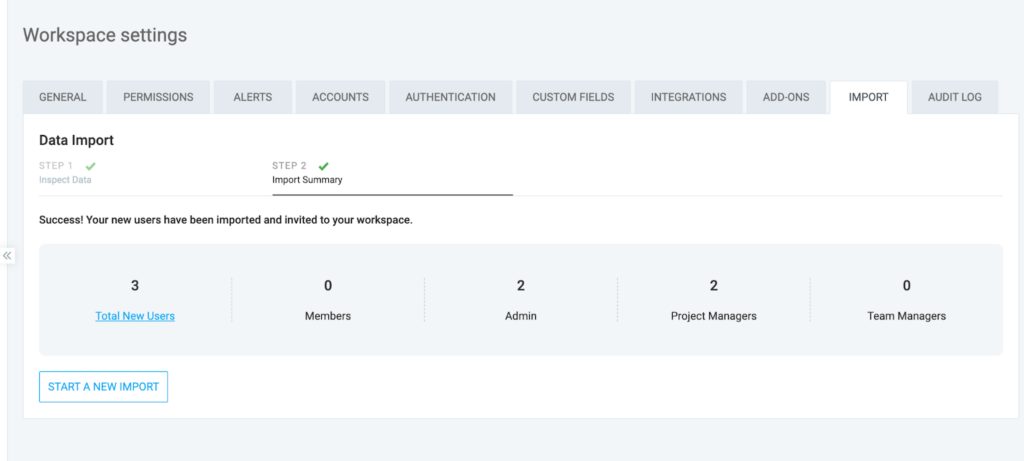
Step 5: View import summary
Upon successful completion of the import, the Import Summary page will display the number of users added. Click on Total New Users to go to the Team page and view the newly imported users.
To verify the successful import of the user custom field, click the ![]() three-dot icon next to the new user, and then select Edit profile.
three-dot icon next to the new user, and then select Edit profile.
Revert imported data #
You can undo or revert an import if you made a mistake or you don’t need the data anymore.
Here’s how:
- Click on the three dot icon next to your workspace name
- Select Workspace settings
- Click Import
- Locate the import you want to roll back/revert
- Click Revert
- Type REVERT in the pop-up confirmation window
- Click Revert
Imported data can only be reverted within the first 48 hours after the import.
FAQs #
Can I import Client’s details (address, email)?
No. Currently, the CSV import tool only supports importing the Client Name. Additional details such as address, email, or notes must be added manually by editing the client’s profile after they have been created.
I made a mistake, how to undo/delete imported data?
To remove incorrectly imported data, you must delete the entries manually. For bulk removal, go to the relevant page (e.g., Time Tracker, Projects, or Clients), use the Bulk Edit feature to select the items, and choose Delete.
What happens if a project already exists with the same name? Will it duplicate?
No. Clockify matches projects by name (case-sensitive). If the project name in your CSV file matches an existing project in your workspace exactly, the system will recognize it and assign the imported tasks or time entries to that existing project instead of creating a duplicate.
Can I import expenses using the CSV tool?
No. The import tool currently supports time entries, projects, clients, tasks, tags, and users. Expenses cannot be imported via CSV and must be added manually or through the Clockify API.
Can I import Time Off or Leave requests?
No. The CSV import process is designed for historical timesheets and workspace metadata (like projects and users). Time off entries and balances cannot be imported via the CSV tool and should be managed within the Time Off feature or via the API.
Does the importer automatically check for duplicate entries?
No. Clockify does not have a built-in duplicate detection for CSV imports. If your file contains entries that already exist in your workspace, the system will import them again, resulting in duplicates. It is recommended to review your CSV file carefully before uploading.