Lock timesheets
Locking timesheets prevents team members from adding new time entries or editing old ones for a specific period.
This is a paid feature available on Standard, Pro, and Enterprise plans.
Permissions #
When a timesheet is locked, permissions vary based on a user’s role. The table below defines who is permitted to edit timesheets and who is not after the locking process.
| Role | Affected by lock? | Can edit locked entries? |
| Regular user | Yes | No |
| Manager | Yes | No |
| Administrator | No | Yes |
| Workspace Owner | No | Yes |
Manual lock #
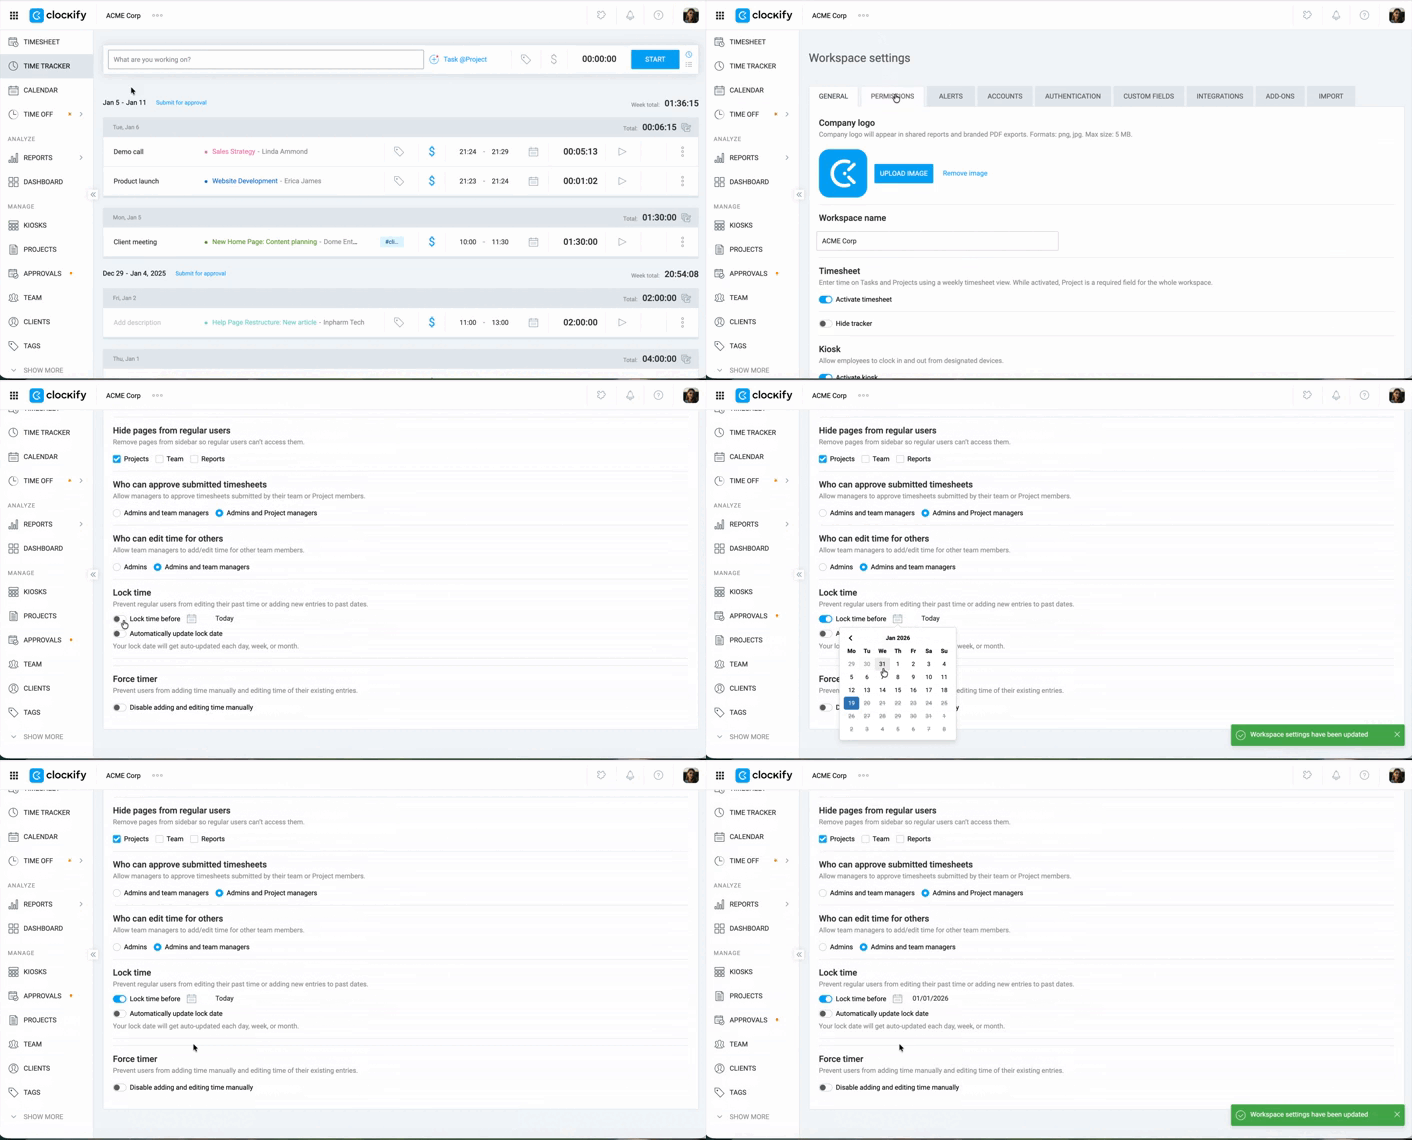
Use this method if you want to lock entries up to a specific date.
To manually lock time entries:
- Click on the three-dot icon next to your Workspace name
- Select Workspace settings
- Open the Permissions tab
- Toggle the Lock entries switch to ON
- Select the date before which all entries will be locked

Changes are saved automatically.
Automatic lock #
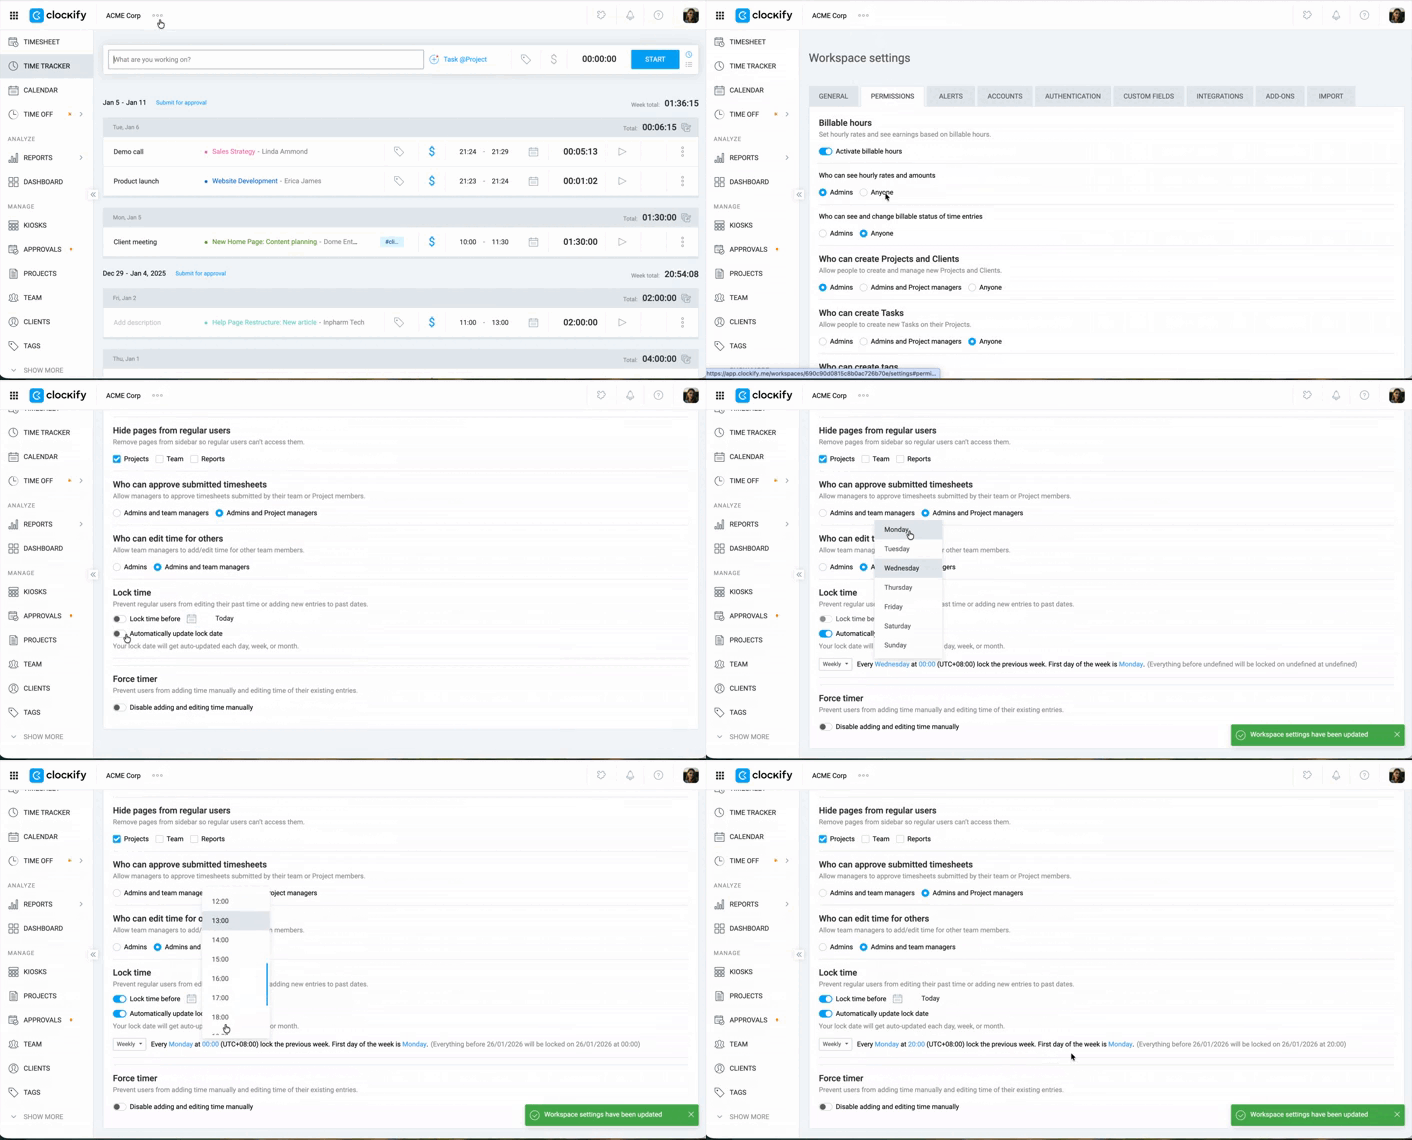
Automating the lock date ensures you don’t have to update settings manually every week or month.
To automatically lock time entries:
- Go to Workspace settings
- Select Permissions tab
- Toggle Automatically update lock date to ON
- Select your preferred frequency:
- Weekly: Choose which day the lock updates
- Monthly: Choose a specific day of the month
- Older than: Set entries to lock after a certain number of days, weeks, or months (e.g., Older than 1 day)

If you set a lock for “Older than 1 day,” the lock updates every day at midnight, based on the Workspace Owner’s timezone.
Unlock timesheets #
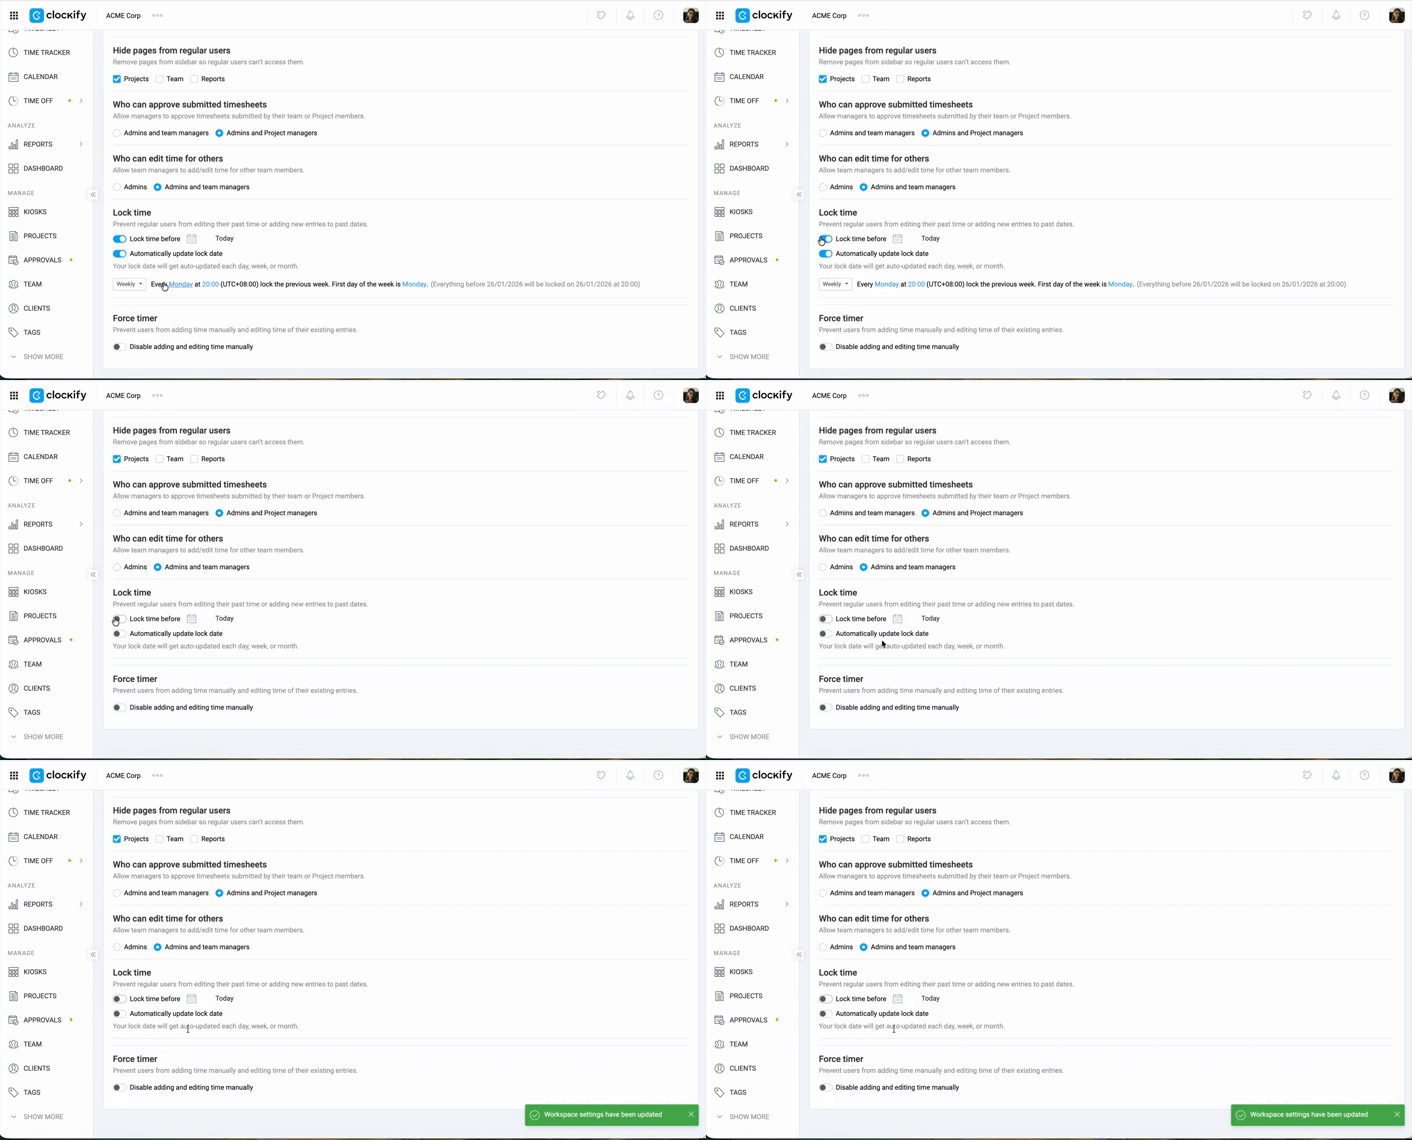
To unlock timesheets in your workspace:
1. Go to Workspace settings
2. Select Permissions tab
3. Scroll down to Locked time
4. Toggle the enabled features to OFF

For teams in different time zones #
If your team works across different timezones, avoid locking on the 1st of the month.
This is to allow team members in later timezones to finish their entries for the final day of the previous month without being prematurely locked out.
We recommend setting the lock date to the 2nd of the month instead.
Lock for current day or future dates #
You cannot use the Lock feature for current or future dates.
If you want to prevent users from manually entering time for the current day, you can use another feature called Force Timer.
Lock expenses #
If you have the Expenses feature enabled, the lock date applies to both time and expenses simultaneously. Users cannot add or modify expense receipts after a timesheet has been locked.