Timesheet
The timesheet view in Clockify is designed for users who prefer to enter time manually at the end of the day or week.
Enable timesheet #
Before you can use the Timesheet, a workspace admin must enable it.
1. Click on the three-dot icon next to the workspace name
2. Select Workspace settings
3. Enable the Activate timesheet option under Timesheet
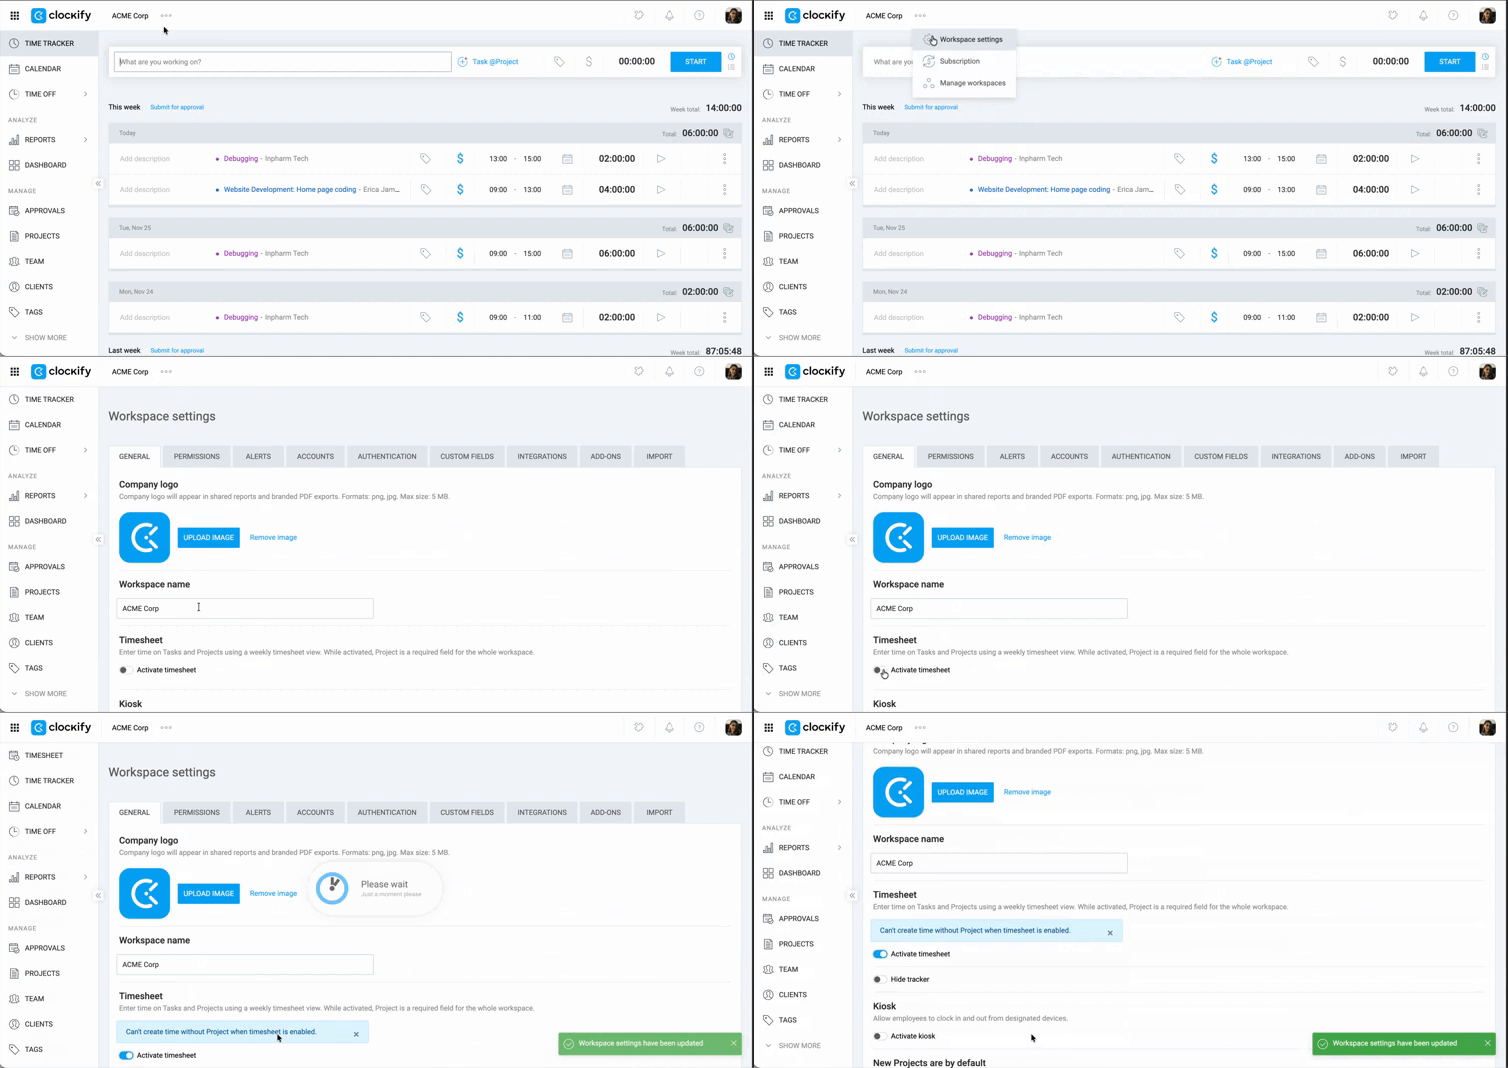
Once enabled, Project automatically becomes a required field for all time entries.

When using the Timesheet, projects must be visible to you before you can add time to them. If a project is:
- Public, it will appear automatically in your list
- Private, an Admin or Project Manager can assign you to that project
Add time #
1. Click the dropdown and choose the project/task you worked on
2. Enter the amount of time you worked in the cell corresponding to that day
3. Click the Add row button to add a new line (optional)
4. Switch to a different week using the date navigation in the top-right corner
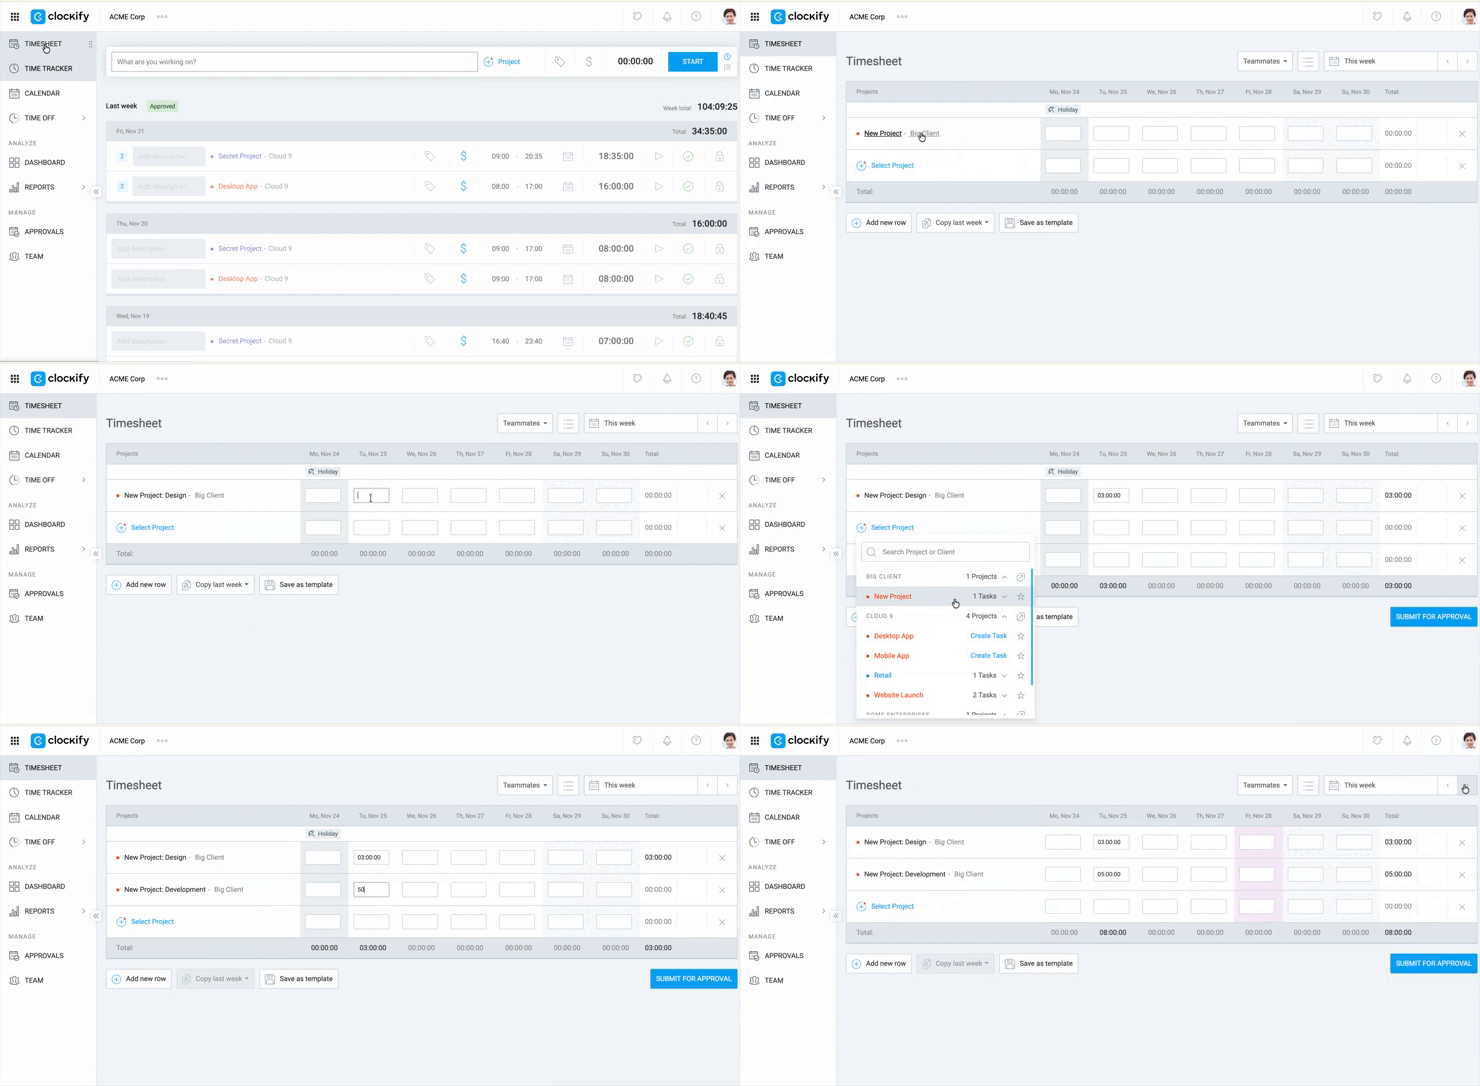
If you delete a time entry in the timesheet, all time associated with that task, for that week, will be deleted.
Edit/add entry details #
To add more detail to a specific block of time:
- Hover over the cell that contains the tracked time
- Click on the three dots that appear
- Enter the detail you want to add in the pop-up (description, tags, billable status, start/end time)

The input is based on your setup in the Workspace settings:
| Input | Duration format is set to minutes/hours | Duration format is set to decimal |
| 1 | Becomes 1 minute | Becomes 1 hour |
Copy last week’s activities #
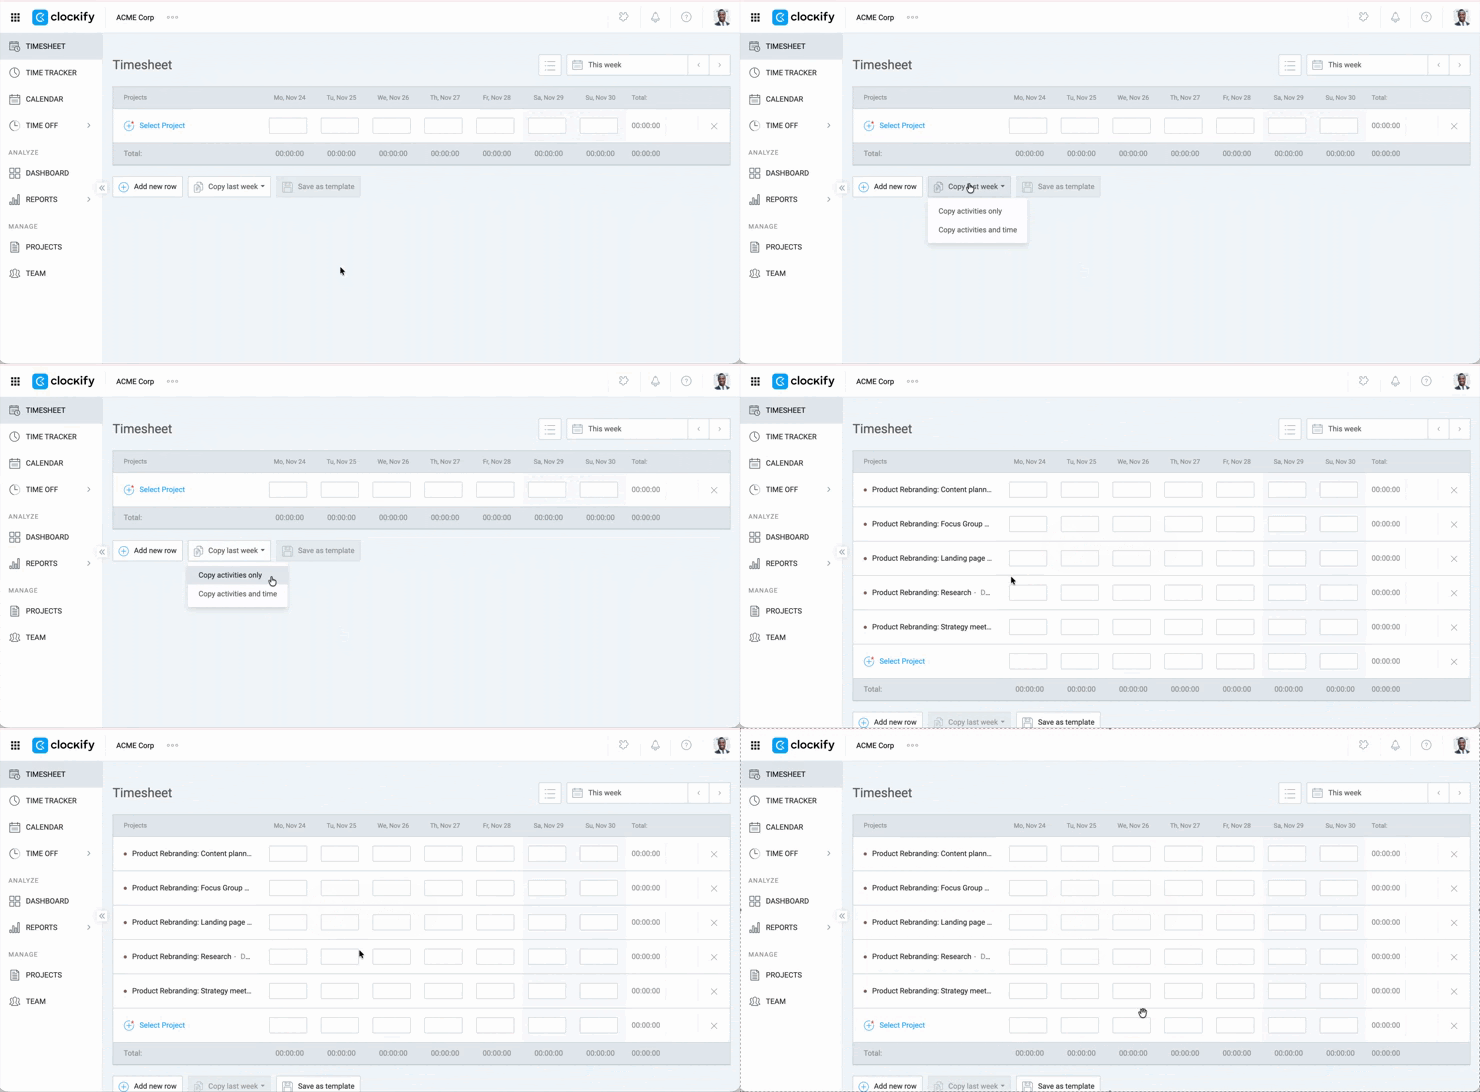
The Copy last week option allows you to copy activities or copy activities with time from the previous week.
- Go to Timesheet page
- Click the Copy last week button on the bottom
- Choose your preference:
- Copy activities only – Imports the projects/tasks list
- Copy activities and time – Imports the projects/tasks list and time logged for those entries
Create templates #
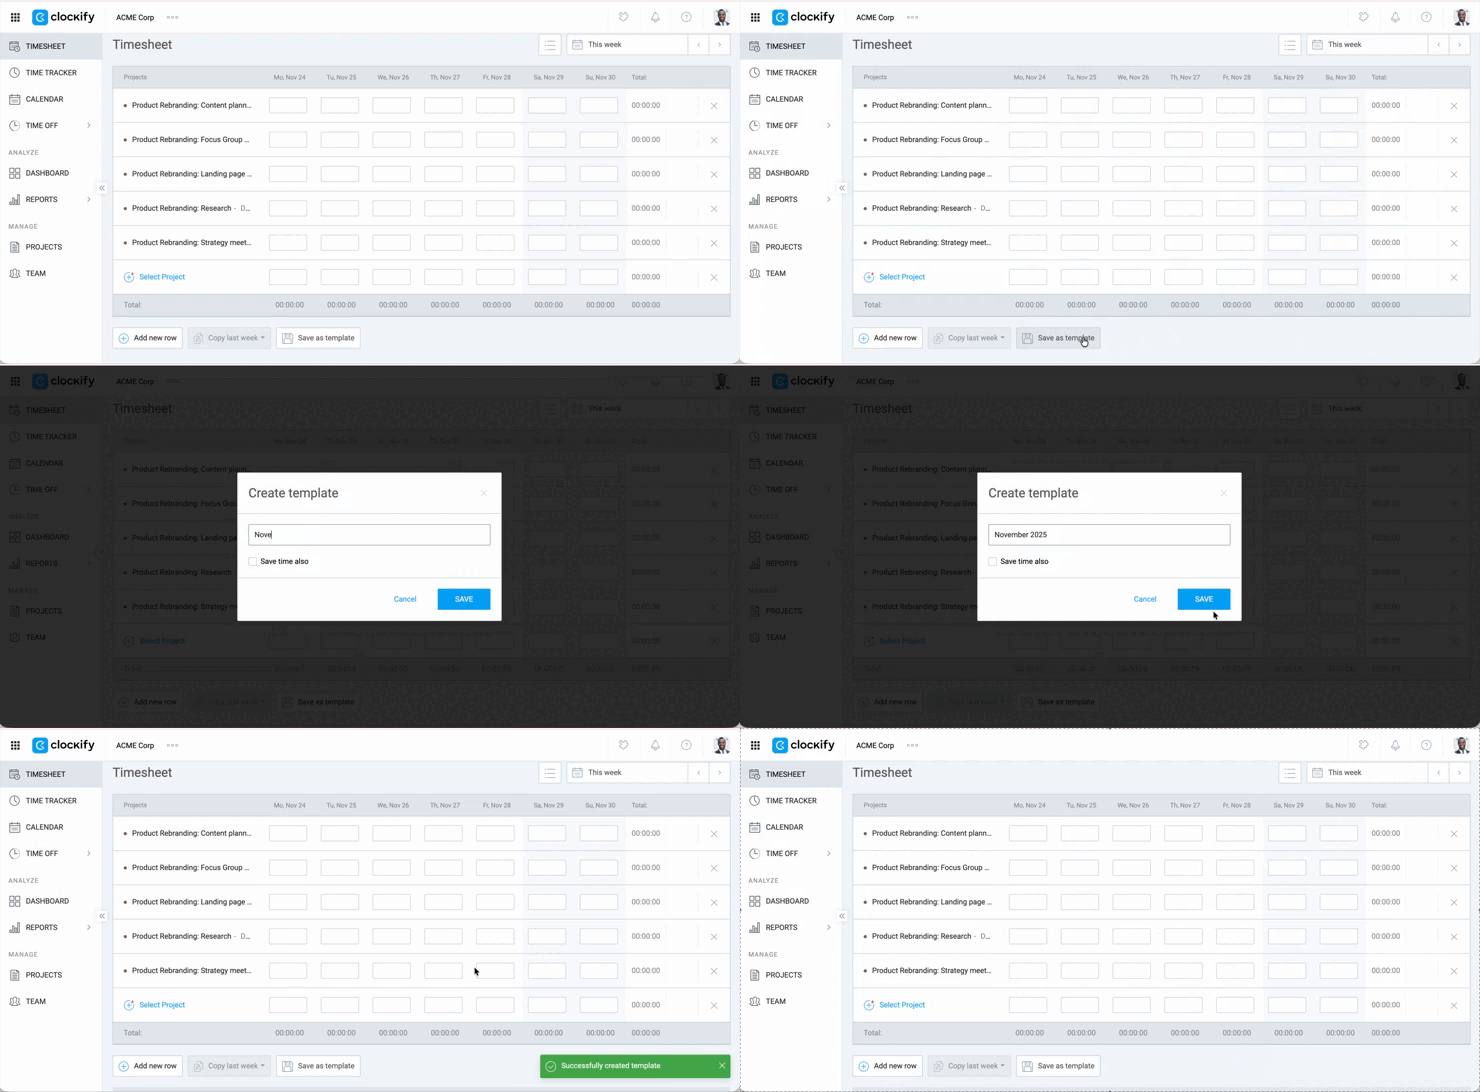
Templates allow you to save and apply pre-defined lists of projects and tasks. You can save the time and tasks for a specific week as a template.
To create a template:
- Choose the week that you want to save as a template
- Click Save as template at the bottom of the page
The timesheet will automatically populate with the projects and tasks from the template.
If the template entries conflict with existing entries, you can choose to:
- Add – Incorporate time entries from the template with existing ones
- Replace – Overwrite existing time entries with the template’s entries
- Skip – Ignore cells where time already exists
Timesheet templates are accessible only to the user who created them.
Submit timesheet #
You can submit your time and expenses for approval directly from the Timesheet page (depending on user role and permissions).
For detailed instructions on the approval process, refer to the Submit time & expenses for approval help page.
The status indicators are visible within the timesheet view:
| Status | Icon | Meaning and Action |
| Approved | Green checkmark (✓) | The entry is locked and cannot be edited or deleted. |
| Pending | Orange checkmark | The entry has been submitted, but is still editable or deletable. |
| Unsubmitted/Rejected | No status | The entry has not been submitted or was previously rejected. It is fully editable. |
Add time for teammates #
This is a paid feature available on any paid plan.
Depending on your workspace settings, only admins or team managers can edit time for others.
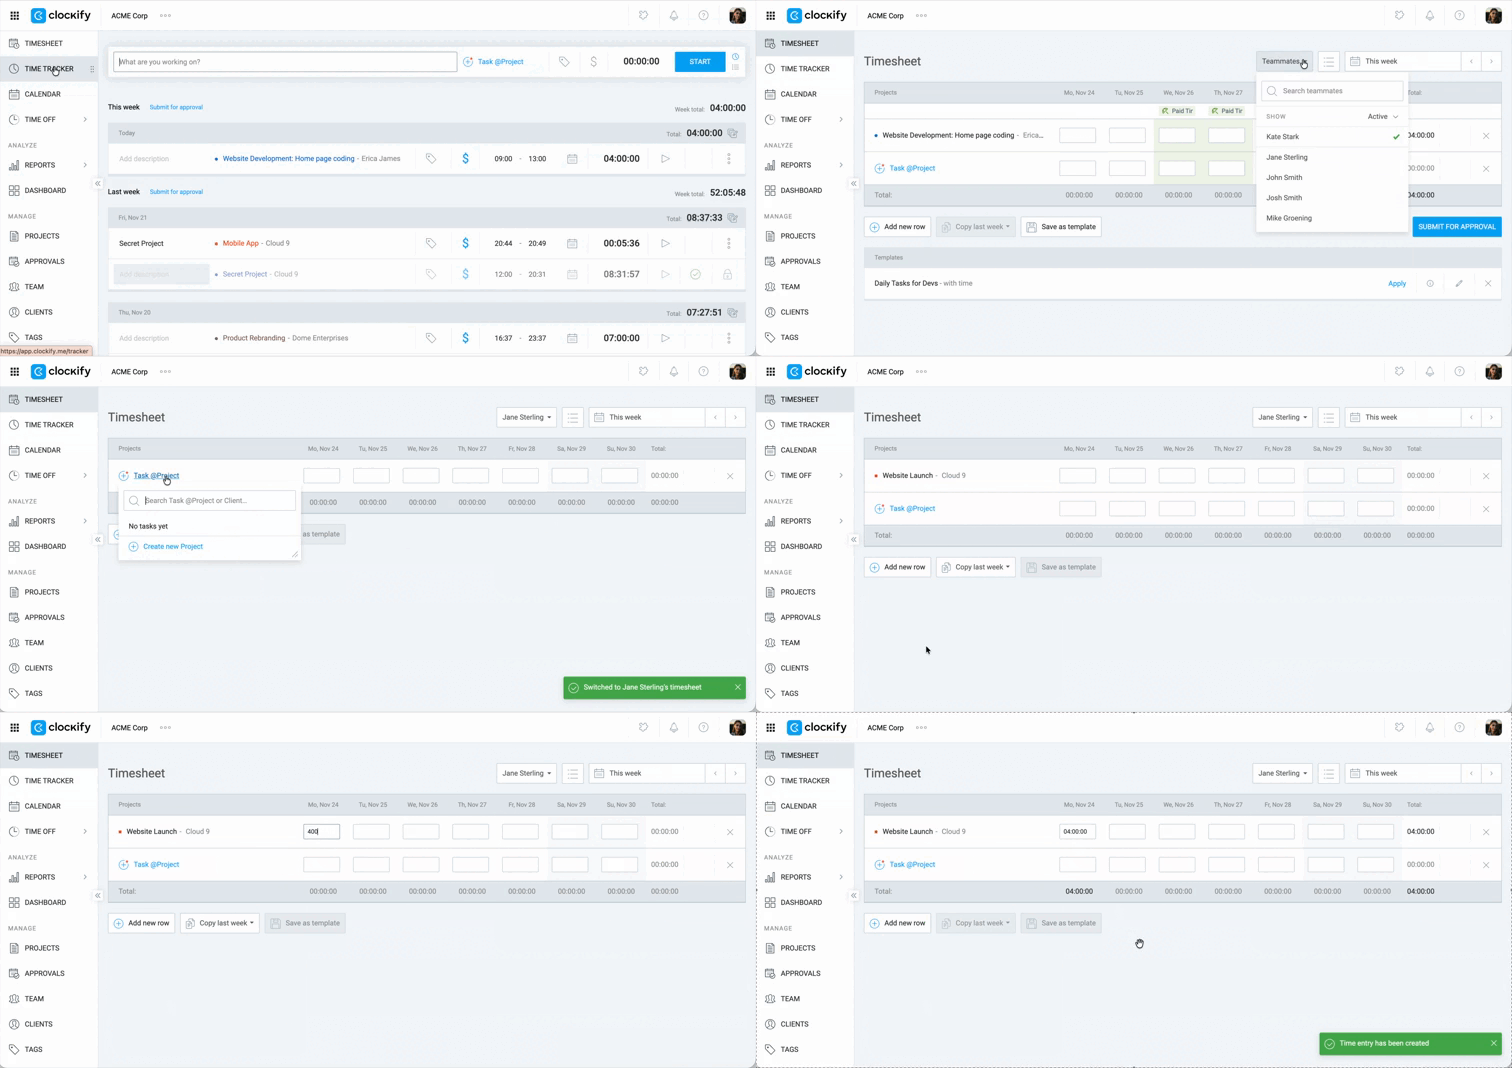
- Go to Timesheet
- Click Teammates
- Select a teammate to view their timesheet
- Choose the Project or Task and add/edit time for that teammate as required
Export timesheet #
You can save the view as a PDF using your browser or export a more customizable report.
Use Print option #
- Navigate to the Timesheet page you wish to save
- Open your browser’s options (usually the three dots in the corner)
- Click Print
- In the print dialog, select the option to Save as PDF
- Click Save
- Enter a name for the file and click Save

Export PDF from weekly report #
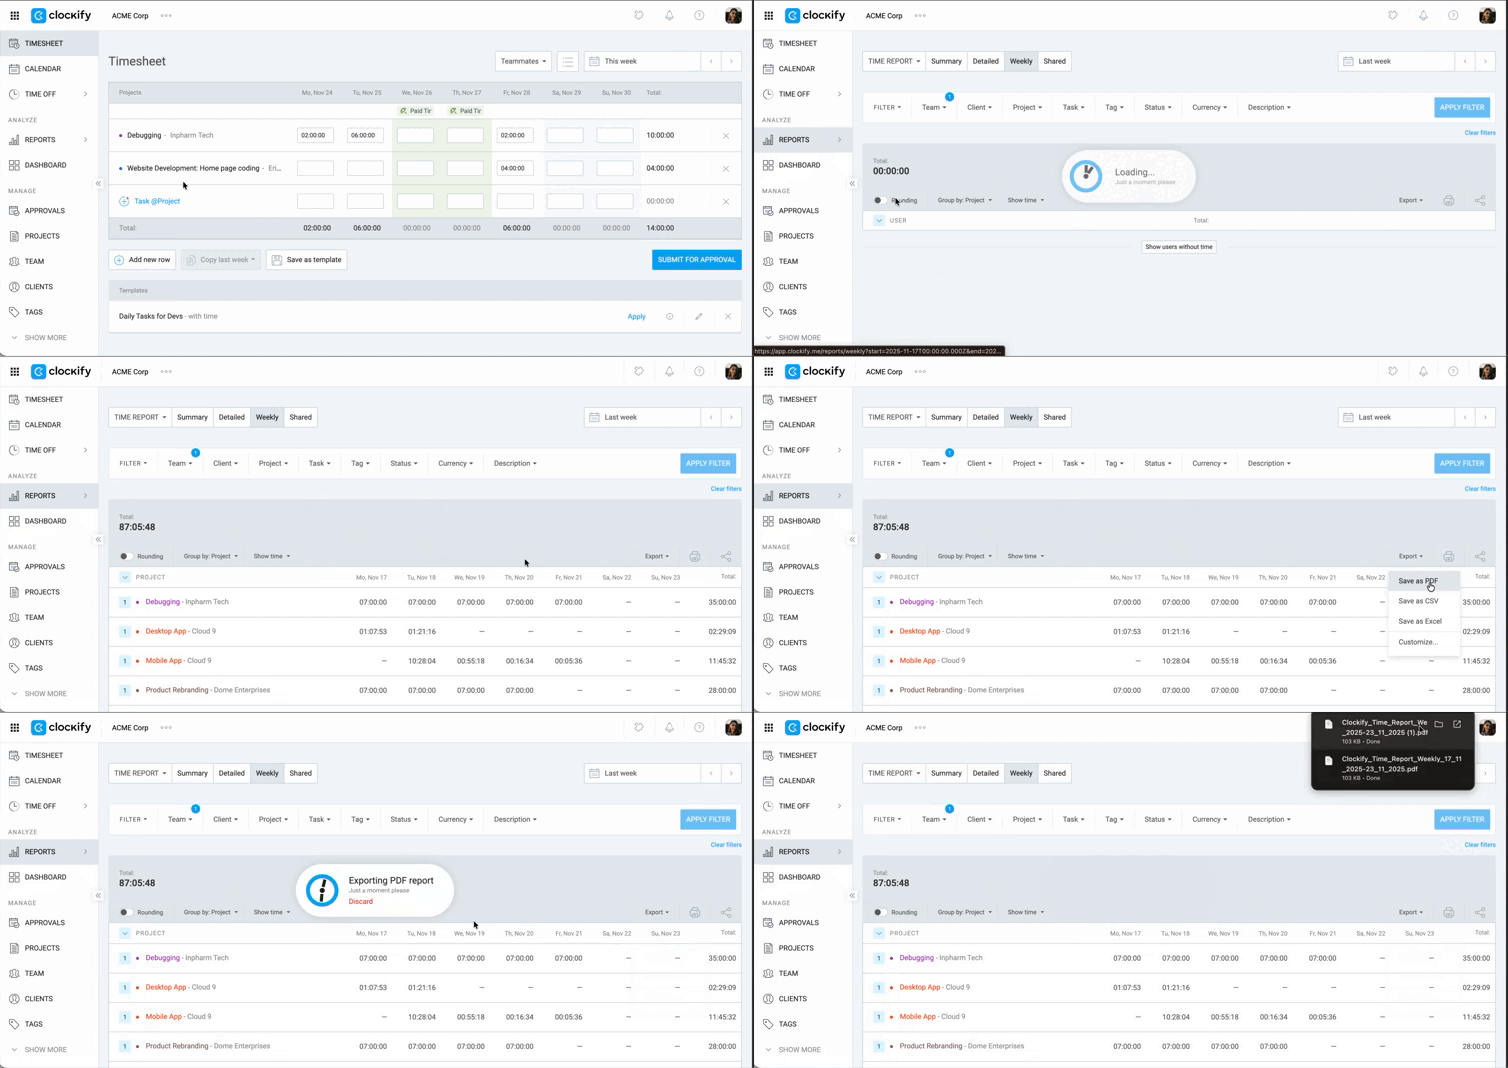
- Go to the Reports page
- Filter the report by a specific user and week
- Click Export
- Customize the report, such as turning off Show subgroup (optional)
- Save the report as a PDF
Hide Time Tracker page #
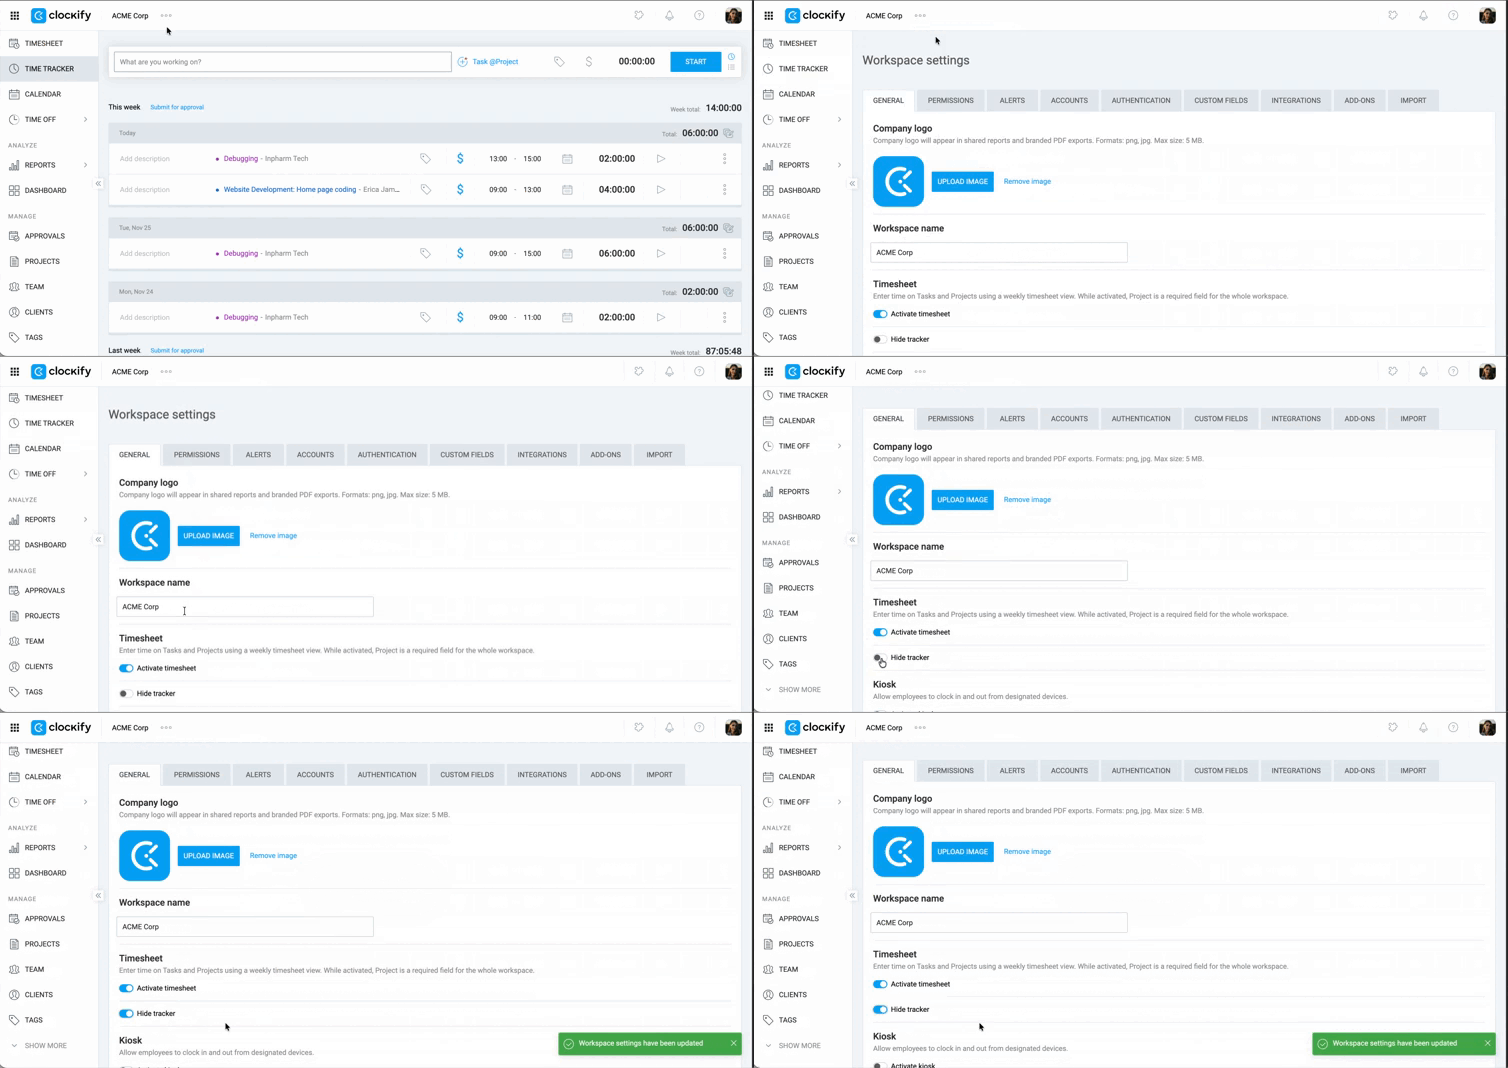
If you only use the Timesheet mode, you can hide the Time Tracker page.
- Go to Workspace settings
- Enable the toggle for Hide tracker
Enable force timer #
The Force timer feature can be used to disable time entry via the Timesheet completely, forcing users to track time only via the timer. In this scenario, the Timesheet can only be used for reviewing entries.