Edit entries for Workspace members
Workspace Owners and Admins can manage and correct time entries for others. This is essential for accurate timesheets, up-to-date time tracking, and precise reporting and invoicing.
What you can edit (depending on user role) #
| User role | Permissions |
| Workspace Owner | Can add or edit entries for all members, including their own |
| Workspace Admin | Can add or edit entries for all members, including their own |
| Team Manager | Can edit time for assigned team members only, provided this is enabled in the workspace settings |
| Regular User | Can only edit their own time entries |
There are three ways that you can add or modify time entries for others in Clockify:
Edit time entry in Timesheet #
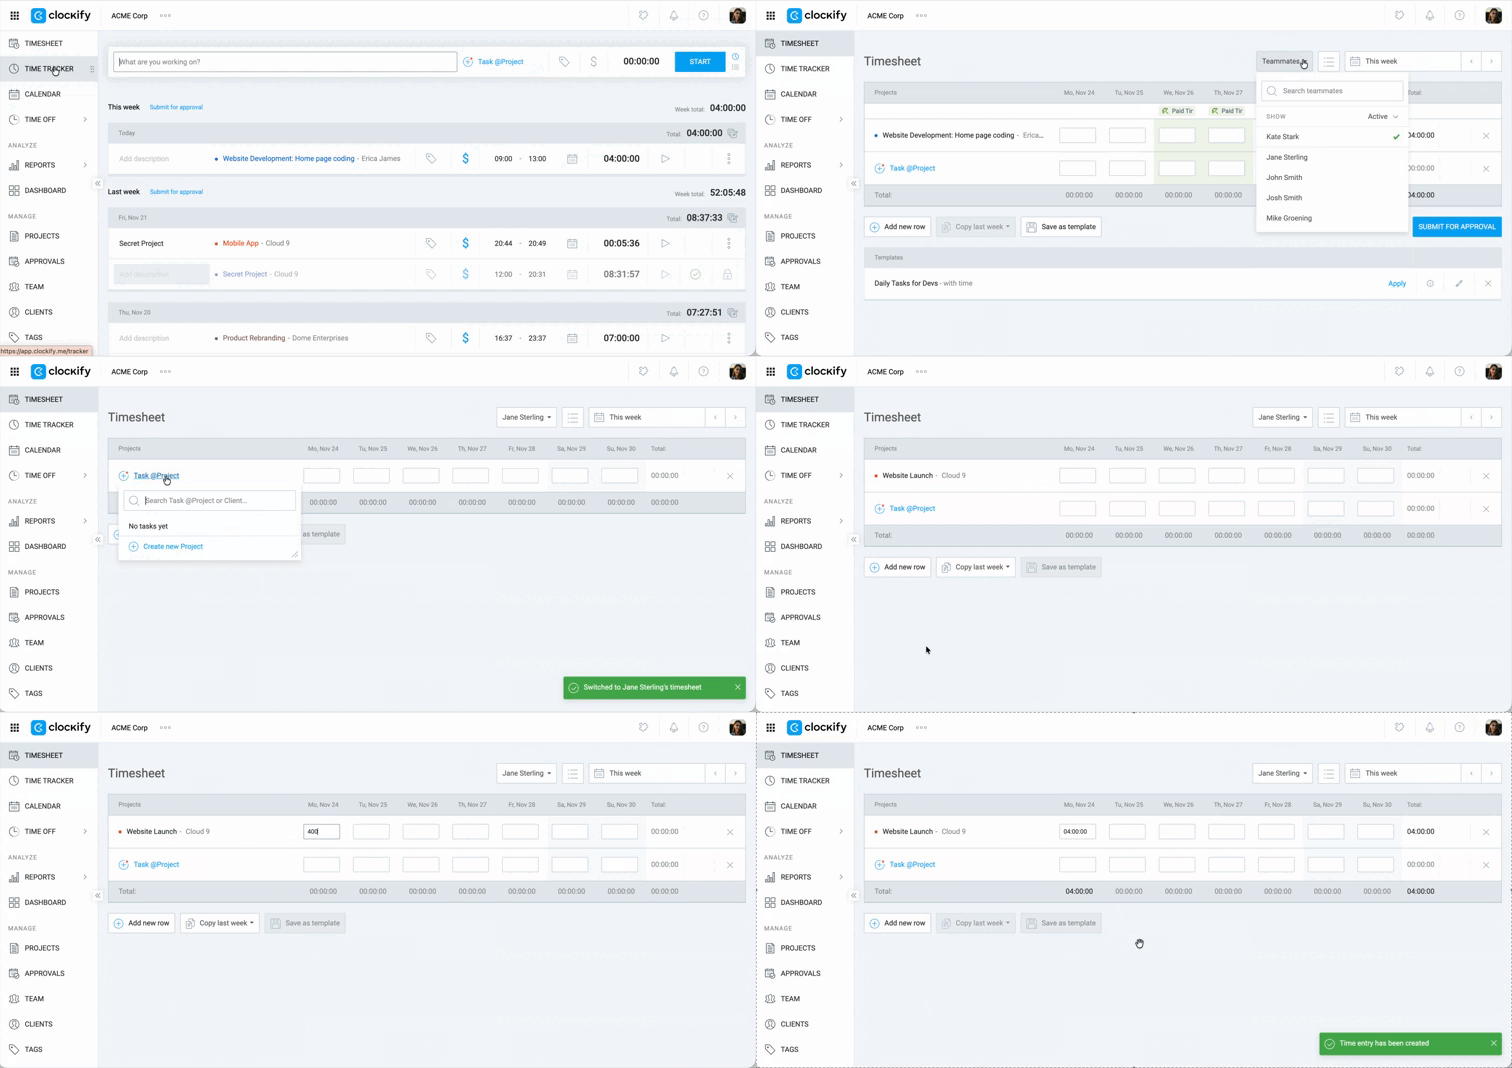
- Go to the Timesheet page from your workspace sidebar
- Select Teammates from the dropdown menu at the top of the page
- Select the teammate whose timesheet you want to view
- Choose the relevant project or task
- Enter or modify the hours worked, the date, and any other details
All changes are automatically saved.
Edit time entry in Detailed Report #
Adding time for others from Reports is a paid feature available on any paid plan.
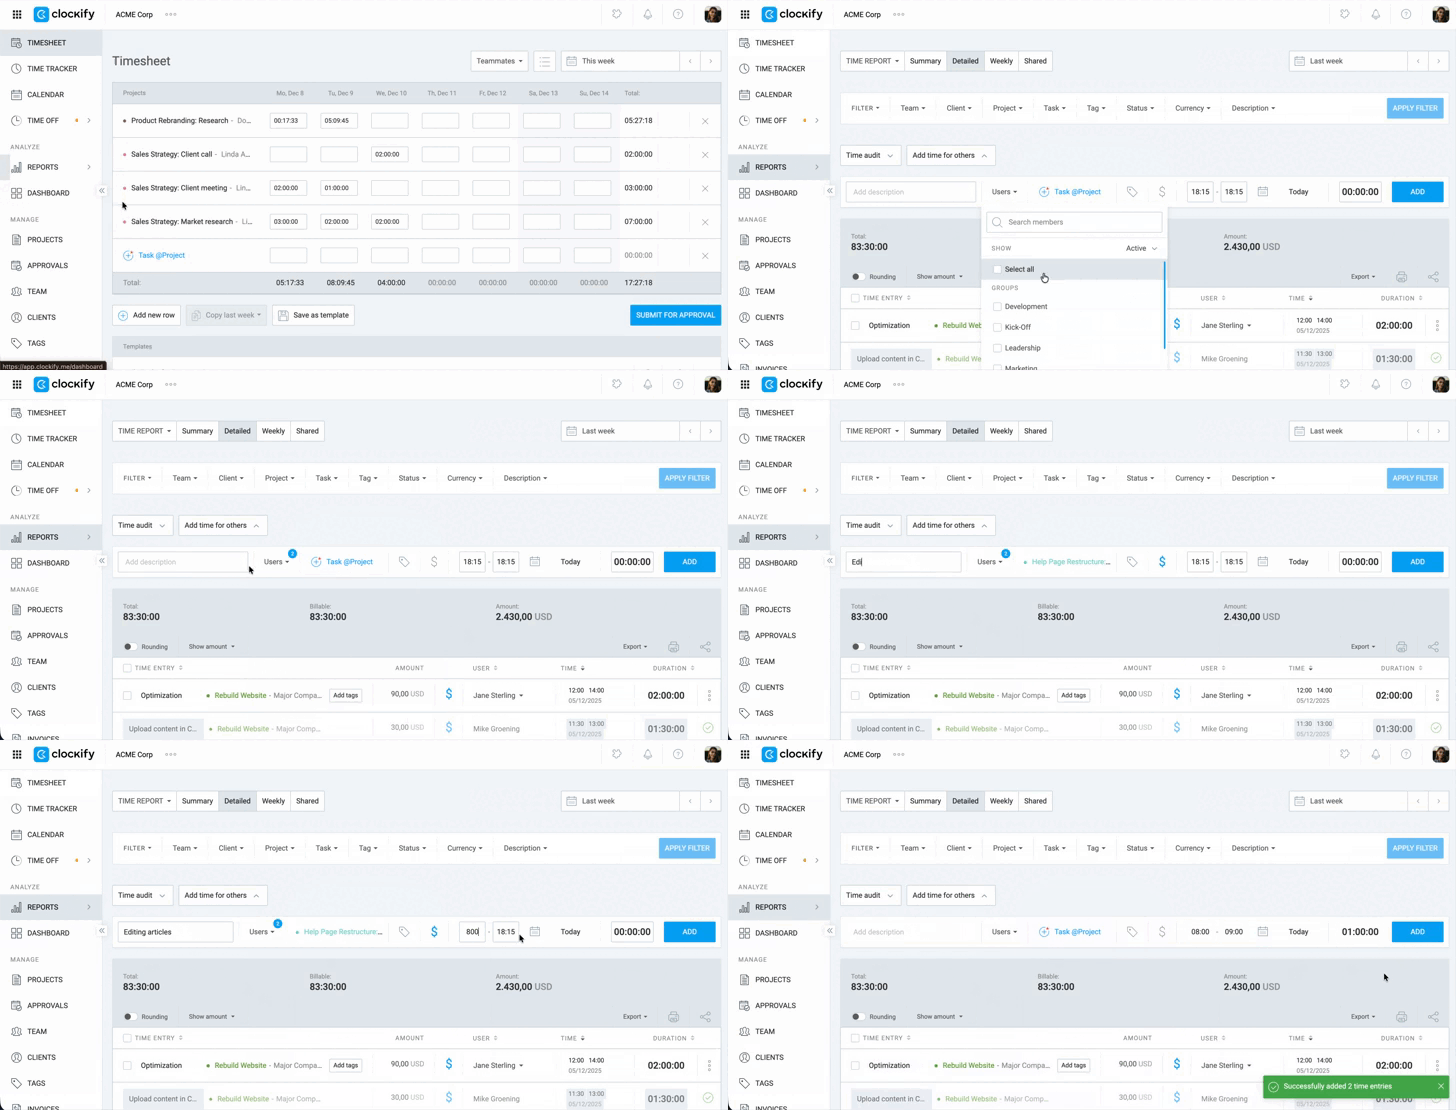
- Hover over Reports in the sidebar and select Detailed
- Click the Add time for others button at the top of the page
- Click Select user and choose the individual team members or user groups
- Enter the time details:
- Add the start time, end time, and date
- Add a description, select a project, add tags, or mark the time as billable/non-billable
5. Click Add to finalize the entry
Edit time entry in the Calendar #
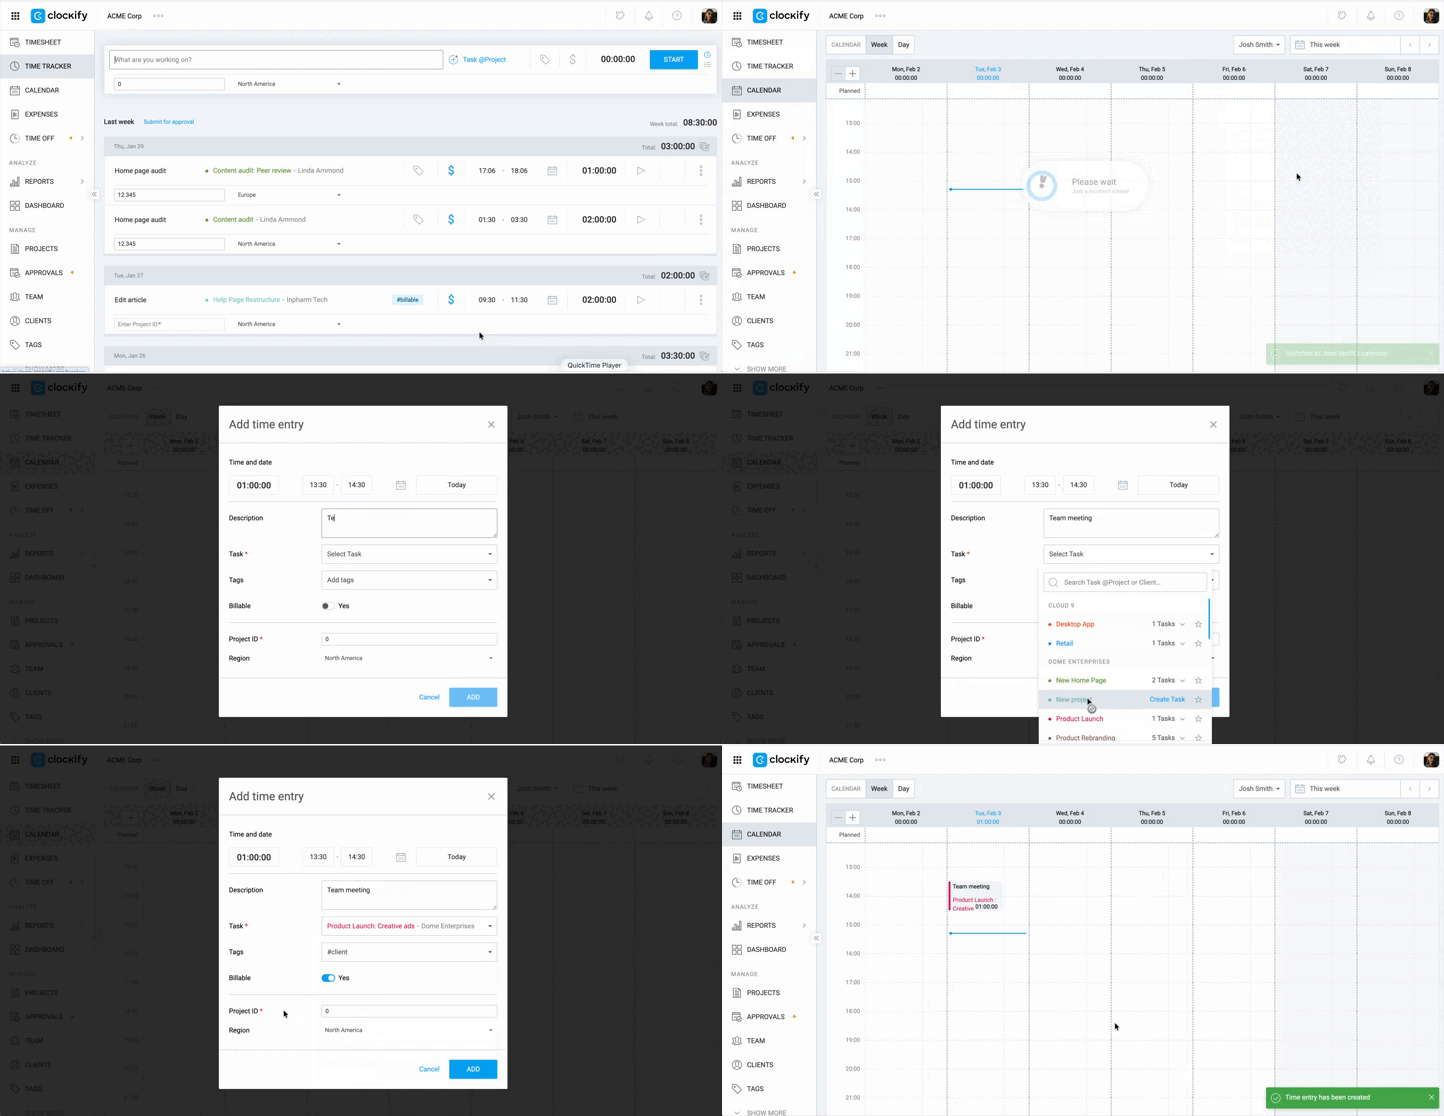
- Go to the Calendar page
- Click the Teammates button and select the teammate whose calendar you need to view
- Do one of the following to add a time entry:
- Click on any open time slot in the calendar or
- Click and drag the cursor up or down to create a time entry block
4. Enter the time details such as task, project, start time, end time, date, tags, and billable/non-billable.
5. Click Add to finalize the entry
Remind team member to submit time #
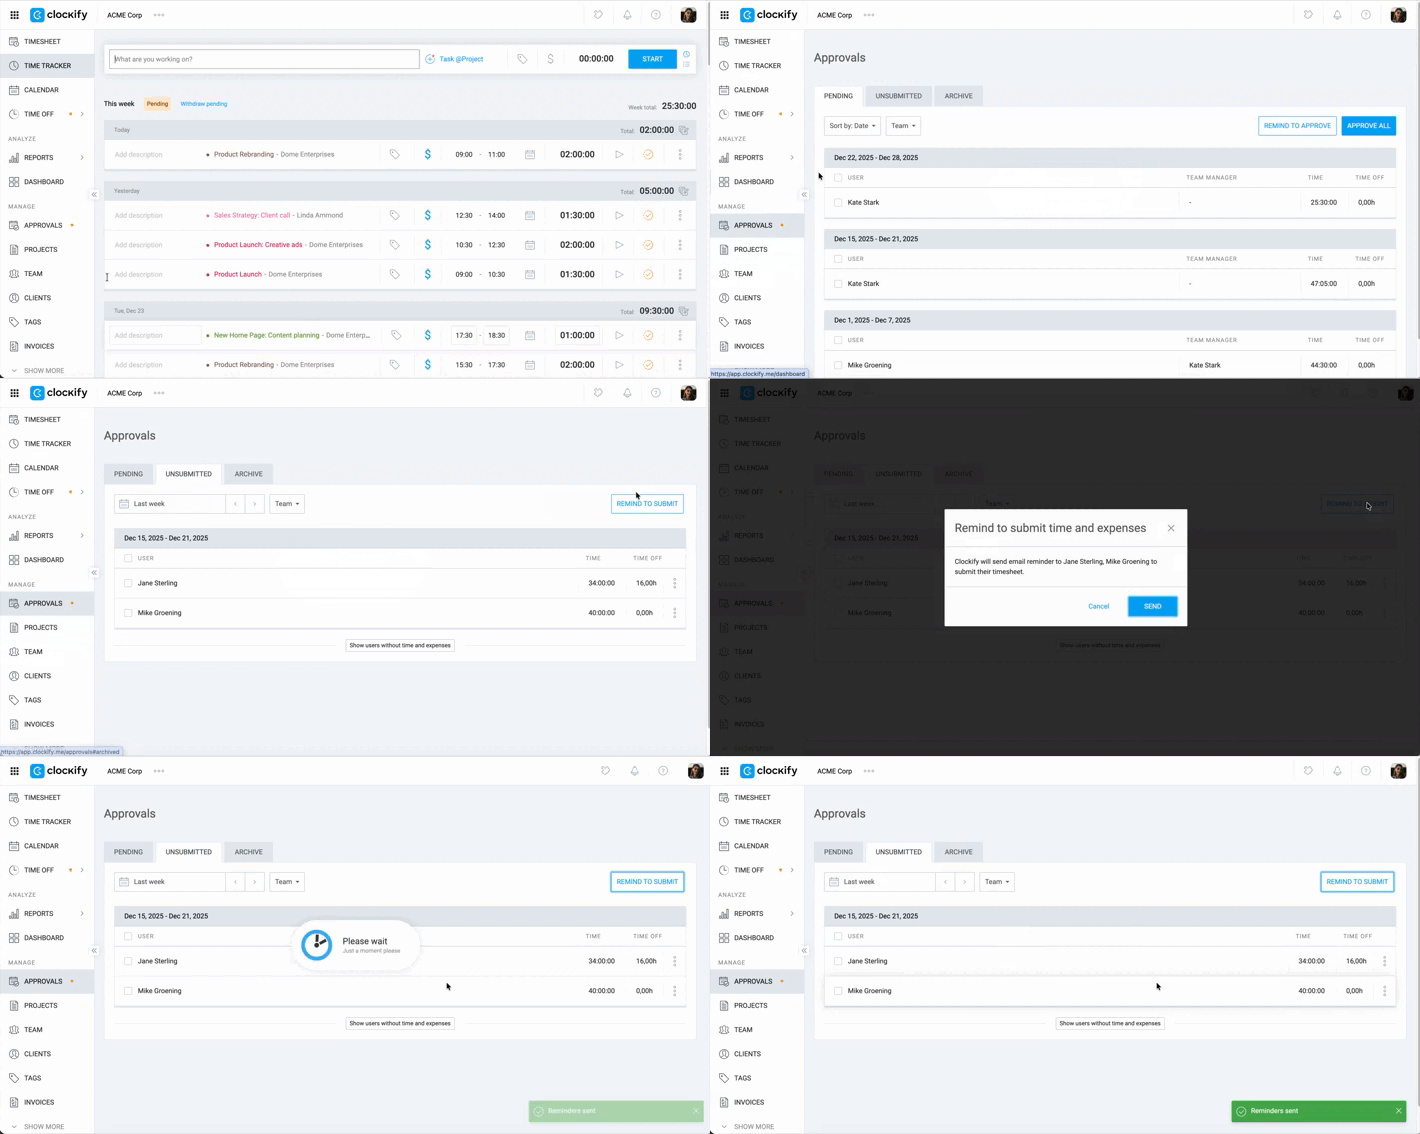
To remind a team member to submit their timesheet:
1. Go to Approvals
2. Click the Unsubmitted tab
3. Click the Remind to submit in the top right corner
4. Click Send on the confirmation window
A reminder email is sent to the team members to submit their timesheet.
Submit for team member #
Workspace owners, admins, and team managers can submit time on behalf of team members.
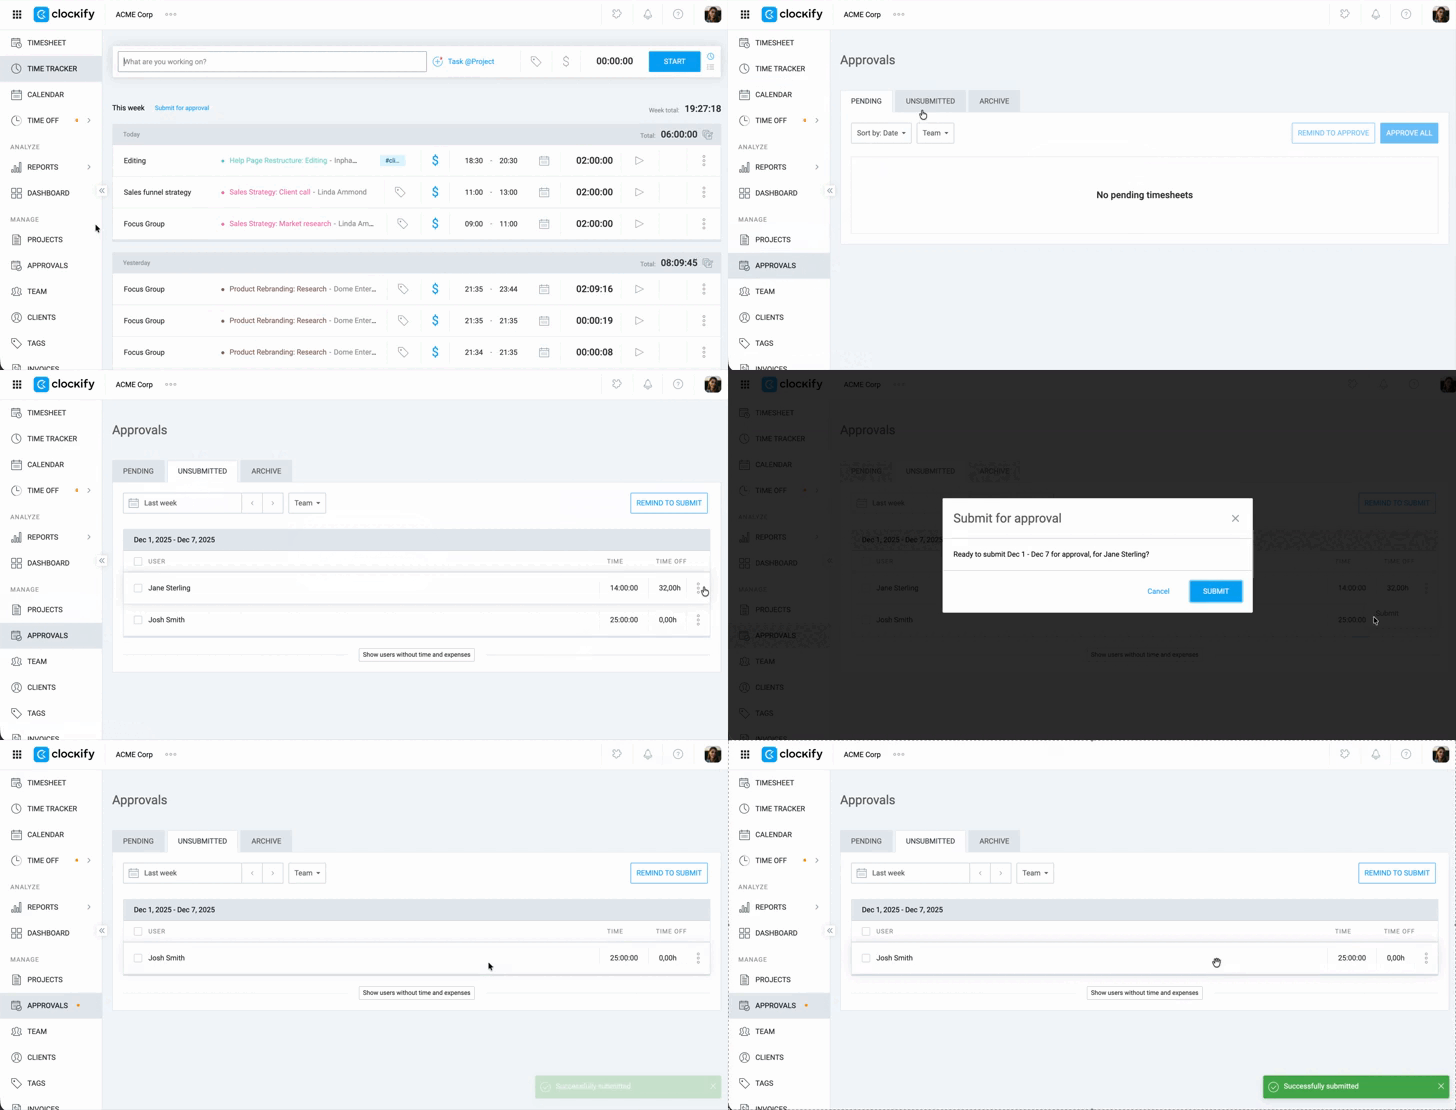
To submit time for others:
1. Go to Approvals
2. Click on the Unsubmitted tab
3. Click the three-dot icon next to the team member you want to submit time for
4. Click Submit
5. Click Submit again on the confirmation window
If there is an error in an already-approved entry, only an Admin or Owner can withdraw the approval to make it editable again.
Withdraw approval #
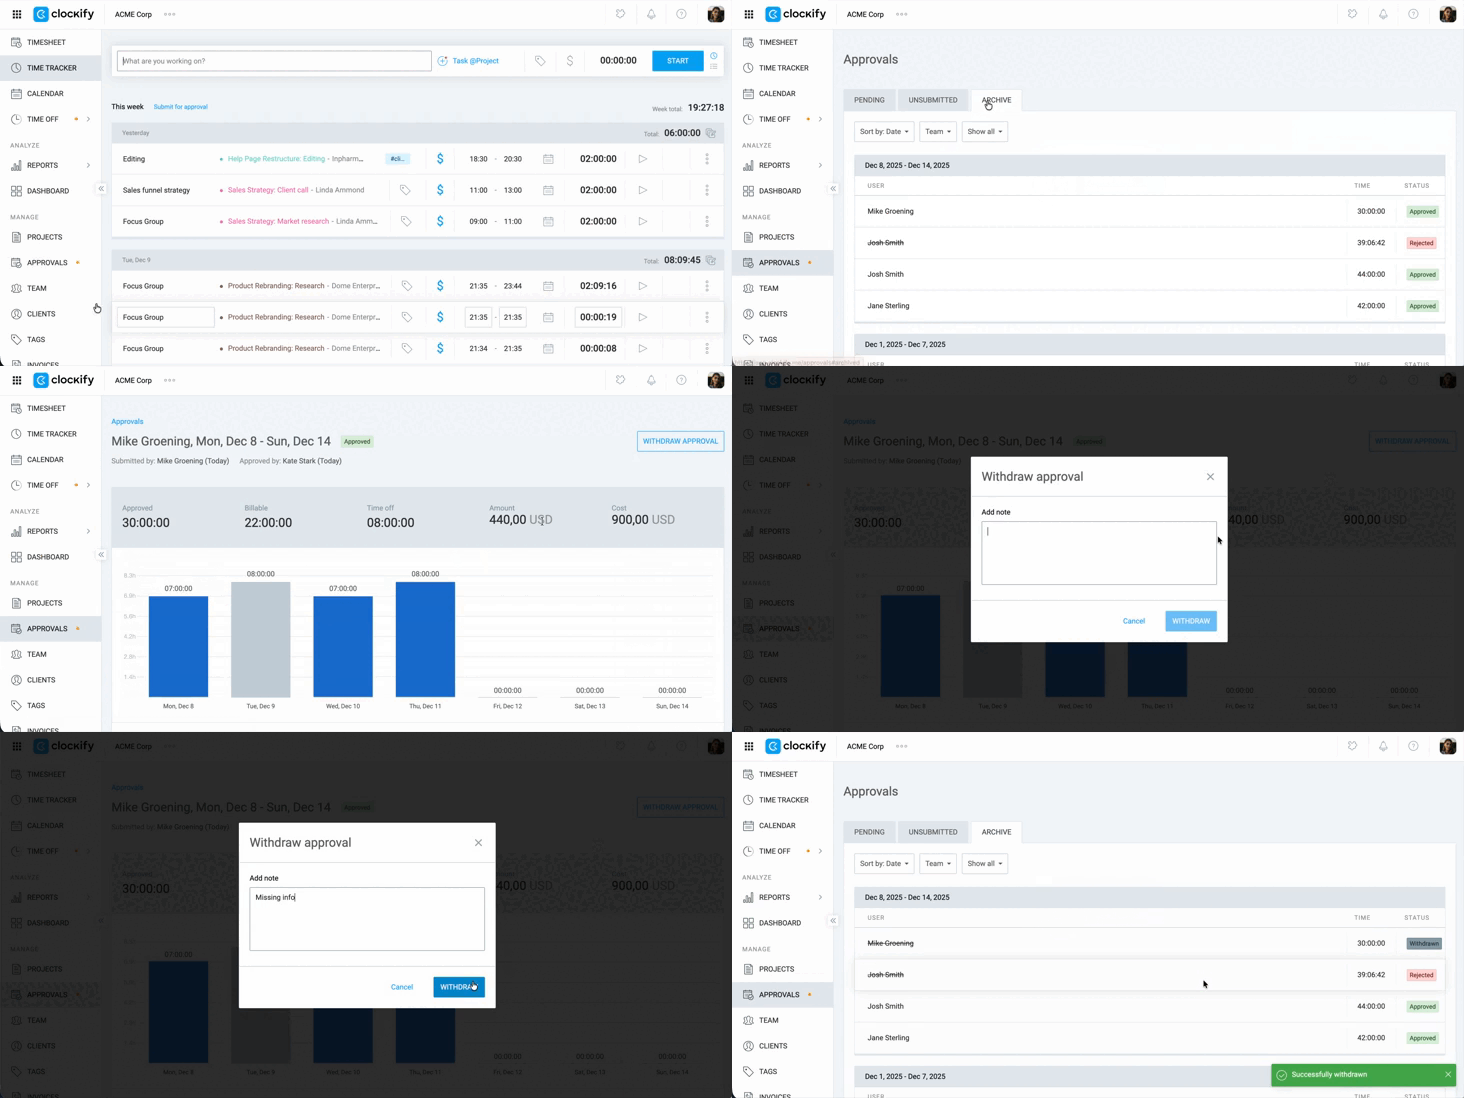
- Navigate to Approvals
- Go to the Archive tab
- Click on the team member whose timesheet approval you need to withdraw
- Click Withdraw approval in the top-right corner
- Add a note explaining the withdrawal and required changes
- Click Withdraw
Once withdrawn, all time entries for that period become editable again in the Detailed Reports section.
A permanent copy of the previously approved time entries is stored in the Withdrawn tab for auditing purposes.