Workspace in Clockify
A workspace is the basic organizational structure for all your time tracking activities. Think of it as your company’s dedicated, secure environment within Clockify, containing everything related to your team’s productivity.
A default workspace is automatically created for you when you sign up for Clockify. You also get a CAKE.com Account and organization, where you can join a workspace within an existing CAKE.com organization.
A single CAKE.com account allows you to create or join multiple, separate Clockify workspaces, each with its own users, projects, and time entries.
Your workspace holds all of your organization’s data and settings, such as:
- People: All your team members, their roles, and their access permissions.
- Projects & tasks: All active and archived projects, clients, and associated tasks.
- Time tracking logs: Every single time entry, timesheet, and approval record made by your team.
- Settings: All administrative configurations, from currency to branding.
Workspace settings #
Only Workspace owners and Admins can see and edit the Workspace settings.
The workspace settings is the configuration center for workspace owners and admins for modifying Clockify features that applies to the whole workspace.
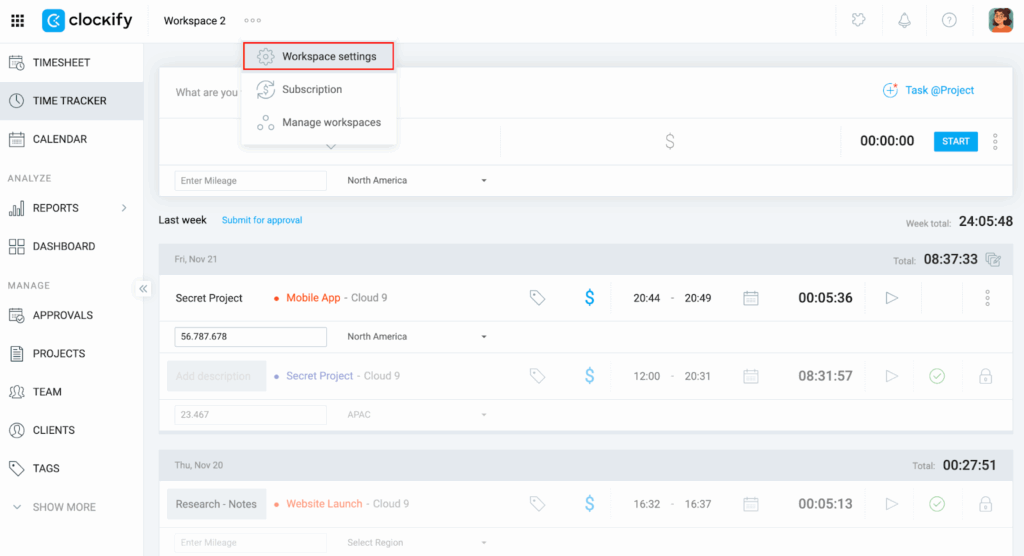
To view the workspace settings:
- Click on the three-dot icon next to the workspace name
- Choose Workspace settings
Use workspace settings to make the following modifications:
- Enable Timesheet
- Upload company logo (which will be displayed in branded reports)
- Change workspace name
- Set workspace billable rate and currency
- Set week start for all workspace members
- Control who can see billable rates and amounts
- Set if projects are billable by default
- Choose how you want to group your projects (e.g. by Client)
- Set who can create projects, tasks, clients, and tags
- Choose if the duration format will be displayed as hh:mm or hh:mm:ss
- Enable project favorites
- Choose preferred number and currency format
- Manage paid features (like hiding time from users, lock timesheets, required fields, hiding pages, and time rounding)
Some settings listed are paid features (such as Billable rates) which can only be accessed by subscribing to a paid plan or Free trial. Check out this article for more details on the features available per subscription plan.
Multiple workspaces #
Clockify workspaces are intentionally designed to be completely isolated. Time entries and data recorded in one workspace are not visible in any other.
This separation is invaluable for organizations that need to maintain strict data boundaries:
| Scenario | Recommended workspace strategy |
| Separate business units | Create a distinct workspace for each department (e.g. Marketing, Development) or subsidiary company. Note that having multiple workspaces means paying for more seats. If you don’t want the extra cost, having one workspace would be a more suitable option. |
| Personal vs. professional | Maintain a personal workspace for side projects or private time tracking, separate from your main company workspace. |
| Multiple clients | While not common, some companies might create separate workspaces for multiple clients |
Time entries are tied to the specific workspace they were recorded in to, and are not visible in other workspaces.
Manage workspace #
Workspace Owners can manage their workspace through the central CAKE.com Account. Here are all the workspaces of all the CAKE.com products that belong to their organization.
To manage CAKE.com account and workspace:
- Navigate to the Profile settings at the top right corner of the screen
- Choose Manage CAKE.com Account
- You’ll jump to the CAKE.com Account/My Account page of your organization
- Go back to the homepage
- Click on the Workspaces page

From this central hub, you can view, create, and join all the Clockify workspaces that are part of your organization.
For more information on how to manage your workspace, check out the CAKE.com Help Center article.