If you use Jira as your project management software, you may want to know how much time your team spends on Jira tasks and projects. It can help you assess your team’s productivity and improve resource planning.
Jira has a native time tracker, but it’s fairly simple. For the most accurate logs, you need an external time tracking software, like Clockify.
With Clockify, you can track the time spent on issues, tasks, and bugs directly within Jira.
In this guide, we’ll explain:
- How to log time in Jira with its built-in time tracker,
- How to track time in Jira with Clockify, and
- Why Clockify is the best choice for Jira time tracking.
Let’s begin.
How to set up Jira’s native time tracker
First, you need to add a time tracking field to your Jira task. Simply open your task, click the cog wheel within the Details section, and choose the Manage fields option. The following page will open.
Then, click on the Time tracking field in the Fields section on the right, select Save changes, and a time tracking option will appear on your task.
Now you’re ready to start recording time in Jira.
How to log and manage work time in Jira
To track your working time with Jira’s time tracker, choose the Work log tab within the Activity section on your Jira issue and click on Log time.
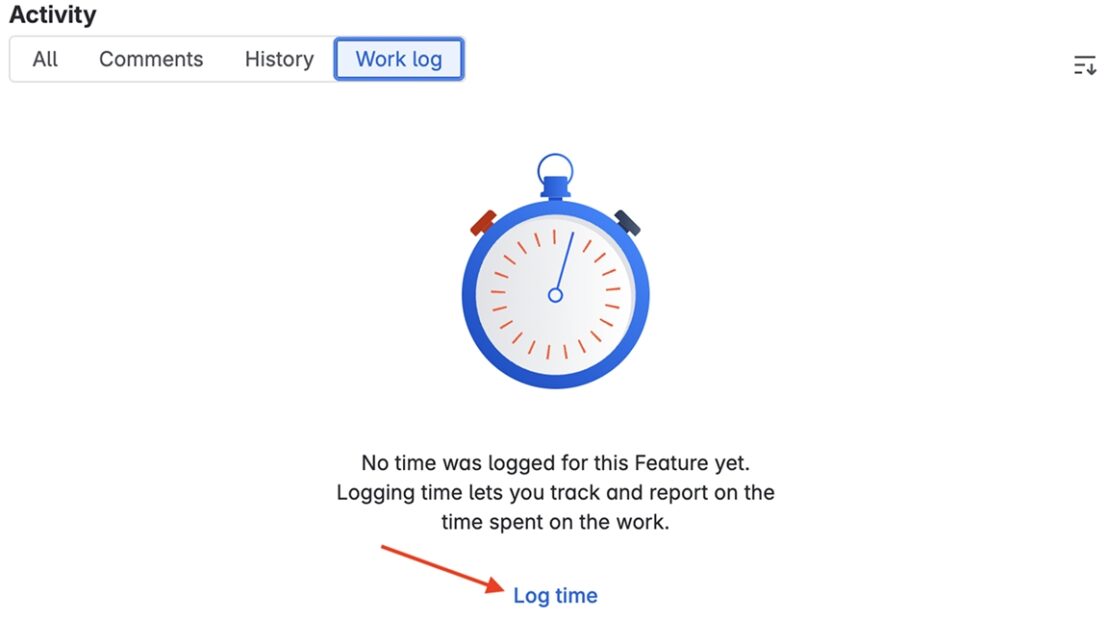
Then, add your time spent on the issue, select the date and the start time, and click Save. Adding a description is optional.
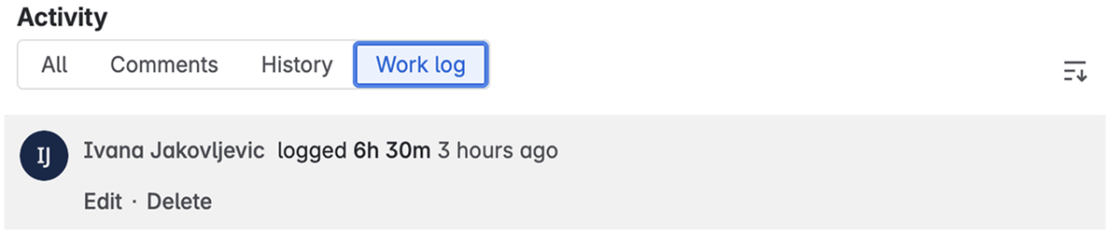
As soon as you save a time entry, you’ll be able to see your logged time within the Work log tab. There, you can also edit or delete your entries.
Note: You must repeat the process of adding a time tracking field for each task you want to log time for.
While Jira’s time tracking functionality is helpful, it lacks advanced time tracking options. For instance, it doesn’t provide the ability to track billable hours or record work hours in real time. You can only log work hours manually after you finish working, which can be tedious and lead to inaccuracies.
Luckily, Clockify by CAKE.com provides a comprehensive timekeeping solution, enabling accurate and efficient Jira time tracking.
Read on to learn more.
What is Clockify, and how can you track time with it in Jira?
Clockify is a time tracking tool that allows teams to track their work hours across projects. It also integrates with 80+ web apps, including Jira.
To track time in Jira with Clockify, you need to create a Clockify account and integrate Clockify with Jira by installing Clockify’s plugin in Jira.
Clockify Jira integration lets you:
- Track time on your activities with just one click directly in Jira,
- Associate activities you’re tracking time on with the right projects, tasks, and tags, and
- Define the billability status of your time entries.
Clockify’s plugin is linked with other Clockify apps, which means that once you enter data in the plugin, it automatically appears across other Clockify platforms. These platforms include desktop, mobile apps, and browser extensions.

How to integrate Clockify with Jira
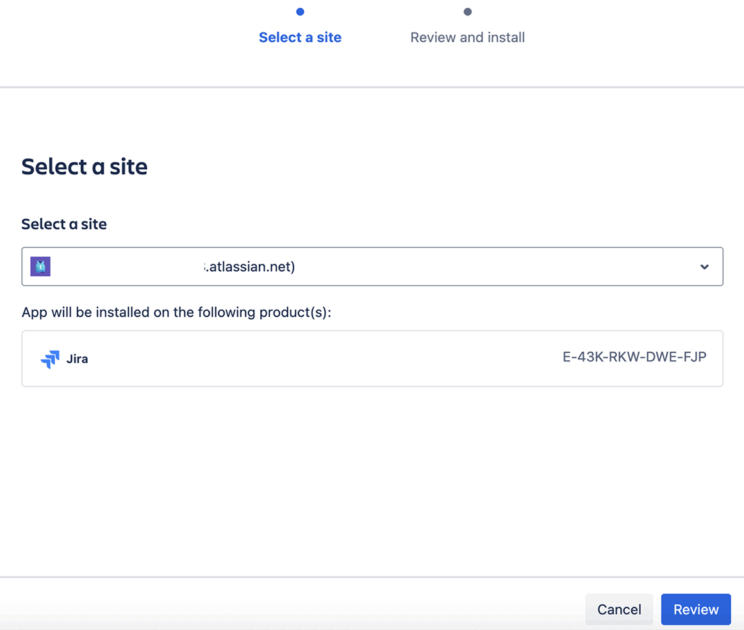
To connect Clockify and Jira, you need to install the Clockify app in Jira. To do that, follow these steps:
- Find the Clockify app on the Atlassian Marketplace,
- Click the Get it now button, and
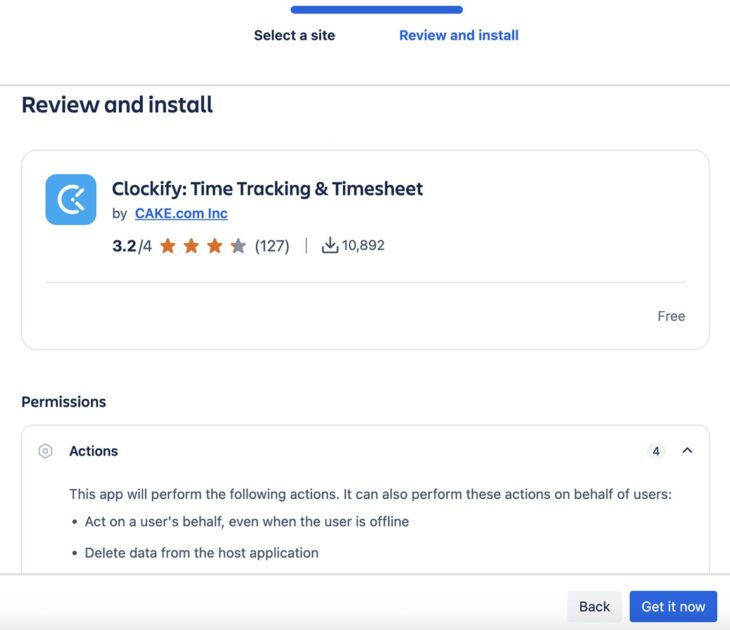
- Select a site from the dropdown list where you want to install the app and click Review.
After reviewing all the permissions, confirm the installation by clicking the Get it now button.
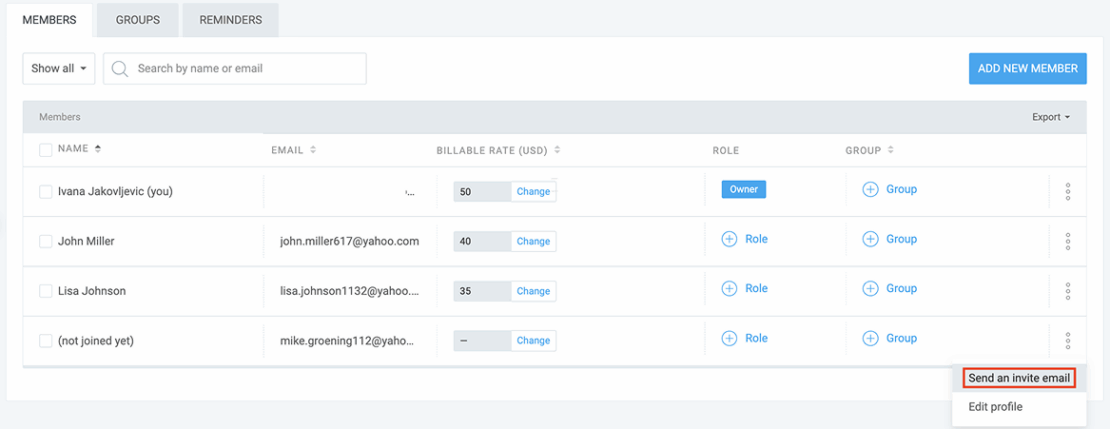
Now that you’ve integrated Clockify with Jira, invite the rest of your team to track time. Just go to the Team section in Clockify’s web version, click on the 3 dots next to a team member, and select Send an invite email.
As you can see, the setup is simple and easy.
Later, you’ll choose whether to track time on Jira tasks via timer or manually enter the hours.
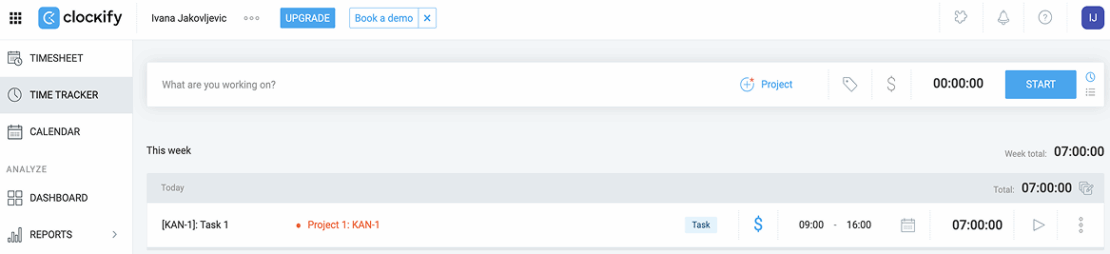
How to track time in Jira with the Clockify timer
Once you integrate Clockify with Jira, you’ll be able to record time in Jira with Clockify’s timer.
To track time with Clockify’s timer, get your API key. API keys are serial numbers that work like your digital identification number. It’s how Jira recognizes that the person using the timer is also working on a particular task.
As a result, the time tracked on a Jira issue will be automatically recorded in Clockify. No need to go back and enter anything manually.
Follow the steps below to start tracking time in Jira with the Clockify timer.
Step #1: Generate your API key
Click on your profile picture in Clockify (in the top right corner), choose the Preferences option, and open the Advanced tab. Then, select the Manage API keys option, and the following page will open.

After that, click the Generate new button, name your API key, and click Copy. As soon as you copy your API key, it will be automatically saved in Clockify.

Note: You should generate an API key only the first time you start the timer. Also, deleting your API key in Clockify will render your integration useless.
Step #2: Paste the API key and start the timer
After copying the key from Clockify, go to your Jira workspace and open the task you need to work on.
On the right side of your Jira task, you’ll see Clockify’s Start/Stop option right below the Automation option.
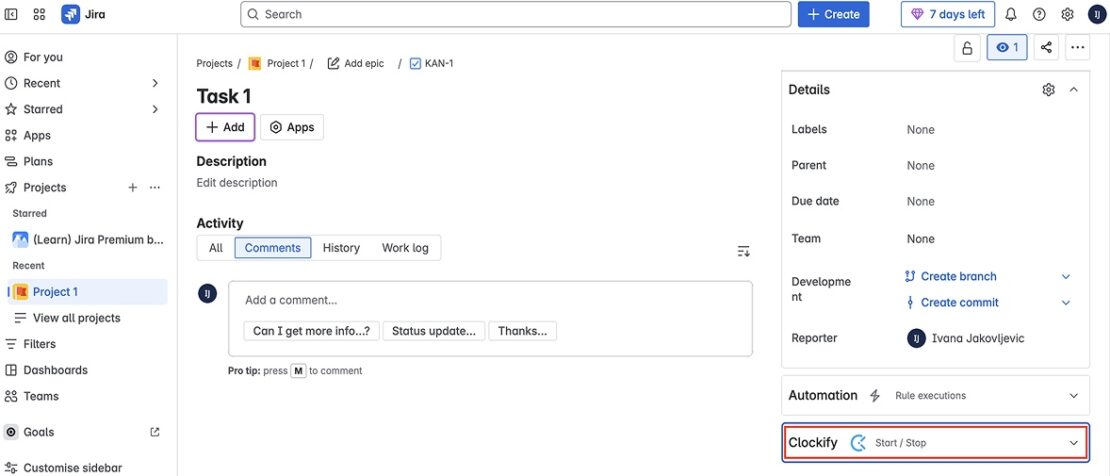
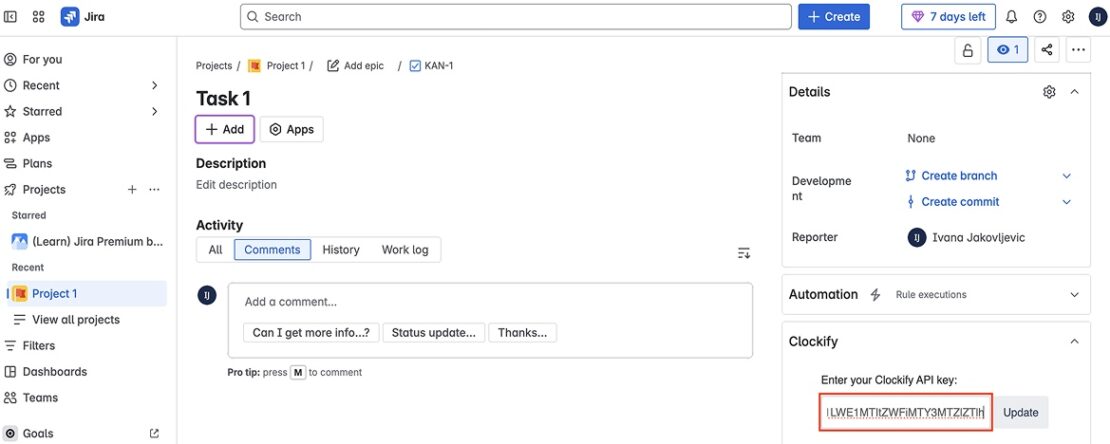
When you click the Start/Stop option, an empty field will appear for you to insert the API key. Simply paste the serial number into that field and click Update to apply the changes.
After that, the Clockify timer will pop right up. Click on the Start timer button to start time tracking. Once you’re done with the task, you can stop the timer from the Jira card again.
Whenever you start the timer, the time entry displays all the essential information concerning the task, including:
- Project name,
- Task name,
- Tags, and
- Billable/nonbillable status.

Once the timer is stopped, a time entry is created inside Clockify, with the data on the task and project.
Note: While new time entries are synced between Clockify and Jira, deleting entries doesn’t sync. Editing or deleting entries, whether in Jira or Clockify, won’t reflect the changes in the other platform.
How to manually track time in Jira with Clockify
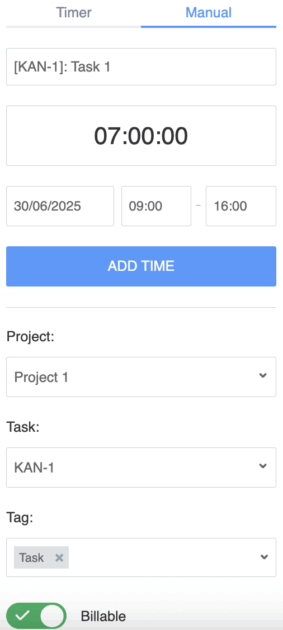
If you’ve forgotten to track your time, Clockify in Jira lets you log work time manually. The Manual option to record time is conveniently located right beside the Timer option. To manually log your time spent on a Jira issue, do the following:
- Choose the Manual option,
- Add your start and end times,
- Select the appropriate project, tags, and billable status, and
- Click the Add time button.
Once you add your hours, the time entry is automatically transferred to your Clockify web version and is visible to you and your team.
We’ve explained how to track time spent on Jira tasks with Clockify in Jira. Now let’s see how you can generate Jira time tracking reports in Clockify so you can learn more about your tasks and track your project progress.
Generating Jira time tracking reports in Clockify by CAKE.com
With Clockify, you can generate detailed time reports based on your team’s recorded time in Jira. Then, you can analyze how time was spent on Jira tasks and assess your team’s performance.
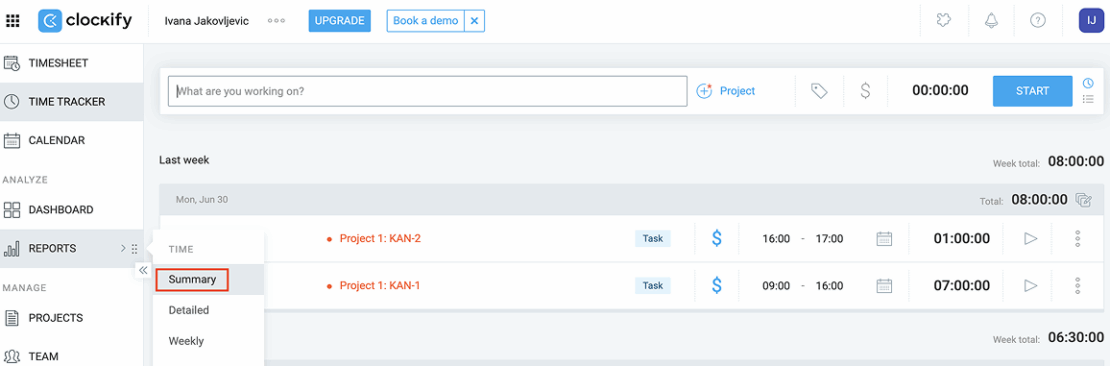
For instance, you can generate a summary report in Clockify. To do that, follow these steps:
- Go to the Clockify web version,
- Hover over the Reports section in the sidebar, and
- Select Summary from the dropdown menu.
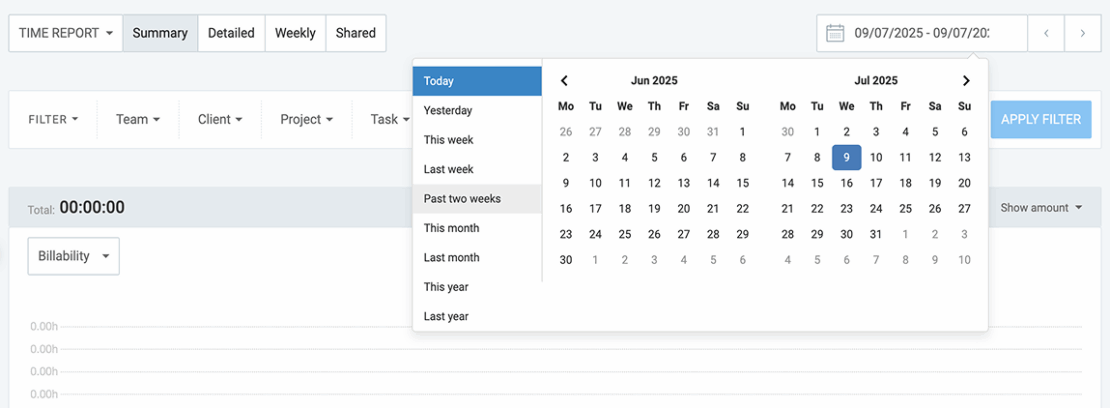
Then, choose the desired date range by clicking on the date range feature at the top right of the report page. You can either select a custom date range or choose one of the predefined options like ‘This week’ or ‘Past two weeks.’
After that, use the filter options to narrow down the data included in your report. You can filter the report by:
- Team,
- Client,
- Project,
- Task,
- Tag,
- Status, and
- Description.
You can also further break down the data by groups and subgroups. For example, you can group time entries by project and then subgroup them by task and user for more granular analysis.
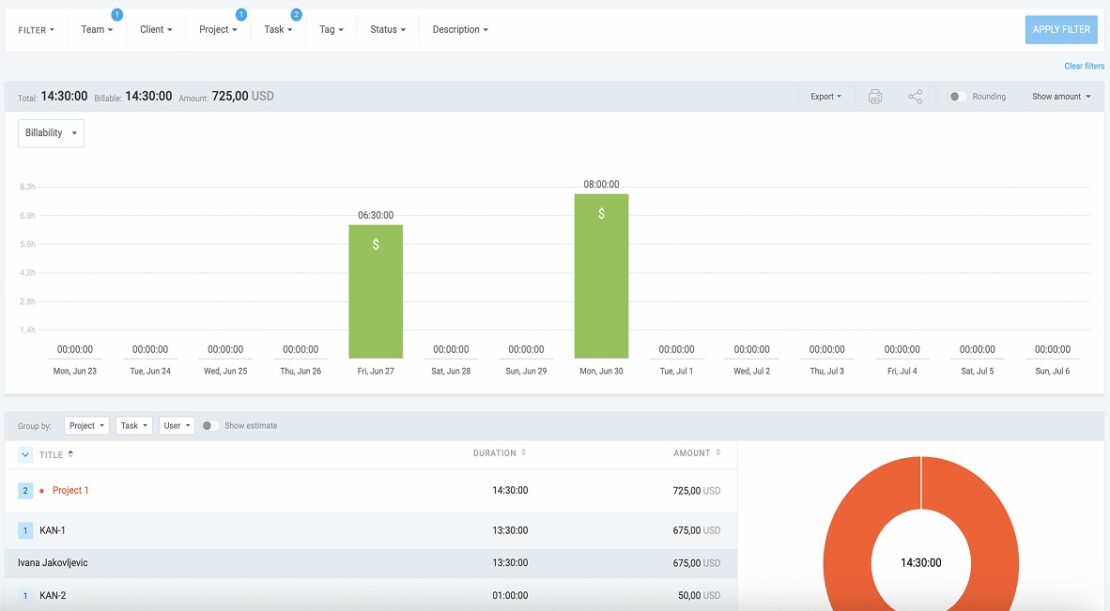
Your summary report shows the total tracked time for each task and the entire project, as well as who worked on which task. This way, you’ll know if a particular team member spends too much time on a specific issue, so you can help them finish it faster.
Additionally, you can export time tracking reports in PDF, CSV, or Excel format and customize them to your needs.
Clockify’s powerful reporting capabilities allow teams to analyze efficiency and make informed project management decisions. This helps them achieve optimal results.
FAQs about Jira and Jira time tracking
In this section, you’ll find the answers to some of the frequently asked questions about Jira and Jira time tracking.
Is Jira a time tracking tool?
No, Jira is not a time tracking tool. Jira is primarily a project management software that includes built-in time tracking functionality, rather than a dedicated time tracking tool.
How to track timelines in Jira?
To track timelines for your Jira issues, use the timeline view in Jira. To access this feature, open your project and click on Timeline, as shown below:
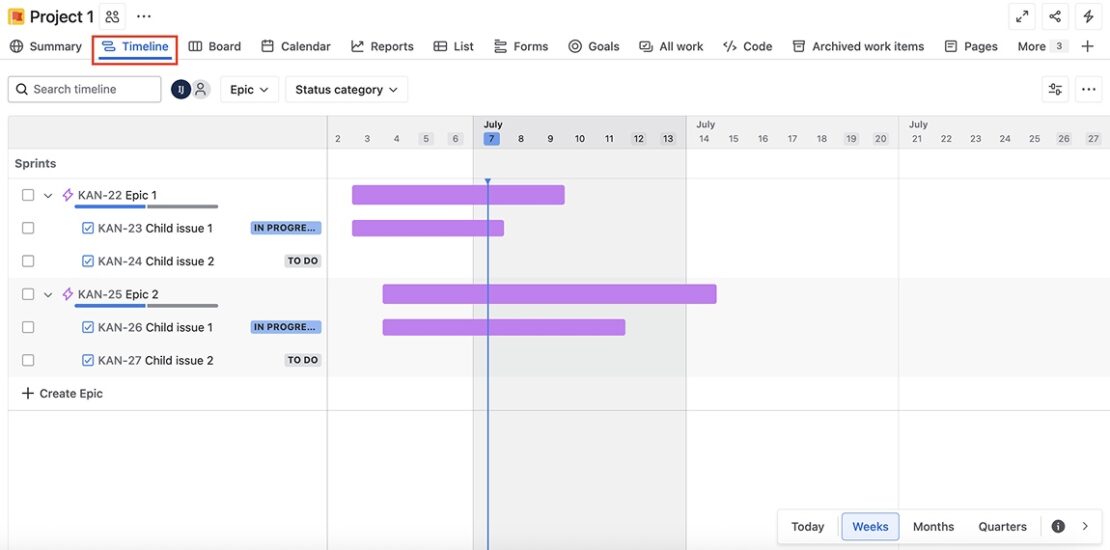
The timeline view in Jira displays tasks as bars on a timeline, based on their start and due dates. It also allows you to select the timeframe you want to view, offering options such as weeks, months, or quarters.
With this feature, you can:
- Track deadlines and progress of your issues,
- Identify potential bottlenecks, and
- Visualize dependencies (or ‘issue links’) to understand how tasks relate to each other.
This enables you to adjust the timing and sequence of your team’s tasks, leading to improved planning and successful project delivery.
Note: Jira’s timeline view is limited in the free version of the app. It only shows the epics (larger bodies of work) and their child issues. To see subtasks, dependencies, or milestones, you need to upgrade to one of the paid plans.
How do you estimate time in Jira?
First, enable the estimation feature in Jira. Click on the project you’re working on, choose Project settings, and select Features. The following page will open:
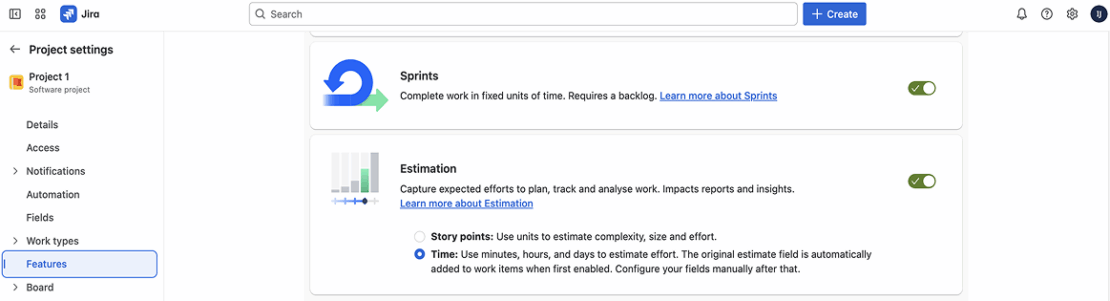
Then, toggle the Estimation button on and choose the Time option, as shown above. Once you do that, the original estimate field will appear on all the tasks related to that project.
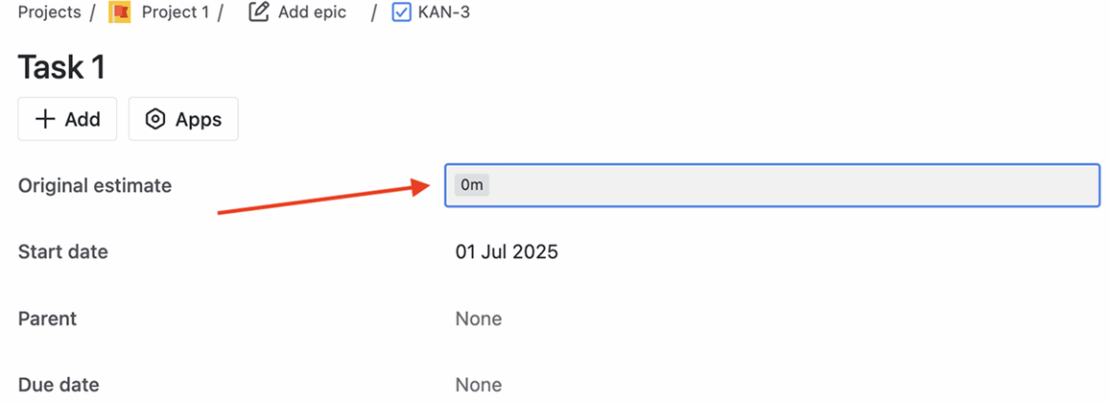
To set a time estimate for your task, add the expected time for completing the task in the appropriate field and press Enter on your keyboard. Available units are weeks, days, hours, or minutes (e.g., ‘1w’, ‘2d’, ‘3h’, or ‘4m’).
As you track time on the task, you’ll be able to see the logged time and the time remaining within a time tracking option on your Jira card. This way, you’ll know how much time is left (in this case, 2h 30m) until you reach your estimated time (in this case, 2d or two 8-hour workdays).
Note: Jira automatically updates the time remaining based on the original estimate after you track time. However, if you change the original estimate after logging time, the remaining time won’t update automatically. In this case, you’ll need to manually adjust the remaining estimate to reflect the new approximate time.
How to track activity in Jira?
You can track user and issue activity in Jira by checking the history of a specific issue. Jira’s History tab is located within the Activity section on your Jira card.
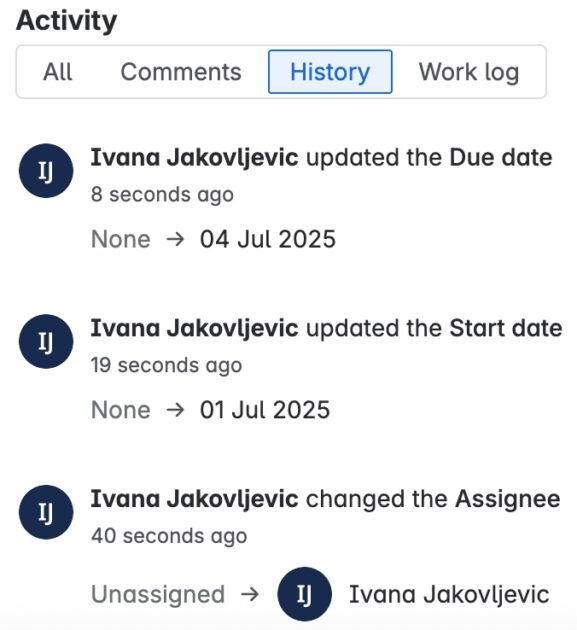
When you click on History, you’ll see a timeline of all the actions that have been taken on the issue. These actions include changes to the issue’s status or assignee, work logs, and comments.
Use Clockify’s integration with Jira to optimize your workflows
By using Jira and Clockify together, you’ll have better control over your projects. You’ll know which project took how long, what your team is working on, and more. This helps you allocate resources and plan future projects better.
Moreover, Clockify’s integration with Jira streamlines Jira time tracking. Thanks to Clockify’s useful time tracking features, your team can easily record their time spent on issues with just one click. This way, they can focus on their work and stay productive.
If you have any questions regarding Clockify or its integration with Jira, contact our customer support team (available 24/7) via email, chat, or phone.
Clockify lets you track time for unlimited projects and generate and export reports in PDF (on the BASIC plan). If you need additional features, you can choose one of the affordable paid plans Clockify offers — see below:
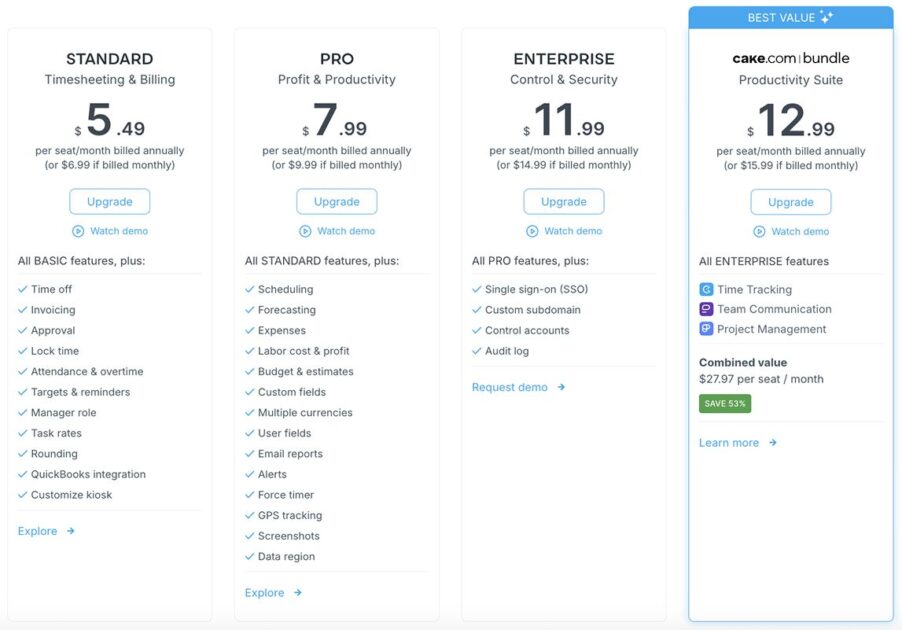
And, if you want to skyrocket your team’s productivity, check out CAKE.com’s Bundle!