Browser extension
Clockify Time Tracker for browser lets you track time from anywhere on the web, without opening Clockify.
For step-by-step guidance on using Clockify in your browser, watch the video and follow the instructions below.
How it works #
Log in #
To start tracking time, you’ll first need to log in to the browser extension.
To log in:
- Click the Login button
- You’ll be redirected to the web app Login screen
- Continue the process by entering and verifying your email
After you complete the login process, you can start using the extension and tracking time.
If you’re already logged in, the extension will automatically open Clockify.
If you don’t have a Clockify account yet, you can create it by clicking the New here? Create an account button.
Logging in with custom domain and subdomain #
Users on custom domain or subdomain can also use the Chrome browser extension:
- Open the extension
- Find the Log in to custom domain or Log in to subdomain (Pro plan users on subdomain) link at the bottom of the extension screen
If you’re logging in with a custom domain, choose your custom address.
If you’re logging in with a subdomain, enter subdomain name in the field (e.g. https://acme.clockify.me).
Click Submit and log in with your email or SSO.
Time tracking #
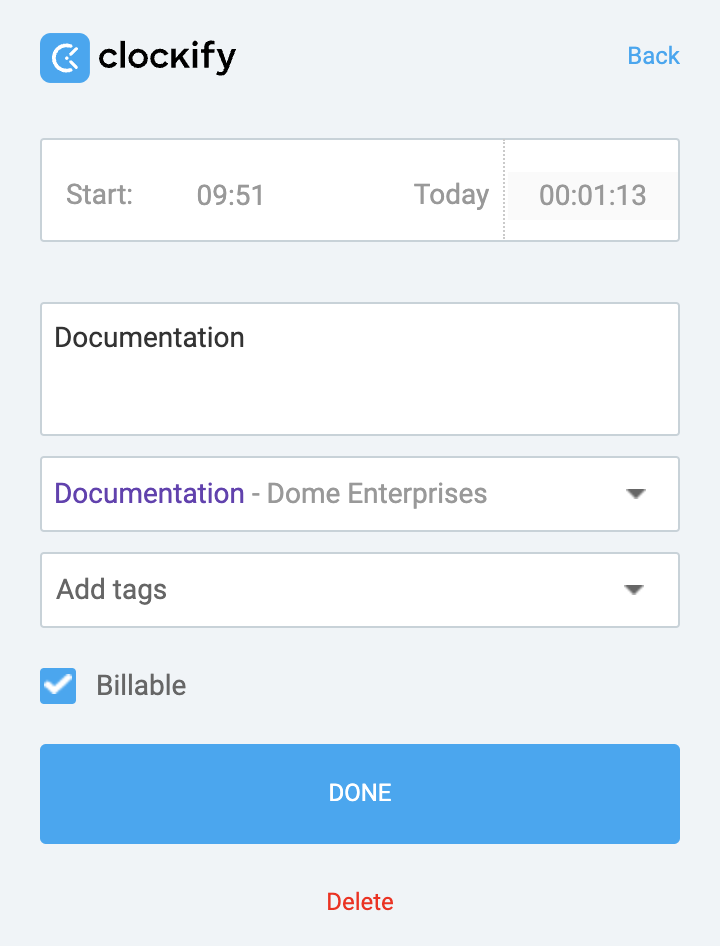
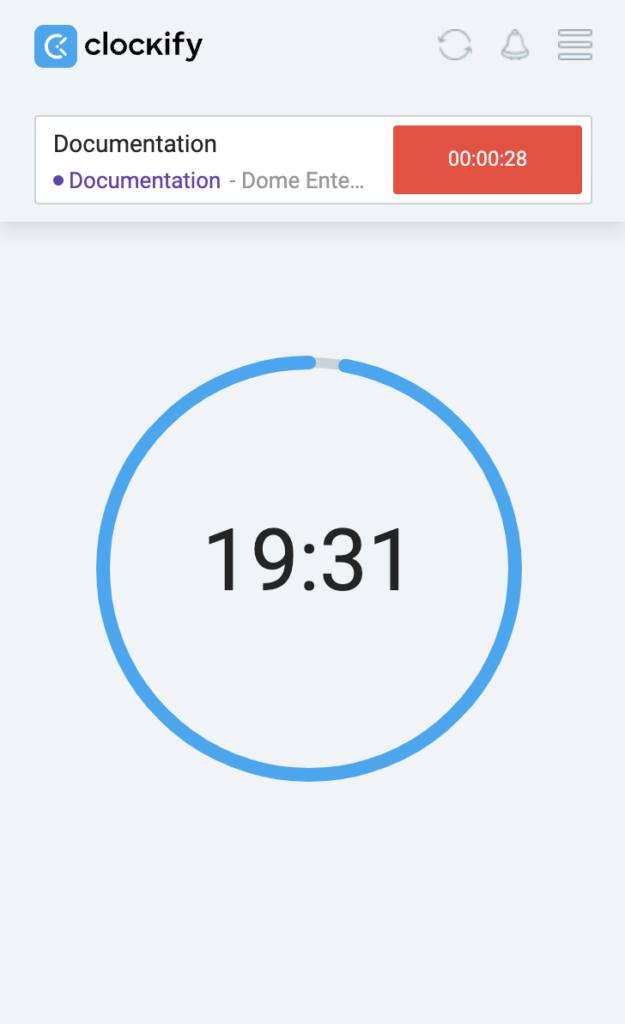
Once you’ve logged in to the extension, type what you’re working on and start the timer.
To edit the running time, click on the running entry to bring up its details. There you can change the description, change running time, mark time as billable, and add project and tags.
You can also edit past time entries by clicking on them, or add time manually (once you switch to manual mode in the settings).
To quickly continue tracking time, click on the play icon for the time entry you wish to continue, and the timer will start ticking again for that entry.
Clockify also supports tracking holidays and time off on the web app. Time off and holiday entries are distinctly displayed in the tracker.
For more information on how to time off and holiday entries, check out Track holidays & time off.
Dark mode #
You can enable dark mode for the extension (as well as desktop and mobile app) in the app’s Settings.
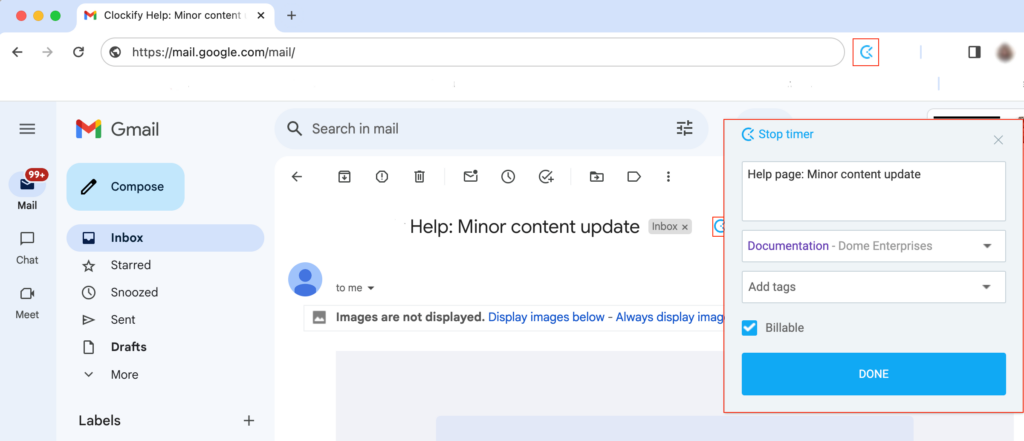
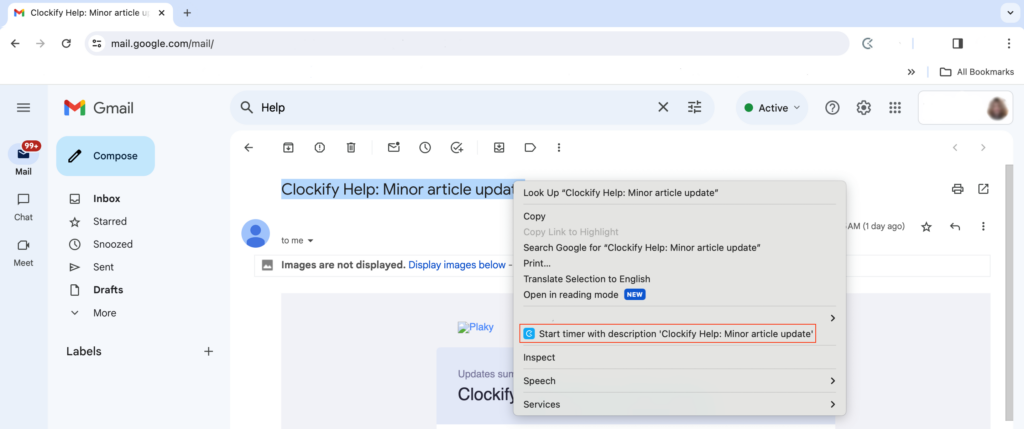
Track time from selected text #
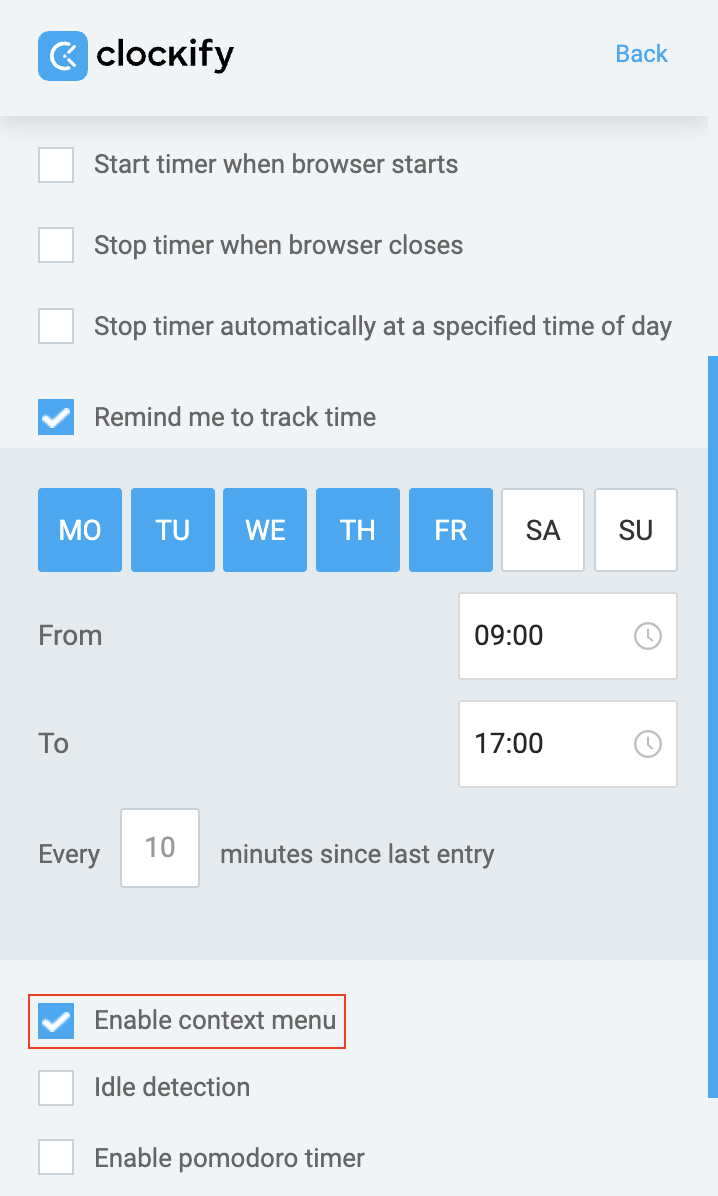
- Go to Settings
- Check Enable context menu option
- Select any text in the browser (e.g. task name in Trello, email subject in Gmail, issue in Github)
- Right-click on the selected text
- Click Start timer with description in the right-click menu
Track time from web app Projects page #
If you’re involved in an extensive project and task planning but would like to easily navigate through the Clockify web app, you have the option to start the timer from the created projects and tasks on the Projects page.
You need to be logged in to the Clockify browser extension and the Clockify web app with the same account to use this feature.
Once you’re logged in:
- Navigate to the Projects page
- Find the project you’d like to track time for
- Hover over the project and the start button will appear
- Click the button
- Timer will start running and the time entry details window will appear
- Choose project task, make some other modifications, or stop the timer
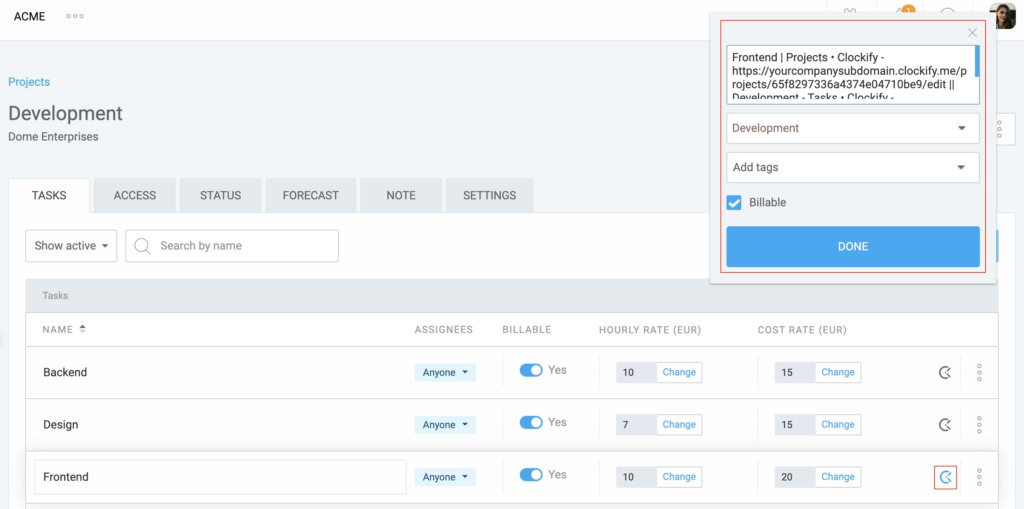
To start the timer for a project task:
- Click on the project in the Projects page
- Go to the Task tab
- Hover over the task and the Clockify button will appear
- Click on the button
- Timer will start running and the time entry details window will appear
- The extension will pick up project and task name from the web app
Task name will be in the description.
If you stop the timer in the extension, that entry will be added in the time tracker with all other info related to that entry.
The Start time button is not available for archived projects and tasks.
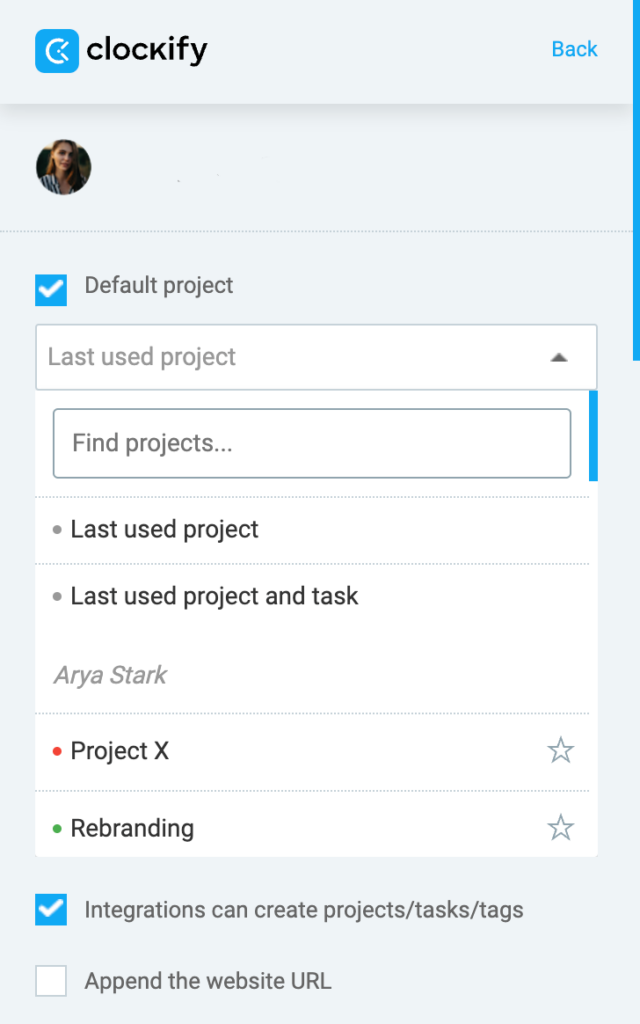
Default project and task #
If you work on the same project every day, set a default project or task. Then, all you have to do is type what you’re working on, start the timer, and the project will be selected automatically.
You can select:
- Fixed project to always use when you start a timer for an entry without project
- Fixed task to always use when you start a timer for an entry without project/task
- Last used project to pick up most recently used available project (if task is required, task will also be picked up)
Enable default project in the Settings.
Delete time entry #
To delete a time entry:
1. Click the three dots icon next to the time entry you want to delete
2. Click Delete
3. Click Delete again on the confirmation window
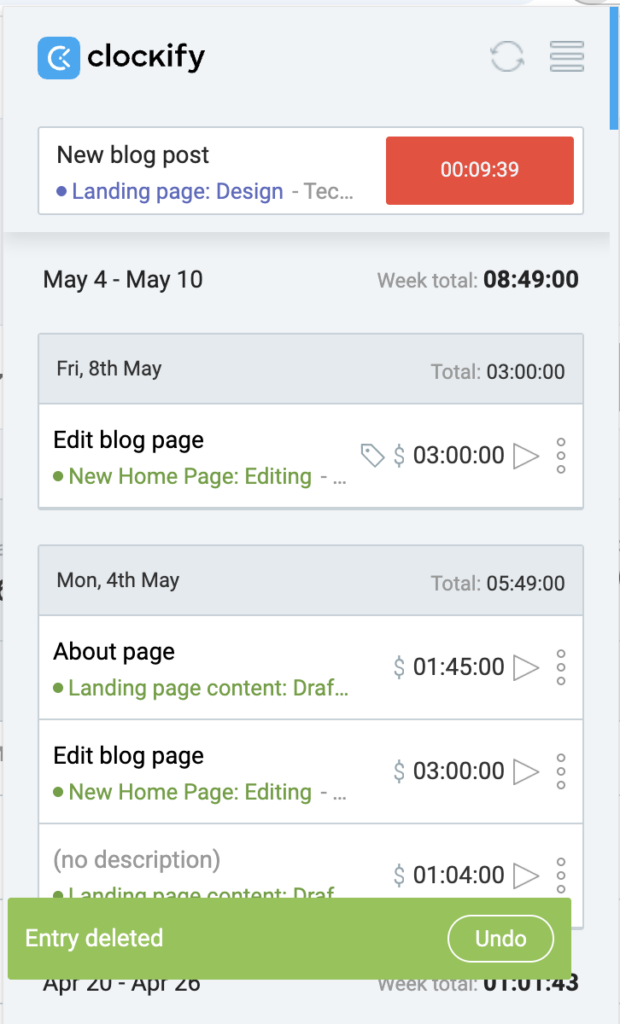
An Undo button will be visible for 5 seconds. Click this button if you want to undo the deletion and restore the time entry.
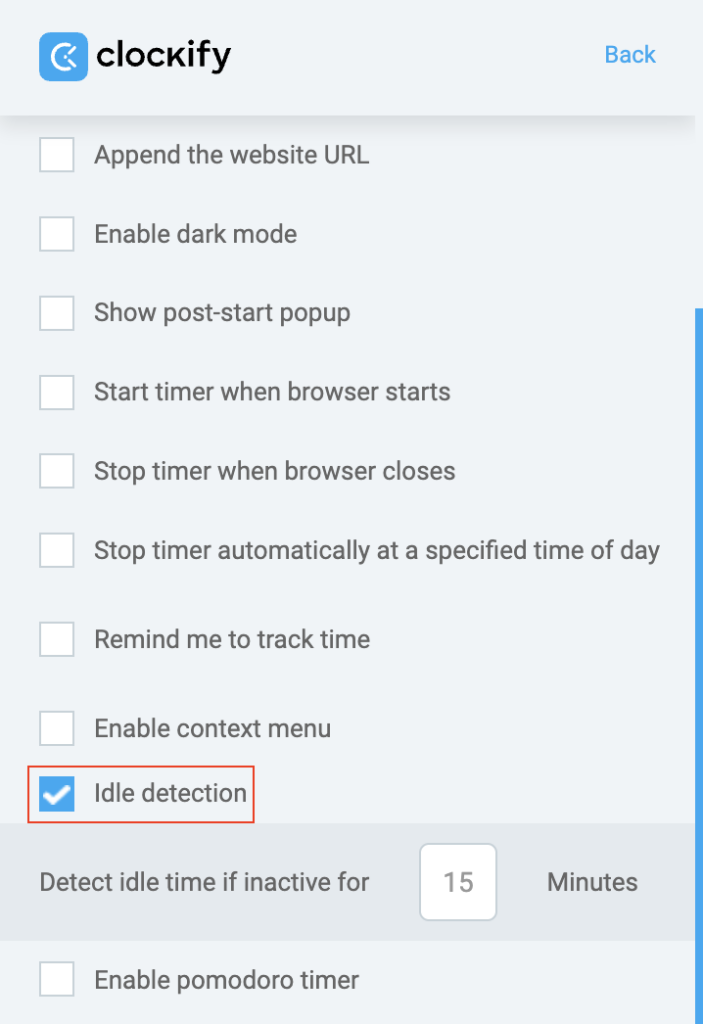
Idle detection #
While tracking time, Clockify browser extension can detect when you’re away from your computer so you don’t accidentally log that time. The extension detects when you’re inactive based on your mouse and keyboard movements.
If there’s no mouse movement or keyboard strokes for X minutes, the timer will enter into idle mode. It will continue running, but it will treat those X minutes (and the time after that) as idle. When you become active, a notification will pop up, asking what you want to do with the idle time.
You can choose to:
- Discard idle time – The timer will be stopped and the detected idle time will be removed from its total.
- Discard and continue – The current timer will be stopped, the detected idle time will be removed from its total, and a new timer will immediately start for the same activity.
- Keep idle time – The timer will keep running as it is. In order to keep idle time in the extension, simply close or dismiss the notification.
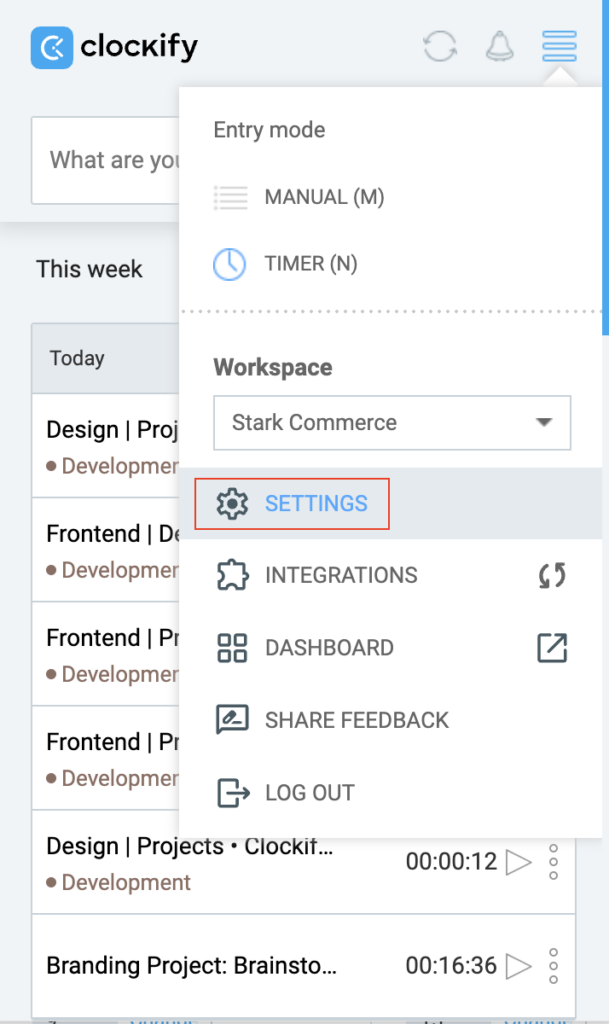
To set up idle time detection in the extension:
- Click on the Clockify timer button located in the upper right-hand corner of your browser
- Open the extension settings by clicking on the hamburger icon
- Go to Settings
- Select Idle detection checkbox
- Specify the number of minutes of inactivity after which the idle time will be detected
- Click Done
Idle detection will work only if you started the timer from the extension (it won’t work if you started the timer from the web but have the extension installed).
Pomodoro #
With the Pomodoro timer, set up notifications to let you know when it’s time to take a short break.
To enable Pomodoro:
- Open the extension settings by clicking on the hamburger icon
- Go to Settings
- Check the Enable Pomodoro timer
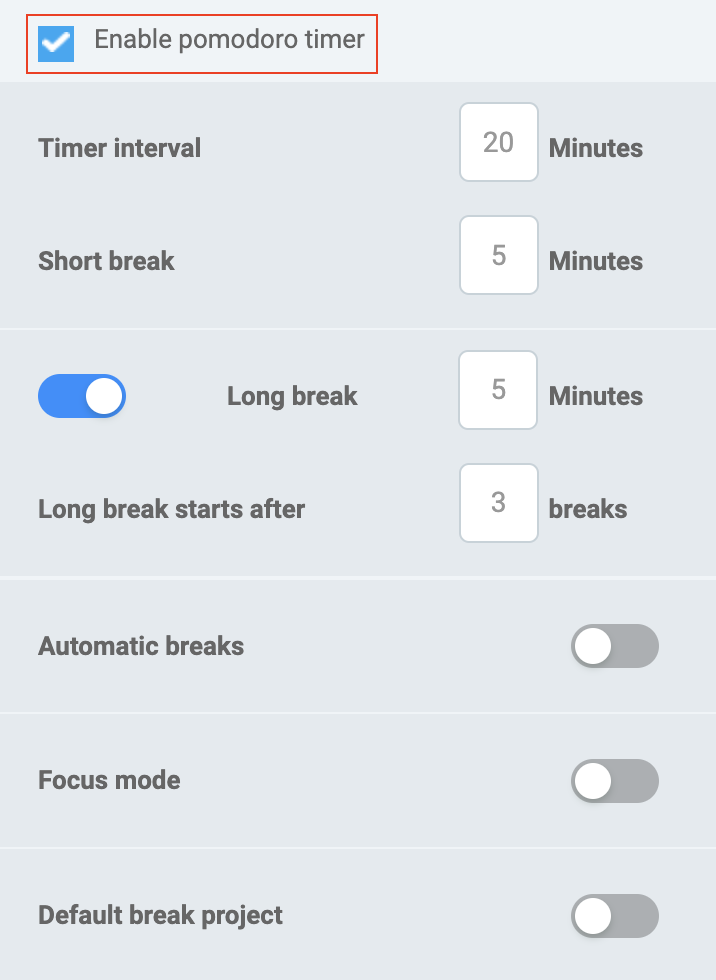
Timer interval – set how long will your Pomodoro session last.
Short break – set how long will your short break last.
Long break – set how long will your long break last and after how many short breaks it will occur. For example, if you set Long break starts after 3 short breaks your fourth break will be the long break.
For Long Break to work you would need to start/stop the timer from the notification popup. If you stop the timer manually, it will reset the count sessions and will start over.
If you have built-in notification sound enabled in Windows already, the notification will play both sounds so it’s best to have just one option enabled.
Disable/enable notification sound on Windows by going to Settings>System>Notifications & actions then click on the Google Chrome icon (note: this switch should still be set to ON) and switch off or on Play sound when the notification arrives.
Default break project – Select the default project on which the break timer will be logged (Last used project will take the project/task from the timer just before the break).
Automatic breaks – You can choose to automatically start/stop the timer when the Pomodoro period or break ends.
Focus mode – When enabled, your time logs will be hidden while you have the timer running and you’ll just see a visual representation of time left.
Start/stop automatically #
You can automatically start/stop the timer when you open/close the browser so you don’t have to worry about clocking in when you start working or clocking out when you finish with your work.
- Open the extension settings by clicking on the hamburger icon
- Go to Settings
- Check the Start timer when browser starts and/or Stop timer when browser closes
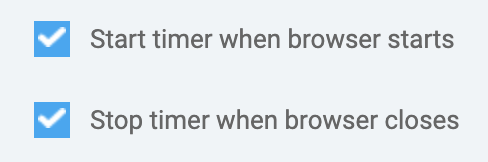
If you shut down your PC and leave the browser open, the timer will continue working. You would have to close the browser first and then turn off the computer for the timer to stop.
In case you have both idle detection and auto-stop enabled, if the timer is stopped automatically, idle detection will not trigger (meaning idle time will be kept).
To see more about how it works, follow this link.
Notifications #
Notifications are located under the bell icon at the top-right corner of the screen.
Synchronization across platforms
Notifications in the extensions sync with those on the web app. If you’ve read notifications on the web app, they’re marked as read in the Clockify extension.
Visual indicators for new notifications
New notifications are marked with an orange dot and a count. Click the bell to read them.
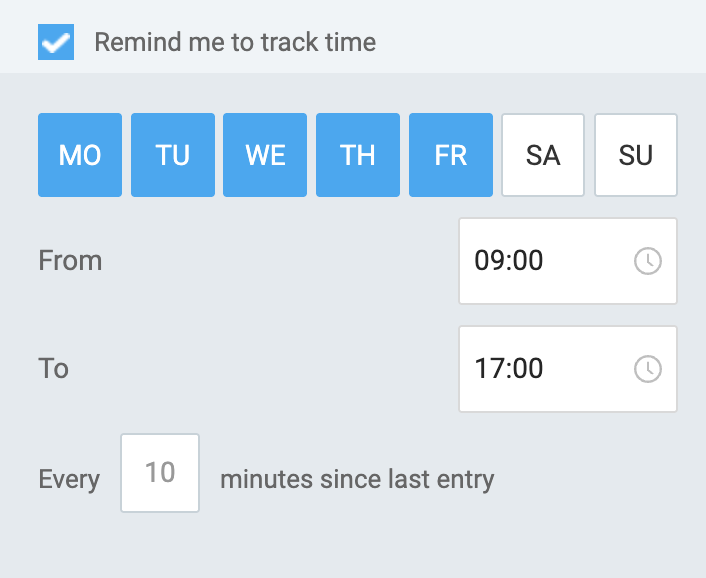
Reminders #
Simply check Remind to track time box in the Clockify browser extension settings, specify the interval (e.g. 10 minutes), and you will receive a notification from Clockify every 10 minutes, reminding you to use the timer.
You can also set reminder start and end time, and the reminder notification will only appear during this time period (e.g. from 08:00 to 16:00).
And, you can also set days for which you want to enable/disable reminders. If you don’t want to receive reminders on Sundays for example, leave it unchecked.
To see more about how it works, follow this link.
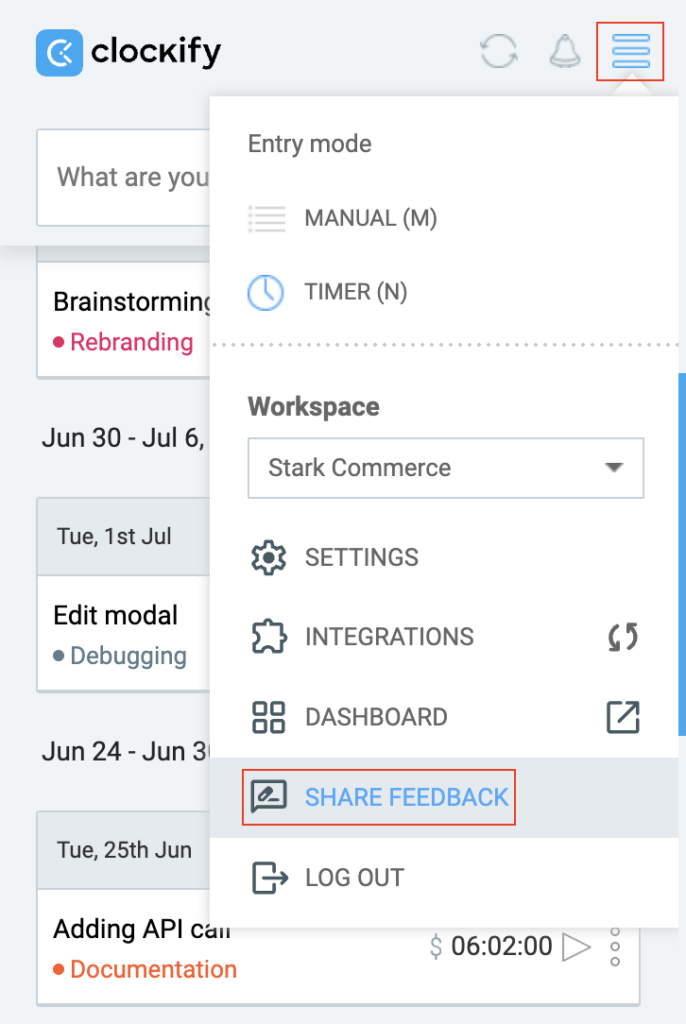
Integrations #
Start Clockify timer in other web tools, like Jira, Trello, Asana, Gitlab, Basecamp, Slack, Github, Pumble, Google Calendar, or Xero.
If you try to stop the timer from another website and you get an error, it means that project is a required field. You’ll either have to add the project manually from extension, enable the creation of projects/tasks/tags in the extension’s settings, or disable required field (if you have Timesheet enabled, project field is automatically required).
The extension can also pick up project name from another app if there’s a project in Clockify with the same name, and create and select projects, tasks, and tags based on the integration. Here’s how.
You can also make Clockify work with self-hosted instances of software (like JIRA, Redmine, etc.), here’s how.
When you start a timer via a Start timer button, a popup will appear where you can add a project and edit other information for the time entry. You can disable this in the extension’s Settings > Show post-start popup.