Create & manage invoices
Create invoices for clients based on tracked time and mark entries as invoiced, so you don’t double bill clients.
Invoicing is a paid feature, which you can use if you upgrade your workspace to Standard, Pro, or Enterprise plan.
For step-by-step guidance on how to create and manage invoices in Clockify, watch the video and follow the instructions below.
Create invoices #
Creating an invoice only works in the Clockify web app and needs to be enabled in Workspace settings.
To create invoices:
- Go to the Invoices page
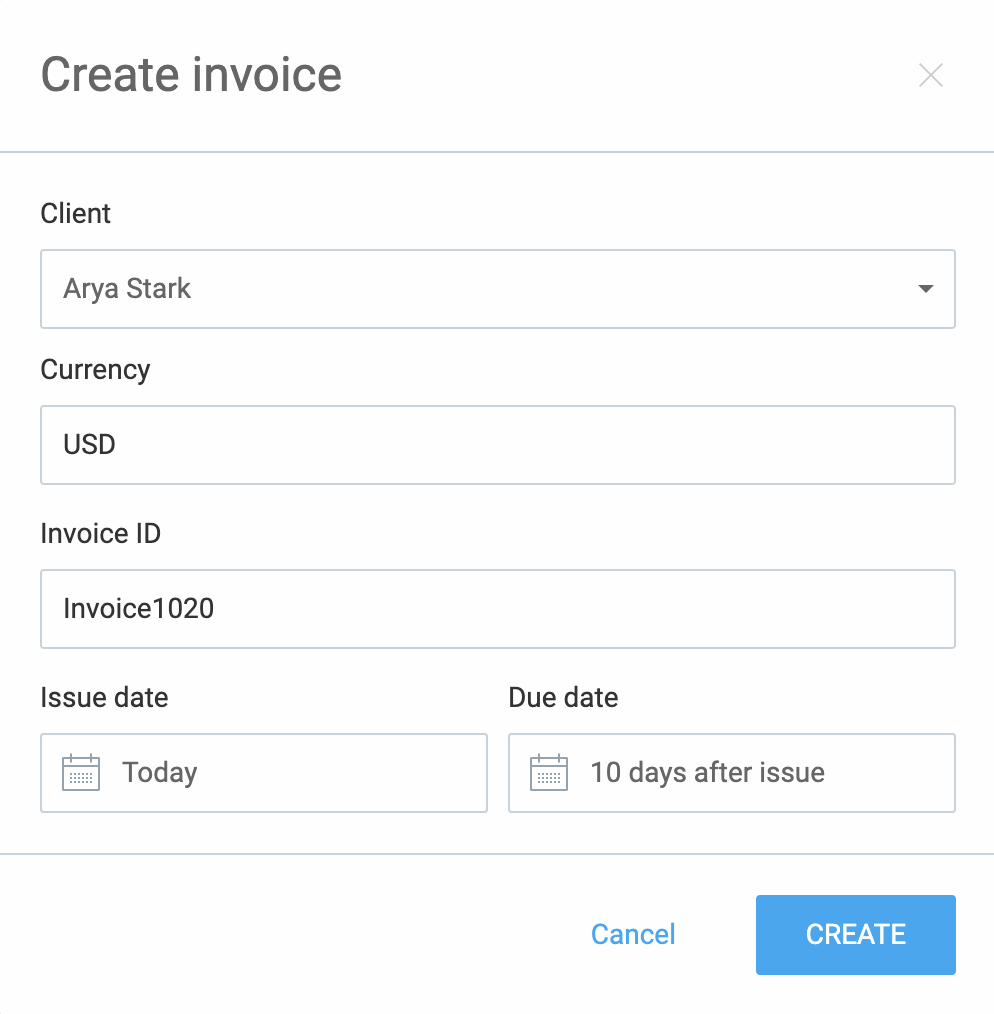
- Click Create invoice
- Choose client
- Change currency, invoice number, and issue/due dates (if needed)
- Click Create
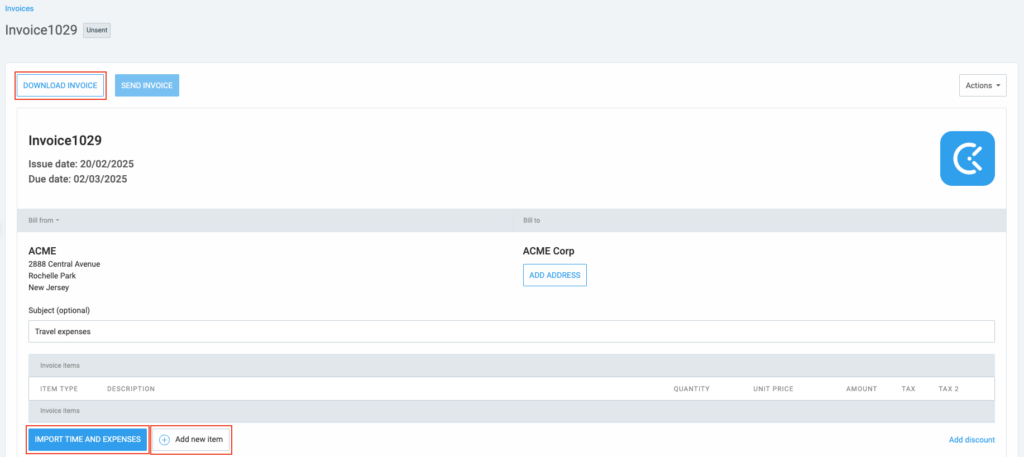
After you’ve done that, you can also make some additional changes like:
- Manually add items to the invoice
- Import your tracked time and expenses
- Download the invoice
- Set taxation mode
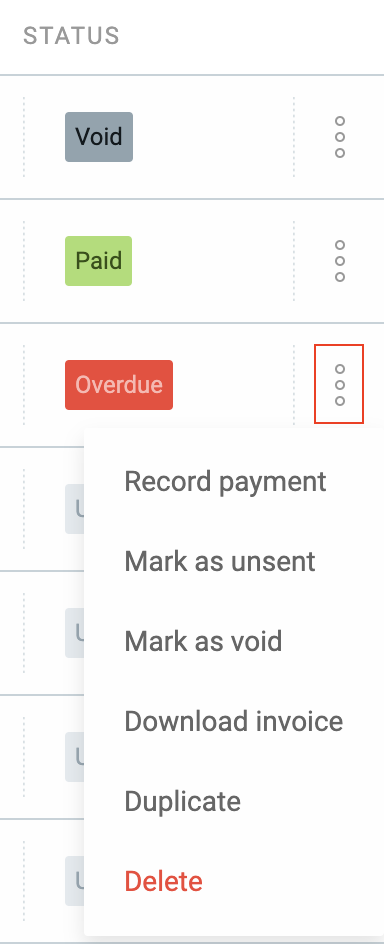
There are also some actions you can do such as to duplicate the existing invoice and quickly create a new one.
- Choose the invoice you’d like to duplicate
- Click on the three dots menu
- Choose the Duplicate option from the dropdown
This newly-created invoice contains the same information as the original one. This information can be changed and edited according to your needs. Any imported time entries won’t carry over their dependency.
Bill from, name, address and logo are taken from your Workspace settings, and Bill to address is taken from the client.
To edit client address:
- Go to the Clients page
- Choose client
- Click the edit icon and edit their address
Expand your contact list in the settings on the Invoices page. Once you add more contacts, they’ll appear in the Bill from the dropdown on any invoice.
Admins can access the Invoices page. You can allow specific members to also see and manage in workspace settings under the Who can manage invoices section.
Set up recurring invoices #
This feature is available in the Standard plan and higher subscription plans and can only be applied to newly-created invoices.
Use Recurring invoices to automate invoices that repeat at custom intervals, such as weekly or monthly and save time and minimize errors along the way.
Recurring invoice settings
You can manage all settings for recurring invoices and stop the automation process whenever necessary.
Set up recurring invoices
To set up a recurring invoice:
- Navigate to the Invoices page
- Click the three-dot menu next to the invoice you want to set as recurring
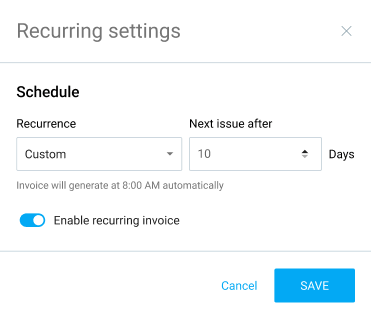
- Choose Recurring settings
- In the modal choose your recurrence (weekly, monthly, custom, etc.)
If you choose Custom, enter the exact number of days for the interval. - Set the date for the next invoice
- Toggle the switch to enable recurring invoicing
- Click Save to complete the action
Notifications & alerts
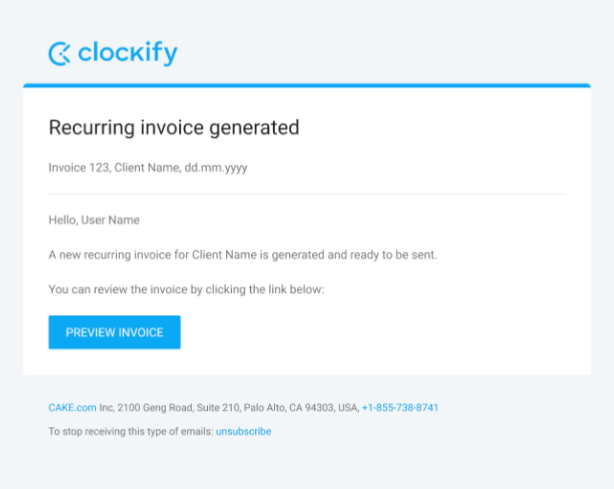
All users with permissions to manage invoices will receive notifications when a recurring invoice is generated.
You’ll receive an email containing the invoice ID, client name and a link to review the invoice.
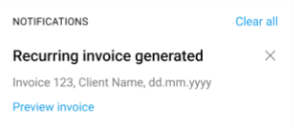
A notification popup will also appear in the app with a link to the invoice preview.
If you archive a client who has a recurring invoice set up, a notification will appear to confirm that the recurring process for that client will be stopped.
If you don’t want to receive notifications, you can uncheck that option in your email settings.
Reminders if invoice is past due #
Reminders is a paid feature available in the Standard plan and higher.
Stay informed about your outstanding payments by sending reminders via email and in-app notifications when an invoice is past due. This way, you can manage all your payments on time.
How it works
You’ll be notified about your overdue invoices via email and in-app notifications.
Every day you’ll receive an email listing all the invoices that are past due for that given day.
You’ll also receive a separate in-app notification for each overdue invoice.
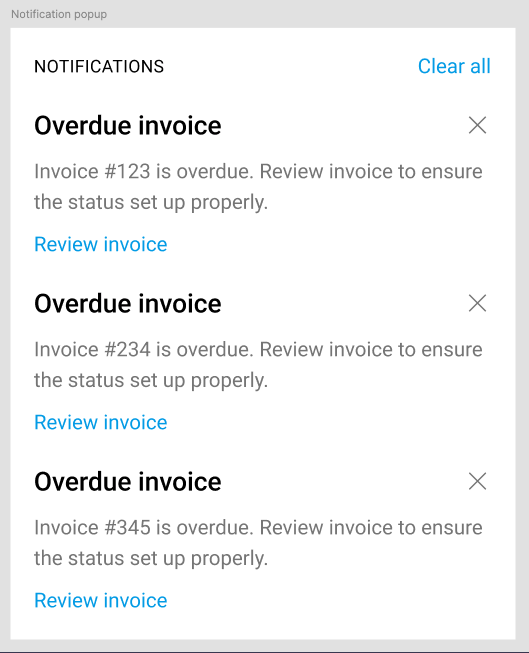
All reminders contain a direct link (Review invoice) to an overdue invoice for quick access.
Manage reminders
Admins and invoice managers can configure these reminders in the settings and turn them on or off.
All users that can manage the invoice will get the notification.
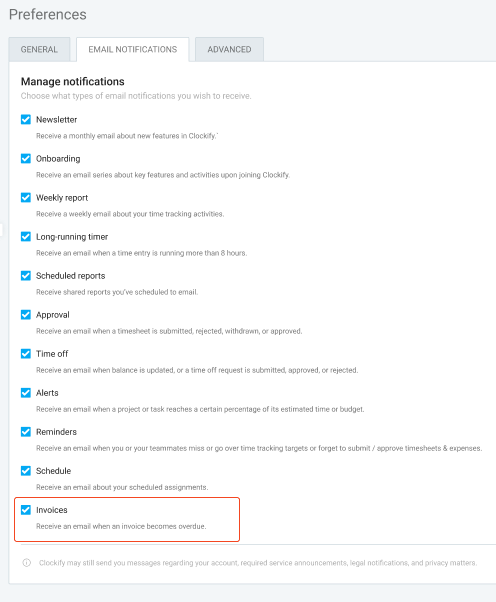
Email notification preference
To manage all email notifications related to invoicing, go to the Email notification tab in your Preferences page.
Edit invoice #
To edit an invoice:
- Go to the invoice you’d like to edit
- Choose an action from the Actions dropdown in the upper right corner
- Choose one of the following actions:
- See all your invoices
- Filter invoices by status
- Mark invoices as Sent, Paid, Void
- Edit, delete, change status of an invoice
- Download expenses
Record payment #
Record payment option saves the invoice payment.
To record invoice payment:
- Choose the Record payment option
- Record payment screen appears
- Date: Enter today’s date
- Amount: Enter unpaid invoice amount you’d like to mark as Paid
- Optionally change Date, Amount or add a Note
Click Save to complete the action.
As a result, invoice is marked as:
- Paid (you entered full amount)
- Partially paid: (you entered amount smaller than invoice amount)
The amount is displayed in the currency assigned to the client.
Payments window #
When an invoice is marked as Paid, you’ll see the Payments option in the three-dot menu. This will open a list of all recorded payments for that invoice.
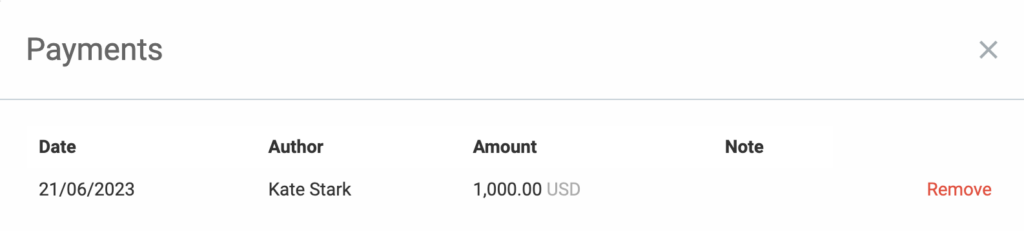
The Payments window includes the following details:
- Date: The payment date
- Author: The person who made the payment
- Amount: The total amount paid
- Note: An optional field where you can add a note
Invoice status #
- Invoice with Partially paid, Fully paid and Void status cannot be edited; In order to be edited, paid invoices need to be marked as either Unsent or Sent
- If invoice status is Partially paid, you can see all previously invoiced payments
- If record payment amount is negative number or zero, invoice can be immediately marked as Paid
- If due date for sent invoice passes, invoice gets an Overdue status
- If status is changed to Unsent, all previously processed payments are deleted
All other invoices need to be processed through the Record payment option.
Customize invoice items #
You can format the line items on your invoices to display the specific details you want your clients to see.
Info: Line items on an invoice refer to the specific entries that specify the goods or services provided, including information such as description, quantity, rate, and the total cost for each item.
To customize the line items in your invoice:
- Click Import time and expenses on the Create Invoice page
- Select the relevant projects and the date range
- Choose your preferred line item format under Display time
- Click Import
Display time options #
Here’s a breakdown of the three options for customizing the line items in your invoice:
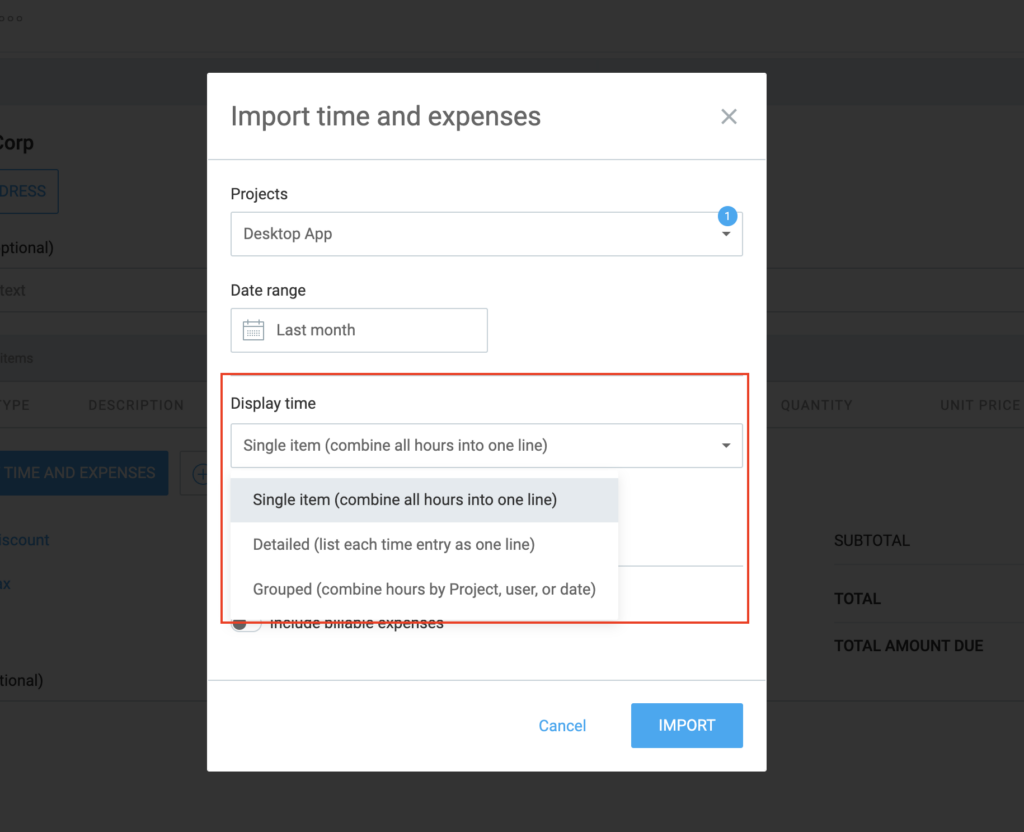
Single item (combine all hours into one line)
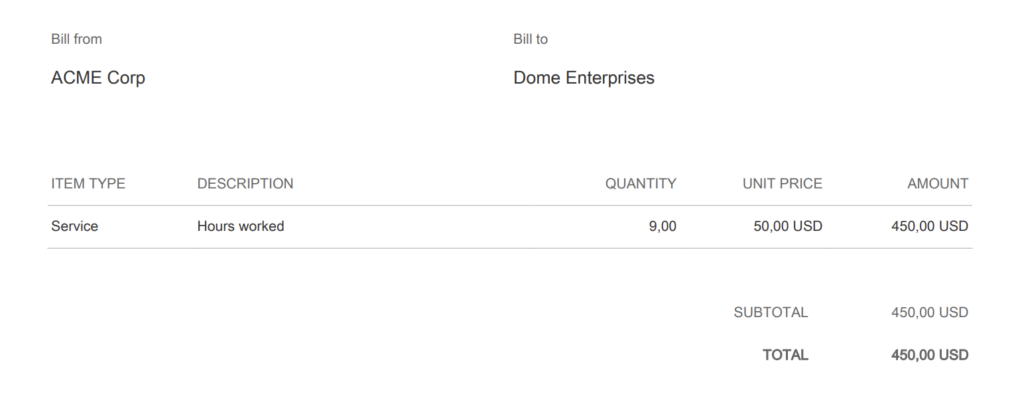
Use this for clients who prefer a simple, consolidated bill showing only the total cost for a specified time range without a breakdown of daily activities.
Detailed (list each time entry as one line)
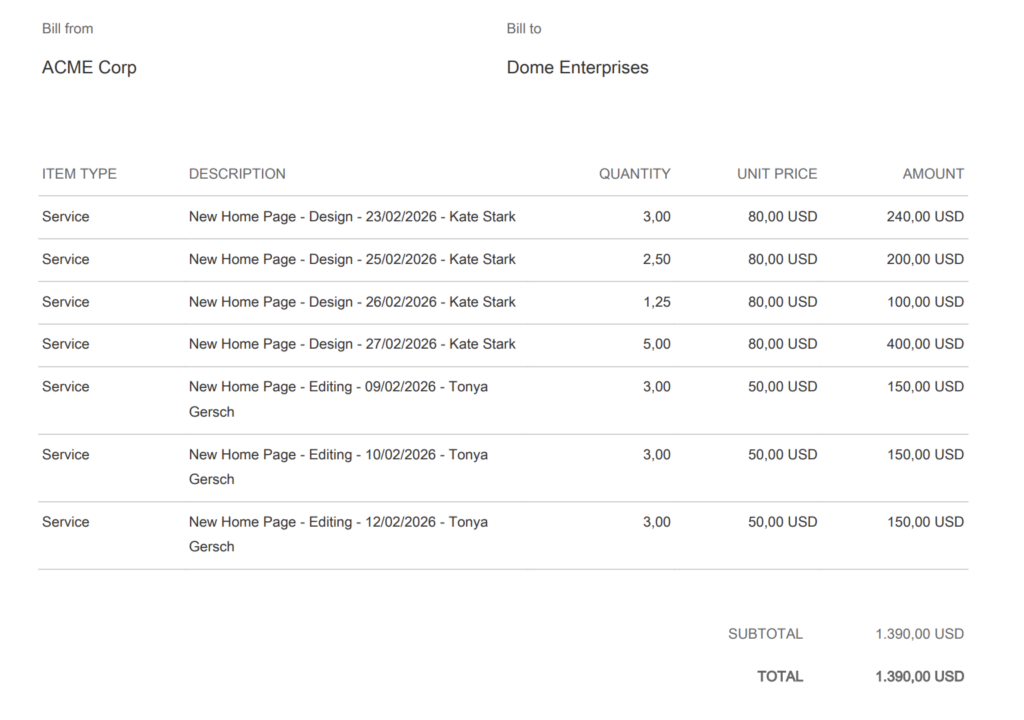
Use this for clients who require complete transparency and line-by-line justification for every billable task performed.
Grouped (combine hours by Project, user, or date)
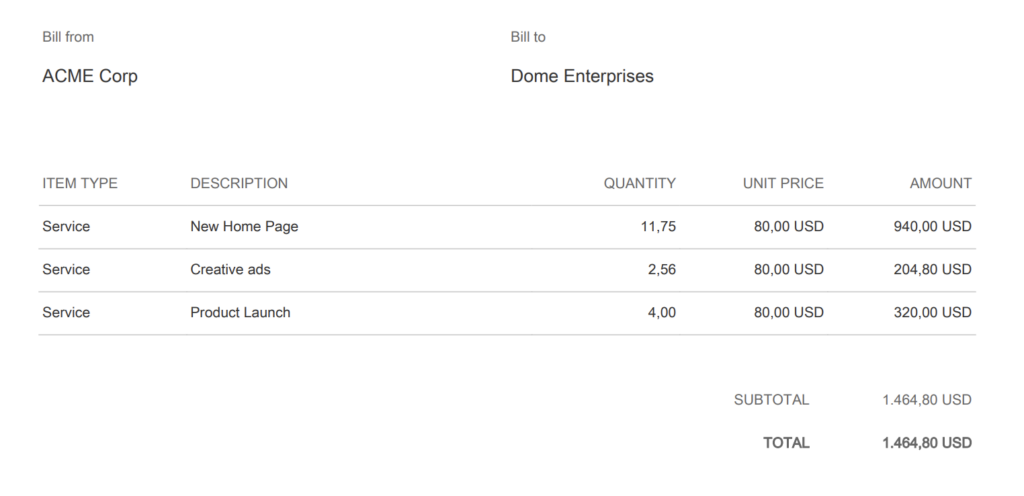
Use this for clients who want an organized summary of costs per project, user, or date.
Include time and expense report #
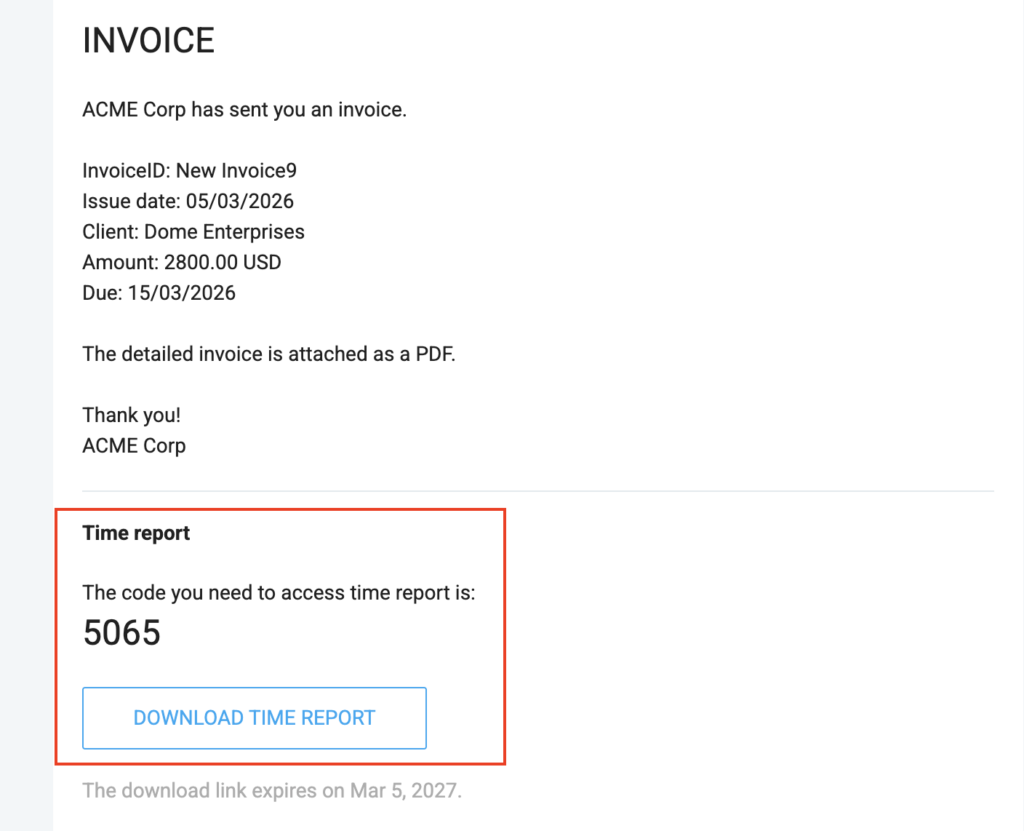
You have the option to send clients a downloadable PDF of your time and expense reports, even when using a concise, minimal line item format on the actual invoice.
To send a detailed report of time and/or expenses with the invoice:
- Click Send Invoice
- Scroll down and check the box next to Include time report and/or Include an expense report
- Click Send
The client will receive an email containing a link to download the PDF invoice, along with a four-digit PIN to open the file.
Manually configure invoices #
Clockify allows you to manually mark time entries and expenses as invoiced/uninvoiced. This way you have complete control over the invoicing workflow, accurate time and expense tracking without duplicated invoices errors.
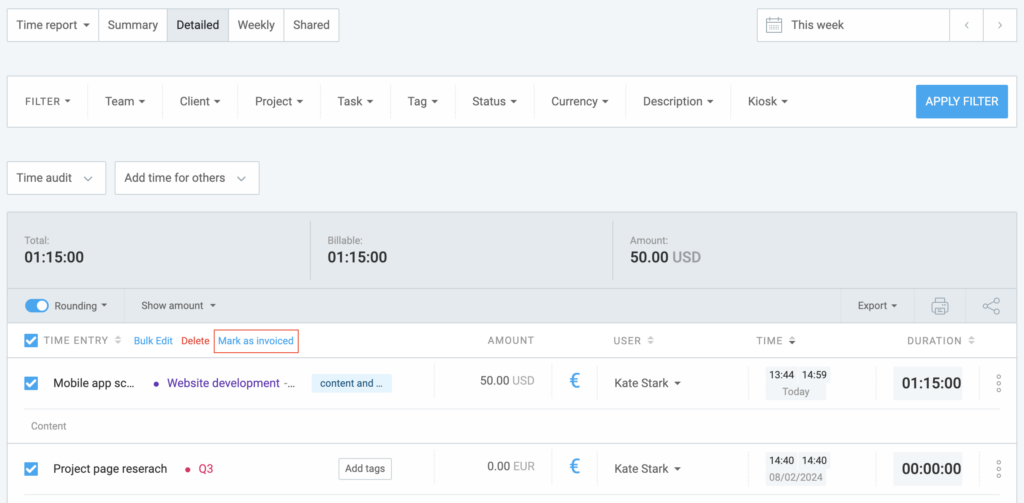
To manually mark time as invoiced:
- Go to the Detailed report
- Choose all time entries you need via Bulk edit
- Click on Mark as invoiced (next to Bulk edit in table header)
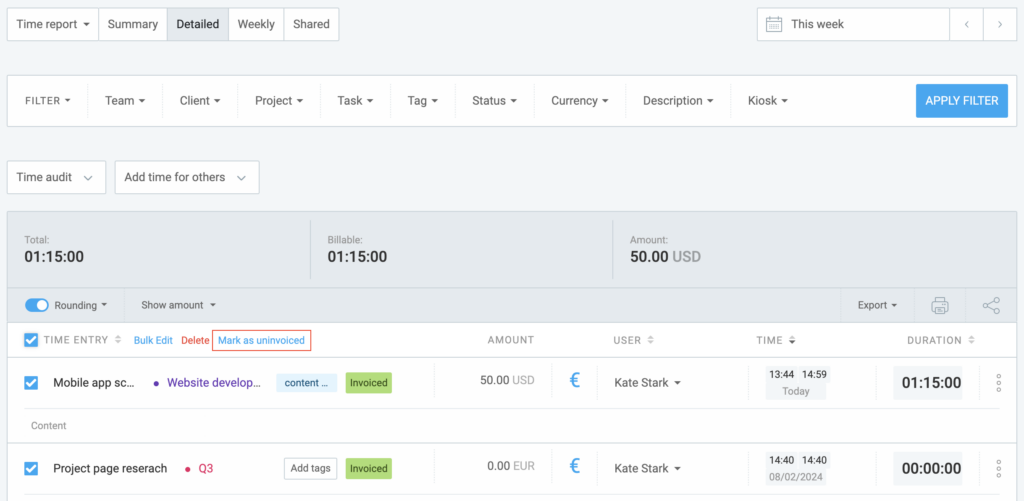
Invoiced time entries have a green Invoiced tag next to them in the Detailed report.
When you hover over the Invoiced tag, you’ll see the client and the invoice ID under which the time entry was invoiced (unless it was manually marked as invoiced).
By default, each new invoiceID is automatically assigned a unique number in sequence, such as Invoice1, Invoice2, Invoice3, and so on.
To mark time as uninvoiced:
- Choose only invoiced time entries
- Click Mark as uninvoiced
Conversion from clock to decimal format #
Total amount between reports and invoices may slightly differ.
Invoices round time on two decimals, while reports take more decimals into account.
For example:
You have a time entry whose duration is 20min, or 0.3333333h when converted to decimal format. When a report multiplies it with hourly rate of $100, the result in the report is $33.33. But when that entry is imported into an invoice, the invoice imports time rounded to two decimals (0.33h), which when multiplied with $100 equals $33.00.
Grouping option may also result in different total amounts.
For example:
You have three entries on some project, each 20min. If you import time one by one with the Group hours: Detailed option, the invoice will make three line items of 0.33 and total amount will be $99.00 (3 x 0.33h x $100). But if you choose Group hours: Project option, they will be summed up and rounded using more decimals (like in the reports), resulting in $100.00 invoice.
To avoid discrepancy due to the decimal rounding, round time up, down, or to nearest number 6/12/15/30 minutes (i.e. any number divisible by six).
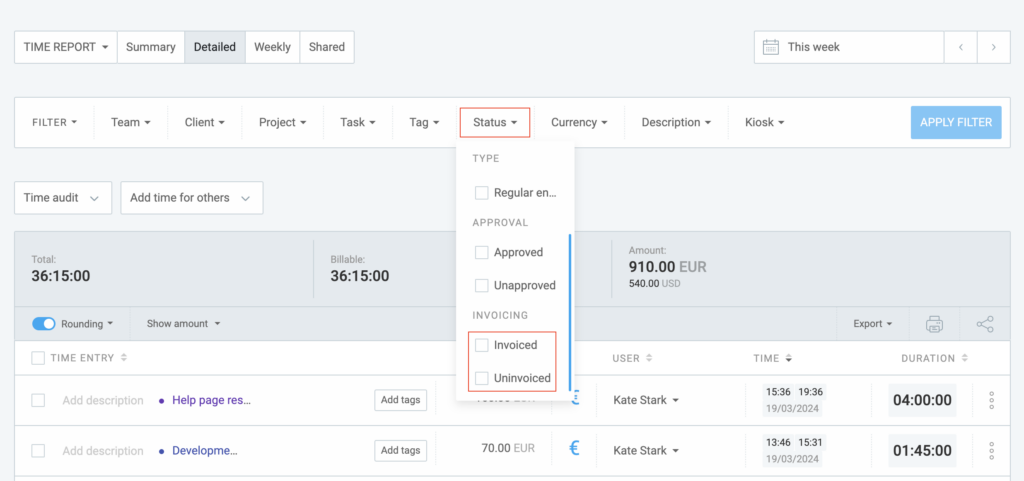
Filter invoices #
You can filter invoices by:
- Status
- Issue date
- Client
- ID
- Bill from contact
- Amount
To filter invoices:
- Go to the Invoices page
- Choose filter criteria at the top of the Invoices page:
- Date range
- Click Apply filter
- Client
- Status
- Amount
- Balance
- Invoice ID
All invoices will be filtered out according to the selected criteria.
Sort by time entry or expense details #
When you create a new invoice or edit the existing one and import time and expenses, you can choose to display them according to the details in the Detailed view.
To display entries and expenses in Detailed view:
- Choose the invoice on the Invoices page
- Click on Import time and expenses at the bottom of the page
- Choose Detailed in Display time dropdown
In Show in invoice label choose the tag by checking the box and rearrange them by drag & drop. The checkbox you chose will appear in the Item’s description.
Same behavior is applied for Expense details and Time entry details.
When different billing rates are applied, entries are always displayed in multiple lines, overriding the single-line option.
Additional invoice settings #
You can get invoices in another language or name things differently (e.g. change label from Tax to VAT):
- Go to the Invoices page
- Click on the cog icon (settings) next to the Create invoice button
- In the Defaults tab, edit the content you’d like to be displayed in each label
After the changes you’ve made, each PDF you generate will display the new labels.
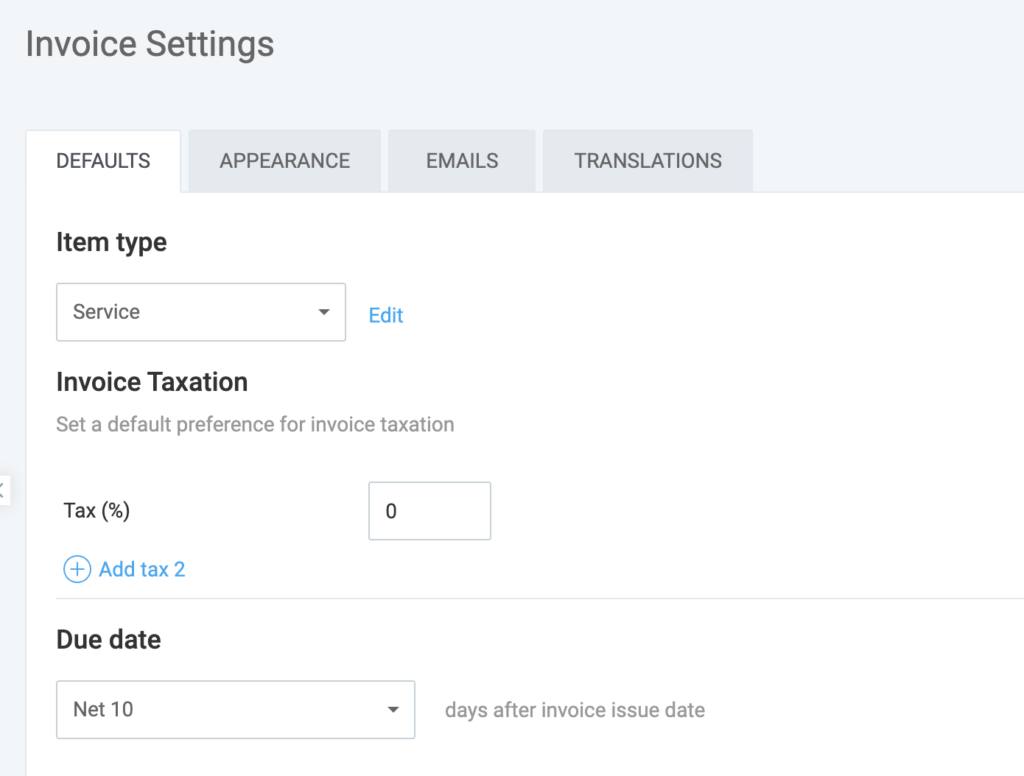
When you create a new invoice, it can inherit some predefined subject, note, issue date, and tax.
To set defaults:
- Go to Invoices page
- Click on the cog icon (Settings) on the Invoices pages
- Make the necessary changes in the Defaults tab

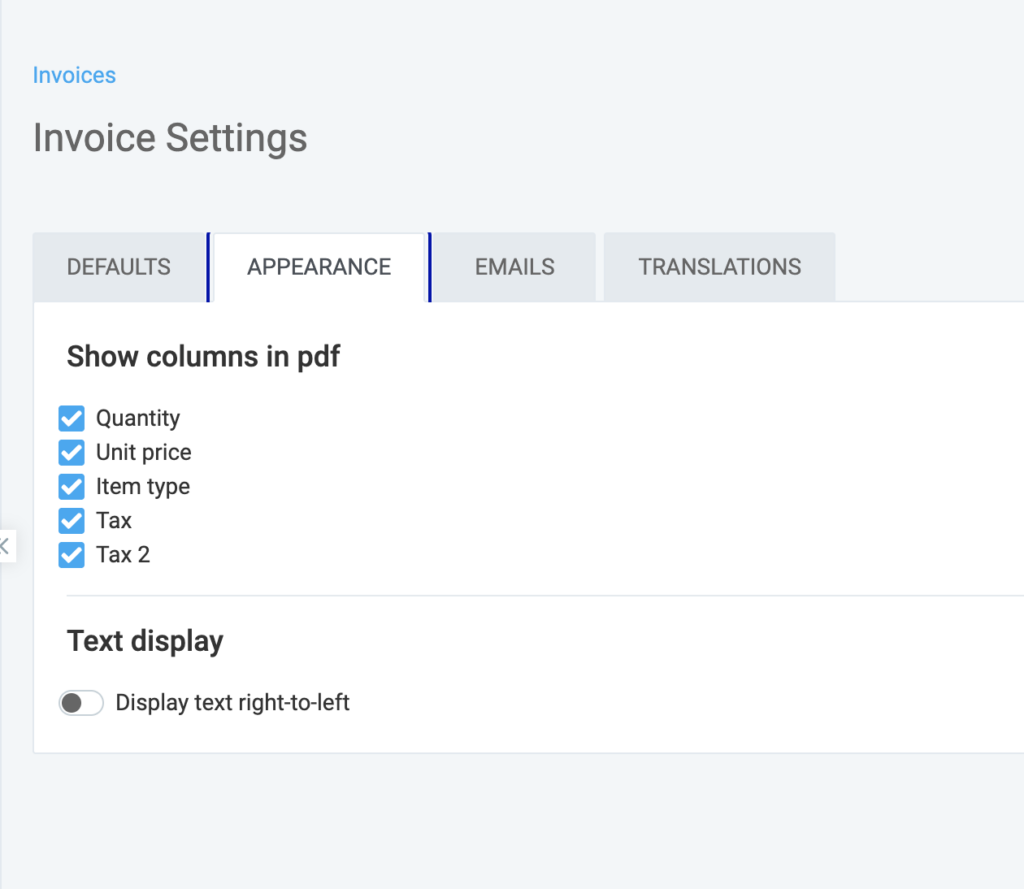
Customize invoices exported in PDF from the Appearance tab in the Invoice Settings. Here, you have the option to hide Quantity and Unit Price columns, as well as toggle text direction from left-to-right or right-to-left.
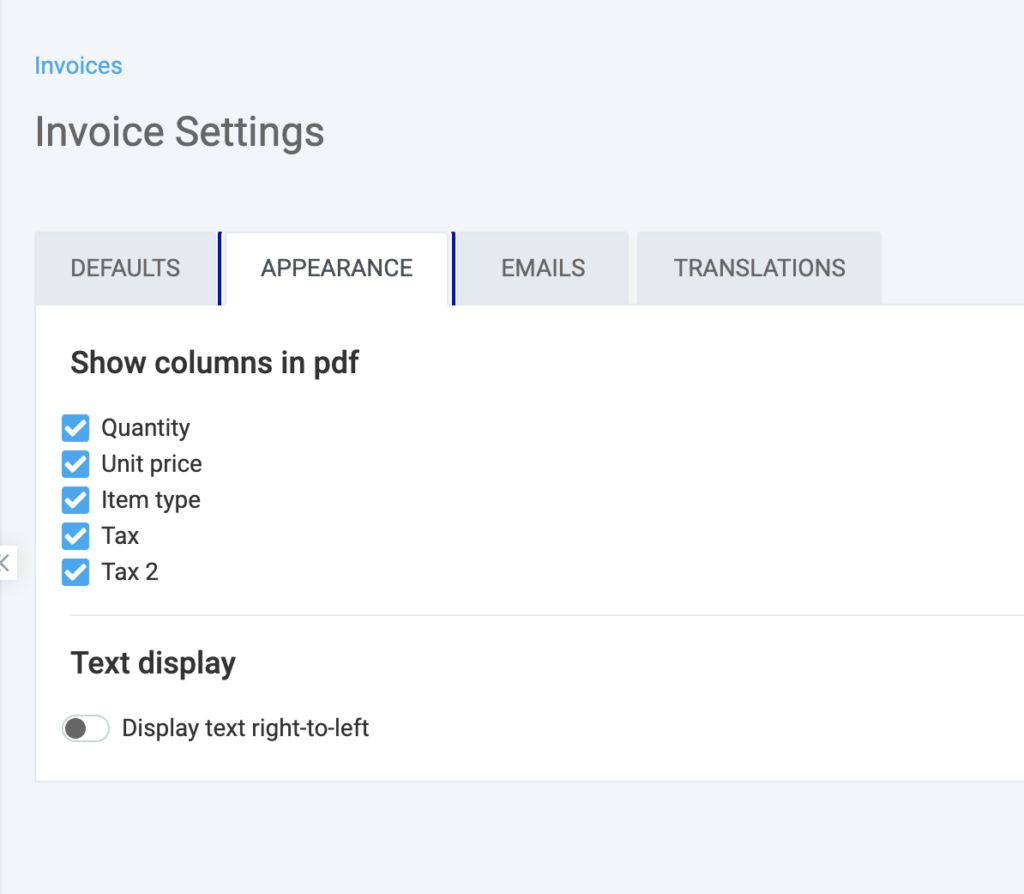
Enable detailed invoicing by including TAX and TAX2 columns in your PDF exports simply by checking the provided boxes.
Add custom item types #
You can add an item type in addition to the defaults (Service and Product).
- Click the cog icon on the Invoice page
- Click Edit next to the Item Type dropdown list
- Click Add Type
- Type in the name of the new item type
- Click Close
The new item type should now appear when you create an invoice.
Existing invoices #
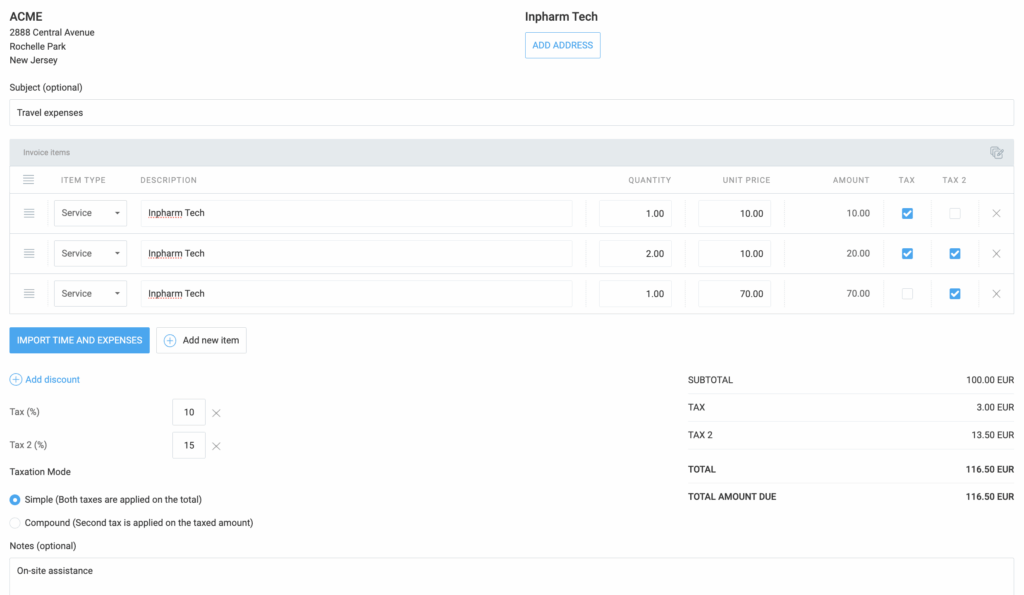
When the user clicks on the Invoices tab and enters any of the invoices, after the Amount column, there should be two columns. TAX and TAX 2 depending on whether you applied one or two taxes on your invoices.
Paid and partially paid invoices cannot be edited and the checkboxes are disabled, as well.
Download invoices in PDF #
You can choose which columns should be visible in the downloaded PDF file. You can customize the PDF in the Invoice settings > Appearance tab and choose if you’d like to include TAX and TAX 2.
Depending on which items you checked, those columns will be displayed in the PDF file.
TAX and TAX 2 are system names which can be changed for the download file in the Invoices, Translation tab, where TAX and TAX 2 are input fields.
For more information on invoice taxes, check out this article.
Set up translations #
With translations, you can customize labels on your invoices, from item types to total amounts due.
Translations will appear on the PDF and printed versions of all your invoices.
- Click on the cog icon (Settings) next to the Create invoice button on the Invoices page
- Choose the Translations tab
- Locate the field labeled Item type and enter your translation
- Repeat step 3 for each relevant field
- Save your translations
If you delete a value in the label field, that label won’t appear in the PDF version of the invoice.
FAQs #
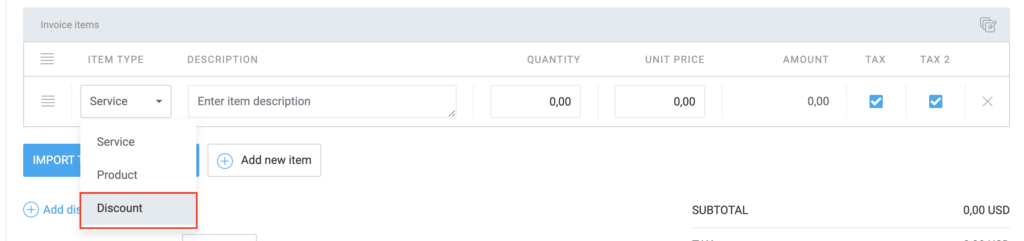
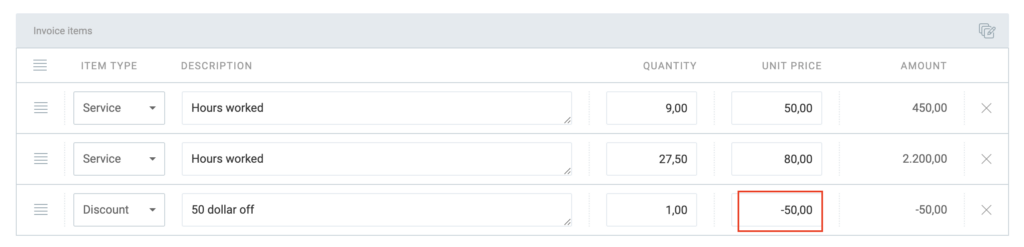
Can I apply a specific dollar amount for a discount instead of a percentage?
Currently, Clockify only allows percentage-based discounts. However, as a workaround, you can manually add a new line item to your invoice, name it “Discount,” and enter the specific amount as a negative value in the price field (e.g., enter -50 for a $50 discount).
How can I make sure my invoices and reports show the exact same totals?
If you notice small discrepancies between your Reports and Invoices, it is likely due to how rounding is handled. Invoices round each individual time entry to two decimal places before calculating the total. To ensure consistency, go to your Workspace Settings and enable Time Rounding (setting it to the nearest 6 minutes or 0.1h is recommended), which will align the calculations across both features.
What happens to my tracked time if I delete an invoice?
When you delete an invoice, all the time entries and expenses that were imported into it are automatically marked as “Uninvoiced.” This means they will reappear as available items the next time you create an invoice or run a report filtered by uninvoiced time, ensuring no billable work is accidentally lost or forgotten.