Import data into Clockify
If you have historical timesheets data in Excel, you can import your workspace data, including projects, tasks, clients, tags, time entries and their custom fields into Clockify using a CSV file.
Clockify’s import data process is designed to guide you and help you catch errors before you finalize the import.
Import data and permissions #
| Data | User role | Subscription plan |
| Projects, clients, tasks, tags | owner/admin | Any plan |
| Timesheets | owner/admin | Paid plans only |
The maximum file size for any CSV file is 10MB.
Format your data #
To make sure that the import is completed successfully, your CSV data need to match the format required by Clockify.
Download templates (recommended)
The easiest way to format your data correctly is by downloading our pre-made templates for Timesheets and Projects & Clients directly from the Import page.
Include all required columns
Your CSV file must contain all the required columns for your workspace and that the column headers are named correctly.
Use English headers
All CSV column headers must be in English and exactly match the names you set in workspace settings, even if you are using the app in a different language.
Start import #
To start the import process:
- Go to the Settings and choose the Import tab
- Drag & drop a CSV file, or upload it from your computer
After that, you’ll complete two steps to make sure your data is accurate.
Step 1: Inspect data #
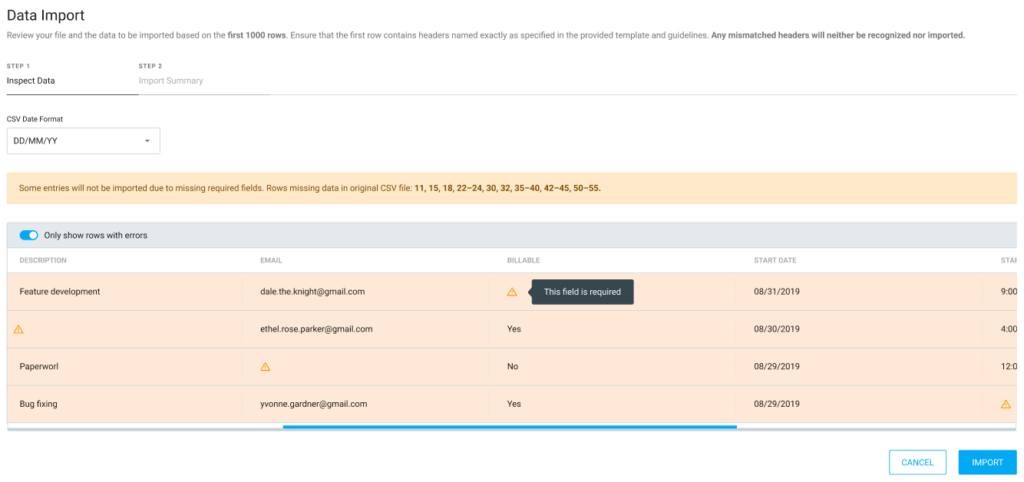
After you upload your file, a preview will appear. Here, you can review the data and correct any issues before you proceed.
Error detection
Rows and errors are automatically highlighted. Use the Only show rows with errors option to quickly filter the list and see what needs to be fixed.

Fix errors & reupload
Clockify automatically detects common delimiters (commas and semicolons). If a column name is not recognized, it will be marked with a warning and that data won’t be imported.
If you find errors you need to fix, you can make changes to your file outside Clockify and reupload it directly from this step.

Timesheet-specific checks
If you are importing Timesheet data, you need to confirm the date format used in your file.
You will also be notified if you are importing Timesheet data for users who are not yet in your workspace, allowing you to add them first.
Step 2: Import summary #
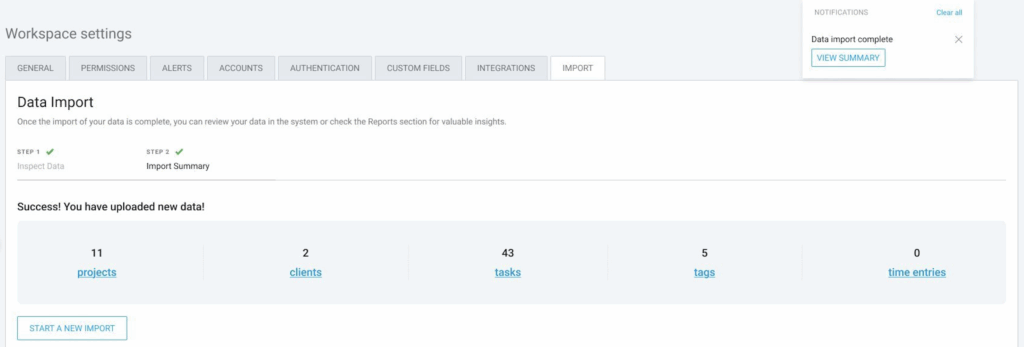
Once you’ve reviewed your data and clicked Import, the progress bar will show the import status. The import will continue in the background if you leave the page.
When it’s complete, a summary will be displayed with a link to your newly-imported data in Clockify.

Check time and date formats #
The formats used in your CSV file must exactly match the formats set in your Clockify account.
| Format | Where to check settings | Mismatch example |
| Time (12-hour / 24-hour) | Profile Settings | If your CSV has 1:00 PM, but your settings use 24-hour time, the import will fail. |
| Duration (hh:mm:ss, etc.) | Workspace Settings | Your CSV duration format (e.g. 1:30) doesn’t match the format set in your workspace. |
| Date (DD/MM/YYYY, etc.) | Profile Settings | Your CSV date format doesn’t match the one set in your profile. |
Max character limits #
- Description: 3,000
- Task: 1,000
- Project: 250
- Client: 100
- Tag: 100
Important to note #
- Required fields for time import: Email, Start date, Start time, Duration
- Optional fields for time import: Billable, Description, Project, Task, Client, Tag (if some required field is enabled, it is required in CSV too)
- If you don’t group projects by client, you should rename the client column in the CSV file accordingly
- End date and end time are calculated automatically based on start time and duration
- Time entries are imported according to the time zone of the person who does the import
- If you don’t specify an entry’s billable status, it will be inherited from its project
- Hourly rates are inherited according to the hierarchy