Profile settings
Your Profile Settings in Clockify allow you to personalize your workspace experience, adjust notifications, and manage your account security.
Changes in the Profile settings will only affect your individual view and will not alter the workspace for your team members or managers.
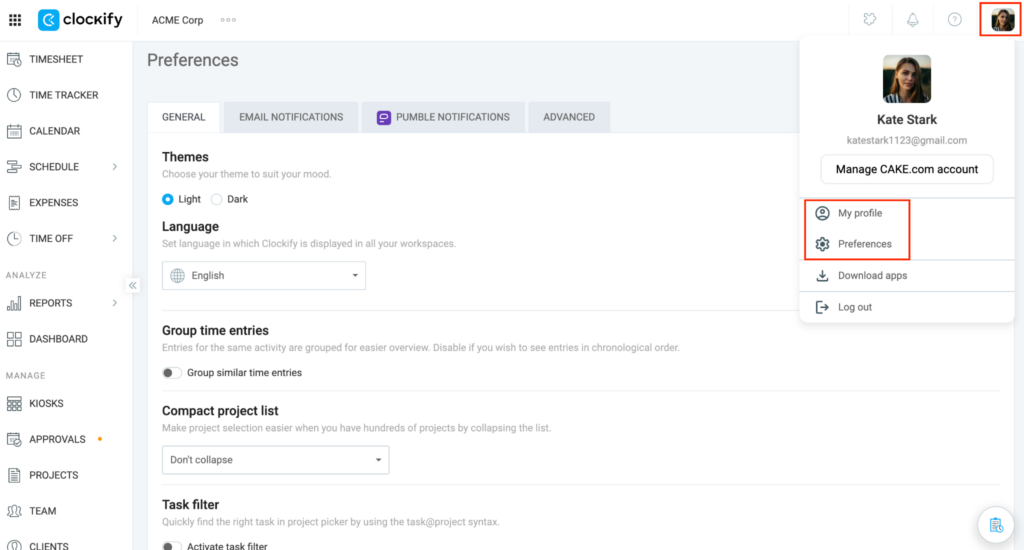
Access your profile settings #
To get started, log into the Clockify web app:
- Locate your Profile picture/avatar in the upper left corner of the screen
- Click on the avatar to open the dropdown menu
The settings area is divided into two main sections: My Profile and Preferences.
My Profile #
Clockify is part of the CAKE.com productivity suite. Your core identity details are centralized through your CAKE.com account.
If you need to update your email address, username, password, or profile picture, click the Manage CAKE.com Account button.
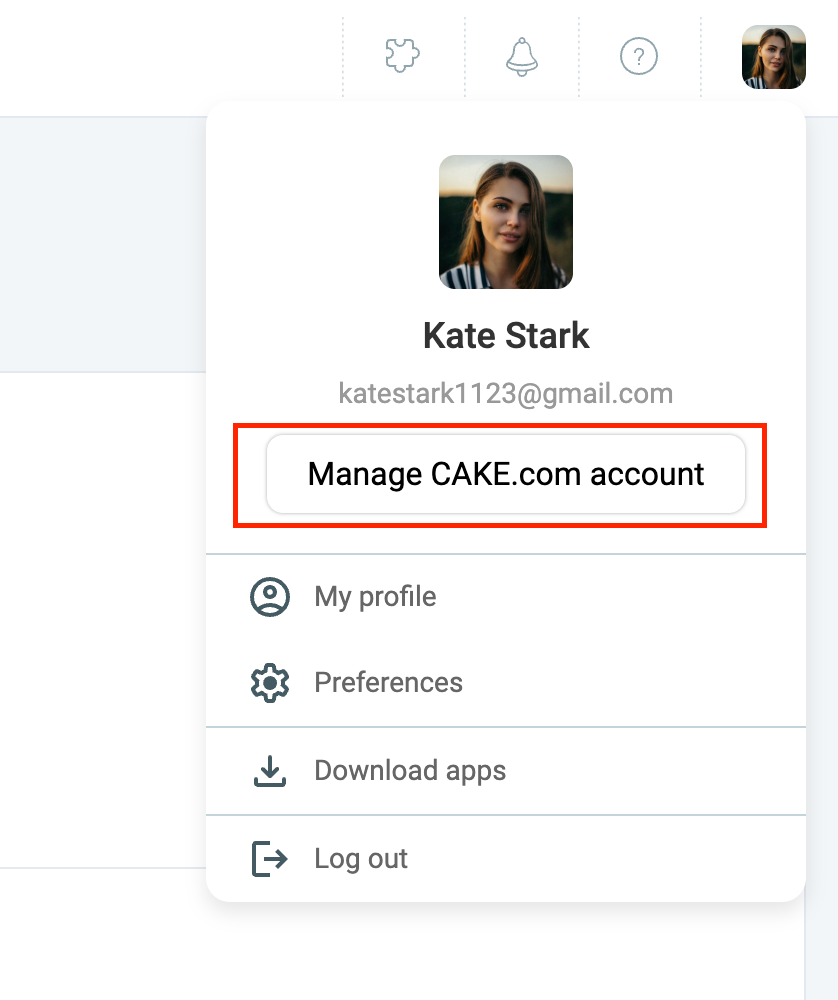
You will be redirected to a centralized portal to make these changes securely. Any updates made there will automatically sync back to your Clockify workspace in real-time.
Preferences: General Settings #
The General tab allows you to customize the look, feel, and functionality of the Clockify web application.
- Themes: Switch between Light and Dark modes
- Time & date settings: Customize your personal time zone, preferred date format, time format (12-hour vs. 24-hour), and the start of your day.
- Group time entries: Choose whether similar, repeated time entries are bundled together for a cleaner view or kept on separate lines.
- Collapse project list: Toggle this on to make your project selection dropdown more compact.
- Task filter: Activate or deactivate the task filter to help organize massive task lists.
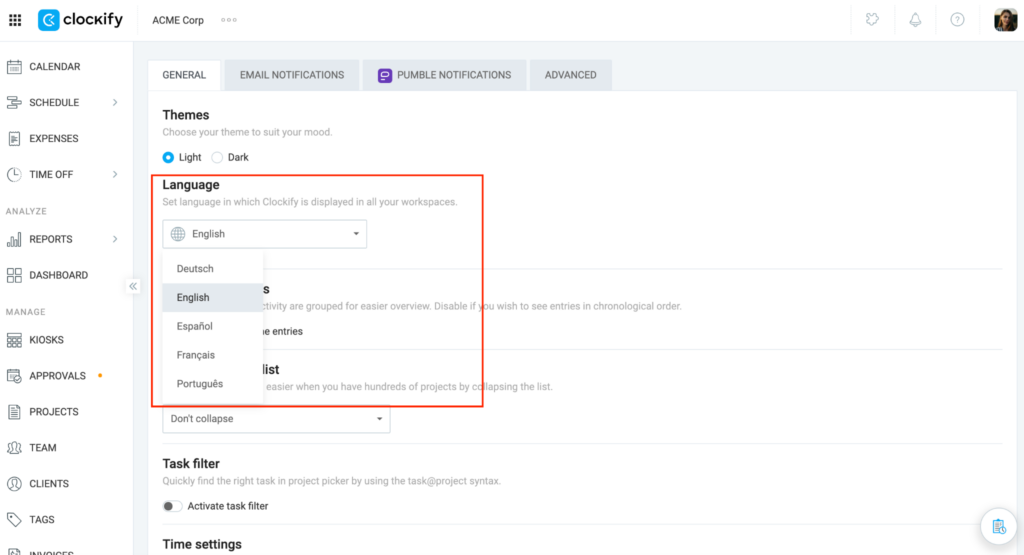
Change your language #
Clockify natively supports English, French, German, Spanish, and Portuguese.
To change your language:
- Click on your profile photo on the top right corner
- Select Preferences
- Locate Language in the General tab
- Select your language from the dropdown
If you are an admin and invite a new user, their signup screen will inherit your language setting. They can change it in their own profile later.
Changing the language in your web Profile Settings does not sync to the Clockify desktop or mobile apps. Those native applications will automatically adapt to your device’s operating system language.
Preferences: Email notifications #
To change which notifications you want to receive in your email:
- Click on your profile photo
- Select Preferences
- Click the Email notifications tab
- Check (or uncheck) boxes to suit your preferences:
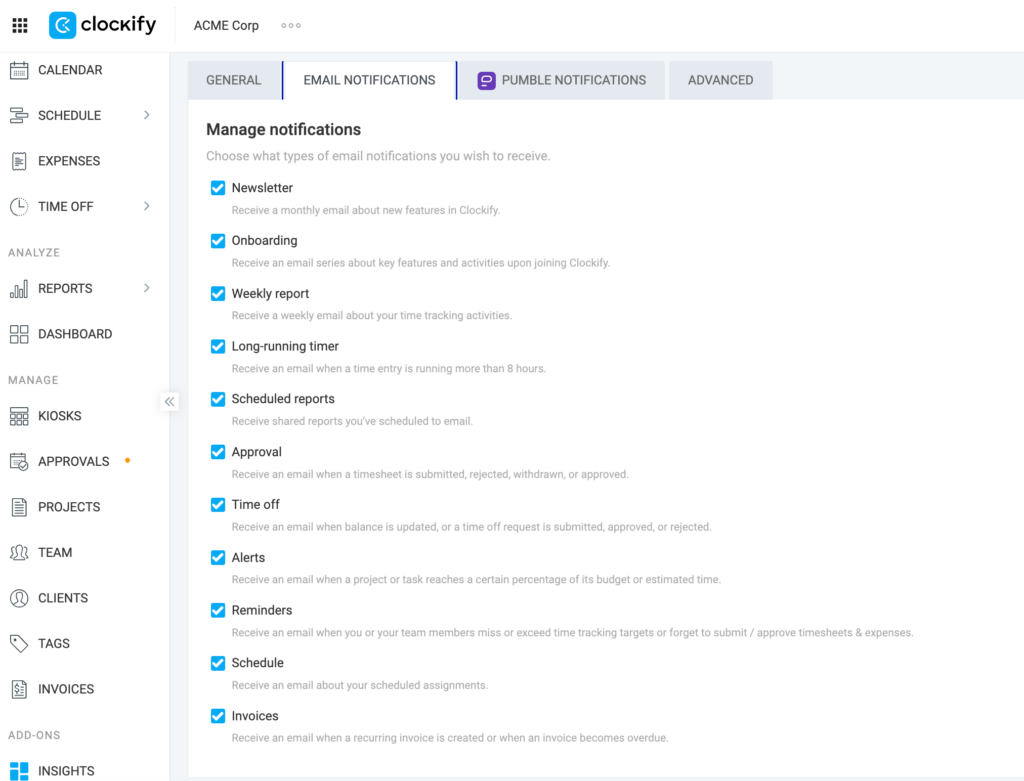
Here’s what these notifications include:
- System & updates: Newsletters (monthly feature updates) and Onboarding emails
- Tracking alerts: Long-running timer alerts (triggered if a timer runs past 8 hours), Reminders (if you miss tracking targets), and Alerts (when projects reach a specific budget/time percentage)
- Reporting & approvals: Weekly personal reports, Scheduled reports, and updates on Timesheet Approvals (submitted, rejected, approved)
- Team & scheduling: Time Off updates (balance changes or request statuses) and Schedule updates (newly assigned shifts or tasks)
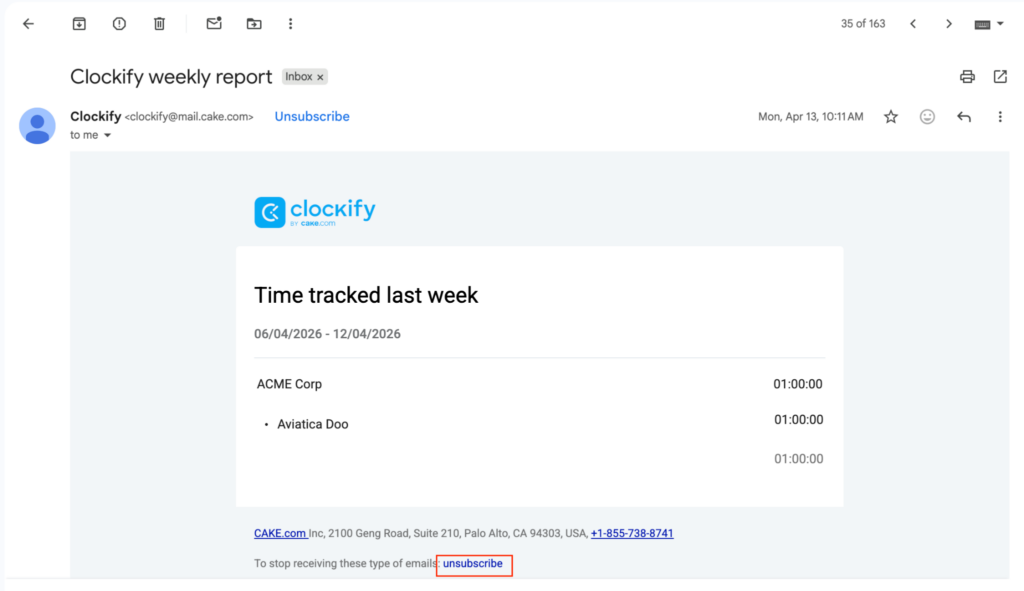
Even if you unsubscribe from all marketing and tracking emails, Clockify will still send mandatory communications regarding legal notices, privacy matters, or account security.
You can also click Unsubscribe when you get an email notification from Clockify that you no longer want to receive.
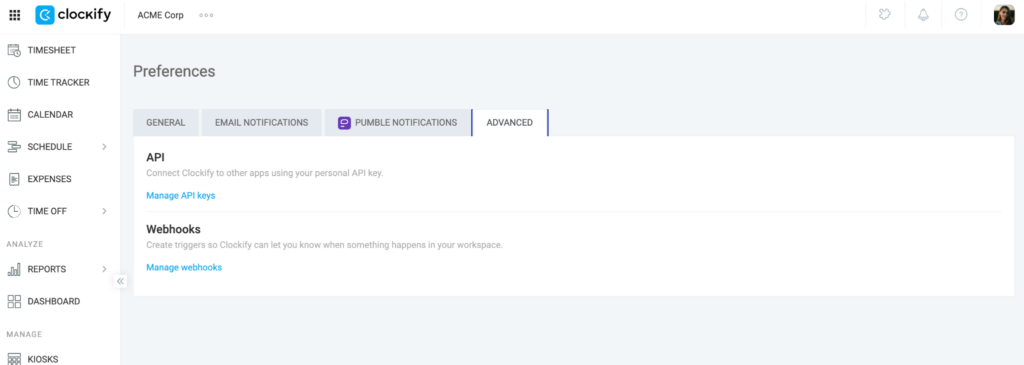
Advanced settings #
For developers, power users, and security administrators, the Advanced tab houses technical configurations:
- API Keys: Generate and manage personal API keys to build custom integrations or connect Clockify with third-party software.
- Webhooks: Configure webhooks to send real-time data from Clockify to other applications whenever specific events occur.
FAQs #
Will changing my time zone or theme mess up my manager’s view?
No. Settings configured in the Profile Settings menu are entirely personal. Your time zone, visual theme, language, and grouping preferences will not alter the workspace view or reports for your colleagues or workspace owners.
How do I change the language on my Clockify mobile app?
Because Profile settings only apply to the web version of Clockify, your mobile and desktop apps determine their language based on your device’s operating system. To change the mobile app to Spanish, for example, your phone’s system language must be set to Spanish.
I left my timer running overnight and got an email. How do I turn that off?
Navigate to Profile settings > Preferences > Email notifications and uncheck the box labeled Long-running timer. This will stop the system from emailing you when a timer crosses the 8-hour mark.
Why can’t I change my email address or password directly on this page?
Clockify uses a unified account system called CAKE.com for enhanced security across multiple apps (like Pumble and Plaky). To change your core login credentials or profile avatar, click “Manage CAKE.com Account” to update your identity globally.
How can I change the day my timesheet week starts on?
You cannot change the start of the week from your personal Profile Settings. The “Week start” is an administrative setting. If it needs to be changed, an Admin must edit your profile from the workspace’s Team page.