Tired of tracking time at work manually?
With the right software, you can automate time tracking and get more accurate data about your team’s productivity.
All you need is a reliable time tracker like Clockify and a Zapier account.
Zapier acts as a middleman between different web applications, allowing them to “talk” to each other and trigger actions based on rules you define.
For example, you can use Zapier to connect Google Calendar and Clockify — automatically starting your timer in Clockify when an event in your Google Calendar starts.
What else can you automate with Clockify and Zapier, and where do you start?
Let’s dive in and find out.
Getting started: connecting Clockify and Zapier
To connect Clockify and Zapier, you need to:
- Create Clockify and Zapier accounts,
- Generate your API key in Clockify, and
- Use the API key to give Zapier access to your Clockify account.
The whole process only takes a few minutes — check out this guide on connecting Clockify and Zapier effortlessly.
Once you complete the 3 steps above, you can start creating Zaps — individual automations in Zapier.
At their core, Zaps are simple “if this, then that” automations. You can use them to save time you’d otherwise spend switching between different apps and entering the same information.
Let’s take a look at some practical ways to be more efficient and productive with Zapier and Clockify.
#1: Track your work time automatically
If you often forget to start your timer in Clockify at the start of your workday, you can set it to start each day automatically with Zapier.
To create time-based triggers, just create a Zap that connects Schedule (Zapier’s simple clock app) to Clockify. You simply need to:
- Open Zapier,
- Click Create,
- Choose Zaps from the drop-down menu, and
- Set up triggers and actions like in the screenshot below.
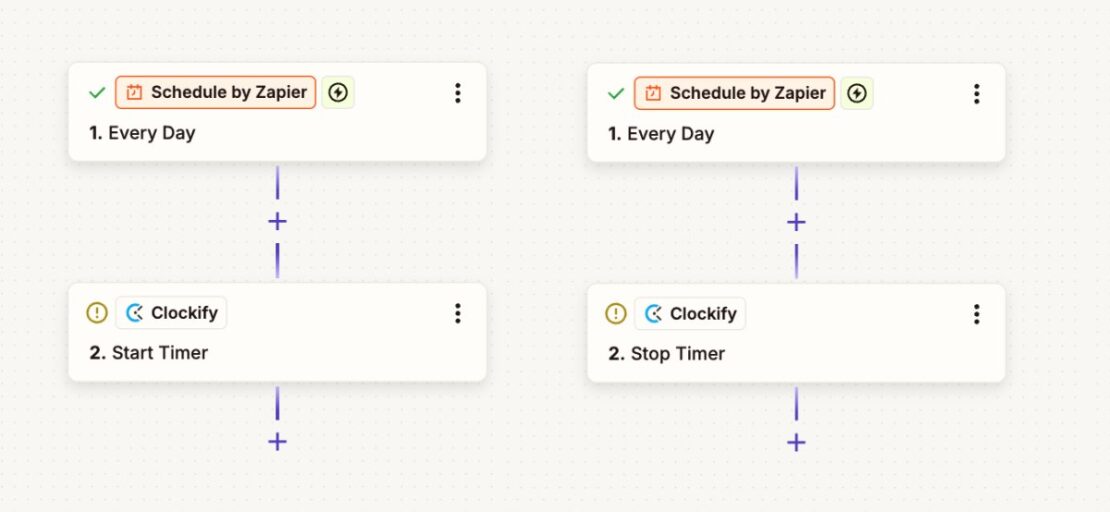
With this setup, your Clockify timer will automatically start at 9 a.m. and stop at 5 p.m. each day. If you work different hours, change the time in the triggers according to your workday.
This way, you have one less thing to worry about when you start and end your day, and you don’t have to fret over inaccurate time tracking.
💡 CLOCKIFY PRO TIP
Want a few ideas on great ways to wind down after the end of your workday? Check out this handy guide on our blog:
#2: Track how much you oversleep automatically
As you create a healthier daily routine, you can set up a simple Zap that tracks how much you oversleep each day. You just need to:
- Create a Schedule trigger,
- Set it to the time when you want to get up, and
- Create a Start Timer action with Clockify.

This creates an “Oversleeping” timer. Stop it when you get up, and you’ll see exactly how much longer you slept than you intended.
Track your habits with Clockify
#3: Log meetings in Clockify automatically
You can automatically log your Google Calendar events, including meetings, as new time entries in Clockify — like below.
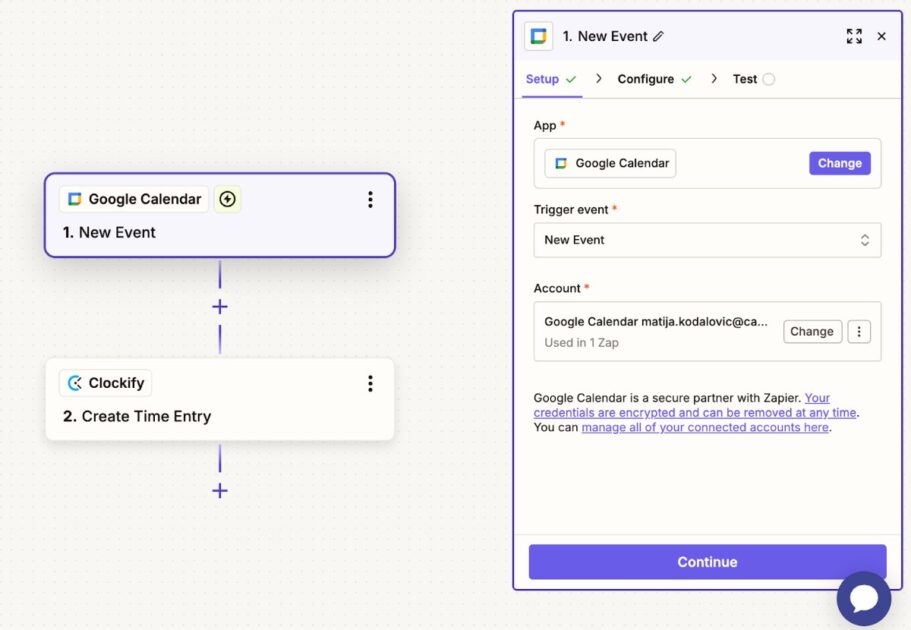
The process is simple, and you only need to:
- Create a New Event trigger with Google Calendar, and
- Set a Create Time Entry action with Clockify.
That way, you don’t have to manually track the time you spend on your meetings, sessions, and other appointments. This also means fewer mistakes that are inevitable with manual time tracking.
#4: Create new projects in Clockify automatically
In Clockify, most managers and small business owners create separate projects to label time entries for different clients. This makes it easier to analyze the time spent working for each client per project.
However, manually entering information from your CRM or project management tools into Clockify prolongs the onboarding process, especially if you frequently take on new clients.
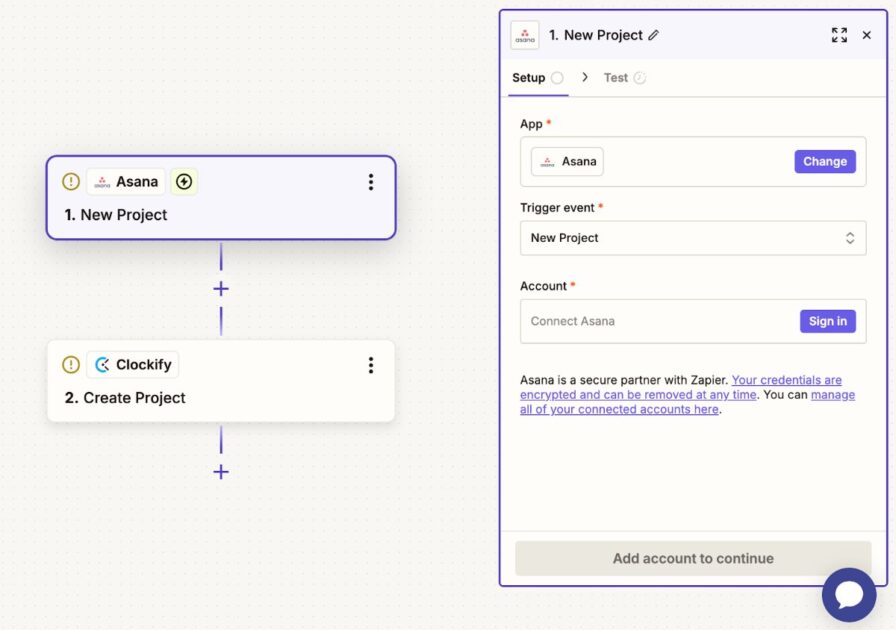
Fortunately, Zapier lets you automatically create new projects in Clockify using data from various project management apps. Here’s how to create a Zap with Asana:
- Set a New Project trigger with Asana,
- Click Connect Asana,
- Log in to your Asana account, and
- Set up a Create Project action with Clockify.
You can follow the same process with HubSpot, Salesforce, and many other CRM and project management software. As a result, you won’t have to spend time creating Clockify projects for new clients by hand.
#5: Sync time entries across platforms automatically
Even with Clockify’s auto tracker, you may still have to manually re-enter your time entries on other platforms, like Salesforce, QuickBooks, or Jira.
Besides wasting your time, this also leaves more room for human error.
Here’s a Zap that automatically syncs time entries between Clockify and Salesforce:
- Trigger: New time entry in Clockify,
- Action: Data Transformation (get the hours rounded to the correct quarter hour),
- Search: Salesforce for the related project record,
- Filter condition: Does the project exist, and
- Action: Create the time entry in Salesforce.
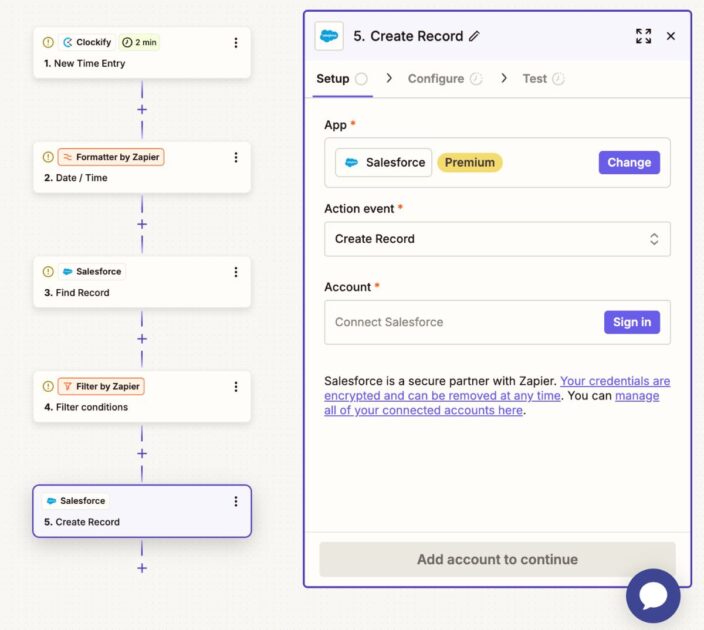
With this Zap, Salesforce automatically creates a corresponding time entry when you create a new one in Clockify.
You only need a minute to review the daily time entries on both platforms and ensure they match, saving time you’d spend on re-entering them manually.
💡 CLOCKIFY PRO TIP
Need help choosing the best business management software to integrate with Clockify? Here are our top choices:
#6: Start tracking time on tasks automatically
If you use another project management app with Clockify, you don’t have to manually start your timer each time you start working on a task.
Let’s take Trello as an example:
- Set a Card Moved to List trigger with Trello,
- Click Connect Trello,
- Log in to your Trello account, and
- Set up a Start Timer action with Clockify.
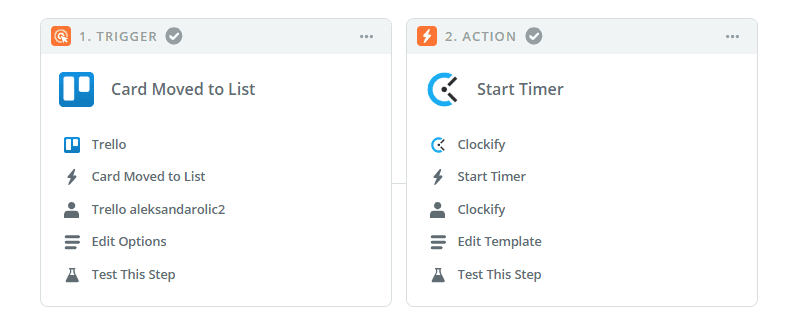
With this Zap, a timer for your task will start in Clockify whenever you move a Trello card from To-Do to In Progress. You can also create a similar automation with other project management apps supported by Zapier, like ClickUp and Asana.
#7: Update your team on Slack automatically
As a team leader, do you feel you’re spending too much time notifying your team members about each new task manually?
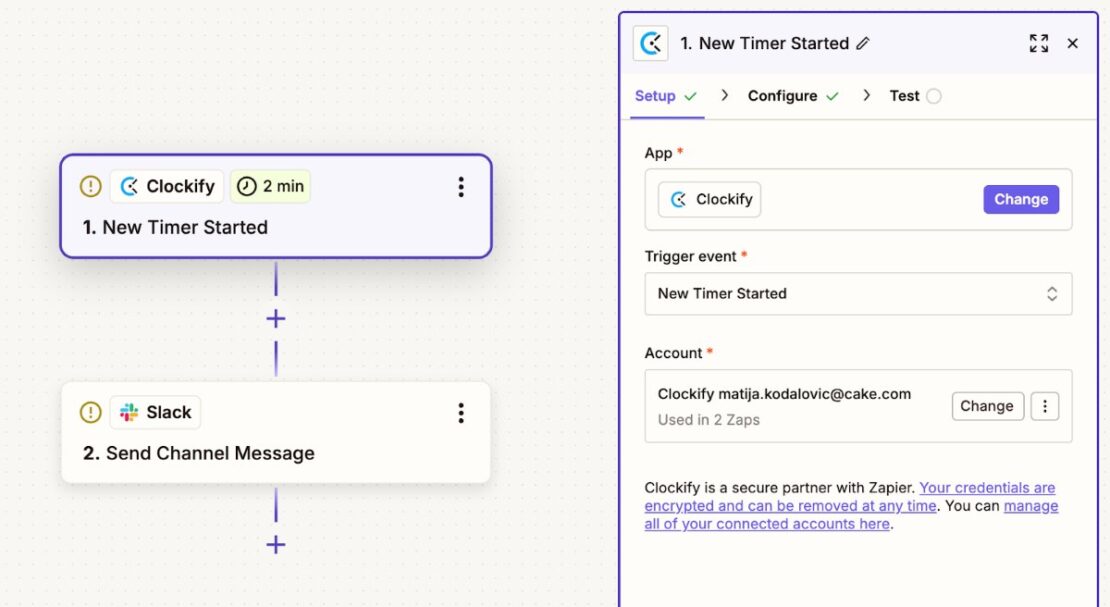
With Zapier, you can automatically send a message on Slack whenever you start a timer for a specific project. All you need to do is:
- Create a New Timer Started trigger with Clockify,
- Log in to your Slack account in Zapier, and
- Create a Send Channel Message action.
You can also use the same Zap to send a channel message when you start working on an important task and want to avoid interruptions. Or, you could set up a different Zap that automatically changes your Slack status based on your Clockify time entries:
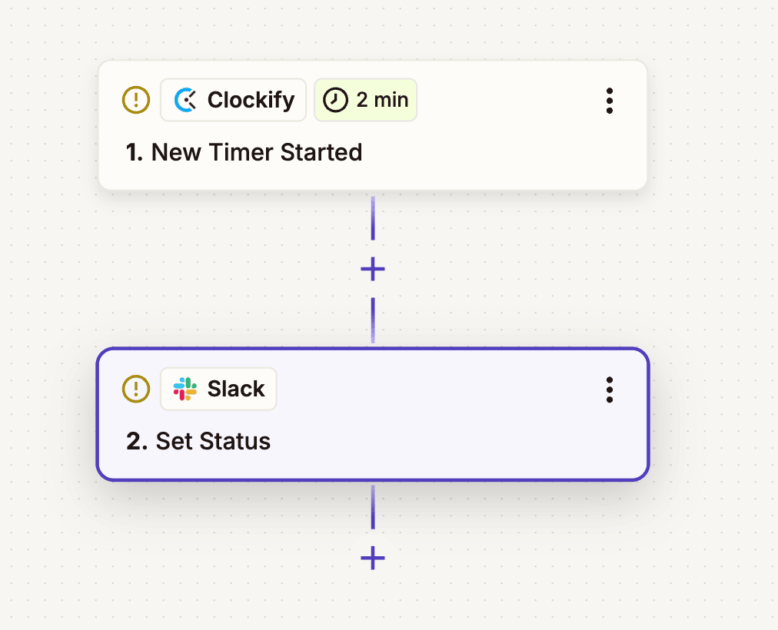
With these Zaps, you can ensure you and your team don’t waste time on meetings and messages that could’ve easily been automated.
#8: Send a newsletter in Gmail or Slack automatically
As a team lead, you can easily show how much you work, share regular updates, or update collaborators with Zapier’s digests. With the right setup, Zapier can automatically:
- Collect specific information, like new clients added to Clockify,
- Compile a Gmail or Slack message to share that info, and
- Send the message periodically on a daily, weekly, or monthly basis.
Here’s a simple Zap that does this:
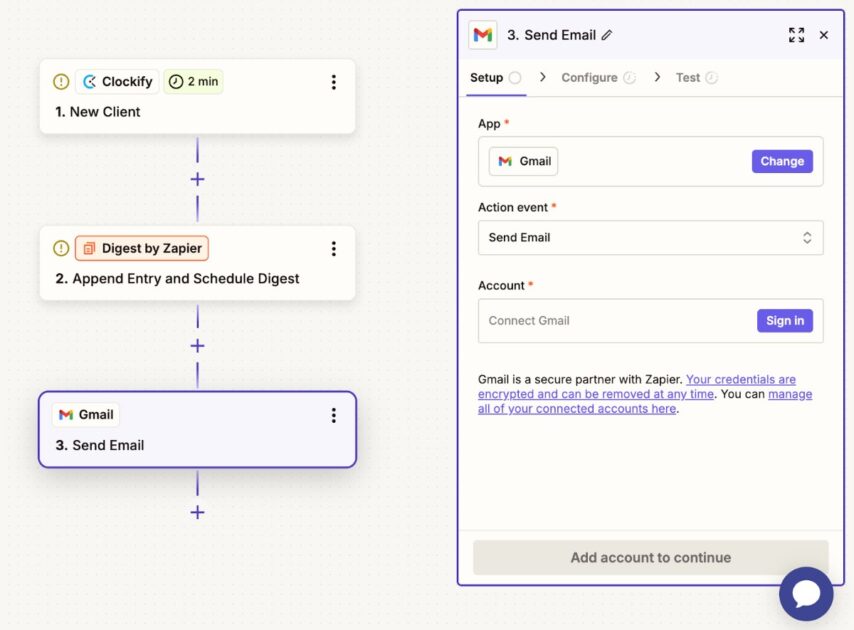
Consequently, Zapier will send a message outlining all new clients you add to Clockify in a given period. You don’t have to waste time collecting the information and sharing it with key stakeholders — and there’s less risk of mistakes.

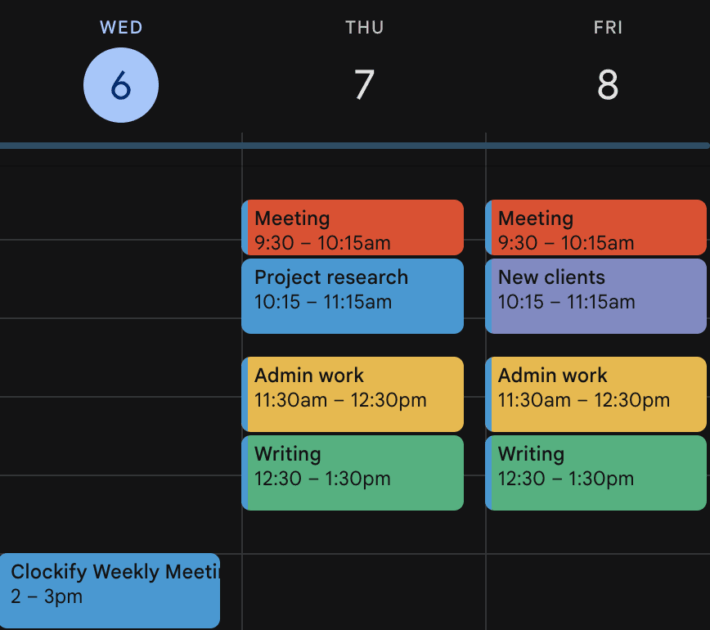
#9: Fill your work calendar automatically
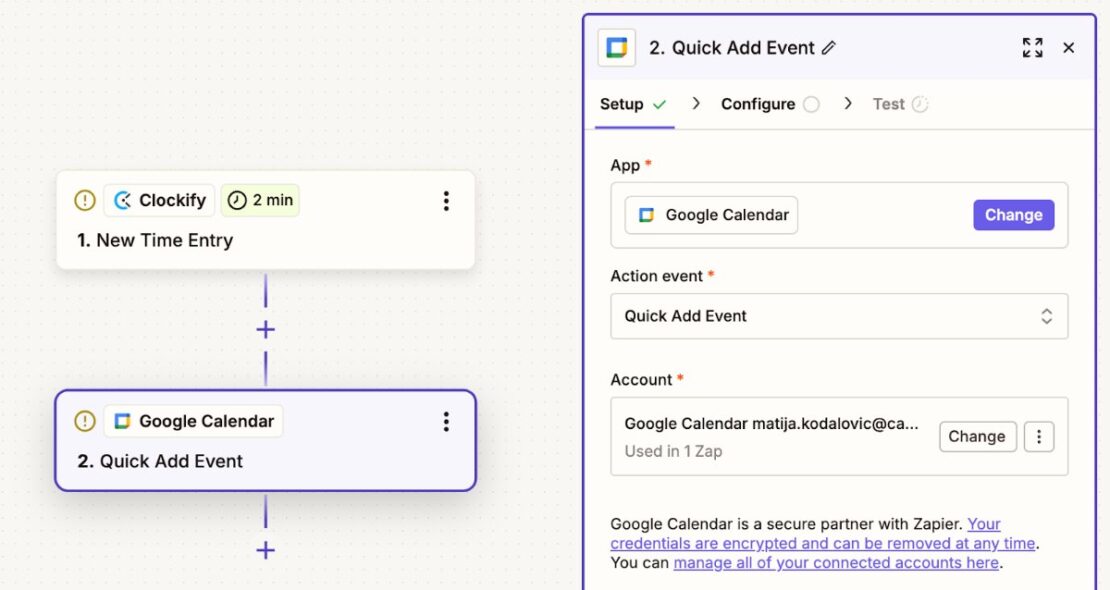
Whenever you create a time entry in Clockify, Zapier can automatically create a corresponding event in your Google Calendar.
To do this, set up a simple Zap in 2 easy steps:
- Create a New Time Entry trigger with Clockify, and
- Make a Quick Add Event trigger with Google Calendar.
That way, you can see what you’ve worked on over the week in a neatly organized timeline — without entering any information manually.
Frequently asked questions about Zapier automations
Now that you know about common Clockify automations with Zapier, let’s answer some of the most frequently asked questions on the topic.
How can I create more advanced and customized automations?
For more advanced and customized automations, you can make more complex workflows that include:
- Multi-step Zaps — automations with multiple actions that connect more than 2 apps in a single Zap.
- Filters — Zap actions that only run if certain conditions are met, allowing you to create more specific and complex if-then loops. For example, only calendar events with specific keywords trigger a new Clockify project.
- Formatter — Zapier action that lets you automatically format data within your Zaps, for easier sharing between applications. You can format dates and times, capitalize text, extract email addresses or URLs, and more.
How do I measure the ROI of this integration?
The most direct way to measure the ROI of Zapier automations is to:
- Measure the time you spend on manual data entry after integrating Zapier into your Clockify workflow,
- See how much daily time you save compared to before, and
- Multiply the saved hours by your team’s average hourly rate.
This way, you’ll know how much money automations save your company each day.
💡 CLOCKIFY PRO TIP
Need help determining your hourly rate? Use our hourly rate calculator to see what works best for your industry, niche, and level of experience.
What are some alternative tools or methods?
Some popular Zapier alternatives include:
- Make (formerly Integromat),
- Microsoft Power Automate,
- Workato, and
- If This Then That (IFTTT).
However, Zapier is still the most widely used automation platform that supports more apps than these competitors.

Automate time tracking with Zapier and Clockify
You can save hours every day by automating your time tracking with Clockify and Zapier.
With the right Zap, you can:
- Start timers automatically,
- Log meetings,
- Sync entries across apps, and do much more.
Besides the automations you can set up with Zapier, Clockify has plenty of built-in automation, including:
- Auto tracker — track how much time you spend across programs, websites, and documents, and then create time entries based on recorded activity.
- Idle detection — deduct non-work time from a running timer (time you’ve spent away from the computer).
- Timesheet targets and reminders — set up targets, and your team will get an automatic email reminder if they don’t log enough time.
- Alerts — receive email alerts when a project is nearing its allotted budget, or when you’re over budget.
These Clockify automations don’t just save time — they also reduce human error that’s common with manual data entry.
Start tracking time automatically, more accurately, and with a bigger ROI.