Overview of hourly rates
Manage hourly rates in Clockify and keep time records accurate while reflecting your earnings, simplifying payroll, invoicing, and reporting.
Clockify calculates your total earnings by applying assigned hourly rates to your billable time entries. When you generate a report, Clockify multiplies the duration of a billable time entry by its corresponding hourly rate.
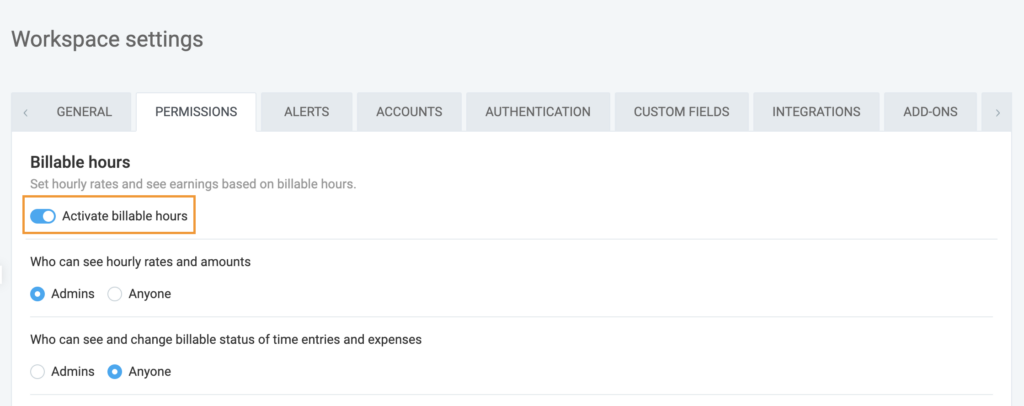
To enable billable rates in the workspace, Workspace owners/admins need to turn on the Activate billable hours toggle in the Workspace settings > Permissions tab.
Enable billable rate by clicking on the $ icon on your time entry in the Time Tracker page.
When Activate billable hours is enabled in the workspace, time entries are marked billable by default.
If your team doesn’t bill by the hour, Workspace Admins can turn off the “Activate billable hours” setting via Workspace settings > Permissions tab. This will completely hide the billable features from the interface for everyone (or just for regular users, depending on your preference).
Permissions #
Access to view and edit hourly rates is strictly controlled by your user role:
| Role | Can Set/Edit Hourly Rates | Scope |
| Workspace admins | Yes | For the entire workspace, any user, and any project. |
| Project managers | Yes (Conditional) | For people working on their assigned projects, only if the “Who can see billable rates” setting in Workspace Settings is set to “Everyone”. |
| Regular members | No | N/A |
If you want to prevent regular users from seeing the currency symbol or changing the billable status of their entries entirely, an Admin can restrict this in Workspace Settings > Permissions (available on paid plans or the free trial).
Types of rates #
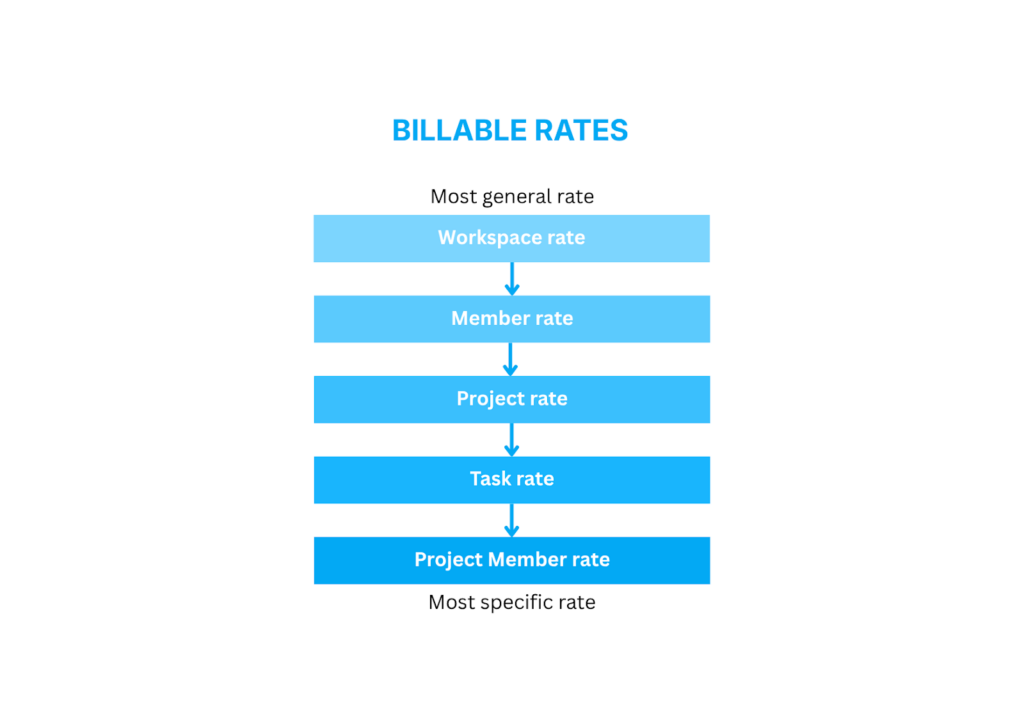
Clockify offers 5 levels of hourly rates to give you maximum flexibility. If multiple rates apply to a single entry, Clockify uses a strict hierarchy where a more specific rate always overrides a less specific one.
Here is the hierarchy, from general to specific:
Workspace rate #
Workspace rate is the default rate for all billable time across the workspace unless overridden.
Apex Digital, a web development agency, has set their Workspace billable rate at $100/hour.
When a new junior developer joins the team and logs time on standard, undefined internal client work, or when the team takes on a basic ad-hoc request that doesn’t have a formalized contract yet, their time is automatically billed at $100/hour. This ensures that no tracked time accidentally slips through the cracks at $0/hour.
Set workspace rate #
To set a workspace rate:
- Click on the three dots icon next to your workspace name
- Select Workspace settings
- Scroll down to find Workspace billable rate section
- Click Change to edit the rate
- Select one of the following options:
- Apply the rate from today onwards
- Apply the rate to all past and future time entries
6. Click Save
Member rate #
The member rate applies to everything a specific member tracks.
Sarah is Apex’s Senior UX/UI Designer. Because of her extensive experience and high demand, her time is worth more than the agency average.
The admin sets Sarah’s Member rate at $150/hour. Whether she is working on Client A’s landing page or Client B’s mobile app, her tracked time will automatically generate revenue at $150/hour, while the rest of the standard team continues billing at the $100/hour Workspace rate. This setup can be done for other team members who might also have a different rate depending on their role in the company.
To set a member rate:
- Go to Team page
- Locate the billable rate field next to the member’s name in the Billable rate column
- Click Change
- Enter the billable rate
- Click Save
Project rate #
The project rate applies to all time tracked on a specific project.
Apex Digital takes on a website redesign for a local non-profit organization, City Rescue Mission. To support the charity, Apex agrees to a discounted flat rate for the entire project.
The project manager sets the Project rate for City Rescue Mission Redesign to $75/hour. Even if Sarah (whose Member rate is $150/hour) logs time on this project, her time will be billed at the negotiated $75/hour rate. This ensures the client is billed accurately according to their specific contract without needing to adjust everyone’s individual profiles.
Set project rate #
To set a project rate:
- Go to Projects
- Click on the project
- Go to the Settings tab
- Find Project billable rate
- Click Change
- Enter the amount of the project rate (per hour)
- Select to apply the rate:
- From the current day onwards or
- To past and future time entries
8. Click Save
Task rate #
A task rate is a defined rate for a specific task within a project.
On the major e-commerce project, there is a requirement to build a personalized product recommendation engine, which involves complex custom AI model training. This is a premium service that costs more than standard web development.
The project manager creates a Task called “Custom AI Model Training” and sets the Task rate to $200/hour. If a standard developer or Sarah the designer logs time to this specific task to help prepare the UI or format the data, their time is elevated and billed to the client at the $200/hour task rate.
Set task rate #
To set a task rate:
- Go to Projects
- Click on the project
- Click Change next to the task you want to set a rate for
- Enter the rate on the pop-up window
- Click Save
Project member rate #
The project member rate is a rate for a specific member within a project.
Apex brings in Elliot, an elite, highly specialized external Data Scientist for the AI task. Elliot’s contract dictates he is billed at a premium rate no matter what he is doing on the project.
The admin sets a project member rate for Elliot on the e-commerce project at $350/hour. Even when Elliot logs time under the “Custom AI Model Training” task (which usually caps at $200/hour for the rest of the team), Elliot’s rate overrides it. His time is billed at $350/hour, ensuring the agency properly bills for his expertise regardless of his task.
Set project member rate #
To set a project member rate:
- Go to Projects and select the project
- Click the Access tab
- Find the member’s name and click Change next to the amount field
- Enter the new rate
- Select when the rates will be applied
- Click Save
Set custom rate for a client #
If you charge a specific client a different rate than your standard workspace rate, follow these steps:
- Go to the Projects page
- Create a new project and assign it to a client
- Click on the project name to open it
- Navigate to the Settings tab
- Under the Project billable rate section, enter your desired hourly rate
One-off rates #
You cannot assign a custom billable rate directly to a single, specific time entry.
If you need a special rate for a one-off entry, use a Tag to label it, so you know exactly how much to charge when preparing your final invoice.
To do this:
1. Go to Time Tracker page
2. Enter the task/project
3. Click on the tag icon
4. Click on the tag applicable to the one-off rate
You can create a tag if you haven’t done so yet by typing in the tag name (e.g., #80perhour) and clicking Create tag.
Set custom currencies #
Only Workspace owners and admins can edit the currency. Once changed, it applies to the whole account, including all billable rates.
By default, Clockify uses USD. However, you can change your workspace currency.
To do this:
- Go to Workspace settings
- Find the section called Currencies
- Click Edit
- Enter the new currency
- Click Close
- Choose the newly created currency in the drop down
Changes are saved automatically.
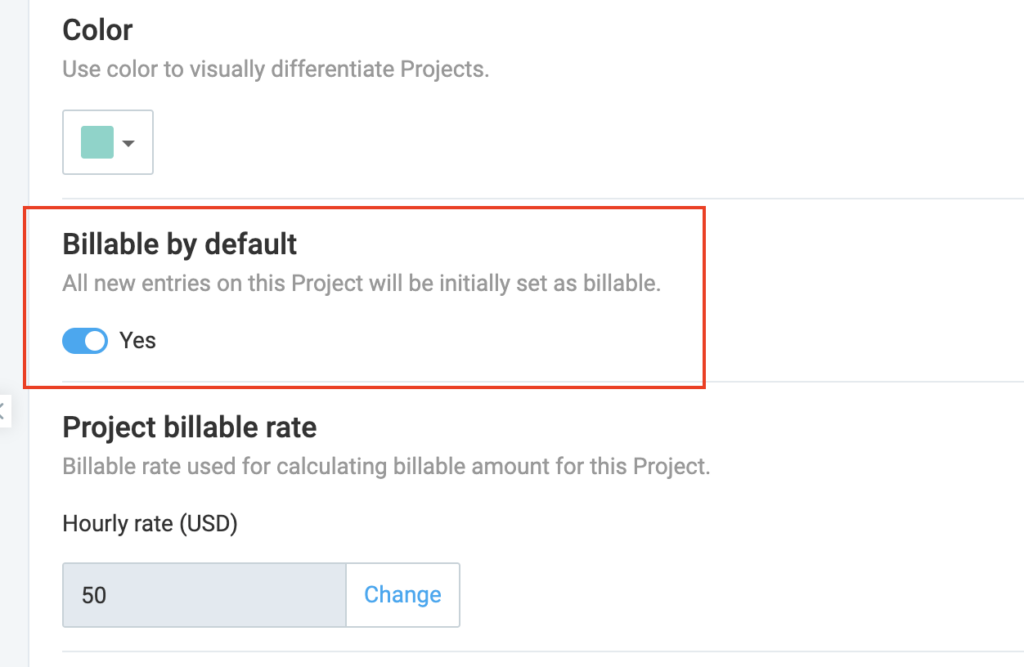
Project and task billability #
You can set projects or individual tasks to be billable or non-billable by default, which means all new entries will initially be set according to what you choose. This helps save your team from having to click the $ icon manually on every single time entry.
To do this:
- Go to the Projects page and select a project
- Go to the Settings tab
- Toggle the project’s default billability status on or off
How to handle historic rates #
When you update an hourly rate (for example, giving a team member a raise from $20/hr to $40/hr), the new rate only applies to new time entries created from that moment onward.
Existing entries will keep the historic rate to ensure your past reports and invoices remain legally and financially accurate.
Note: You can view each historical entry’s exact hourly rate by hovering over the amount in the Detailed Report or exporting to CSV/Excel.
Apply new rates retroactively #
If you want to overwrite a historic rate and apply a newly updated rate to past time entries, you have two options:
Option A: Retroactive Update (Available in any paid plan)
- When changing a rate on the settings screen, you will be prompted with an option to apply the new rate retroactively to all existing entries at once.
Option B: Manual Refresh Update
Because time entries pick up the latest valid rate whenever their billable status is updated, you can force a manual refresh:
- Go to the Time Tracker or Detailed Report
- Click the $ (billable icon) to mark the entry as non-billable
- Click it again to mark it back as billable. This action resets the entry to pull the newest applicable rate.
You can do this individually or use the Bulk Edit feature to do several at once.
To prevent accidental loss of historic rates due to manual user edits, use the Lock Timesheets feature so regular users cannot edit past time entries. Alternatively, use the Approval feature to freeze timesheets once they’ve been reviewed.
Beyond billable rates, you have the option to set cost rates, which let you compare client charges against team costs and monitor overall profitability. Learn more about cost rates.