Track expenses
Record project and task-related expenses via web or mobile app, and include them in invoices. You can also use expenses to record fixed fees (e.g. day rates, retainers, overtime pay, reimbursements, salaries, etc.), and expenses that are unit-based (e.g. hours, mileage, days, materials, etc.).
Expenses is a paid feature, which you can enable by upgrading your workspace to Pro or Enterprise plan.
To use Expenses, you first need to enable that functionality in the Workspace settings.
For an overall guidance on how to add Expenses in Clockify, watch the video and follow the instructions below.
Add expenses #
To use Expenses, first go to the Workspace settings and enable Activate expense tracking in the Expenses section.
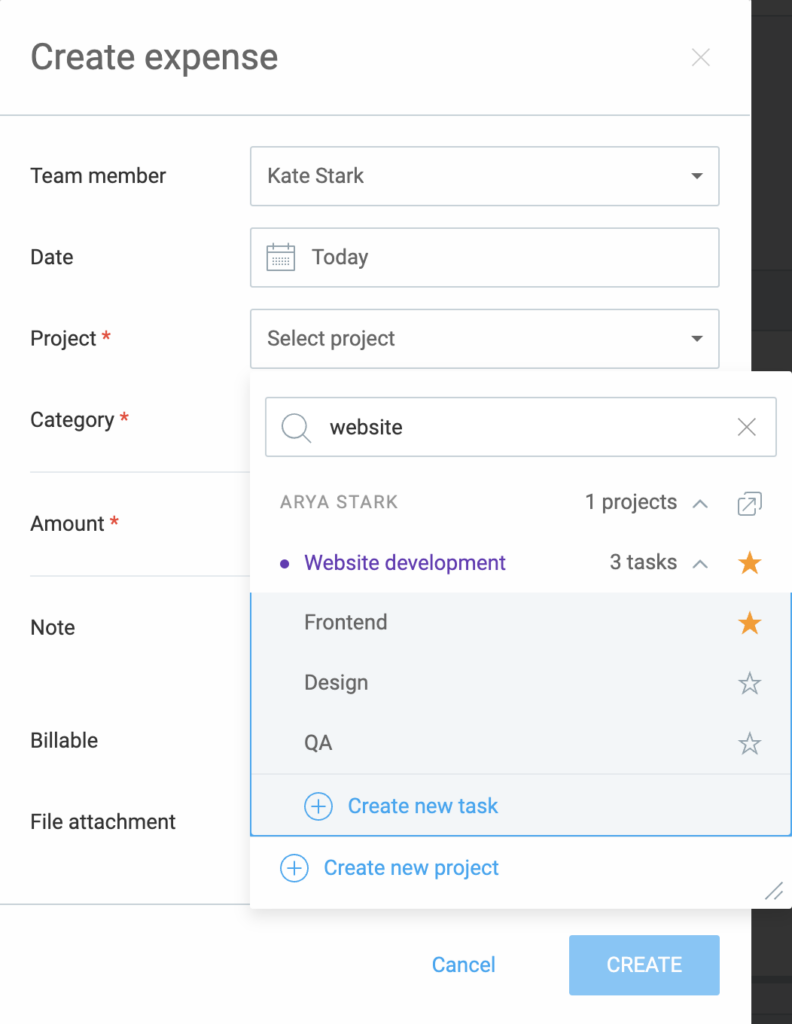
Proceed by doing the following:
- Click Expenses in the sidebar
- Click Add expense
- Choose date, project/task (optional), and category
- Enter amount (or unit)
- Enter note with more information (optional)
- Upload receipt (optional)
- Click Save
For expenses that have unit, users enter unit (e.g. miles) and the total amount is automatically calculated based on that category’s amount per unit.
Create expense category #
To create a custom category for your expense when creating a new expense or editing an existing one:
In the Create/edit expense window:
- Select Category
- Click Create new category at the bottom of the dropdown
- Enter a name for the category
- Add a unit price and name (optional)
- Enter the unit price next to Amount (optional)
- Set if Billable (Y/N)
- Click Create
Note that:
- Each expense inherits billable status from its project/task, which you can change on per expense basis
- Each expense inherits currency assigned to client
- You can edit existing expenses by clicking on the three dots next to the expense
- You can delete expenses from the three dots menu and immediately undo the action from the success toast message
- You can view expense’s receipts by clicking on the attachment icon
Supported file formats for attachments: .png, .gif, .pdf, .jpg and .jpeg. Max file size: 5MB.
Record expenses using mobile app #
You can also record expenses via Clockify mobile app (iOS or Android).
Who can add and see expenses #
- Each user can see and add their own expenses (unless they are locked)
- Team managers can see and add expenses for their team members
- Project managers can see expenses for members working on projects they manage
- Admins can see and add expenses for everyone
If you lock timesheets past a certain date, it will also affect expenses, meaning regular users won’t be able to edit or add new expenses for past locked dates.
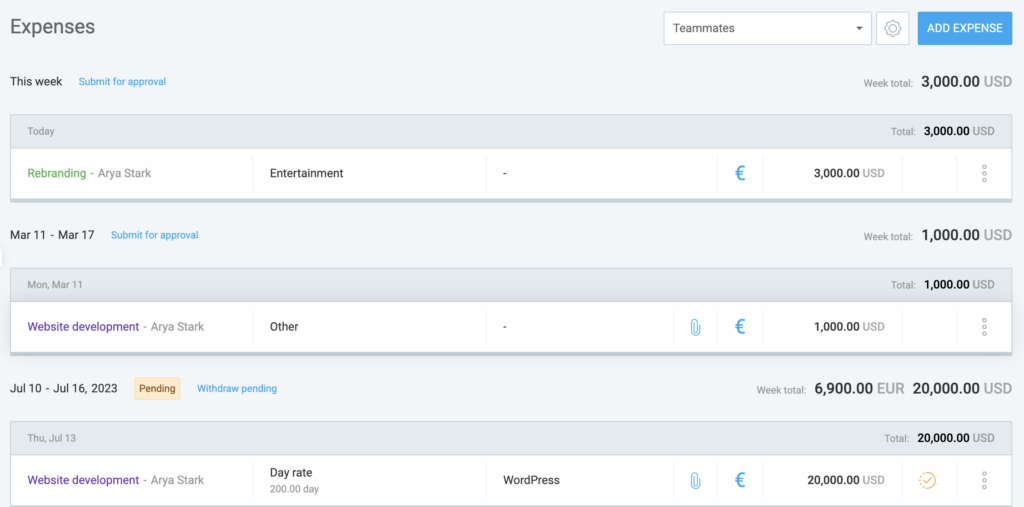
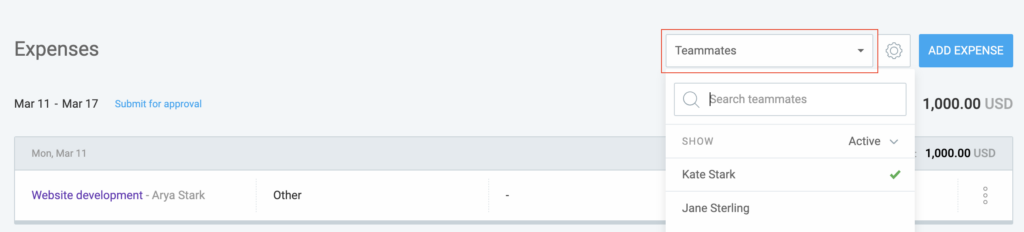
If you’re Admin or Team manager, you can see other people’s expenses by clicking on the Teammate picker in the upper right corner, and edit them, if allowed.
You can update, archive, restore, and delete a category by clicking on the three dots.
When a category is archived, users won’t be able to create new expenses for it, but all existing expenses will remain unchanged.
To delete a category, you first need to archive it, and then you can delete it. When a category is deleted, all expenses for it will become uncategorized.
Project budget #
If your project/task has a budget, you can enable Budget includes billable expenses in the Settings.
To do that:
- Navigate to the Projects page
- Choose the project and click on project’s Settings tab
- Scroll down to Project estimate section
- Choose Project budget from the dropdown as a way of tracking project progress
- You can choose it to be Manual or Task-based
- Finally, toggle the switch to enable Including billable expenses into the budget
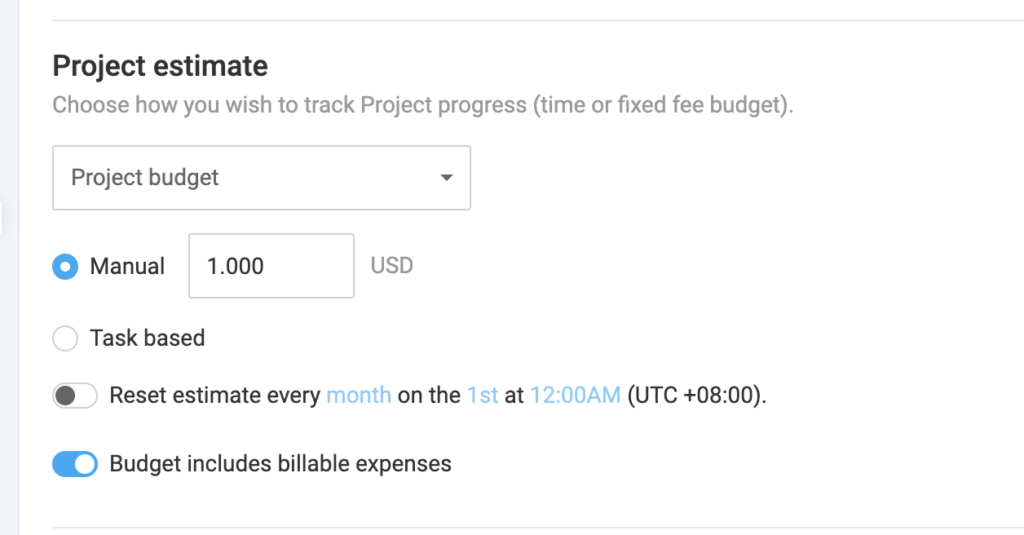
Once enabled, project/task budget will include both billable time and billable expenses as part of their progress bar (and alerts).
Expense report #
Use expense report to see, edit, filter out and export tracked expenses. This is a paid feature available on Pro and Enterprise subscription plans.
For more information, check out the Expense report article.
Approve expenses #
Added expenses appear in the Expenses page.
For expenses to be approved, an Admin or a Team/Project manager need to perform this action on the Approvals page. Prior to approving, expenses need to be submitted first.
Submit expenses for approval #
Added expenses appear in the Expenses page. Expenses can be submitted for approval by Owner/Admin/Team manager and subsequently approved by Owner/Admin/Team/Project manager.
For more information, check out how to Submit expenses for approval.
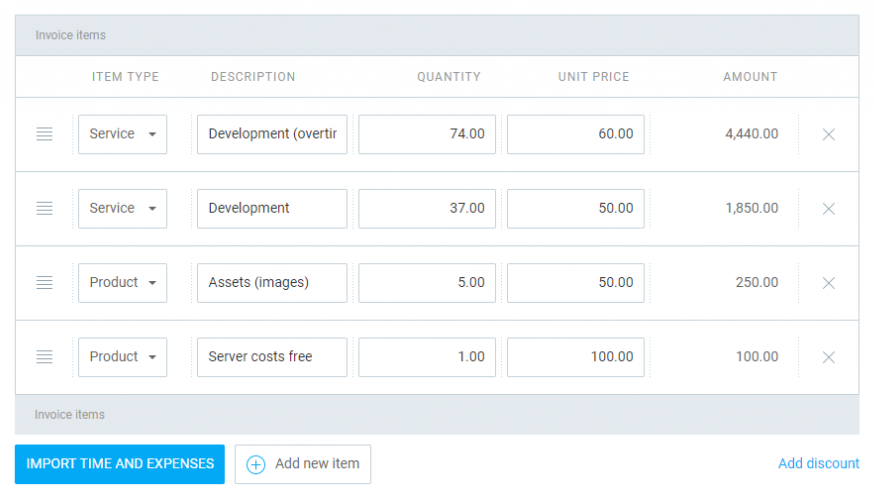
Invoice expenses #
- Open an invoice
- Click Import time and expenses
- Select date and projects
- Enable Include billable expenses
- Choose how you wish expenses to be displayed (display each expense as a new line item, or group them by project, user, or category)
- Click import
Only billable uninvoiced expenses are imported into invoice.
If an expense has unit, unit column will take the unit from the expense and the price column will take price from the category. Expenses that don’t have a unit will be displayed as one unit.
Imported time will be displayed as Service item type, and expenses as Product item type. You can customize name of item types in invoice settings, as well as hide the item type column from PDF.
Each imported expense will be marked as invoiced so you don’t accidentally invoice same expense twice. If you remove a line item that contains imported expenses (or delete the whole invoice), those expenses will be marked as uninvoiced.
You can always mark an expense as invoiced or uninvoiced manually in the Detailed Expense Report by selecting them via bulk edit.