Aktualisiert: 25. Februar 2026
 Diese Anleitung bietet praktische Schritte zum Ein- und Ausstempeln in Clockify über die mobile App und die Web-App. Zudem wird erklärt, wie Manager und HR-Mitarbeiter die Daten zum Ein- und Ausstempeln in Clockify einsehen können, um sie für Leistungsbewertungen und die Lohnabrechnung zu nutzen.

Arbeitsbereich in Clockify einrichten
Bevor deine Mitarbeitenden mit der Zeiterfassung in Clockify von CAKE.com beginnen, musst du den Arbeitsbereich in der App einrichten. Ein Standard-Arbeitsbereich wird automatisch für dich erstellt, sobald du dich bei Clockify registrierst. Du kannst deinen Arbeitsbereich individuell anpassen, indem du:
- das Firmenlogo hinzufügst,
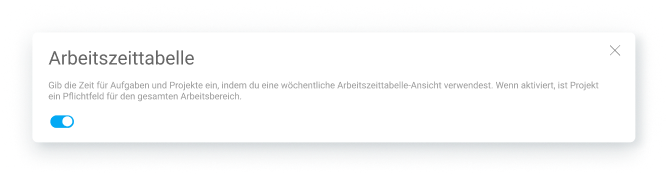
- Funktionen wie Arbeitszeittabellen oder Arbeitsfreie Zeit aktivierst,
- ein Format für die Zeitdauer wählst und vieles mehr.
Nachdem du den Arbeitsbereich angepasst hast, kannst du Teammitglieder einladen, Rollen und Berechtigungen zuweisen sowie Aufgaben und Projekte erstellen, auf welche die Mitarbeitenden ihre Zeit erfassen.
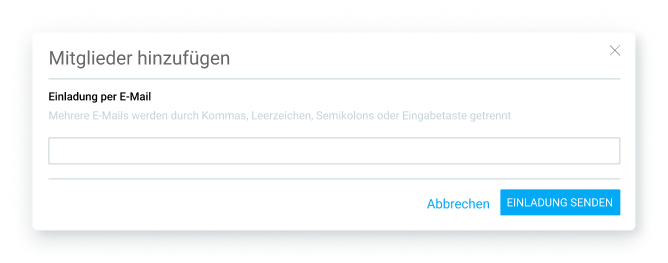
Das Einladen von Mitarbeitenden in den Arbeitsbereich erfolgt in wenigen einfachen Schritten:
- Wähle Team in der Seitenleiste aus,
- Klicke auf Neues Mitglied hinzufügen,
- Gib die E-Mail-Adresse des Mitglieds ein, und
- Klicke auf Einladung senden.
Nachdem die Mitarbeitenden auf den Link in der Einladungs-E-Mail geklickt und ihre E-Mail-Adresse verifiziert haben, können sie sich in ihrem Konto anmelden und mit der Zeiterfassung beginnen.
Hol dir Clockify von CAKE.com KOSTENLOS
Ein- und Ausstempeln in der Clockify-Web-App
In der Web-App von Clockify können Mitarbeitende die für Aufgaben und Projekte aufgewendete Zeit mit dem Clockify-Timer erfassen. Falls sie vergessen haben, den Timer zu starten, können sie die Zeit manuell hinzufügen, nachdem die Aufgabe abgeschlossen wurde.
Wenn die Arbeitszeittabelle-Funktion in den Arbeitsbereichseinstellungen aktiviert ist, können Nutzer ihre Stunden auch am Ende des Tages erfassen, indem sie ihre Arbeitszeittabellen in Clockify einreichen.
Ein- und Ausstempeln per Timer in der Clockify-Web-App
Um über den Clockify-Timer ein- und auszustempeln, müssen Mitarbeitende folgende Schritte ausführen:
- In der Seitenleiste Timer auswählen
- Eingeben, woran gerade gearbeitet wird,
- Das passende Projekt auswählen und
- Auf die Schaltfläche Start klicken, um die Zeiterfassung zu beginnen.
Sobald die Arbeit beendet ist, klicken sie auf die Schaltfläche Stopp, um die Aufnahme der Zeit zu beenden.

Sobald ein Teammitglied den Timer stoppt, wird automatisch ein neuer Zeiteintrag zu dessen Liste der Zeiteinträge hinzugefügt.
Erfasse deine Arbeitszeiten in Clockify
Ein- und Ausstempeln im manuellen Modus in der Clockify-Web-App
Um Zeit manuell hinzuzufügen, müssen Mitglieder die Seite Timer öffnen und auf das Listen-Symbol in der oberen rechten Ecke klicken.

Anschließend müssen sie:
- eingeben, woran sie gearbeitet haben,
- das passende Projekt auswählen,
- ihre Start- und Endzeiten eingeben und
- auf die Schaltfläche Hinzufügen klicken.

Sobald sie auf die Schaltfläche Hinzufügen klicken, wird ihr Zeiteintrag in Clockify gespeichert.
HINWEIS: Alle Nutzer des Arbeitsbereichs können Zeit in Clockify manuell hinzufügen, sofern der Timer erzwingen in den Arbeitsbereichseinstellungen deaktiviert ist. Ist dieser aktiviert, können sie Zeit ausschließlich über einen aktiven Timer erfassen.

Ein- und ausstempeln über Arbeitszeittabellen in der Clockify-Web-App
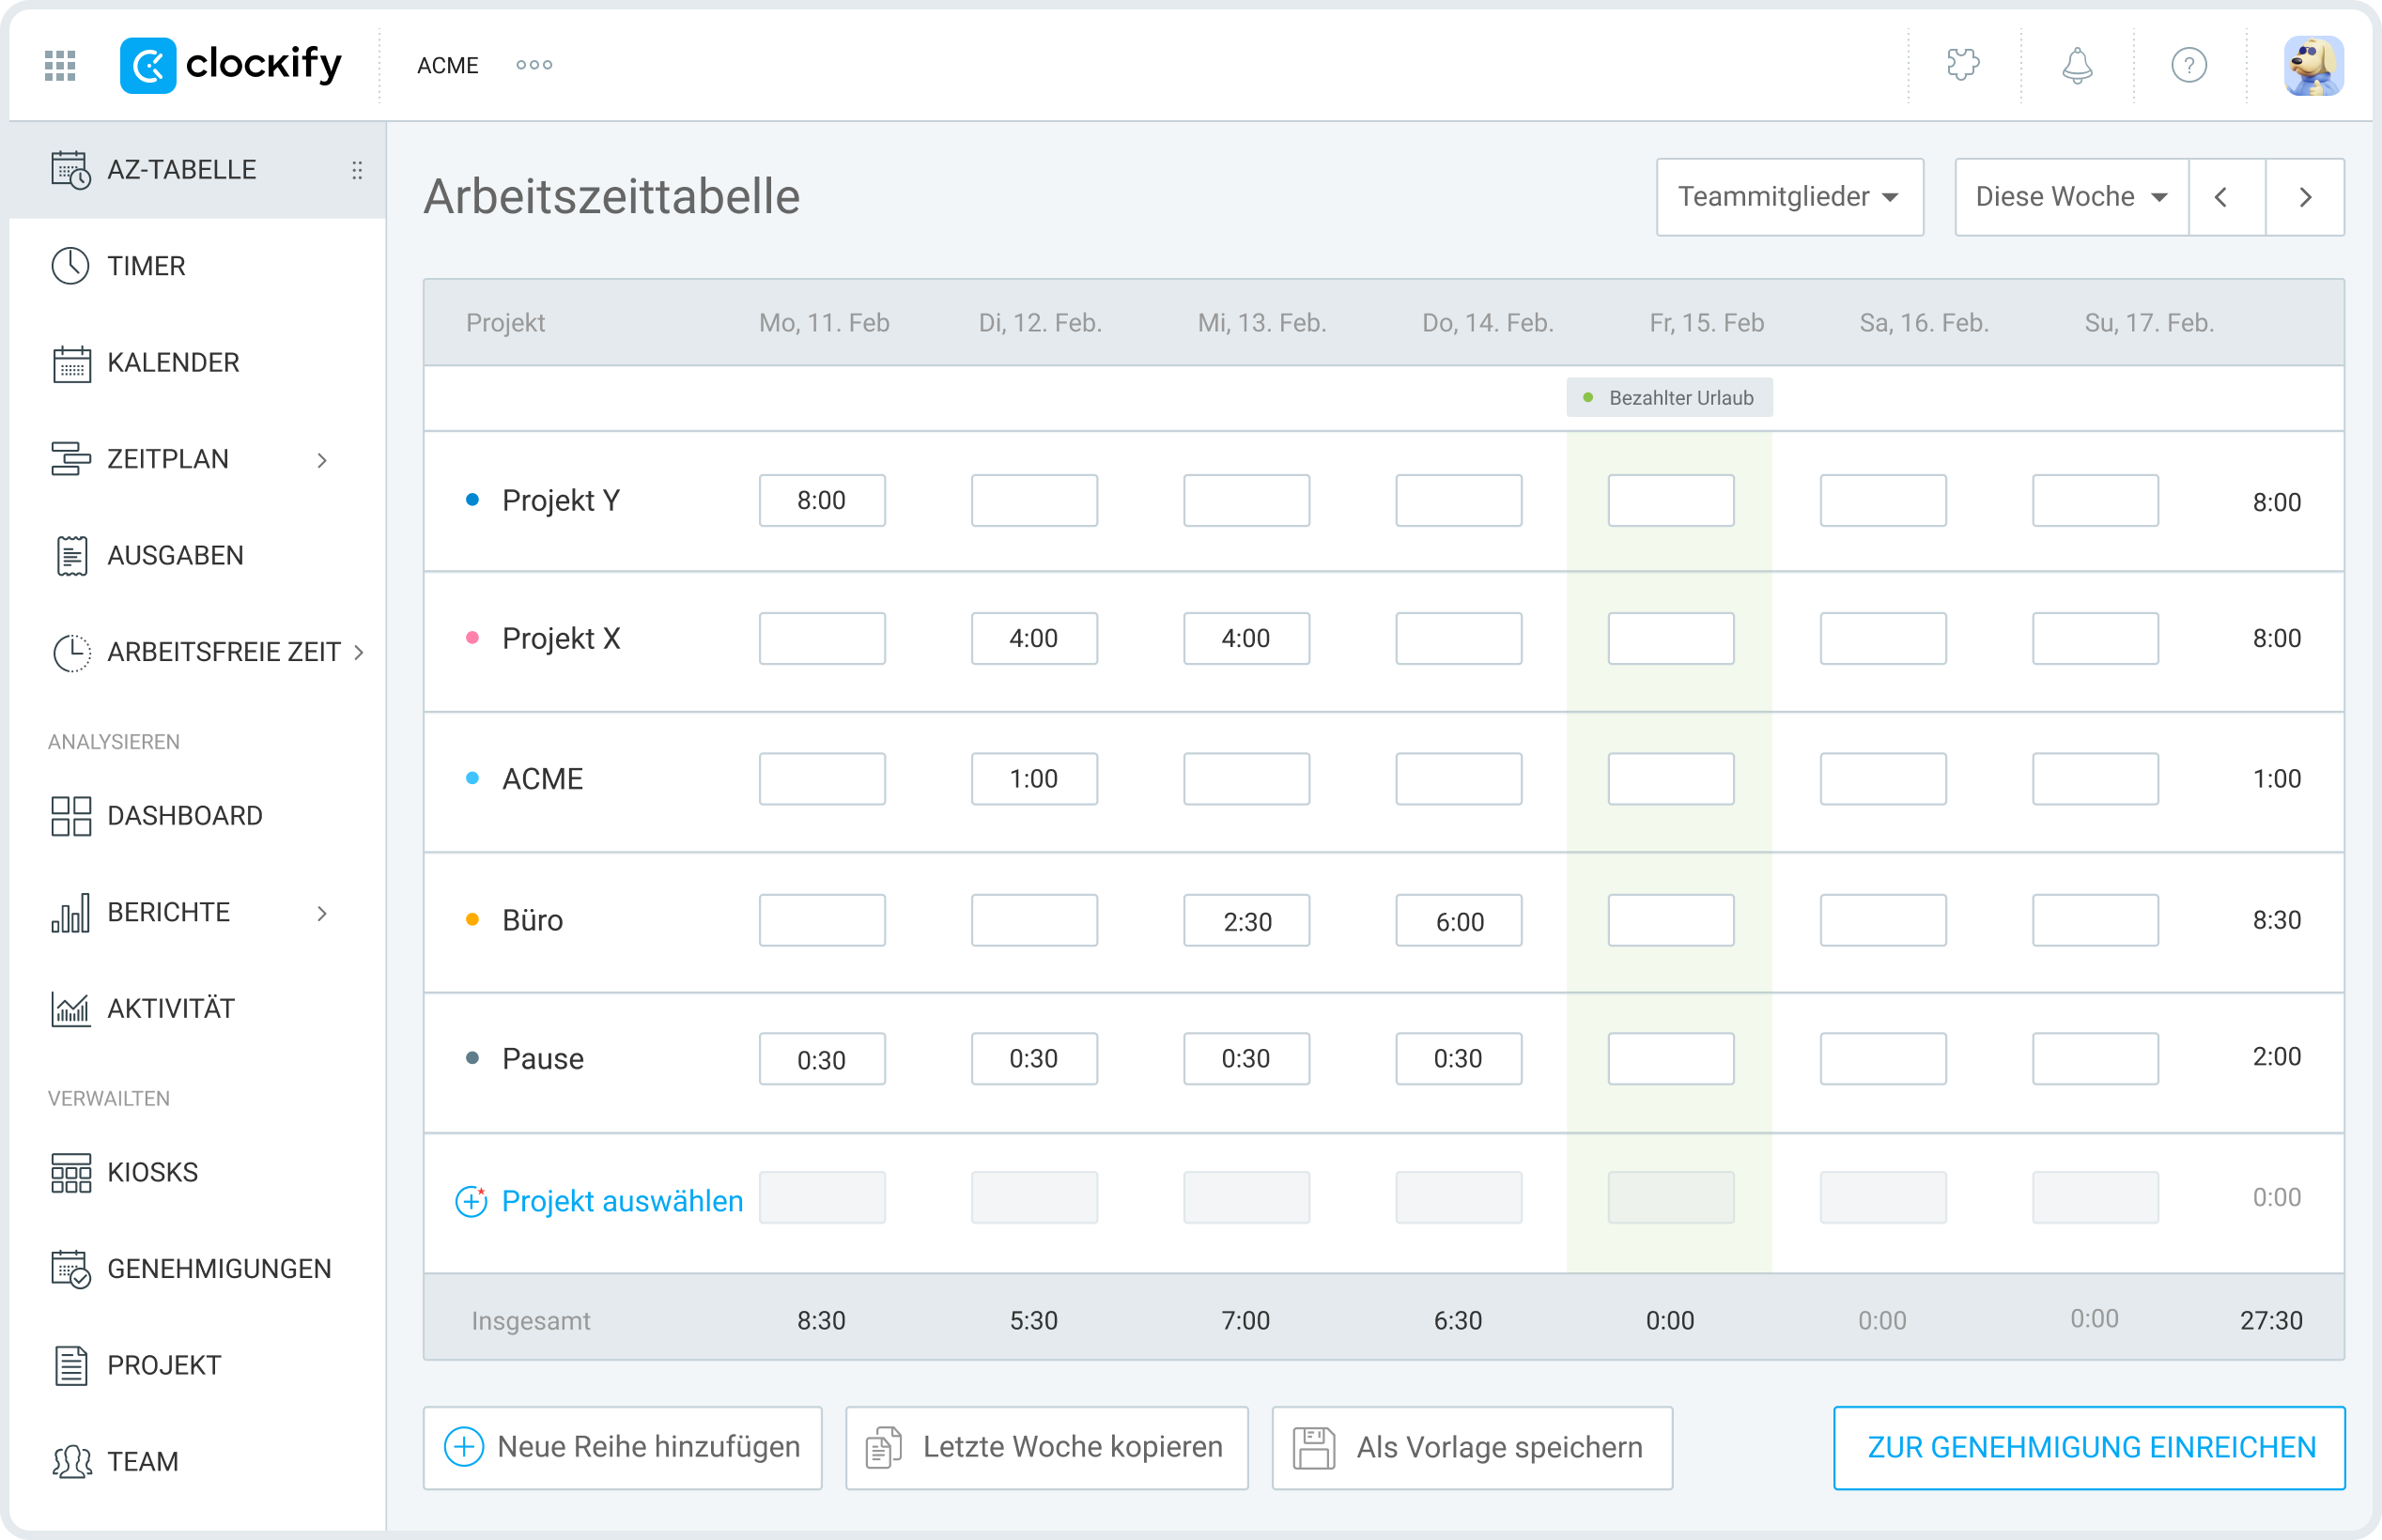
Um über die Clockify-Arbeitszeittabellen ein- und auszustempeln, müssen Teammitglieder folgende Schritte ausführen:
- In der Seitenleiste Arbeitszeittabelle auswählen,
- Das passende Projekt auswählen und
- Ihre Arbeitsstunden in das entsprechende Zeitfenster eingeben.
Außerdem können Mitglieder auf diese Weise weitere Details zu ihren Zeiteinträgen hinzufügen:
- Bewege den Mauszeiger über eine bestimmte Zelle mit erfasster Zeit,
- Klicke auf die drei Punkte,
- Füge Start- und Endzeiten, eine Beschreibung oder Tags hinzu, und
- Klicke auf Speichern.
HINWEIS: Reguläre Nutzer können in Clockify nur ihre eigene Zeit bearbeiten, während der Besitzer des Arbeitsbereichs und Admins die Zeiten aller Personen bearbeiten können. Team-Manager können in Clockify die Zeiten ihrer zugewiesenen Teammitglieder bearbeiten, sofern der Besitzer dies in den Arbeitsbereichseinstellungen aktiviert hat.
Ein- und Ausstempeln in der mobilen Clockify-App
Zuerst müssen die Teammitglieder die mobile Clockify-App aus dem App Store (iOS) oder von Google Play (Android) herunterladen. Nach der Installation der App können sie sich in ihrem Konto anmelden und mit der Zeiterfassung beginnen.
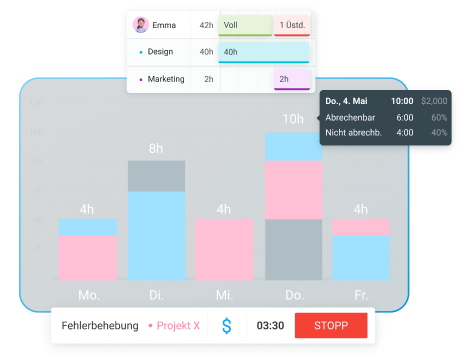
In der mobilen App von Clockify können Mitarbeitende ihre Arbeitsstunden in Echtzeit über den Timer erfassen. Falls sie ein vergangenes Ereignis nachtragen müssen, können sie die Zeit im manuellen Modus eingeben. Schließlich können sie die Clockify-Arbeitszeittabellen nutzen, um ihre Stunden am Ende des Tages zu protokollieren.

Ein- und Ausstempeln per Timer in der mobilen Clockify-App
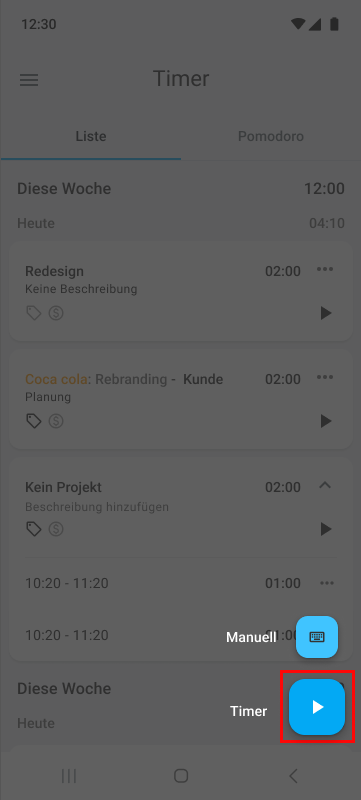
Beim Öffnen der mobilen Clockify-App gelangen die Mitarbeitenden direkt auf die Seite Timer, wo sie alle ihre Zeiteinträge einsehen können.
Um einen neuen Eintrag hinzuzufügen, müssen sie auf das Pluszeichen in der unteren rechten Ecke tippen.
Um die Zeiterfassung über Timer zu starten, sollten Teammitglieder den Button anklicken.
Sobald sie die Arbeit beendet haben, tippen sie auf die Stopp-Schaltfläche neben dem laufenden Timer.
Sobald du das tust, erscheint ein neues Fenster, in dem du die Details deines Zeiteintrags ergänzen kannst. Du hast dort auch die Möglichkeit, einzugeben, woran du gerade arbeitest, und Tags auszuwählen. (Die Auswahl eines Projekts ist verpflichtend, um falsch zugewiesene Zeiteinträge zu vermeiden.)
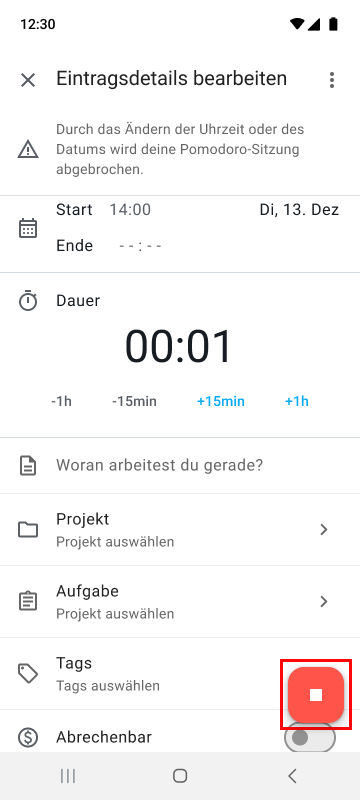
Sobald du auf die Stopp-Schaltfläche in der unteren rechten Ecke tippst, stoppt der Timer und dein Eintrag wird gespeichert.
Ein- und Ausstempeln im manuellen Modus in der mobilen Clockify-App
Um Zeit manuell hinzuzufügen, müssen Teammitglieder auf der Seite Timer auf das Pluszeichen tippen und Manuell auswählen.
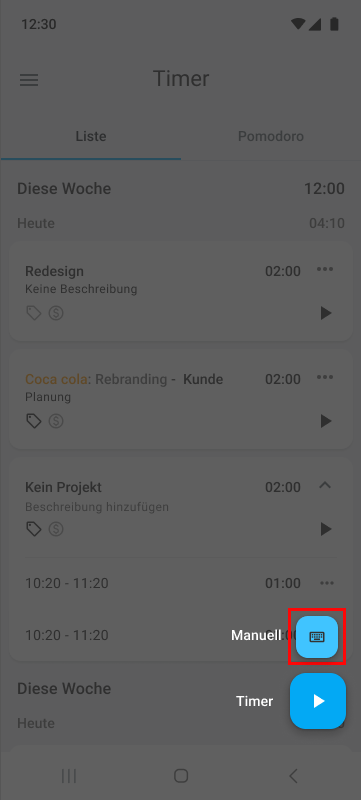
Anschließend gibst du deine geleisteten Stunden und Minuten in die entsprechenden Felder ein und tippst auf OK.
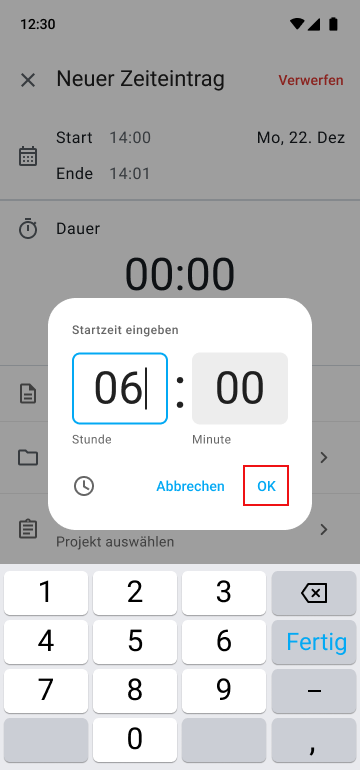
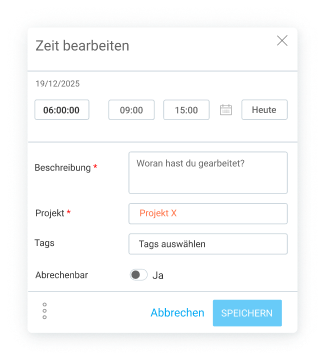
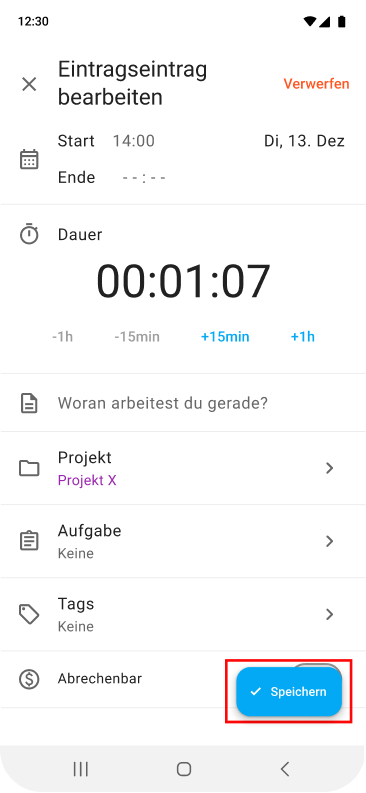
Sobald sie auf OK klicken, können Teammitglieder Start- und Endzeiten sowie weitere Details zu ihrem Eintrag hinzufügen.
Um die Startzeit zu ändern, tippe auf das Startfeld und wähle die genaue Uhrzeit über die Zeitauswahl aus.
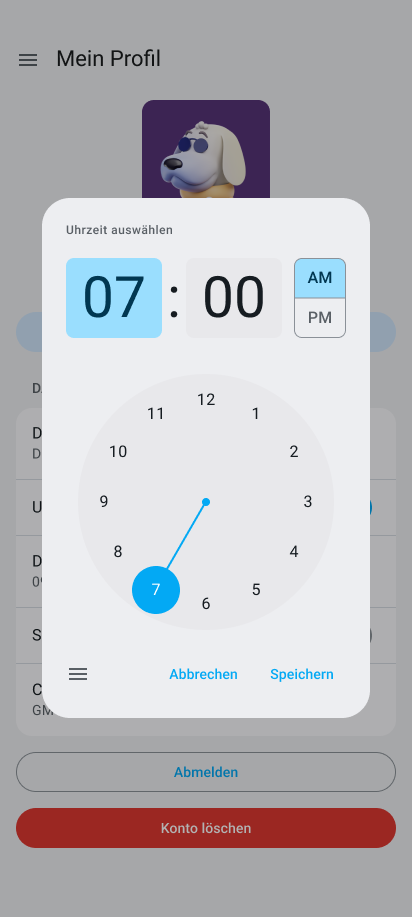
Alternativ kannst du auf das Tastatursymbol in der Zeitauswahl tippen und deine Startzeit direkt eintippen. Sobald du das erledigt hast, tippst du auf OK.

Der Vorgang zum Ändern der Endzeit ist derselbe – mit dem Unterschied, dass du hierfür auf das Feld für die Endzeit tippst.
Nachdem du deine Start- und Endzeiten sowie weitere Details eingegeben hast, müssen Mitarbeitende das Projekt auswählen (verpflichtend) und auf Speichern tippen, um den Zeiteintrag zu übermitteln.
KOSTENLOSE Zeiterfassung mit Clockify
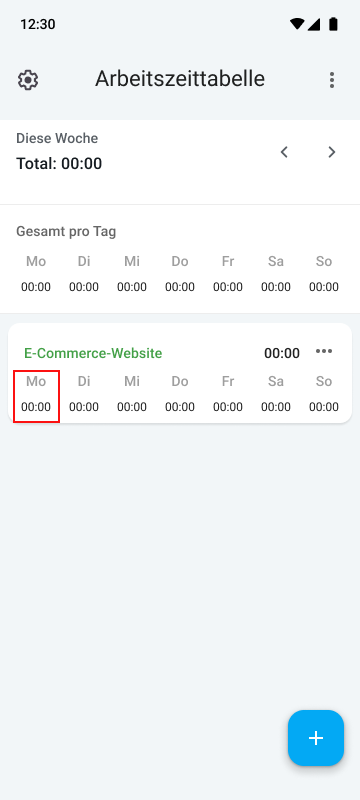
Ein- und Ausstempeln über Arbeitszeittabellen in der mobilen Clockify-App
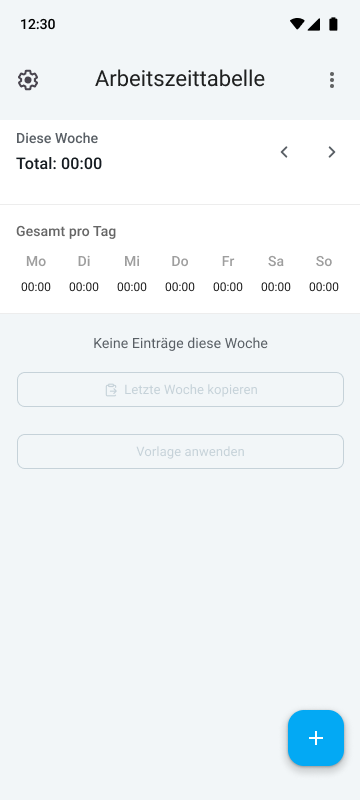
Um ihre Stunden über die Arbeitszeittabellen zu erfassen, müssen Teammitglieder auf das Hamburger-Menü-Symbol in der oberen linken Ecke der Timer-Seite tippen. Dann sollten sie Arbeitszeittabelle in der Seitenleiste auswählen.
Danach sollten sie:
- auf das Plus-Symbol in der unteren rechten Ecke tippen,
- ein Projekt auswählen und
- auf das entsprechende Zeitfenster klicken.
Danach können sie ihre Start- und Endzeiten, den Aufgabennamen sowie alle weiteren relevanten Informationen hinzufügen.
Um die Startzeit einzugeben, tippen die Mitglieder auf das Startfeld und wählen die gewünschte Uhrzeit aus oder geben sie manuell ein. Danach klicken sie auf OK, um die Änderungen zu speichern.
Das Hinzufügen der Endzeit funktioniert genauso – mit dem Unterschied, dass sie hierfür auf das Endfeld tippen.
Um den Zeiteintrag schließlich abzuschließen, klicken die Mitarbeiter auf Speichern.
Erfasse deine Arbeitszeiten einfach
Bonus: Ein-/Ausstempeln über Clockify-Kiosk
Eine weitere Möglichkeit für Mitarbeiter, ihre Zeit zu erfassen, ist der Clockify-Stempelterminal (Kiosk). Sie stempeln sich an einem gemeinsamen Gerät (Tablet, Smartphone oder Computer) mit einer persönlichen PIN oder einem QR-Code ein und aus.
Weitere Informationen zum Erstellen und Nutzen des Clockify-Kiosks findest du auf der Hilfeseite zum Clockify-Kiosk.

Einstempeln-/Ausstempeln-Daten in Clockify von CAKE.com überprüfen
Um die Zeitdaten der Mitarbeiter zu überprüfen, verwende die Clockify-Berichte wie z. B. Zusammenfassung, Detailliert, Wöchentlich und Geteilt.
Um den detaillierten Bericht von Clockify zu öffnen, fahre mit der Maus über Berichte in der Seitenleiste und klicke auf Detailliert.
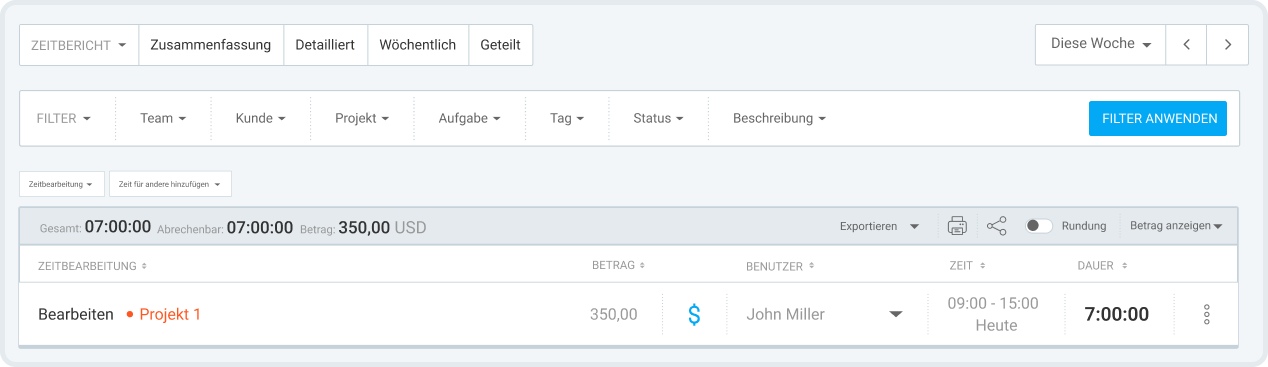
Der detaillierte Bericht von Clockify bietet eine Aufschlüsselung jedes Zeiteintrags, einschließlich:
- Benutzer,
- Aufgabe und Projekt,
- Start- und Endzeit,
- Datum der Zeiterfassung,
- Gesamtdauer sowie
- Abrechenbarer Betrag (sofern abrechenbare Zeiten erfasst wurden).
Mit diesen Erkenntnissen können Manager:
- die Teamproduktivität bewerten,
- Ineffizienzen erkennen und beseitigen,
- die Arbeitslast ausgleichen sowie
- nachvollziehen, welche Aufgaben oder Projekte wirklich rentabel sind.
Clockify-Zeitberichte können zudem als PDF, CSV oder Excel exportiert werden – ideal für weiterführende Analysen oder die Lohnabrechnung. Die Berichte lassen sich außerdem über einen privaten oder öffentlichen Link mit den relevanten Parteien teilen.
Eine weitere Möglichkeit, die Kommen/Gehen-Zeiten der Mitarbeiter zu überprüfen, bietet der Anwesenheitsbericht von Clockify. Hier können Manager und HR die täglichen Anwesenheitsdetails einsehen, einschließlich:
- Start- und Endzeiten,
- Pausenzeiten,
- Arbeitszeit,
- Kapazität,
- Überstunden (Differenz zwischen tatsächlicher Arbeit und Kapazität) sowie
- Abwesenheiten.
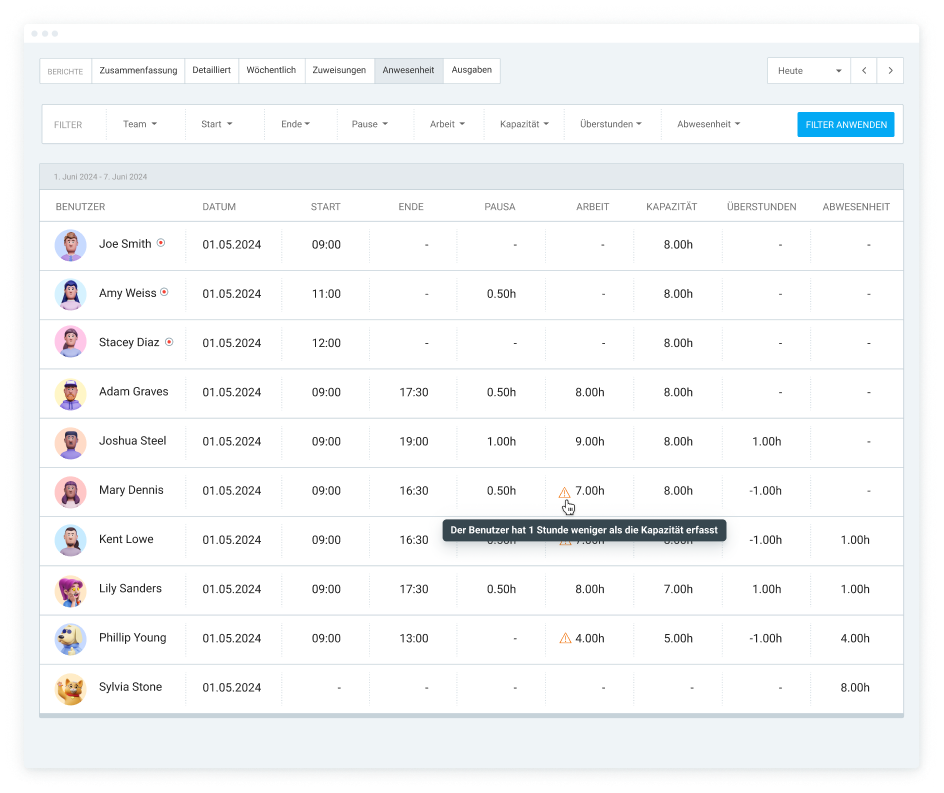
Dies hilft ihnen dabei, Anwesenheitsmuster zu überwachen, Personallücken zu vermeiden und Burnout bei Mitarbeitern vorzubeugen.
Analysiere Zeitdaten in Clockify
Häufige Probleme beim Ein- und Ausstempeln in Clockify (+ Lösungen)
Hier sind einige Probleme beim Ein- und Ausstempeln in Clockify sowie Tipps, wie du sie beheben kannst.
Problem #1: Ich habe das Ein-/Ausstempeln vergessen
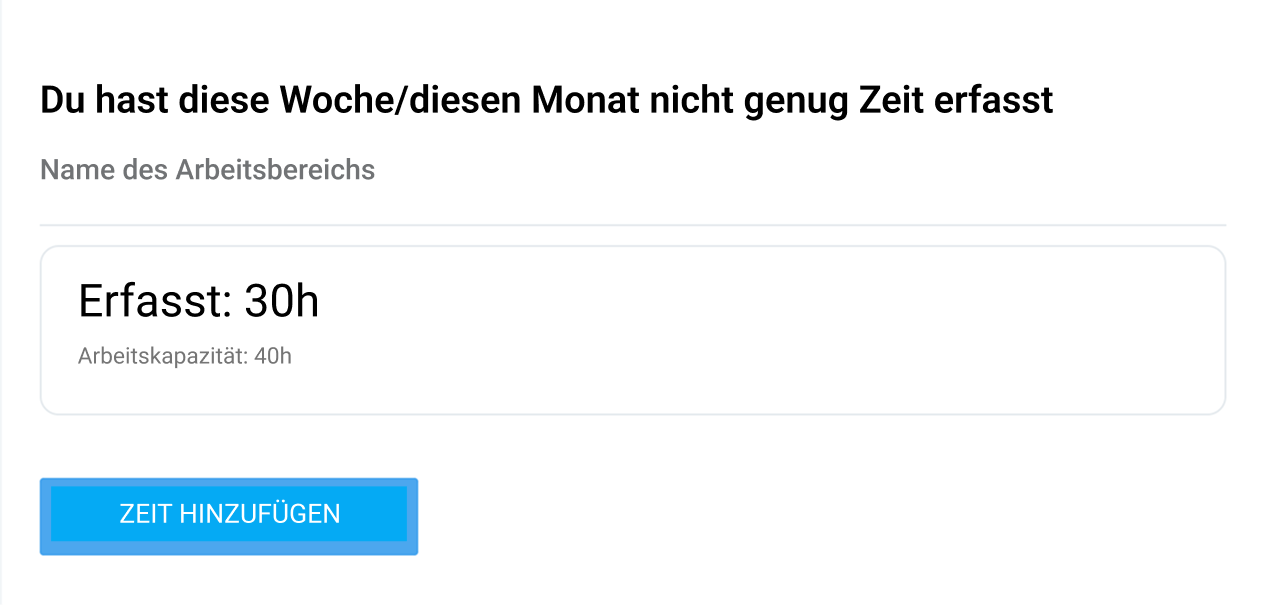
Mitarbeiter vergessen oft, den Timer bei Arbeitsbeginn oder -ende zu starten oder zu stoppen, was zu fehlenden oder ungenauen Zeitdaten führt. Um fehlerhafte Zeitnachweise zu vermeiden, kannst du in Clockify Zeiterfassungs-Erinnerungen für deine Teammitglieder einrichten.
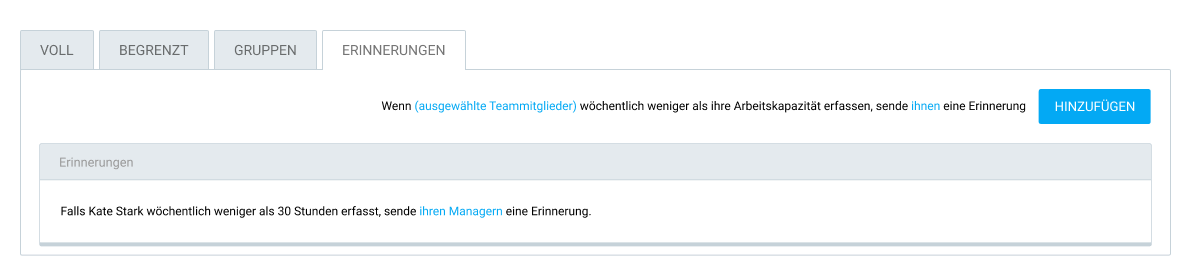
Wenn ein Teammitglied sein tägliches, wöchentliches oder monatliches Soll nicht erreicht oder mehr Zeit als erforderlich erfasst, erhält es eine Erinnerung per E-Mail:
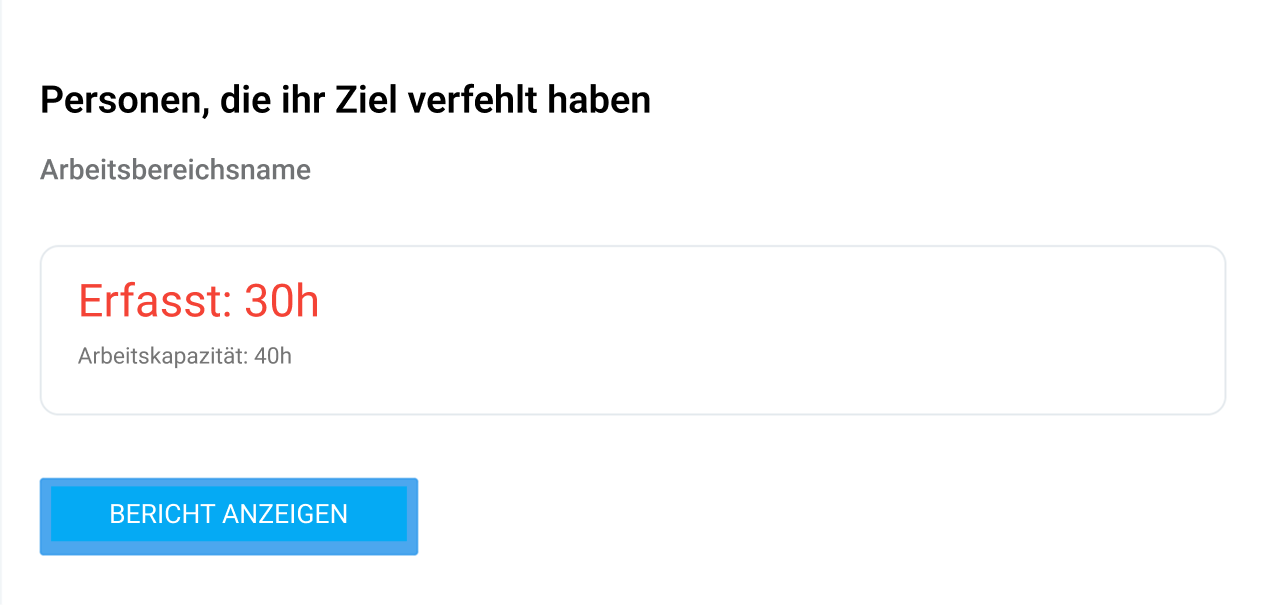
Administratoren und Teammanager können ebenfalls per E-Mail benachrichtigt werden, wenn ein Mitglied seine Sollstunden nicht erreicht.
Zeiterfassungs-Erinnerungen einrichten
Problem #2: Ich kann den Timer nicht stoppen
Wenn Benutzer den Timer nicht stoppen können, liegt das meist daran, dass in Clockify Informationen fehlen oder Einschränkungen aktiv sind.
Falls im Arbeitsbereich Pflichtfelder (Projekt, Aufgabe, Tag oder Beschreibung) festgelegt wurden, können Teammitglieder den Timer erst stoppen, wenn sie diese Informationen eingegeben haben.
Um den Timer zu stoppen, müssen die Mitarbeiter:
- die Seite Timer öffnen,
- nach den Pflichtfeldern suchen (gekennzeichnet mit einem roten Sternchen),
- die erforderlichen Informationen eingeben und
- auf die Schaltfläche Stopp klicken.

Wenn der Timer eines Mitarbeiters zudem bereits sehr lange läuft und in den Einstellungen des Arbeitsbereichs die Funktion Arbeitszeittabellen sperren aktiviert ist, kann er den Timer unter Umständen nicht mehr stoppen.
In diesem Fall müssen sie den Timer entweder verwerfen oder den Administrator bitten, den Zeiterfassungsbogen zu entsperren, damit sie ihre Zeit anpassen können. Um den Timer zu verwerfen, müssen die Mitarbeiter:
- Auf die drei Punkte neben der Schaltfläche Stopp klicken und
- Verwerfen auswählen.

Klicke schließlich auf die Schaltfläche Verwerfen, um die Aktion zu bestätigen.
Problem #3: Abweichungen in der Zeiterfassung
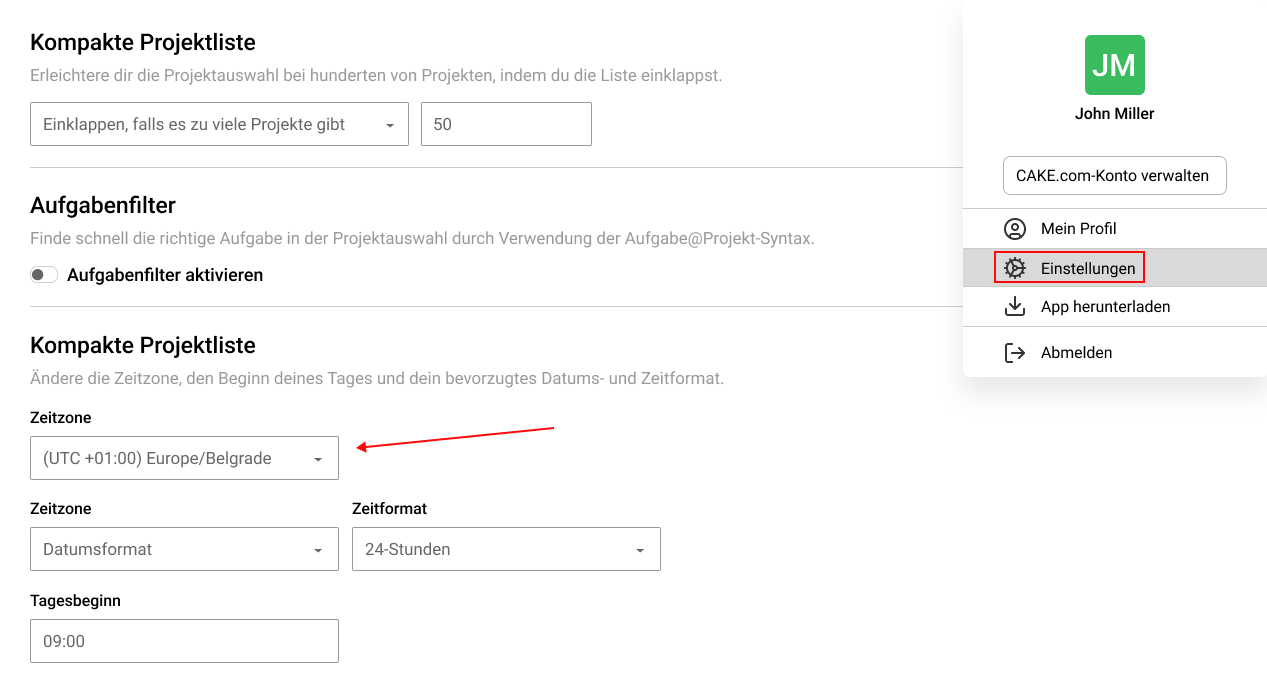
Es kann vorkommen, dass die Zeiteinträge deiner Teammitglieder in deinem Konto an einem anderen Tag oder zu anderen Uhrzeiten angezeigt werden. Dies liegt höchstwahrscheinlich an einer fehlerhaften Zeitzonen-Einstellung in den einzelnen Benutzerprofilen.
Um ihre Zeitzone in Clockify mit deiner abzugleichen, müssen die Mitarbeiter:
- Auf ihr Profilbild in der oberen rechten Ecke klicken,
- die Einstellungen öffnen,
- nach unten zum Abschnitt Zeiteinstellungen scrollen und
- ihre Zeitzone so ändern, dass sie mit deiner übereinstimmt.
🎓 Wie die Zeitzone deine Produktivität beeinflusst
Um mehr über Probleme in Clockify und deren Behebung zu erfahren, besuche unsere Seite zur Problembehebung.
Häufig gestellte Fragen zum Ein- und Ausstempeln
In diesem Abschnitt findest du Antworten auf häufig gestellte Fragen zum Ein- und Ausstempeln in Clockify.
Wie wird die Zeit in Clockify erfasst?
Um Zeit in Clockify zu erfassen, stehen dir folgende Möglichkeiten zur Verfügung:
- Timer-Modus: Erfasse die für Aufgaben und Projekte aufgewendete Zeit in Echtzeit,
- Manueller Modus: Füge Arbeitsstunden nachträglich manuell hinzu, und
- Arbeitszeittabellen-Modus: Erfasse deine Stunden, indem du tägliche oder wöchentliche Arbeitszeittabellen ausfüllst.
Mitarbeiter vor Ort können den Clockify-Kiosk nutzen, um sich an einem gemeinsamen Gerät mit ihrer persönlichen PIN oder einem QR-Code ein- und auszustempeln. Dies verhindert wirksam das Abstempeln für Kollegen.
Erfasse Arbeitszeiten mit Clockify
Was ist Arbeitszeittabellen-Modus in Clockify?
Die Arbeitszeittabelle-Ansicht in Clockify ermöglicht es Mitarbeitern, ihre Arbeitsstunden in einem tabellenähnlichen Layout (ähnlich wie in Excel) für bestimmte Aufgaben und Projekte zu erfassen.
Der Arbeitszeittabellen-Modus von Clockify ist ideal für Mitarbeiter, die ihre täglichen oder wöchentlichen Arbeitszeiten lieber nachträglich eintragen, anstatt einen laufenden Timer zur Zeiterfassung zu nutzen.
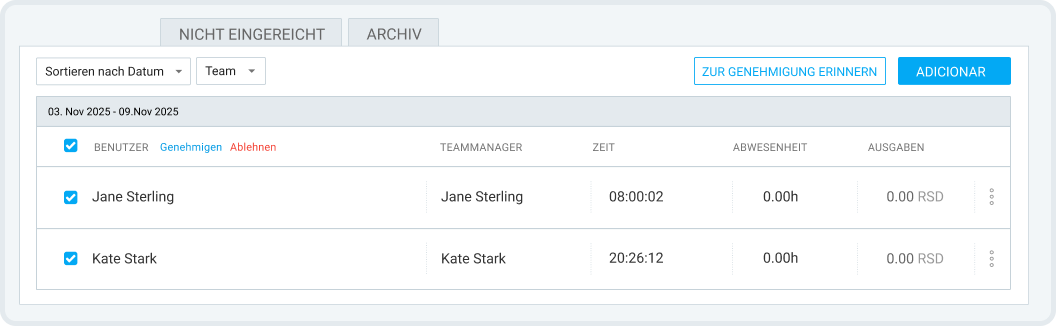
Darüber hinaus können Mitarbeiter in Clockify ihre Arbeitszeittabellen zur Genehmigung einreichen, was einen reibungslosen Genehmigungsprozess ermöglicht. Manager haben zudem die Möglichkeit, Arbeitszeittabellen für ihre Teammitglieder gesammelt einzureichen sowie mehrere Tabellen gleichzeitig zu genehmigen oder abzulehnen.
Clockify-Arbeitszeittabellen GRATIS testen
Was ist die 7-Minuten-Regel beim Ein- und Ausstempeln?
Die 7-Minuten-Regel (auch 7/8-Minuten-Regel genannt) ist eine Richtlinie zur Zeiterfassung gemäß dem US-Arbeitsrecht (FLSA). Sie erlaubt es Arbeitgebern, die Stempelzeiten der Mitarbeiter auf die nächste Viertelstunde (15 Minuten) zu runden.
Gemäß dem North Carolina Wage and Hour Act können Arbeitgeber das Ein- und Ausstempeln ihrer Mitarbeiter runden, „solange die Rundung konsistent ‚auf- und abwärts‘ erfolgt“.
BEISPIEL: Wenn der Arbeitstag eines Mitarbeiters um 9:00 Uhr beginnt und er an einem Tag um 9:05 Uhr einstempelt, rundet der Arbeitgeber die Startzeit auf 9:00 Uhr „ab“. Stempelt derselbe Mitarbeiter an einem anderen Tag jedoch erst um 9:09 Uhr ein, wird die Startzeit auf 9:15 Uhr „aufgerundet“.
Welche Admin-Funktionen bietet Clockify für das Anwesenheitsmanagement?
Clockify bietet eine Reihe von Funktionen auf Administrator-Ebene zur Verwaltung von Arbeitszeiten und Anwesenheit, darunter:
- Arbeitsfreie Zeit,
- Zeitgenehmigung,
- Zeitplanung,
- Anwesenheitsberichte,
- Soll-Arbeitszeiten und Erinnerungen,
- GPS-Tracking sowie
- Möglichkeiten zur manuellen Korrektur von Mitarbeiterzeiten.
Mit der Anwesenheitserfassung von Clockify können Manager die Arbeitsstunden der Mitarbeiter überwachen, Pausen und Überstunden nachverfolgen, detaillierte Zeitberichte für die Lohnabrechnung erstellen und vieles mehr.
🎓 Anwesenheitserfassung — So erfasst du und prüfst du Anwesenheit
Wie erfasse ich die Ein- und Ausstempeln-Daten meiner Mitarbeiter?
Um die Zeiten deines Teams präzise zu erfassen, benötigst du ein spezielles System zum Ein- und Ausstempeln, das sowohl benutzerfreundlich als auch zuverlässig ist – wie Clockify von CAKE.com.
Mit Clockify kannst du nicht nur die Kommen- und Gehen-Zeiten deiner Mitarbeiter erfassen, sondern auch deren Standorte. Das ermöglicht:
- eine gesteigerte Produktivität sowie
- eine verbesserte Effizienz.
Um mehr darüber zu erfahren, wie wichtig ein verlässliches System für die Zeiterfassung ist, lies unseren Artikel über die Vorteile eines digitalen Stempelsystems.
Mit Clockify ein- und ausstempeln
So haben wir diesen Beitrag überprüft: Unsere Autoren und Redakteure überwachen die Beiträge und aktualisieren sie, wenn neue Informationen verfügbar werden, um sie aktuell und relevant zu halten.